The mass changer helps you make the same change(s) to multiple entity records at once. Rather than open 150 employee records one at a time to record a fixed percentage pay increase, you can select the records you want to act on, specify the pay change to make, and apply the change in one process. The mass changer saves time and reduces omissions and errors.
Some changes can have big consequences, so be sure to "measure twice and cut once". In particular, changing the main, ledger, or auxiliary segments on accounts modifies the chart of accounts structure. Changes to an account segment affects accounts, but the underlying segment items are not changed. The mass changer will return errors if changes to the account structure would produce duplicate accounts.
![]() Make changes from an entity folder
Make changes from an entity folder
Change records from an entity folder
- In the Navigation pane, highlight the folder with the entity records you need to change.
- Right-click and select Select and Change... from the shortcut menu. The Change wizard starts.
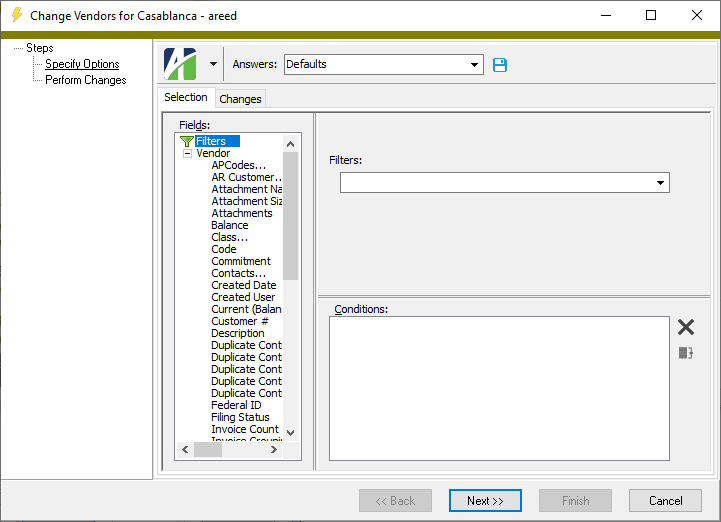
- On the Selection tab, select a filter or define any filters to apply to the data.
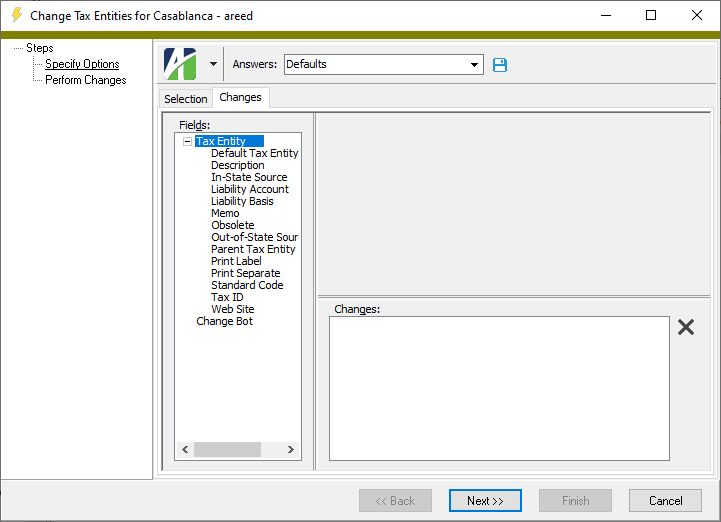
- Select the Changes tab.
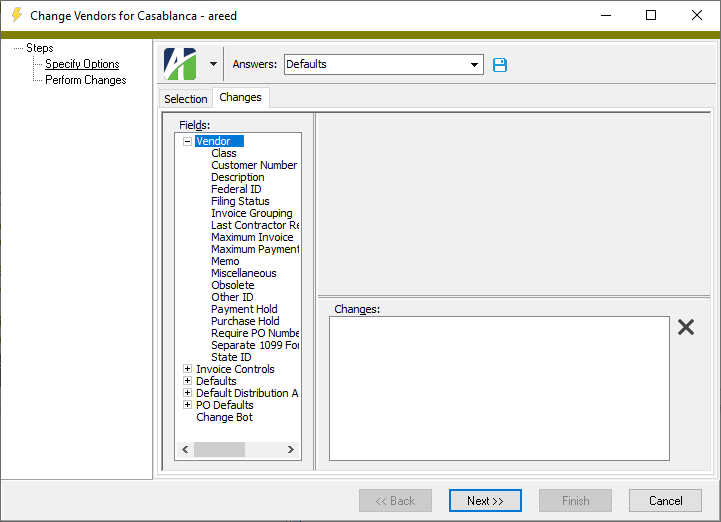
- In the Fields list box, highlight a field to change. A field is added to the panel on the right.
- In the field, enter the value to change the current field value(s) to.
- Repeat steps 5-6 for each field you want to change.
- When you finish specifying changes, click Next >>. ActivityHD prompts you to confirm that you want to make the changes.
- Click Yes.
- Click Finish.
Change records from an HD view
- In the Navigation pane, highlight the folder with the entity records you need to change.
- In the HD view, select the entity records to change. You can use Ctrl and/or Shift selection to select multiple records.
- Right-click and select Change from the shortcut menu. The Change wizard starts.

- In the Fields list box, highlight a field to change. A field is added to the panel on the right.
- In the field, enter the value to change the current field value(s) to.
- Repeat steps 4-5 for each field you want to change.
- When you finish specifying changes, click Next >>. ActivityHD prompts you to confirm that you want to make the changes.
- Click Yes.
- Click Finish.
![]() Use the mass changer to change specific positions in an account mask to wildcards
Use the mass changer to change specific positions in an account mask to wildcards
Use the mass changer to change specific positions in an account mask to wildcards
Note
The following procedure applies only to entities which reference an account mask.
- In the Navigation pane, highlight the folder with the entity records you need to change.
- Right-click and select Select and Change... from the shortcut menu. The Change wizard starts.

- On the Selection tab, select a filter or define any filters to apply to the data.
- Select the Changes tab.
- In the Fields list box, highlight the field with an account mask you want to change. Controls are added to the panel on the right.

- In the account field, enter the desired account mask using the instructions for the Replace All/Partial Replace options as a guide (see the next step).
- Select the option that describes the type of replacements you want to make in the account mask. Your options are:
- Replace All. If you select this option:
- Using an underscore in a specific position clears the value and leaves it empty.
- Using a question mark in a specific position changes the value to a wildcard.
- Partial Replace. If you select this option:
- Using an underscore in a specific position leaves the value unchanged.
- Using a question mark in a specific position changes the value to a wildcard.
- Replace All. If you select this option:
- Specify other changes if necessary.
- When you finish specifying changes, click Next >>. ActivityHD prompts you to confirm that you want to make the changes.
- Click Yes.
- Click Finish.
Use change bots
The ability to mass change records using change bots is available when running the mass changer from an entity's HD view.
Caution!
There is no undo action on change bots. Ensure you understand the consequences of your change bot before running it!
Tip
Use "ShowFields" to help learn the syntax to use in change bots.
- In the Navigation pane, highlight the folder with the entity records you need to change.
- In the HD view, select the records to change. You can select the records manually or use filtering to make your selections.
- Right-click in the HD view and select Change... from the shortcut menu. The Change wizard starts.
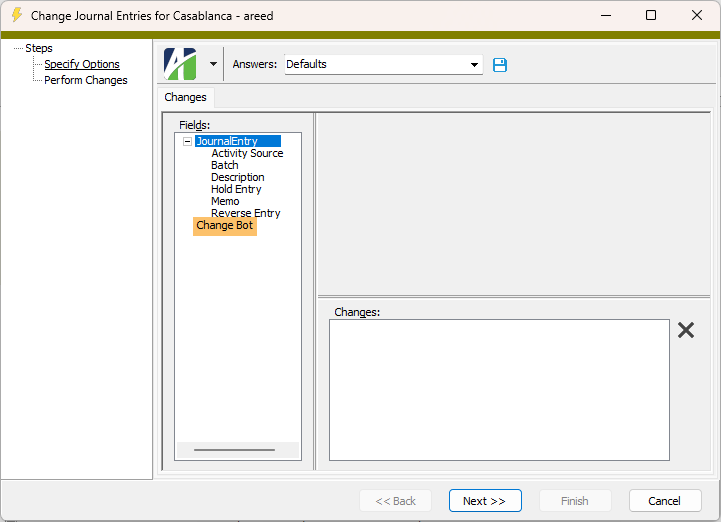
- In the Fields list box, highlight "Change Bot". A Bot text box displays in the upper right panel.
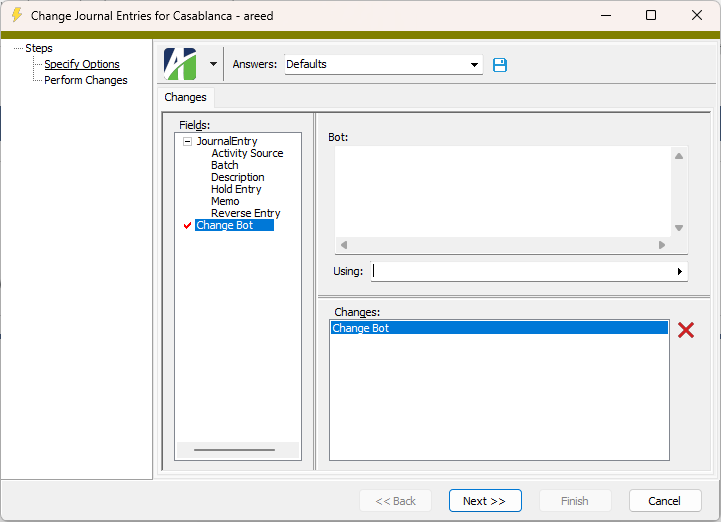
- In the Bot text box, enter the appropriate bot code to make the desired changes. (See examples below.)
- If the bot code you entered depends on an existing class or module bot, select that bot in the Using field. You can select multiple class and module bots in the Find dialog, if needed. If you enter multiple bot names manually, separate the names with commas.
- Click Next >>. ActivityHD prompts you to confirm that you want to make the changes.
- Click Yes.
- Click Finish.
Tip
You can copy code snippets directly from the help topic!
![]() Set the GL date on an AR invoice to the invoice date
Set the GL date on an AR invoice to the invoice date
Display the field names:
set Data = ChangeLoop.Data
Data.Fields.ShowFields
Make the change:
set Data = ChangeLoop.Data
Data.Fields("GLDate").Value = Data.Fields("InvoiceDate").Value![]() Change the domain on email addresses
Change the domain on email addresses
This bot prompts for the email domain you want to change to.
Option Explicit
Dim strNewDomain
Dim arrEmailParts
arrEmailParts = Split(ChangeLoop.Data.Fields("EmailAddress1").Value, "@")
strNewDomain = InputBox("New Domain","Change Email Domain")
ChangeLoop.Data.Fields("EmailAddress1").Value = arrEmailParts(0) & "@" & strNewDomain</p>
![]() Uppercase the contents of a specified field
Uppercase the contents of a specified field
This bot changes the contents of the specified field to uppercase. Here "Code" is the name of the field being acted on. Replace "Code" with the name of the field you need to change to uppercase.
ChangeLoop.Data.Fields("Code").Value = UCase(ChangeLoop.Data.Fields("Code").value)![]() Uppercase the contents of the field specified in an input field
Uppercase the contents of the field specified in an input field
This bot prompts for a field name and changes the contents of the specified field to uppercase.
Dim fieldname
fieldname = InputBox("Enter the field name to change:")
ChangeLoop.Data.Fields(fieldname).Value = UCase(ChangeLoop.Data.Fields(fieldname).value)![]() Change UPPER case text to Proper case
Change UPPER case text to Proper case
'Set the value of the constant to the name of the field to be updated
'The bot will not do anything until a field name is provided

MyField = ""

'Change IsLive to "True" when you are ready to make changes

IsLive = False

'Uncomment the following line to learn the name of the field you need to edit

'.Data.Fields.ShowFields

sp = " "
Function PCase(strText)
    PCase = ""
    Dim strWordDim arrWords
    arrWords = Split(strText," ")
    For Each strWord in arrWords
        Select Case Trim(UCase(strWord))
            Case "A", "AN", "AND", "OF", "THE"
                PCase = PCase & sp & LCase(strWord)
            Case Else
                PCase = PCase & sp & UCase(Left(strWord,1)) & LCase(Mid(strWord,2))
        End Select
            Next
    PCase = Time(PCase)
End Function

If MyField <> "" Then
    If IsLive Then
        ChangeLoop.Data.Fields(MyField).Value = PCase(ChangeLoop.Data.Fields("Description").Value)
    Else
        ChangeLoop.AddMessage "Old value:" & ChangeLoop.Data.Fields(MyField).Value
        ChangeLoop.AddMessage "New value would be:" & PCase(ChangeLoop.Data.Fields(MyField).Value)
        ChangeLoop.AddMessage Empty
        ChangeLoop.AddMessage "No changes were actually made"
    End If
Else
    ChangeLoop.AddMessage "No changes were actually made because the field name was not set (MyField)"
End If![]() Display the current status of employees in Payroll
Display the current status of employees in Payroll
ChangeLoop.AddMessage
ChangeLoop.Data.EmployeeStatuses.PRStatusCode![]() Set company authorized users to "web only"
Set company authorized users to "web only"
When run on the company Authorized Users HD view, this bot sets the Web Only checkbox to "True" and the Access Control option to "Unpermitted".
set Data = ChangeLoop.Data
Data.Fields("WebOnly").Value = True
Data.Fields("AccessControl").Value = "Unpermitted"![]() Add an AP Control to Payroll check lines
Add an AP Control to Payroll check lines
When run on the company Check Lines HD view, this bot gets the state code from the state tax PRCode and adds an AP control called "<State Code> SUTA" to the selected check line (e.g., "TX SUTA").
x = mid(ChangeLoop.Data.Lines.Fields("PRCode").Value,7,2)
'ChangeLoop.AddMessage x
ChangeLoop.Data.Lines.Edit
ChangeLoop.Data.Lines.Fields("PRAPControl").Value = x + "SUTA"
ChangeLoop.Data.Save![]() Set a description from the value entered in an input box
Set a description from the value entered in an input box
ChangeLoop.Data.Fields("Description).Value = InputBox("Enter the correct description:"), "Update Description", ChangeLoop.Data.Fields("Description").Value![]() Strip the first n characters from a description
Strip the first n characters from a description
This bot trims the first seven characters from a description and returns the resulting description. To strip a different number of characters, replace "7" below with the number of characters to strip off and replace "8" with the position in the original string to begin the new string at.
set Desc = ChangeLoop.Data.Fields("Description")
Desc.Value = mid(Desc.Value,8,(len(Desc.Value)-7))![]() Assign a rollup based on assignment to another rollup
Assign a rollup based on assignment to another rollup
This bot directly assigns account category rollup items to Balance Sheet or Income Statement rollup items with the same account category rollup item code. If the account category rollup items are one-to-one with the Balance Sheet or Income Statement rollup items, this allows you to directly assign all account category rollup items to their counterparts on the Balance Sheet or Income Statement rollups.
set BalSheetRollupItemCode = ChangeLoop.Data.Fields("Rollup/Balance Sheet Detail")
BalSheetRollupItemCode.Value = ChangeLoop.Data.Fields("Code").Value

set IncStmtRollupItemCode = ChangeLoop.Data.Fields("Rollup/Income Statement Rollup Name")
IncStmtRollupItemCode.Value = ChangeLoop.Data.Fields("Code").Value

set RollupItemCode = ChangeLoop.Data.Fields("Rollup/Income Statement Rollup Name")
RollupItemCode.Value = ChangeLoop.Data.Fields("Code").Value![]() Directly assign a rollup item code which matches a rollup item code already assigned
Directly assign a rollup item code which matches a rollup item code already assigned
set NewRollupItemCode = ChangeLoop.Data.Fields("Rollup/New Rollup Name")
NewRollupItemCode.Value = ChangeLoop.Data.Fields("Rollup/Old Rollup Name").Value![]() Set the rollup item on an account to the same rollup item as that on the account in another ledger
Set the rollup item on an account to the same rollup item as that on the account in another ledger
set AcctCategory = ChangeLoop.Data.Fields("Rollup/Rollup Name")
set BudgetAcct = ChangeLoop.Data.Fields("FormattedAccount")
ActualAcctString = left(BudgetAcct.Value,(len(BudgetAcct.Value),-1)) & "Ledger Code"
set ActualAcct = Company.GeneralLedger.Account
ActualAccount.Locate(ActualAcctString)
ActualAcctCategory = ActualAcct.Fields("Rollup/Rollup Name").Value
AcctCategory.Value = ActualAcctCategory
Example
The following instance of the bot above finds the "A" ledger version of the selected account, notes the account category rollup item it is assigned to, and assigns it to the selected account so that the rollup items match.
set AcctCategory = ChangeLoop.Data.Fields("Rollup/AcctCategory")
set BudgetAcct = ChangeLoop.Data.Fields("FormattedAccount")
ActualAcctString = left(BudgetAcct.Value,(len(BudgetAcct.Value),-1)) & "A"
set ActualAcct = Company.GeneralLedger.Account
ActualAccount.Locate(ActualAcctString)
ActualAcctCategory = ActualAcct.Fields("Rollup/AcctCategory").Value
AcctCategory.Value = ActualAcctCategory|
5225 S Loop 289, #207 Lubbock, TX 79424 806.687.8500 | 800.354.7152 |
© 2025 AccountingWare, LLC All rights reserved. |