Important!
The information in this topic only applies if the AR/Tessitura interface package is installed at your site. The Tessitura Controls folder is only visible when the interface is installed.
AccountingWare's AR/Tessitura interface facilitates interaction between ActivityHD and a Tessitura website application. Tessitura is a third-party application developed for arts, cultural, and entertainment organizations to manage ticketing, donations processing, promotions, solicitations, campaigns, etc. To learn more about Tessitura products and services, visit their website here.
The AR/Tessitura interface can automatically import AR invoices with immediate payments directly from the Tessitura website. A custom SQL procedure exposed in the website's API selects GL posting detail for a specified posting number and date range. ActivityHD's Tessitura import process connects to the Tessitura website using the credentials supplied by the user, executes the custom stored procedure, downloads the GL posting detail in JSON format, parses it, and creates AR invoices with payment detail using the set-up information from a Tessitura control.
Create a Tessitura control
- In the Navigation pane, highlight the Accounts Receivable > Setup > Tessitura Controls folder.
- Click
 . The New Tessitura Control window opens.
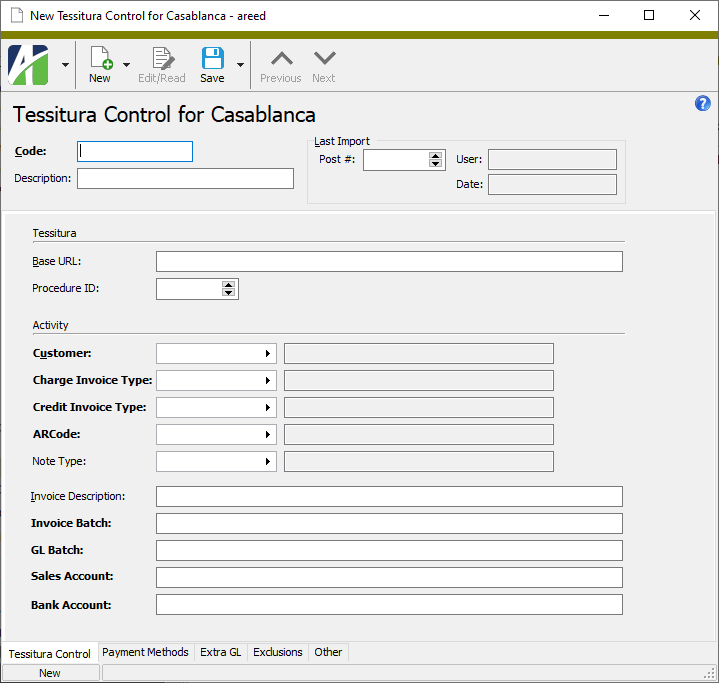
- Enter a unique Code for the Tessitura control.
- Enter a Description of the Tessitura control.
- In the Base URL field, enter the path for connecting to the Tessitura REST website.
- In the Procedure ID field, enter the number associated with the Tessitura custom procedure which returns selected postings.
- In the Activity section in the Customer field, select the customer to use for imported AR invoices.
- In the Charge Invoice Type field, select the invoice type to use for imported charge invoices.
- In the Credit Invoice Type field, select the invoice type to use for imported credit invoices.
- In the ARCode field, select the ARCode for invoice detail to use on imported invoices.
- In the Note Type field, select the note type to associate with imported invoices.
- In the Invoice Description field, enter an expression for building the invoice description on the imported invoices.
- In the Invoice Batch field, enter an expression for building the AR invoice batch code.
- In the GL Batch field, enter an expression for building the AR invoice GL batch code.
- In the Sales Account field, enter an expression to convert the Tessitura GL account to the invoice detail sales account.
- In the Bank Account field, enter an expression to convert the bank account from the Tessitura feed to the ActivityHD bank account for receipts posting.
- Select the Payment Methods tab.
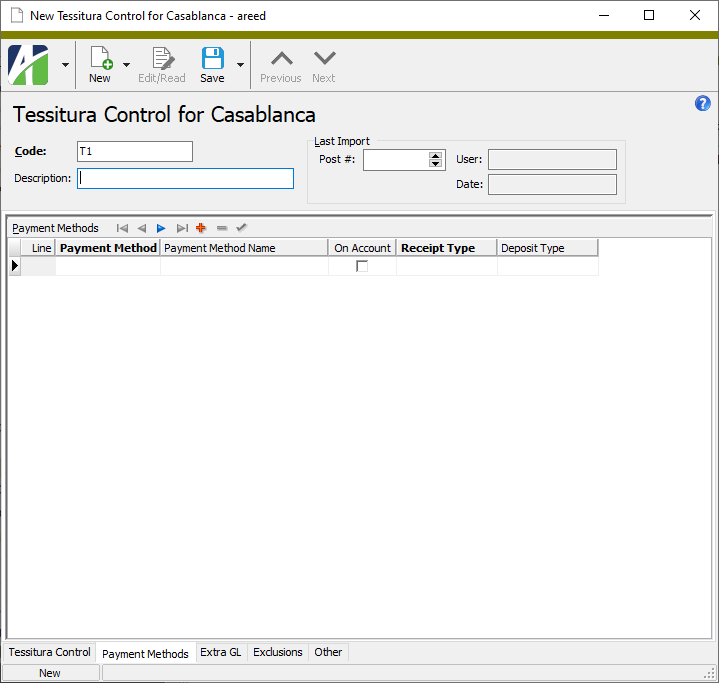
- For each payment method you need to set up, provide the following information in the Payment Methods table:
- In the Payment Method column, enter the code for the Tessitura payment method you are defining. These codes are dictated by Tessitura.
- In the Payment Method Name column, enter a descriptive name for the payment method.
- In the Receipt Type column, select the receipt type to associate with the payment method.
- In the Deposit Type column, select the deposit type to associate with the payment method.
- Select the Extra GL tab.
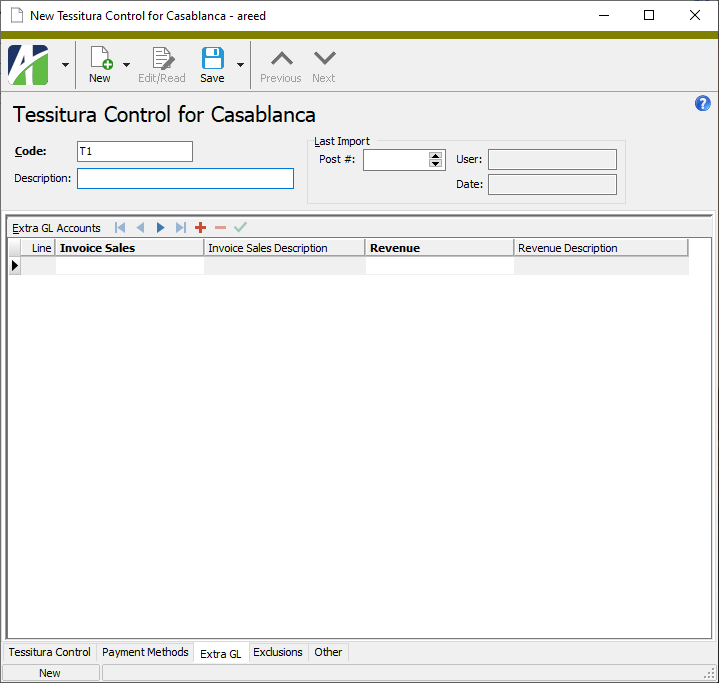
- For each extra GL definition you need to set up, provide the following information in the Extra GL table:
- In the Invoice Sales column, select the deferred revenue account. When the import process finds a match on this account, an extra GL entry is automatically created that debits this account and credits the extra GL account specified in the adjacent column.
- In the Revenue column, select the actual revenue account. This is the account that is credited when the import process automatically creates the extra GL entry.
- Select the Exclusions tab.
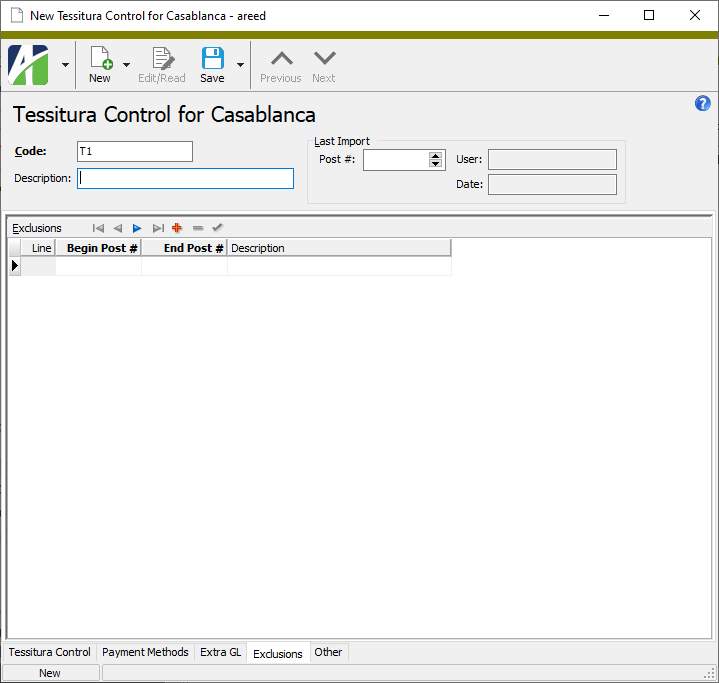
- For each range of postings you need to exclude from import processing, provide the following information in the Exclusions table:
- Enter the first posting of the range of postings to exclude in the Begin Post # column.
- Enter the last posting of the range of postings to exclude in the End Post # column.
- In the Description field, explain why the range of postings is excluded.
- When you finish, save the new control.
Expressions
The remaining fields on this tab use expressions to derive the values which appear in the results. You can combine literals, portions of the Tessitura GL account, and/or portions of the deposit date to build these values.
Two tokens are available to embed in these expressions: <GLAccount> and <Deposit Date>.
You can extract a portion of a token by adding special notation to the end of the token. In parentheses, type the starting position within the value that you want to show, followed by a colon (:), followed by the number of characters to show. For example, given the date 11/30/2018, <Deposit Date(7:4)> produces a result of "2018".

Examples
Sales Account
<GLAccount(2:1)><GLAccount(4:2)>-<GLAccount(8:1)>-00-00000-A
Given an account 12-456-89, this expression builds an ActivityHD GL account of "245-8-00-00000-A".
Invoice Batch
Dep <Deposit Date>
Given a deposit date of "11/30/18", this expression builds a value of "Dep 11/30/2018".
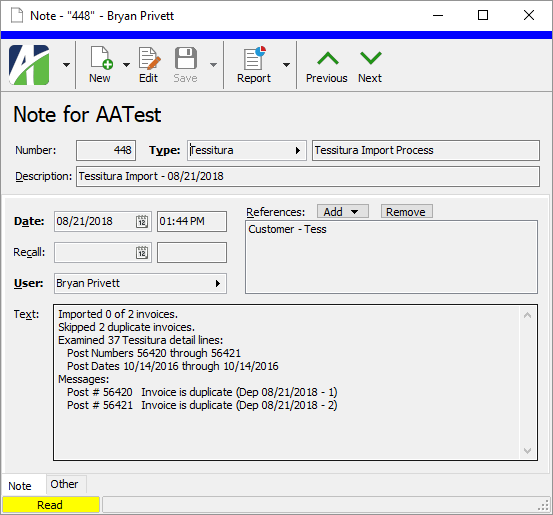
When you run the Tessitura import process using a Tessitura control that has a note type specified on it, customer notes are generated. These notes contain process messages from the import. This capability is useful in general, but particularly if you run the import in a scheduled unattended process.
To view process notes:
- Open the Tessitura control used on the import you want to view notes for.
- Select the Process Notes tab.
- Locate the note you want to view and double-click it to open it in the Note window.
Tessitura Control Record ID
Tessitura Control tab
Payment Methods tab
Extra GL tab
Exclusions tab
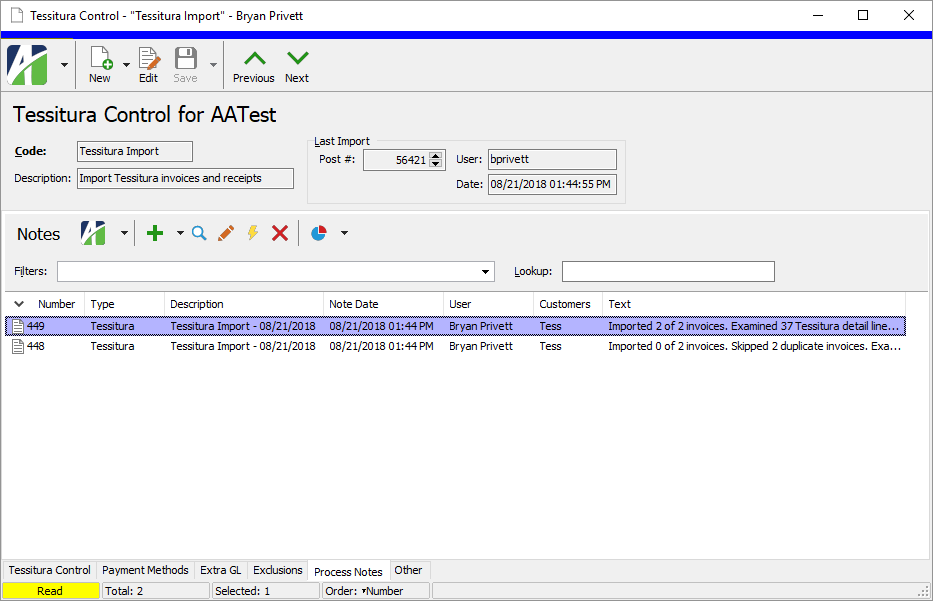
Process Notes tab
The Notes pane shows the Notes HD view filtered to show process notes for the selected Tessitura control.
Double-click a row in the pane to drill down to its record in the Note window.
Custom tab
This tab is visible if custom fields exist for the entity. At a minimum, if there are custom fields, a Fields subtab will be present. One or more additional categories of subtabs may also be visible.
Fields subtab
This tab prompts for values for any custom fields set up for entity records of this entity type. Respond to the prompts as appropriate.
References subtab
This tab is visible if other records reference the current record.
Example
Suppose a custom field exists on PRCodes that references an ARCode. On the ARCode record, on the Custom > References subtab, you can view all the PRCodes which reference that ARCode.
Exchange Folder subtab
This tab is visible only if you set up a custom field with a data type of "Exchange Folder". The label on this tab is the name assigned to the custom field.
This tab shows the contents of the specified Exchange folder.
File subtab
This tab is visible only if you set up a custom field with a data type of "File". The label on the tab is the name assigned to the custom field.
This tab renders the contents of the specified file according to its file type.
Internet Address subtab
This tab is visible only if you set up a custom field with a data type of "Internet Address". The label on this tab is the name assigned to the custom field.
This tab shows the contents of the specified web page.
Network Folder subtab
This tab is visible only if you set up a custom field with a data type of "Network Folder". The label on this tab is the name assigned to the custom field.
This tab shows the contents of the specified network folder.
Attachments tab
The Attachments tab is visible if any record for a given entity has an attachment. If the Attachments tab is not visible, this implies that no record of the entity type has an attachment on it; however, once an attachment is added to any record of the entity type, the Attachments tab will become available.
Change Logs tab
This tab is visible if the user has "Change Logs" access to the associated data folder resource.
The Change Logs pane shows the Change Logs HD view filtered to show all change logs for the selected entity record.
Double-click a row in the pane to drill down to its record in the Change Log window.
Other tab
Developer tab
This tab is visible only when developer features are enabled.
Automation subtab
This subtab shows field names and values for the current data record. Use the information in the subtab to assist when creating automation objects such as bots and import files. The field names and field values can be copied from the text box and pasted directly into your code or application. To copy content from the text box, highlight the content to copy and press Ctrl+C or right-click your selection and select Copy from the context menu.
Export (XML) subtab
This subtab shows the XML syntax for exporting the selected data record. The syntax can be copied from the text box as an exemplar for creating your own automation objects for bots, import files, ActivWebAPI, etc. To copy content from the text box, highlight the content to copy and press Ctrl+C or right-click your selection and select Copy from the context menu.
Import (XML) subtab
This subtab allows you to select a file for import and shows the XML syntax for importing data records. Use the subtab to explore the XML syntax for importing data records. In particular, you can investigate the syntax which results when using Data.Import and ActivWebAPI data POST and DELETE routes.
Change Log (XML) subtab
This subtab is visible only when the Enable Change Logs option is marked in System Options or Company Options (depending on whether the feature applies at the system or the company level). This is the default setting when developer features are enabled.
This subtab allows you to investigate changes to the current data record. The syntax can be copied for use in bots, dashboards, ActivWebAPI, and other automation. To copy content from the text box, highlight the content to copy and press Ctrl+C or right-click your selection and select Copy from the context menu.
Select Statement (SQL) subtab
This subtab allows you to investigate the SQL select statement used to retrieve the current data record. The syntax can be copied as an exemplar for data sources and other automation. To copy content from the text box, highlight the content to copy and press Ctrl+C or right-click your selection and select Copy from the context menu.
|
5225 S Loop 289, #207 Lubbock, TX 79424 806.687.8500 | 800.354.7152 |
© 2025 AccountingWare, LLC All rights reserved. |