Follow the link for the report you want to view help for.
Aged Invoice Analysis
Purpose
The Aged Invoice Analysis report shows customer invoice aging information. It can be run for either current or historical contexts.
Content
Note
The Aged Invoice Analysis uses the aging labels and the aging method set in the Accounts Receivable Options dialog box to determine the default aging categories and category names.
For each customer included on the report, the report shows:
- balance
- balance in each aging category.
In addition, you can include one or more of the following:
- outstanding credits
- summary invoices
- unmerged invoices and receipts not on hold
- invoice information (for each customer: phone number, last payment date and amount; for each invoice: invoice number, due date, terms, balance, balance by aging category)
- percentages (percentage of balance by aging category).
The following totals appear on the report:
- grand totals.
Preinstalled saved answers
For your convenience, ActivityHD includes two preinstalled saved answers for common reporting scenarios:
- "Current Aging"
- "Reconcile to General Ledger"
Print the report
- In the Navigation pane, highlight the Accounts Receivable > Customers folder.
- Start the report set-up wizard.
- To report on all or a filtered subset of customers:
- Right-click the Customers folder and select Select and Report > Aged Invoice Analysis from the shortcut menu.
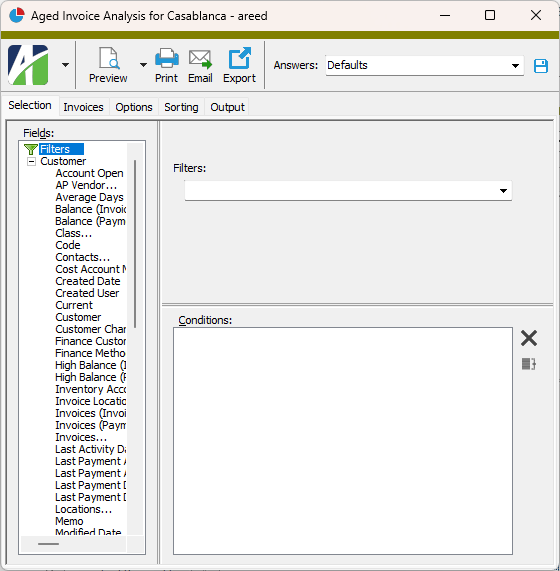
- On the Selection tab, define any filters to apply to the data.
- To report on specifically selected customers:
- In the HD view, select the customers to include on the report. You can use Ctrl and/or Shift selection to select multiple records.
- Click
 and select Aged Invoice Analysis from the drop-down menu.
- To report on a particular customer from the Customer window:
- In the HD view, locate and double-click the customer to report on. The Customer window opens with the customer loaded.
- Click and select Aged Invoice Analysis from the drop-down menu.
- To report on all or a filtered subset of customers:
- Select the Invoices tab.
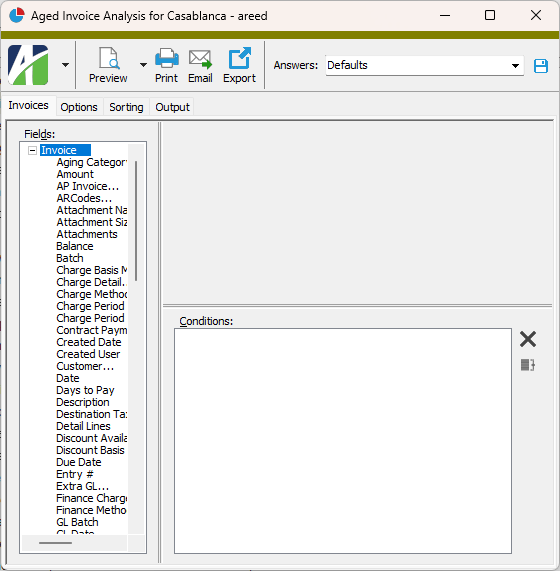
- Define any filters you want to apply to invoices represented in the data.
- Select the Options tab.
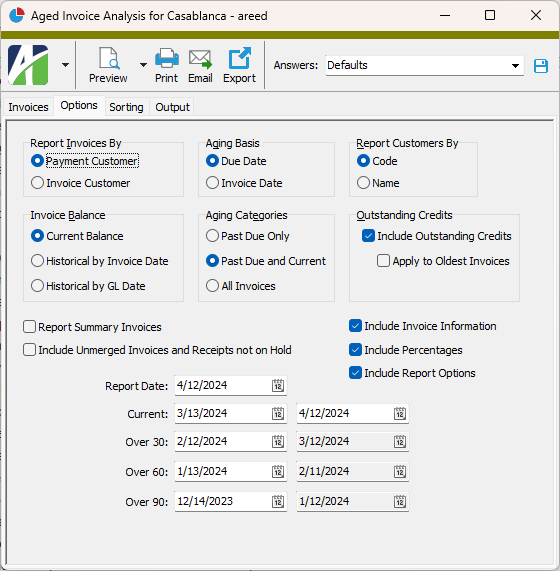
- In the Report Invoices By field, select which customer type to report on. Your options are:
- Payment Customer. Use the payment customer from the customer record.
- Invoice Customer. Use the customer from the invoice record.
- In the Invoice Balance field, select the basis for determining the invoice balance. Your options are:
- Current Balance. The invoice balance is based on the current balance as of today.
- Historical by Invoice Date. The invoice balance is based on the balance calculated as of the date you specify in the Report Date field. The invoice date on invoices and receipts is compared to the report date to determine whether they are included in the report.
- Historical by GL Date. The invoice balance is based on the balance calculated as of the date you specify in the Report Date field. The GL date on invoices and receipts is compared to the report date to determine whether they are included in the report. If you use summary invoices, this option is not valid when you mark the Report Summary Invoices checkbox.
- In the Aging Basis field, select the date to use to age invoices. Your options are:
- Due Date
- Invoice Date
- In the Aging Categories field, select which categories to include on the report. Your options are:
- Past Due Only
- Past Due and Current
All Invoices
Note
If you elect to include outstanding credits, they are included regardless of the dates on the credit invoices.
- In the Report Customers By field, select how to identify customers on the report. This option also affects how data is sorted when you do not specify a sort order on the Sorting tab. Your options are:
- Code. Uses the customer code.
- Name. Uses the customer name.
- If you want the report to show outstanding credits, i.e., invoices with a balance less than zero, mark the Include Outstanding Credits checkbox.
- If you marked the Include Outstanding Credits checkbox, the Apply Oldest Invoices checkbox is enabled. Mark the checkbox if you want credits applied to the oldest invoices first for aging purposes. This can result in a single credit being split and reported among multiple aging categories. If you do not mark the checkbox, credits will be reported in the aging category that corresponds to the aging basis date specified for invoices. If you include outstanding credits, all outstanding credits will be included regardless of aging basis date. Credits which fall outside the date ranges specified on the aging categories will be reported in the "Current" category.
- Mark the checkbox(es) for the additional information to include:
- Summary Invoices (only visible if the Summary Invoice interface is enabled). If you mark this checkbox, the transaction invoices that are linked to summary invoices are reported as summary invoices. If you want to report the linked transactions individually, do not mark this checkbox.
- Unmerged Invoices and Receipts Not on Hold
- Invoice Information
- Percentages. Includes percentage totals on each customer total line and subtotal line.
- To include a section at the end of the report with the report settings used to produce the report, leave the Include Report Options checkbox marked. To produce the report without this information, clear the checkbox.
- In the Report Date field, enter the "as of" date for the report. If you selected one of the historical options in the Invoice Balance field, this date is used to calculate the historical invoice balance. This date is also used as the cut-off date for the "Current" aging category.
-
The default ranges of dates for each of the aging categories is based on the report date and aging basis you specified. If you need to override the default ranges, first enter the range of dates for which to classify invoices as current in the Current fields, then specify beginning dates for the remaining aging categories. The ending dates are calculated for you to help ensure contiguous categories.
Tip
Pressing F2 opens the Date Expression dialog box where you can not only enter a date expression, but you can also specify how ActivityHD interprets "today" in the date expression.
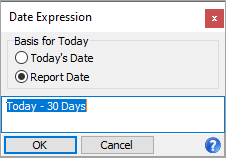
Select whether you want "today" interpreted as the current system date or as an alternate date (e.g., Report Date).
- Select the Sorting tab.
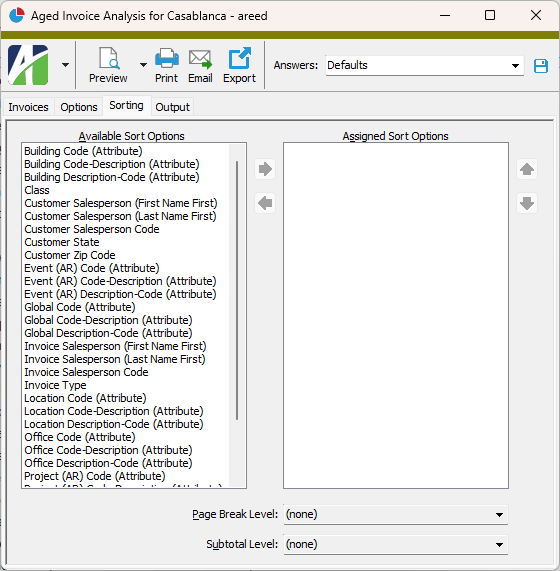
- In the Available Sort Options list box, highlight the field(s) to sort the report by, then click
 to move your selection(s) to the Assigned Sort Options list box.
 - If you selected multiple sort fields, use
 and
and  to arrange the sort fields in the order you want them applied.
 - If you want the report to start a new page for each change in one of the sorting options you specified, select the sorting option to break on from the Page Break Level drop-down list. If you do not want to insert page breaks, accept "(none)".
- If you want the report to subtotal based on one of the sorting options you specified, select the sorting option to subtotal on from the Subtotal Level drop-down list. If you do not want to show subtotals, accept "(none)".
- Select the Output tab.
- In the Design field, look up and select the report design to use.
There are three built-in report designs for the Aged Invoice Analysis report:
- Aged Invoice Analysis - This design has separate columns for Current, Over 30, Over 60, Over 90, Over 120.
- Aged Invoice Analysis Over90 - This design has separate columns for Current, Over 30, Over 60, Over 90 (combines Over 90 and Over 120).
- Aged Invoice Analysis NYD - This design has separate columns for Not Yet Due, Current, Over 30, Over 60, Over 90 (combines Over 90 and Over 120).
- In the toolbar, click the icon for the type of output you want:
 - Provides access to two preview options.
- Preview - Click the icon or click the drop-down arrow and select Preview from the drop-down menu to view the report in the Crystal Reports viewer.
- Preview to PDF - Click the drop-down arrow next to the icon and select Preview to PDF to view the report in the PDF reader.
 - Opens the Print dialog so that you can select and configure a printer and then print a paper copy of the report.
 - Opens the dialog so that you can address and compose an email that the report will be attached to. For best results, ensure your email client is running before you attempt to send a report via email.
 - Opens the Export Report dialog so that you can save the report to a file. File types include Crystal Reports (.rpt), PDF (.pdf), Microsoft Excel (.xls), Microsoft Word (.doc), rich text (.rtf), and XML (.xml).
Data extensions
The following data extensions are available for the report:
- Customers
- Invoices
- Summary invoices
ARCodes Listing
Purpose
The ARCodes Listing provides a list of the ARCodes defined in Accounts Receivable.
Content
For each ARCode included on the report, the listing shows:
- description
- tax category
- whether items with the ARCode are subject to discount
- sales account mask
- cost account mask
- inventory account mask.
In addition, you can include one or more of the following:
- timestamps
- memos
- custom fields.
The following total appears on the report:
- record count.
Print the report
- In the Navigation pane, highlight the Accounts Receivable > Setup > ARCodes folder.
- Start the report set-up wizard.
- To report on all or a filtered subset of ARCodes:
- Right-click the ARCodes folder and select Select and Report > ARCodes Listing from the shortcut menu.
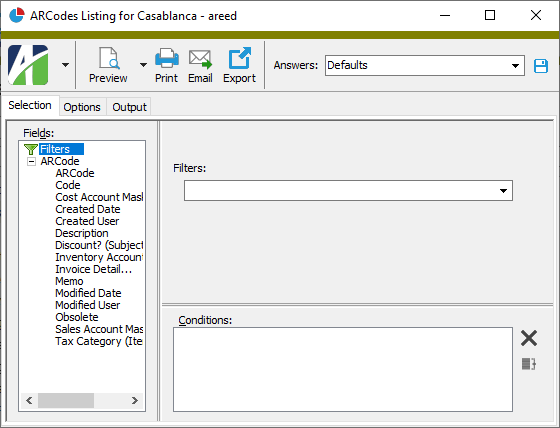
- On the Selection tab, define any filters to apply to the data.
- To report on specifically selected ARCodes:
- In the HD view, select the ARCodes to include on the report. You can use Ctrl and/or Shift selection to select multiple records.
- Click .
- To report on a particular ARCode from the ARCode window:
- In the HD view, locate and double-click the ARCode to report on. The ARCode window opens with the ARCode loaded.
- Click .
- To report on all or a filtered subset of ARCodes:
- Select the Options tab.
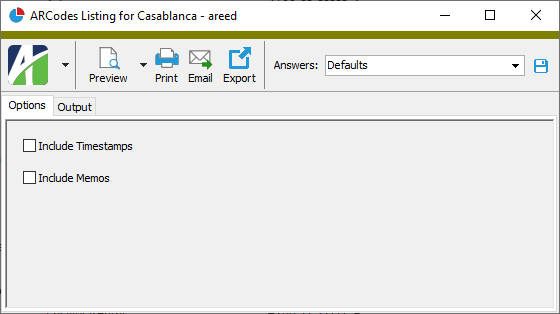
- To include a section at the end of the report with the report settings used to produce the report, leave the Include Report Options checkbox marked. To produce the report without this information, clear the checkbox.
- Mark the checkbox(es) for the additional information to include:
- Timestamps
- Memos
- Custom Fields (only visible if custom fields are set up)
- Select the Output tab.
- In the Design field, look up and select the report design to use.
- In the toolbar, click the icon for the type of output you want:
- - Provides access to two preview options.
- Preview - Click the icon or click the drop-down arrow and select Preview from the drop-down menu to view the report in the Crystal Reports viewer.
- Preview to PDF - Click the drop-down arrow next to the icon and select Preview to PDF to view the report in the PDF reader.
- - Opens the Print dialog so that you can select and configure a printer and then print a paper copy of the report.
- - Opens the dialog so that you can address and compose an email that the report will be attached to. For best results, ensure your email client is running before you attempt to send a report via email.
- - Opens the Export Report dialog so that you can save the report to a file. File types include Crystal Reports (.rpt), PDF (.pdf), Microsoft Excel (.xls), Microsoft Word (.doc), rich text (.rtf), and XML (.xml).
Data extensions
The following data extension is available for the report:
- ARCodes
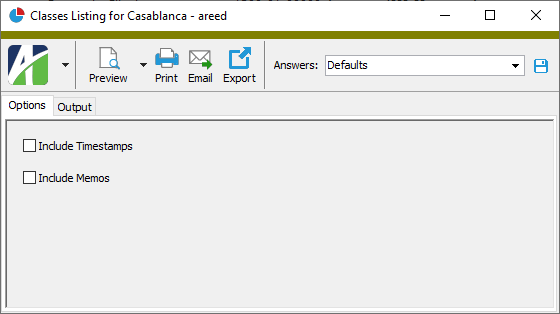
Classes Listing
Purpose
The Classes Listing provides a list of the customer classes defined in your system.
Content
For each customer class included on the report, the listing shows:
- description
- receivables account mask
- sales account mask
- cost account mask
- inventory account mask.
In addition, you can include one or more of the following:
- timestamps
- memos
- custom fields.
The following total appears on the report:
- record count.
Print the report
- In the Navigation pane, highlight the Accounts Receivable > Setup > Classes folder.
- Start the report set-up wizard.
- To report on all or a filtered subset of customer classes:
- Right-click the Classes folder and select Select and Report > Classes Listing from the shortcut menu.
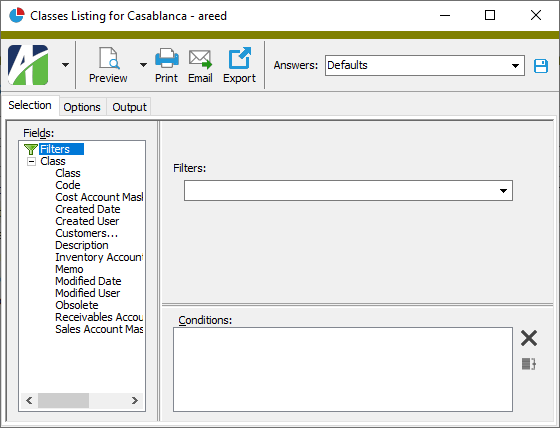
- On the Selection tab, define any filters to apply to the data.
- To report on specifically selected customer classes:
- In the HD view, select the customer classes to include on the report. You can use Ctrl and/or Shift selection to select multiple records.
- Click .
- To report on a particular customer class from the Class window:
- In the HD view, locate and double-click the customer class to report on. The Class window opens with the customer class loaded.
- Click .
- To report on all or a filtered subset of customer classes:
- Select the Options tab.
- To include a section at the end of the report with the report settings used to produce the report, leave the Include Report Options checkbox marked. To produce the report without this information, clear the checkbox.
- Mark the checkbox(es) for the additional information to include:
- Timestamps
- Memos
- Custom Fields (only visible if custom fields are set up)
- Select the Output tab.
- In the Design field, look up and select the report design to use.
- In the toolbar, click the icon for the type of output you want:
- - Provides access to two preview options.
- Preview - Click the icon or click the drop-down arrow and select Preview from the drop-down menu to view the report in the Crystal Reports viewer.
- Preview to PDF - Click the drop-down arrow next to the icon and select Preview to PDF to view the report in the PDF reader.
- - Opens the Print dialog so that you can select and configure a printer and then print a paper copy of the report.
- - Opens the dialog so that you can address and compose an email that the report will be attached to. For best results, ensure your email client is running before you attempt to send a report via email.
- - Opens the Export Report dialog so that you can save the report to a file. File types include Crystal Reports (.rpt), PDF (.pdf), Microsoft Excel (.xls), Microsoft Word (.doc), rich text (.rtf), and XML (.xml).
Data extensions
The following data extension is available for the report:
- Classes
Contact Labels
Purpose
Contact Labels produces a list of customer contact names and addresses formatted for label printing.
Content
For each customer contact included, the labels show:
- customer name
- customer contact name
- customer address.
Print the report
- In the Navigation pane, highlight the Accounts Receivable > Customers > Contacts folder.
- Start the report set-up wizard.
- To create labels for all or a filtered subset of customer contacts:
- Right-click the Contacts folder and select Select and Report > Contact Labels from the shortcut menu.
- On the Selection tab, define any filters to apply to the data.

- To create labels for specifically selected customer contacts:
- In the HD view, select the customer contacts to include on the report. You can use Ctrl and/or Shift selection to select multiple records.
- Click and select Contact Labels from the drop-down menu.
- To create a label for a particular customer contact from the Contact window:
- In the HD view, locate and double-click the customer contact you want to create a label for. The Contact window opens with the customer contact loaded.
- Click and select Contact Labels from the drop-down menu.
- To create labels for all or a filtered subset of customer contacts:
- Select the Options tab.
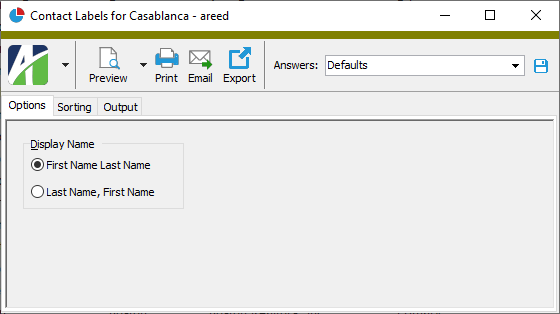
- In the Display Name field, select the order in which to present contact names on the labels. Your options are:
- First Name Last Name
- Last Name, First Name
- Select the Sorting tab.
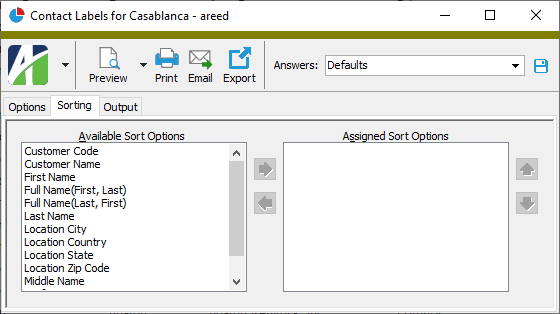
- In the Available Sort Options list box, highlight the field(s) to sort the labels by, then click to move your selection(s) to the Assigned Sort Options list box.
- If you selected multiple sort fields, use and to arrange the sort fields in the order you want them applied.
- Select the Output tab.
- In the Design field, look up and select the report design to use.
There are two built-in report designs for customer labels:
- Contact Labels 2-across
- Contact Labels 3-across
- In the toolbar, click the icon for the type of output you want:
- - Provides access to two preview options.
- Preview - Click the icon or click the drop-down arrow and select Preview from the drop-down menu to view the report in the Crystal Reports viewer.
- Preview to PDF - Click the drop-down arrow next to the icon and select Preview to PDF to view the report in the PDF reader.
- - Opens the Print dialog so that you can select and configure a printer and then print a paper copy of the report.
- - Opens the dialog so that you can address and compose an email that the report will be attached to. For best results, ensure your email client is running before you attempt to send a report via email.
- - Opens the Export Report dialog so that you can save the report to a file. File types include Crystal Reports (.rpt), PDF (.pdf), Microsoft Excel (.xls), Microsoft Word (.doc), rich text (.rtf), and XML (.xml).
Data extensions
The following data extension is available for the report:
- Contacts
Contacts Listing
Purpose
The Contacts Listing provides a list of the contacts associated with your customers.
Content
For each customer contact included on the report, the listing shows:
- customer contact's full name
- customer code
- customer name
- phone number
- email address
- job title
- whether the contact is the primary contact for the customer
- whether the contact record has been flagged as obsolete.
In addition, you can include one or more of the following:
- all phone numbers and name details
- location information
- timestamps
- memos
- custom fields.
The following total appears on the report:
- record count.
Print the report
- In the Navigation pane, highlight the Accounts Receivable > Customers > Contacts folder.
- Start the report set-up wizard.
- To report on all or a filtered subset of customer contacts:
- Right-click the Contacts folder and select Select and Report > Contacts Listing from the shortcut menu.
- On the Selection tab, define any filters to apply to the data.

- To report on specifically selected customer contacts:
- In the HD view, select the customer contacts to include on the report. You can use Ctrl and/or Shift selection to select multiple records.
- Click and select Contacts Listing from the drop-down menu.
- To report on a particular customer contact from the Contact window:
- In the HD view, locate and double-click the customer contact to report on. The Contact window opens with the customer contact loaded.
- Click and select Contacts Listing from the drop-down menu.
- To report on all or a filtered subset of customer contacts:
- Select the Options tab.
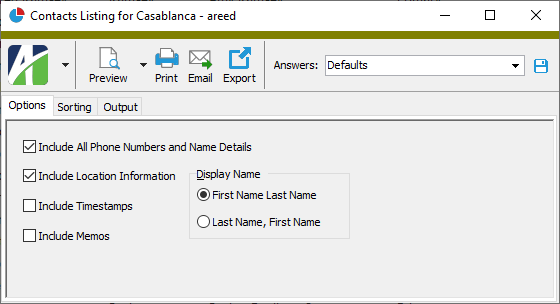
- Mark the checkbox(es) for the additional information to include:
- All Phone Numbers and Name Details
- Location Information
- Report Options. To include a section at the end of the report with the report settings used to produce the report, leave the checkbox marked. To produce the report without this information, clear the checkbox.
- Timestamps
- Memos
- Custom Fields (only visible if custom fields are set up)
- In the Display Name field, select the order in which to present contact names on the listing. Your options are:
- First Name Last Name
- Last Name, First Name
- Select the Sorting tab.

- In the Available Sort Options list box, highlight the field(s) to sort the report by, then click to move your selection(s) to the Assigned Sort Options list box.
- If you selected multiple sort fields, use or to arrange the sort fields in the order you want them applied.
- Select the Output tab.
- In the Design field, look up and select the report design to use.
- In the toolbar, click the icon for the type of output you want:
- - Provides access to two preview options.
- Preview - Click the icon or click the drop-down arrow and select Preview from the drop-down menu to view the report in the Crystal Reports viewer.
- Preview to PDF - Click the drop-down arrow next to the icon and select Preview to PDF to view the report in the PDF reader.
- - Opens the Print dialog so that you can select and configure a printer and then print a paper copy of the report.
- - Opens the dialog so that you can address and compose an email that the report will be attached to. For best results, ensure your email client is running before you attempt to send a report via email.
- - Opens the Export Report dialog so that you can save the report to a file. File types include Crystal Reports (.rpt), PDF (.pdf), Microsoft Excel (.xls), Microsoft Word (.doc), rich text (.rtf), and XML (.xml).
Data extensions
The following data extension is available for the report:
- Contacts
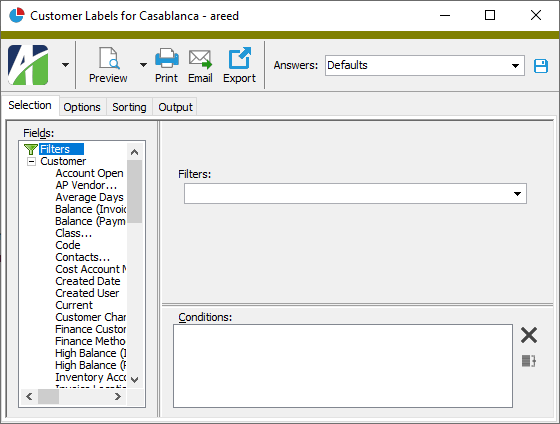
Customer Labels
Purpose
Customer Labels produces a list of customers and addresses formatted for label printing.
Content
For each customer included, the labels show:
- customer name
- customer address.
Print the report
- In the Navigation pane, highlight the Accounts Receivable > Customers folder.
- Start the report set-up wizard.
- To create labels for all or a filtered subset of customers:
- Right-click the Customers folder and select Select and Report > Customer Labels from the shortcut menu.
- On the Selection tab, define any filters to apply to the data.
- To create labels for specifically selected customers:
- In the HD view, select the customers to include on the report. You can use Ctrl and/or Shift selection to select multiple records.
- Click and select Customer Labels from the drop-down menu.
- To create a label for a particular customer from the Customer window:
- In the HD view, locate and double-click the customer you want to create a label for. The Customer window opens with the customer loaded.
- Click and select Customer Labels from the drop-down menu.
- To create labels for all or a filtered subset of customers:
- Select the Options tab.
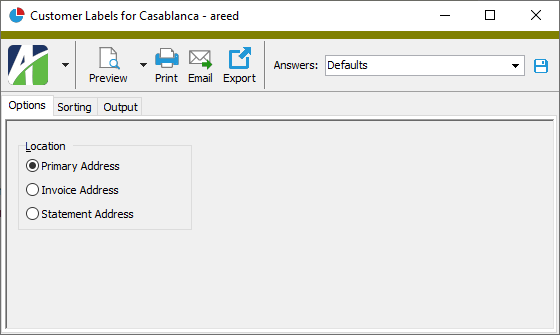
- In the Location field, select which customer address to print on the labels. Your options are:
- Primary Address
- Invoice Address
- Statement Address
- Select the Sorting tab.

- In the Available Sort Options list box, highlight the field(s) to sort the labels by, then click to move your selection(s) to the Assigned Sort Options list box.
- If you selected multiple sort fields, use and to arrange the sort fields in the order you want them applied.
- Select the Output tab.
- In the Design field, look up and select the report design to use.
There are two built-in report designs for customer labels:
- Customer Labels 2-across
- Customer Labels 3-across
- In the toolbar, click the icon for the type of output you want:
- - Provides access to two preview options.
- Preview - Click the icon or click the drop-down arrow and select Preview from the drop-down menu to view the report in the Crystal Reports viewer.
- Preview to PDF - Click the drop-down arrow next to the icon and select Preview to PDF to view the report in the PDF reader.
- - Opens the Print dialog so that you can select and configure a printer and then print a paper copy of the report.
- - Opens the dialog so that you can address and compose an email that the report will be attached to. For best results, ensure your email client is running before you attempt to send a report via email.
- - Opens the Export Report dialog so that you can save the report to a file. File types include Crystal Reports (.rpt), PDF (.pdf), Microsoft Excel (.xls), Microsoft Word (.doc), rich text (.rtf), and XML (.xml).
Data extensions
The following data extensions are available for the report:
- Customers
- Locations
Customers Listing
Purpose
The Customers Listing provides a list of the customers tracked in Accounts Receivable.
Content
For each customer included on the report, the listing shows:
- customer code
- customer name
- customer class
- payment customer
- salesperson
- customer tax category
- payment terms
- finance method
- statement type.
In addition, you can include one or more of the following:
- activity and aging totals (activity totals: account open date, last activity date [invoice/payment], high balance (invoice customer)*, open invoice count (invoice customer), average days to pay; aging totals**: total balance, outstanding credits, balance amounts by aging category***)
- primary locations and contacts (primary location address, phone, email, and defaults; primary contact name, phone, title)
- account masks and attributes
- all contacts (name, phone, location, title, email address)
- all locations (address, phone numbers, email address, website address)
- timestamps
- memos
- custom fields.
The following total appears on the report:
- record count.
*The lookback period for high balance is set in Accounts Receivable Options.
**Aging totals are calculated based on the aging method, aging basis, and aging customer set in Accounts Receivable Options.
***Labels on the aging categories are set in Accounts Receivable Options.
Print the report
- In the Navigation pane, highlight the Accounts Receivable > Customers folder.
- Start the report set-up wizard.
- To report on all or a filtered subset of customers:
- Right-click the Customers folder and select Select and Report > Customers Listing from the shortcut menu.
- On the Selection tab, define any filters to apply to the data.

- To report on specifically selected customers:
- In the HD view, select the customers to include on the report. You can use Ctrl and/or Shift selection to select multiple records.
- Click and select Customers Listing from the drop-down menu.
- To report on a particular customer from the Customer window:
- In the HD view, locate and double-click the customer to report on. The Customer window opens with the customer loaded.
- Click and select Customers Listing from the drop-down menu.
- To report on all or a filtered subset of customers:
- Select the Options tab.

- Mark the checkbox(es) for the additional information to include:
- Activity Totals
- Primary Locations and Contacts
- Account Masks and Attributes
- All Contacts
- All Locations
- Report Options. To include a section at the end of the report with the report settings used to produce the report, leave the checkbox marked. To produce the report without this information, clear the checkbox.
- Timestamps
- Memos
- Custom Fields (only visible if custom fields are set up)
- Select the Sorting tab.
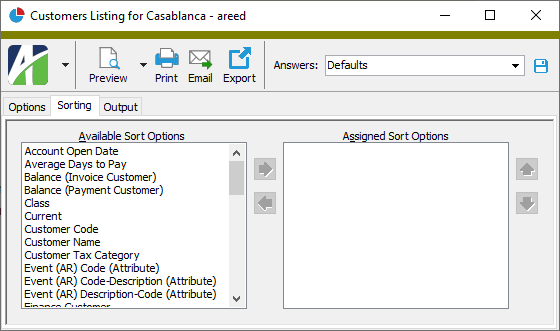
- In the Available Sort Options list box, highlight the field(s) to sort the report by, then click to move your selection(s) to the Assigned Sort Options list box.
- If you selected multiple sort fields, use and to arrange the sort fields in the order you want them applied.
- Select the Output tab.
- In the Design field, look up and select the report design to use.
- In the toolbar, click the icon for the type of output you want:
- - Provides access to two preview options.
- Preview - Click the icon or click the drop-down arrow and select Preview from the drop-down menu to view the report in the Crystal Reports viewer.
- Preview to PDF - Click the drop-down arrow next to the icon and select Preview to PDF to view the report in the PDF reader.
- - Opens the Print dialog so that you can select and configure a printer and then print a paper copy of the report.
- - Opens the dialog so that you can address and compose an email that the report will be attached to. For best results, ensure your email client is running before you attempt to send a report via email.
- - Opens the Export Report dialog so that you can save the report to a file. File types include Crystal Reports (.rpt), PDF (.pdf), Microsoft Excel (.xls), Microsoft Word (.doc), rich text (.rtf), and XML (.xml).
Data extensions
The following data extensions are available for the report:
- Customers
- Locations
- Contacts
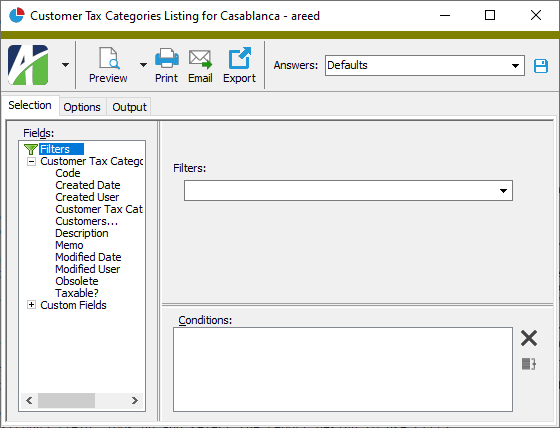
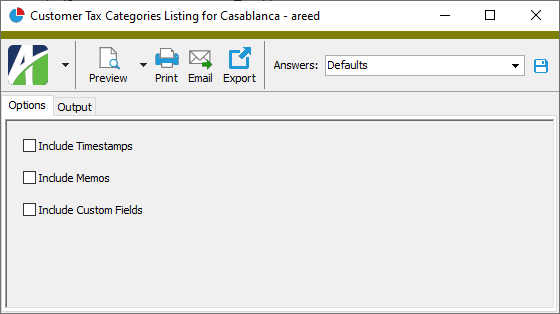
Customer Tax Categories Listing
Purpose
The Customer Tax Categories Listing provides a list of the customer tax categories defined in Accounts Receivable.
Content
For each customer tax category included on the report, the listing shows:
- description
- whether customers in the category are subject to tax.
In addition, you can include one or more of the following:
- timestamps
- memos
- custom fields.
The following total appears on the report:
- record count.
Print the report
- In the Navigation pane, highlight the Accounts Receivable > Setup > Tax > Customer Tax Categories folder.
- Start the report set-up wizard.
- To report on all or a filtered subset of customer tax categories:
- Right-click the Customer Tax Categories folder and select Select and Report > Customer Tax Categories Listing from the shortcut menu.
- On the Selection tab, define any filters to apply to the data.
- To report on specifically selected customer tax categories:
- In the HD view, select the customer tax categories to include on the report. You can use Ctrl and/or Shift selection to select multiple records.
- Click .
- To report on a particular customer tax category from the Customer Tax Category window:
- In the HD view, locate and double-click the customer tax category to report on. The Customer Tax Category window opens with the customer tax category loaded.
- Click .
- To report on all or a filtered subset of customer tax categories:
- Select the Options tab.
- To include a section at the end of the report with the report settings used to produce the report, leave the Include Report Options checkbox marked. To produce the report without this information, clear the checkbox.
- Mark the checkbox(es) for the additional information to include:
- Timestamps
- Memos
- Custom Fields (only visible if custom fields are set up)
- Select the Output tab.
- In the Design field, look up and select the report design to use.
- In the toolbar, click the icon for the type of output you want:
- - Provides access to two preview options.
- Preview - Click the icon or click the drop-down arrow and select Preview from the drop-down menu to view the report in the Crystal Reports viewer.
- Preview to PDF - Click the drop-down arrow next to the icon and select Preview to PDF to view the report in the PDF reader.
- - Opens the Print dialog so that you can select and configure a printer and then print a paper copy of the report.
- - Opens the dialog so that you can address and compose an email that the report will be attached to. For best results, ensure your email client is running before you attempt to send a report via email.
- - Opens the Export Report dialog so that you can save the report to a file. File types include Crystal Reports (.rpt), PDF (.pdf), Microsoft Excel (.xls), Microsoft Word (.doc), rich text (.rtf), and XML (.xml).
Data extensions
The following data extension is available for the report:
- Customer tax categories
Deposit Types Listing
Purpose
The Deposit Types Listing provides a list of the deposit types defined in your system.
Content
For each deposit type included on the report, the listing shows:
- deposit type code
- description
- GL batch
- bank account
- receipt types which can use the deposit type
- whether deposits of the type allow only one receipt.
In addition, you can include one or more of the following:
- deposit references and descriptions
- timestamps
- memos
- custom fields.
The following total appears on the report:
- record count.
Print the report
- In the Navigation pane, highlight the Accounts Receivable > Setup > Deposit Types folder.
- Start the report set-up wizard.
- To report on all or a filtered subset of deposit types:
- Right-click the Deposit Types folder and select Select and Report > Deposit Types Listing from the shortcut menu.
- On the Selection tab, define any filters to apply to the data.

- To report on specifically selected deposit types:
- In the HD view, select the deposit types to include on the report. You can use Ctrl and/or Shift selection to select multiple records.
- Click .
- To report on a particular deposit type from the Deposit Type window:
- In the HD view, locate and double-click the deposit type to report on. The Deposit Type window opens with the deposit type loaded.
- Click .
- To report on all or a filtered subset of deposit types:
- Select the Options tab.

- Mark the checkbox(es) for the additional information to include:
- Deposit References and Deposit Descriptions
- Report Options. To include a section at the end of the report with the report settings used to produce the report, leave the checkbox marked. To produce the report without this information, clear the checkbox.
- Timestamps
- Memos
- Custom Fields (only visible if custom fields are set up)
- Select the Output tab.
- In the Design field, look up and select the report design to use.
- In the toolbar, click the icon for the type of output you want:
- - Provides access to two preview options.
- Preview - Click the icon or click the drop-down arrow and select Preview from the drop-down menu to view the report in the Crystal Reports viewer.
- Preview to PDF - Click the drop-down arrow next to the icon and select Preview to PDF to view the report in the PDF reader.
- - Opens the Print dialog so that you can select and configure a printer and then print a paper copy of the report.
- - Opens the dialog so that you can address and compose an email that the report will be attached to. For best results, ensure your email client is running before you attempt to send a report via email.
- - Opens the Export Report dialog so that you can save the report to a file. File types include Crystal Reports (.rpt), PDF (.pdf), Microsoft Excel (.xls), Microsoft Word (.doc), rich text (.rtf), and XML (.xml).
Data extensions
The following data extension is available for the report:
- Deposit types
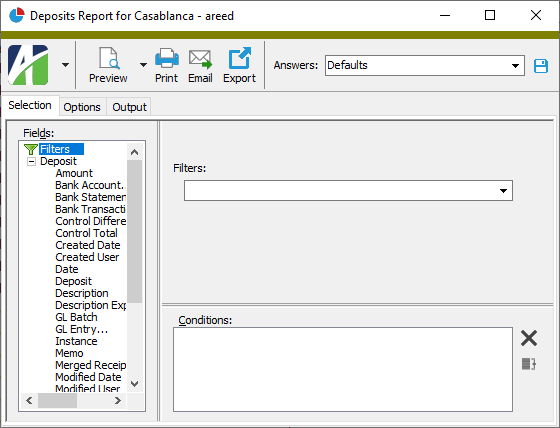
Deposits Report
Purpose
The Deposits Report provides a list of deposits in the Accounts Receivable package.
Content
For each deposit included on the report, the report shows:
- status
- reference
- description
- bank account
- count of receipts in the deposit
- deposit total.
For each receipt type in a deposit, the report shows:
- receipt type
- count of receipts of the receipt type
- deposit total for the receipt type.
In addition, you can include one or more of the following:
- receipt detail (receipt batch - entry number, receipt date, reference, payment customer, amount)
- timestamps
- memos
- custom fields.
The following totals appear on the report:
- grand totals.
Print the report
- In the Navigation pane, highlight the Accounts Receivable > Deposits folder.
- Start the report set-up wizard.
- To report on all or a filtered subset of deposits:
- Right-click the Deposits folder and select Select and Report > Deposits Report from the shortcut menu.
- On the Selection tab, define any filters to apply to the data.
- To report on specifically selected deposits:
- In the HD view, select the deposits to include on the report. You can use Ctrl and/or Shift selection to select multiple records.
- Click .
- To report on a particular deposit from the Deposit window:
- In the HD view, locate and double-click the deposit to report on. The Deposit window opens with the deposit loaded.
- Click .
- To report on all or a filtered subset of deposits:
- Select the Options tab.
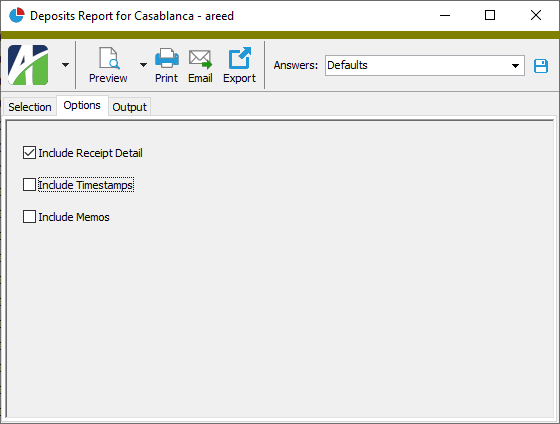
- Mark the checkbox(es) for the additional information to include:
- Receipt Detail
- Report Options. To include a section at the end of the report with the report settings used to produce the report, leave the checkbox marked. To produce the report without this information, clear the checkbox.
- Timestamps
- Memos
- Custom Fields (only visible if custom fields are set up)
- Select the Output tab.
- In the Design field, look up and select the report design to use.
- In the toolbar, click the icon for the type of output you want:
- - Provides access to two preview options.
- Preview - Click the icon or click the drop-down arrow and select Preview from the drop-down menu to view the report in the Crystal Reports viewer.
- Preview to PDF - Click the drop-down arrow next to the icon and select Preview to PDF to view the report in the PDF reader.
- - Opens the Print dialog so that you can select and configure a printer and then print a paper copy of the report.
- - Opens the dialog so that you can address and compose an email that the report will be attached to. For best results, ensure your email client is running before you attempt to send a report via email.
- - Opens the Export Report dialog so that you can save the report to a file. File types include Crystal Reports (.rpt), PDF (.pdf), Microsoft Excel (.xls), Microsoft Word (.doc), rich text (.rtf), and XML (.xml).
Data extensions
The following data extensions are available for the report:
- Deposits
- Receipts
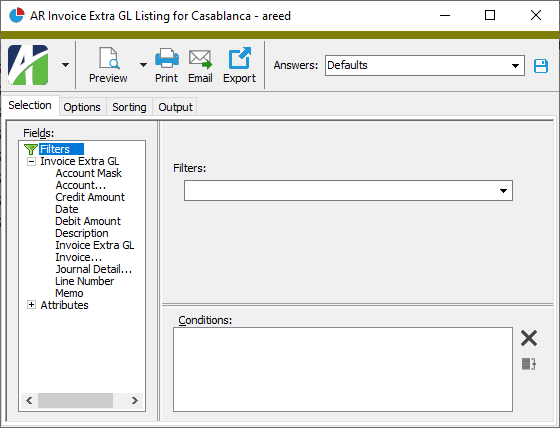
Invoice Extra GL Listing
Purpose
The Invoice Extra GL Listing shows the selected extra GL lines.
Content
For each extra GL line included on the report, the listing shows:
- account number
- GL date
- customer
- invoice date
- invoice number
- batch-entry-line
- debit amount
- credit amount.
The following totals appear on the report:
- grand totals.
Print the report
- In the Navigation pane, highlight the Accounts Receivable > Invoices > Invoice Extra GL folder.
- Start the report set-up wizard.
- To report on all or a filtered subset of extra GL lines:
- Right-click the Invoice Extra GL folder and select Select and Report > Invoice Extra GL Listing from the shortcut menu.
- On the Selection tab, define any filters to apply to the data.
- To report on specifically selected extra GL lines:
- In the HD view, select the extra GL lines to include on the report. You can use Ctrl and/or Shift selection to select multiple records.
- Click .
- To report on all or a filtered subset of extra GL lines:
- Select the Options tab.
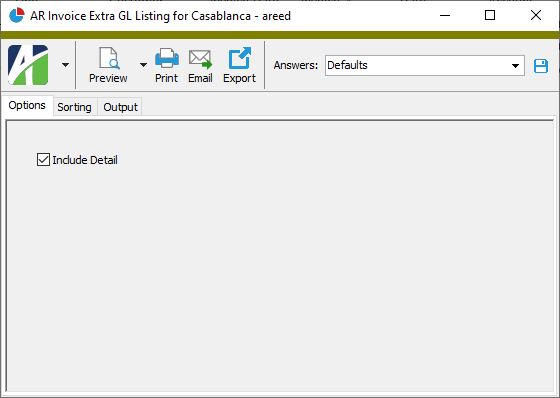
- Ensure the Include Detail checkbox is marked if you want to include extra GL lines on the report. If you clear the checkbox, the report shows grand totals only.
- To include a section at the end of the report with the report settings used to produce the report, leave the Include Report Options checkbox marked. To produce the report without this information, clear the checkbox.
- Select the Sorting tab.
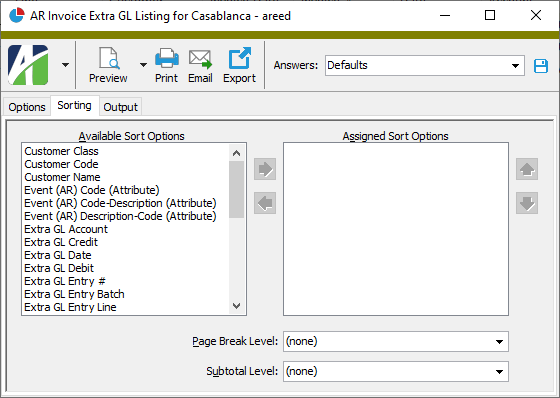
- In the Available Sort Options list box, highlight the field(s) to sort the report by, then click to move your selection(s) to the Assigned Sort Options list box.
- If you selected multiple sort fields, use and to arrange the sort fields in the order you want them applied.
- If you want the report to start a new page for each change in one of the sorting options you specified, select the sorting option to break on from the Page Break Level drop-down list. If you do not want to insert page breaks, accept "(none)".
- If you want the report to subtotal based on one of the sorting options you specified, select the sorting option to subtotal on from the Subtotal Level drop-down list. If you do not want to show subtotals, accept "(none)".
- Select the Output tab.
- In the Design field, look up and select the report design to use.
- In the toolbar, click the icon for the type of output you want:
- - Provides access to two preview options.
- Preview - Click the icon or click the drop-down arrow and select Preview from the drop-down menu to view the report in the Crystal Reports viewer.
- Preview to PDF - Click the drop-down arrow next to the icon and select Preview to PDF to view the report in the PDF reader.
- - Opens the Print dialog so that you can select and configure a printer and then print a paper copy of the report.
- - Opens the dialog so that you can address and compose an email that the report will be attached to. For best results, ensure your email client is running before you attempt to send a report via email.
- - Opens the Export Report dialog so that you can save the report to a file. File types include Crystal Reports (.rpt), PDF (.pdf), Microsoft Excel (.xls), Microsoft Word (.doc), rich text (.rtf), and XML (.xml).
Data extensions
The following data extension is available for the report:
- Invoice extra GL
Invoice Payment Analysis
Purpose
The AR Invoice Payment Analysis report produces a complete purchase and payment history for customers. This report is useful for credit managers who need a quick way to examine a customer's history to determine how best to manage the account.
Content
For each customer included on the report, the report shows:
- customer code and name
- balance forward
- total invoices
- total payments
- ending balance.
When the report is run in detail mode, the report shows the following for each invoice on the report:
- invoice date
- invoice description or invoice type
- invoice number
- last payment number
- invoice amount
- balance.
When the report is run in detail mode, the report shows the following for each payment on the report:
- payment date
- payment description
- payment reference
- payment number
- payment amount
- balance.
In addition, you can include one or more of the following:
- unmerged invoices and receipts not on hold
- customers with no current activity
- voided invoices
- voided receipts.
The following totals appear on the report:
- customer totals
- grand totals.
Print the report
- In the Navigation pane, highlight the Accounts Receivable > Customers folder.
- Start the report set-up wizard.
- To report on all or a filtered subset of customers:
- Right-click the Customers folder and select Select and Report > AR Invoice Payment Analysis from the shortcut menu.
- On the Selection tab, define any filters to apply to the data.
- To report on specifically selected customers:
- In the HD view, select the customers to include on the report. You can use Ctrl and/or Shift selection to select multiple records.
- Click and select AR Invoice Payment Analysis from the drop-down menu.
- To report on a particular customer from the Customer window:
- In the HD view, locate and double-click the customer to report on. The Customer window opens with the customer loaded.
- Click and select AR Invoice Payment Analysis from the drop-down menu.
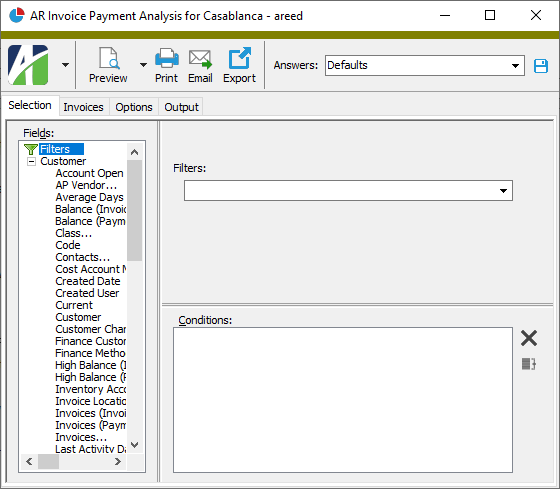
- To report on all or a filtered subset of customers:
- Select the Invoices tab.
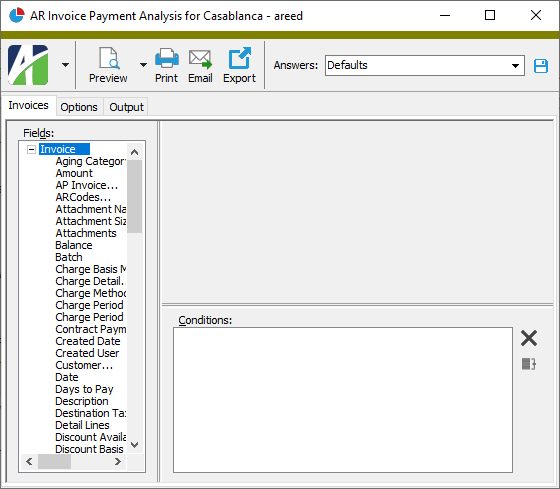
- Define any filters you want to apply to invoices represented in the data.
- Select the Options tab.
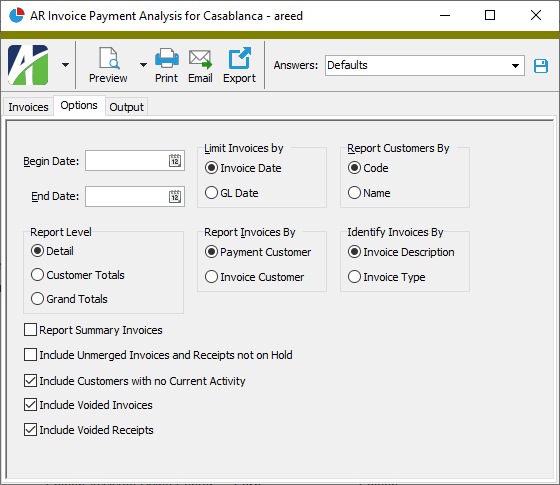
- In the Begin Date and End Date fields, enter the range of dates for which to include invoices and receipts on the report. All outstanding invoices up to the begin date are reported as a balance forward amount.
- In the Limit Invoices by field, select the type of date to compare against the date range to determine which transactions are included on the report. Your options are:
- Invoice Date. Uses the invoice date for invoices and the receipt date for receipts.
- GL Date. Uses the GL date for invoices and receipts. This option is not valid if you have the Summary Invoices package enabled and you mark the Report Summary Invoices checkbox.
- In the Report Customers By field, select how to identify customers on the report. This option also affects how data is sorted when you do not specify a sort order on the Sorting tab. Your options are:
- Code. Uses the customer code.
- Name. Uses the customer name.
- In the Report Level field, select the level of detail to include on the report. Your options are:
- Detail. Shows the balance forward as of the begin date, lists each invoice and receipt in the date range, and shows the running balance for each customer on the report.
- Customer Totals. Shows customer totals on a single line including balance forward as of the begin date, invoice totals for the date range, receipt totals for the date range, and ending balance.
- Grand Totals. Shows totals for all customers on the report including balance forward as of the begin date, invoice totals for the date range, receipt totals for the date range, and ending balance.
- In the Report Invoices By field, select which customer type to report on. Your options are:
- Payment Customer. Uses the payment customer assigned on the customer record.
- Invoice Customer. Uses the customer assigned on the invoice record.
- In the Identify Invoices By field, select which descriptor to use for invoices on the report. (This option is only applicable when you are running a detail report.) Your options are:
- Invoice Description
- Invoice Type. This option is not valid if you have the Summary Invoices package enabled and you mark the Report Summary Invoices checkbox.
- If you have the Summary Invoice interface enabled, the Report Summary Invoices checkbox is visible. Mark the checkbox if you want linked invoices to appear as summary invoices on the report. If you would rather the report show linked invoices separately, ensure the checkbox is cleared.
- Mark the checkbox(es) for the additional information to include:
- Unmerged Invoices and Receipts Not on Hold
- Customers with No Current Activity
- Voided Invoices
- Voided Receipts
- To include a section at the end of the report with the report settings used to produce the report, leave the Include Report Options checkbox marked. To produce the report without this information, clear the checkbox.
- Select the Output tab.
- In the Design field, look up and select the report design to use.
- In the toolbar, click the icon for the type of output you want:
- - Provides access to two preview options.
- Preview - Click the icon or click the drop-down arrow and select Preview from the drop-down menu to view the report in the Crystal Reports viewer.
- Preview to PDF - Click the drop-down arrow next to the icon and select Preview to PDF to view the report in the PDF reader.
- - Opens the Print dialog so that you can select and configure a printer and then print a paper copy of the report.
- - Opens the dialog so that you can address and compose an email that the report will be attached to. For best results, ensure your email client is running before you attempt to send a report via email.
- - Opens the Export Report dialog so that you can save the report to a file. File types include Crystal Reports (.rpt), PDF (.pdf), Microsoft Excel (.xls), Microsoft Word (.doc), rich text (.rtf), and XML (.xml).
Data extensions
The following data extensions are available for the report:
- Customers
- Invoices
- Summary invoices
- Receipts
Invoice Schemes Listing
Purpose
The Invoice Schemes Listing provides a list of the invoice schemes defined in your system.
Content
For each invoice scheme included on the report, the listing shows:
- invoice scheme code
- description
- prefix
- number of display digits
- last invoice number used
- when the invoice number is assigned
- whether the assigned invoice number can be overridden.
The following total appears on the report:
- record count.
Print the report
- In the Navigation pane, highlight the Accounts Receivable > Setup > Invoice Schemes folder.
- Start the report set-up wizard.
- To report on all or a filtered subset of invoice schemes:
- Right-click the Invoice Schemes folder and select Select and Report > Invoice Schemes Listing from the shortcut menu.
- On the Selection tab, define any filters to apply to the data.
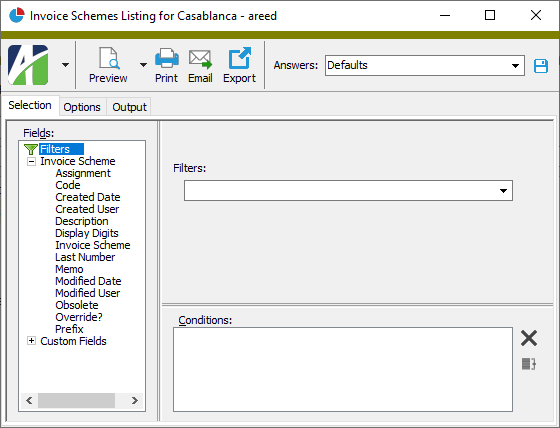
- To report on specifically selected invoice schemes:
- In the HD view, select the invoice schemes to include on the report. You can use Ctrl and/or Shift selection to select multiple records.
- Click .
- To report on a particular invoice scheme from the Invoice Scheme window:
- In the HD view, locate and double-click the invoice scheme to report on. The Invoice Scheme window opens with the invoice scheme loaded.
- Click .
- To report on all or a filtered subset of invoice schemes:
- Select the Options tab.

- To include a section at the end of the report with the report settings used to produce the report, leave the Include Report Options checkbox marked. To produce the report without this information, clear the checkbox.
- Mark the checkbox(es) for the additional information to include:
- Timestamps
- Memos
- Custom Fields (only visible if custom fields are set up)
- Select the Output tab.
- In the Design field, look up and select the report design to use.
- In the toolbar, click the icon for the type of output you want:
- - Provides access to two preview options.
- Preview - Click the icon or click the drop-down arrow and select Preview from the drop-down menu to view the report in the Crystal Reports viewer.
- Preview to PDF - Click the drop-down arrow next to the icon and select Preview to PDF to view the report in the PDF reader.
- - Opens the Print dialog so that you can select and configure a printer and then print a paper copy of the report.
- - Opens the dialog so that you can address and compose an email that the report will be attached to. For best results, ensure your email client is running before you attempt to send a report via email.
- - Opens the Export Report dialog so that you can save the report to a file. File types include Crystal Reports (.rpt), PDF (.pdf), Microsoft Excel (.xls), Microsoft Word (.doc), rich text (.rtf), and XML (.xml).
Data extensions
The following data extension is available for the report:
- Invoice schemes
Invoice Types Listing
Purpose
The Invoice Types Listing provides a list of the invoice types defined in your system.
Content
For each invoice type included on the report, the report shows:
- description
- classification
- GL control setting
- GL batch
- whether the default action is to print invoices of the type
- whether there is a zero balance requirement
- invoice scheme
- fields to check for duplicate entries
- receivables account
- whether to allow invoices of the type to post to AP.
In addition, you can include one or more of the following:
- timestamps
- memos
- custom fields.
The following total appears on the report:
- record count.
Print the report
- In the Navigation pane, highlight the Accounts Receivable > Setup > Invoice Types folder.
- Start the report set-up wizard.
- To report on all or a filtered subset of invoice types:
- Right-click the Invoice Types folder and select Select and Report > Invoice Types Listing from the shortcut menu.
- On the Selection tab, define any filters to apply to the data.
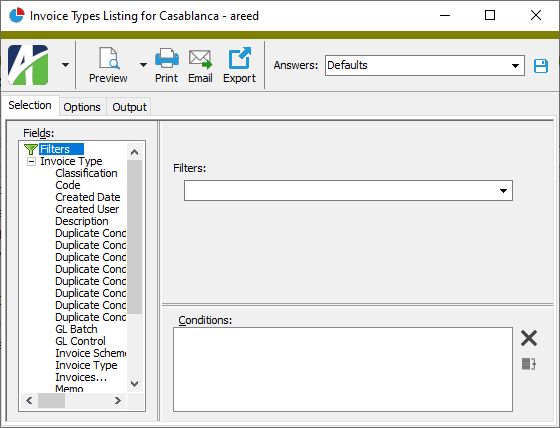
- To report on specifically selected invoice types:
- In the HD view, select the invoice types to include on the report. You can use Ctrl and/or Shift selection to select multiple records.
- Click .
- To report on a particular invoice type from the Invoice Type window:
- In the HD view, locate and double-click the invoice type to report on. The Invoice Type window opens with the invoice type loaded.
- Click .
- To report on all or a filtered subset of invoice types:
- Select the Options tab.
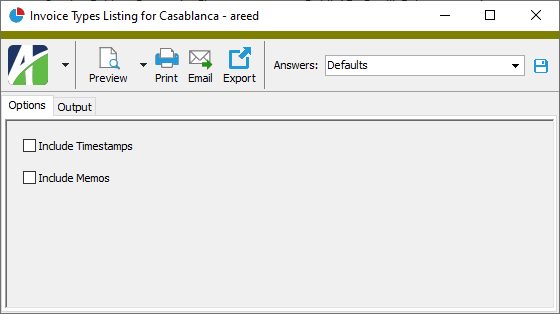
- To include a section at the end of the report with the report settings used to produce the report, leave the Include Report Options checkbox marked. To produce the report without this information, clear the checkbox.
- Mark the checkbox(es) for the additional information to include:
- Timestamps
- Memos
- Custom Fields (only visible if custom fields are set up)
- Select the Output tab.
- In the Design field, look up and select the report design to use.
- In the toolbar, click the icon for the type of output you want:
- - Provides access to two preview options.
- Preview - Click the icon or click the drop-down arrow and select Preview from the drop-down menu to view the report in the Crystal Reports viewer.
- Preview to PDF - Click the drop-down arrow next to the icon and select Preview to PDF to view the report in the PDF reader.
- - Opens the Print dialog so that you can select and configure a printer and then print a paper copy of the report.
- - Opens the dialog so that you can address and compose an email that the report will be attached to. For best results, ensure your email client is running before you attempt to send a report via email.
- - Opens the Export Report dialog so that you can save the report to a file. File types include Crystal Reports (.rpt), PDF (.pdf), Microsoft Excel (.xls), Microsoft Word (.doc), rich text (.rtf), and XML (.xml).
Data extensions
The following data extension is available for the report:
- Invoice types
Invoices Listing
Purpose
The AR Invoices Listing provides a list of invoices recorded in Accounts Receivable.
Content
For each invoice included on the report, the listing shows:
- batch - entry number
- customer code
- customer name
- invoice date
- invoice number
- invoice type
- classification
- due date
- amount
- merge number
- invoice description
- GL date
- PO number
- source
- GL batch
- terms
- balance
- summary invoice (if applicable)
- tax entity
- customer tax category
- salesperson
- finance method
- sales tax
- "voided by" invoice number (when applicable)
- "reverses" invoice number (when applicable).
The report also includes a recap of total invoices and of total payments.
In addition, you can include one or more of the following:
- locations, attributes, and discounts (location address; attributes and assigned values; discount date, discount percentage, discount basis, discount amount)
- tax detail (for each tax entity: tax entity code, tax amount)
- detail (for invoice detail: line number, ARCode, description, quantity, unit price, discount amount, extended amount, cost, item tax category, whether taxable; for charge detail: charge detail line number, invoice batch - entry number, invoice date, due date, invoice number, invoice description, amount, average balance)
- payments (receipt batch - entry number, receipt type, deposit ID, GL date, reference, description, payment amount, GL batch)
- extra GL (for each extra GL line: line number, date, account, unit, debit amount, credit amount, description)
- GL accounts (receivables account, sales tax account, sales account [if you include detail], cost account [if you include detail and there is a cost amount on the detail line], inventory account [if you include detail and there is a cost amount on the detail line], bank account [if you include payments])
- GL summary (for each GL account: account number and name, unit, source, count, total debits, total credits); optionally include attributes which post to GL
- memos
- timestamps
- custom fields.
The following totals appear on the report:
- invoice totals by invoice type
- payment totals by receipt type
Print the report
- In the Navigation pane, highlight the Accounts Receivable > Invoices folder.
- Start the report set-up wizard.
- To report on all or a filtered subset of AR invoices:
- Right-click the Invoices folder and select Select and Report > AR Invoices Listing from the shortcut menu.
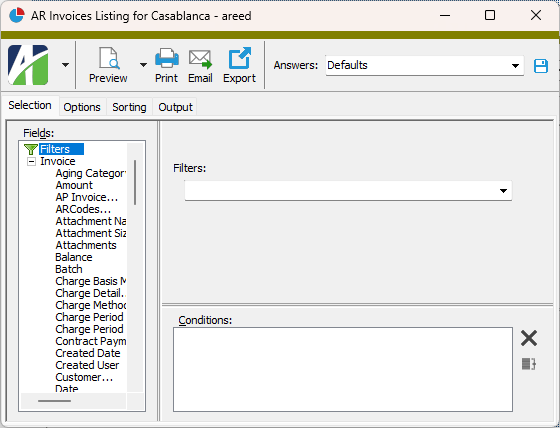
- On the Selection tab, define any filters to apply to the data.
- To report on specifically selected AR invoices:
- In the HD view, select the AR invoices to include on the report. You can use Ctrl and/or Shift selection to select multiple records.
- Click and select AR Invoices Listing from the drop-down menu.
- To report on a particular AR invoice from the AR Invoice window:
- In the HD view, locate and double-click the invoice to report on. The AR Invoice window opens with the invoice loaded.
- Click and select AR Invoices Listing from the drop-down menu.
- To report on all or a filtered subset of AR invoices:
- Select the Options tab.
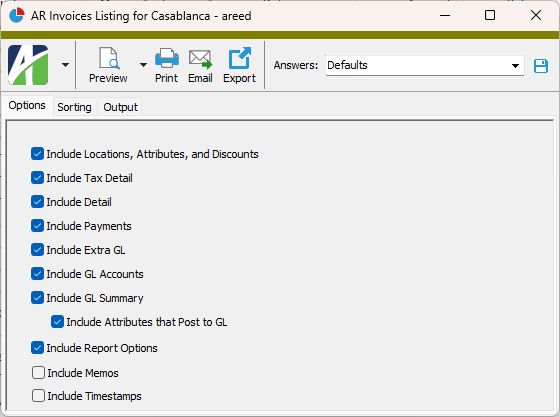
- Mark the checkbox(es) for the additional information to include:
- Locations, Attributes, and Discounts
- Tax Detail
- Detail
- Payments
- Extra GL
- GL Accounts
- GL Summary
- Attributes that Post to GL. This checkbox is enabled if the GL Summary checkbox is marked. Mark this checkbox to include attributes which post to GL in the "GL Summary" section of the report.
- Report Options. To include a section at the end of the report with the report settings used to produce the report, leave the checkbox marked. To produce the report without this information, clear the checkbox.
- Memos
- Timestamps
- Custom Fields (only visible if custom fields are set up)
- Select the Sorting tab.
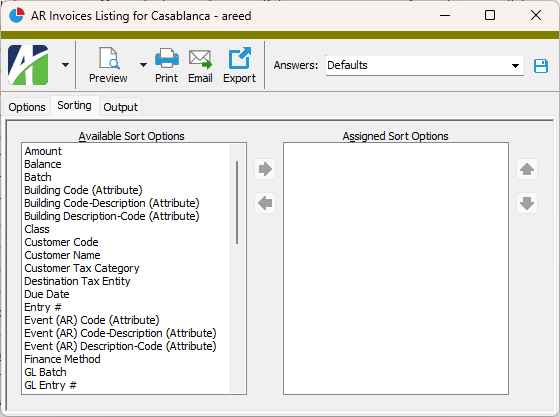
- In the Available Sort Options list box, highlight the field(s) to sort the report by, then click to move your selection(s) to the Assigned Sort Options list box.
- If you selected multiple sort fields, use and to arrange the sort fields in the order you want them applied.
- Select the Output tab.
- In the Design field, look up and select the report design to use.
- In the toolbar, click the icon for the type of output you want:
- - Provides access to two preview options.
- Preview - Click the icon or click the drop-down arrow and select Preview from the drop-down menu to view the report in the Crystal Reports viewer.
- Preview to PDF - Click the drop-down arrow next to the icon and select Preview to PDF to view the report in the PDF reader.
- - Opens the Print dialog so that you can select and configure a printer and then print a paper copy of the report.
- - Opens the dialog so that you can address and compose an email that the report will be attached to. For best results, ensure your email client is running before you attempt to send a report via email.
- - Opens the Export Report dialog so that you can save the report to a file. File types include Crystal Reports (.rpt), PDF (.pdf), Microsoft Excel (.xls), Microsoft Word (.doc), rich text (.rtf), and XML (.xml).
Data extensions
The following data extensions are available for the report:
- Invoices
- Invoice detail
- Tax details
- Invoice discounts
- Attributes
- Receipt detail
- Invoice charge detail
- Extra GL
Item Tax Categories Listing
Purpose
The Item Tax Categories Listing provides a list of item tax categories defined in Accounts Receivable.
Content
For each item tax category included on the report, the listing shows:
- description
- whether items in the category are taxable.
In addition, you can include one or more of the following:
- timestamps
- memos
- custom fields.
The following total appears on the report:
- record count.
Print the report
- In the Navigation pane, highlight the Accounts Receivable > Setup > Tax > Item Tax Categories folder.
- Start the report set-up wizard.
- To report on all or a filtered subset of item tax categories:
- Right-click the Item Tax Categories folder and select Select and Report > Item Tax Categories Listing from the shortcut menu.
- On the Selection tab, define any filters to apply to the data.

- To report on specifically selected item tax categories:
- In the HD view, select the item tax categories to include on the report. You can use Ctrl and/or Shift selection to select multiple records.
- Click .
- To report on a particular item tax category from the Item Tax Category window:
- In the HD view, locate and double-click the item tax category to report on. The Item Tax Category window opens with the item tax category loaded.
- Click .
- To report on all or a filtered subset of item tax categories:
- Select the Options tab.
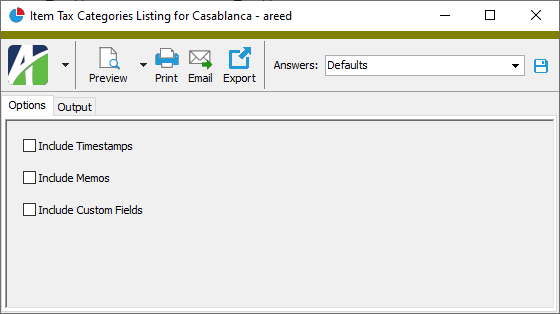
- To include a section at the end of the report with the report settings used to produce the report, leave the Include Report Options checkbox marked. To produce the report without this information, clear the checkbox.
- Mark the checkbox(es) for the additional information to include:
- Timestamps
- Memos
- Custom Fields (only visible if custom fields are set up)
- Select the Output tab.
- In the Design field, look up and select the report design to use.
- In the toolbar, click the icon for the type of output you want:
- - Provides access to two preview options.
- Preview - Click the icon or click the drop-down arrow and select Preview from the drop-down menu to view the report in the Crystal Reports viewer.
- Preview to PDF - Click the drop-down arrow next to the icon and select Preview to PDF to view the report in the PDF reader.
- - Opens the Print dialog so that you can select and configure a printer and then print a paper copy of the report.
- - Opens the dialog so that you can address and compose an email that the report will be attached to. For best results, ensure your email client is running before you attempt to send a report via email.
- - Opens the Export Report dialog so that you can save the report to a file. File types include Crystal Reports (.rpt), PDF (.pdf), Microsoft Excel (.xls), Microsoft Word (.doc), rich text (.rtf), and XML (.xml).
Data extensions
The following data extension is available for the report:
- Tax categories
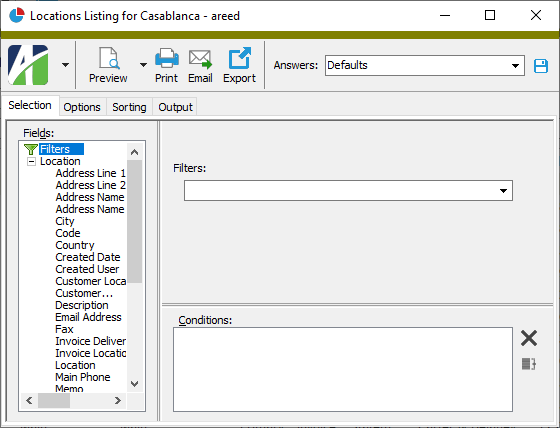
Locations Listing
Purpose
The Locations Listing provides a list of the locations associated with your customers.
Content
For each customer location included on the report, the listing shows:
- customer name
- customer location code
- customer location description
- whether the location record has been flagged as obsolete
- whether the location is the customer's primary location
- whether the location is the customer's default location for sending invoices
- whether the location is the customer's default location for sending statements
- customer's preference for invoice delivery
- customer's preference for statement delivery.
In addition, you can include one or more of the following:
- details (address, phone numbers, email, website address, default tax entity, default salesperson)
- timestamps
- memos
- custom fields.
The following total appears on the report:
- record count.
Print the report
- In the Navigation pane, highlight the Accounts Receivable > Customers > Locations folder.
- Start the report set-up wizard.
- To report on all or a filtered subset of customer locations:
- Right-click the Locations folder and select Select and Report > Locations Listing from the shortcut menu.
- On the Selection tab, define any filters to apply to the data.
- To report on specifically selected customer locations:
- In the HD view, select the customer locations to include on the report. You can use Ctrl and/or Shift selection to select multiple records.
- Click .
- To report on a particular customer location from the Location window:
- In the HD view, locate and double-click the customer location to report on. The Location window opens with the customer location loaded.
- Click .
- To report on all or a filtered subset of customer locations:
- Select the Options tab.
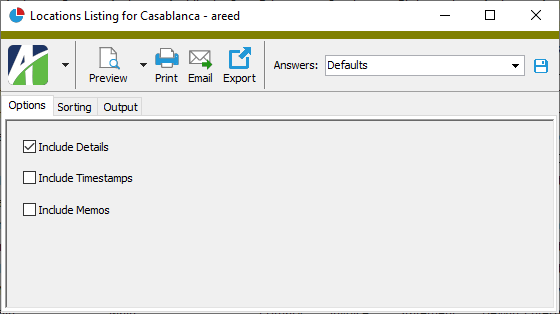
- Mark the checkbox(es) for the additional information to include:
- Details
- Report Options. To include a section at the end of the report with the report settings used to produce the report, leave the checkbox marked. To produce the report without this information, clear the checkbox.
- Timestamps
- Memos
- Custom Fields (only visible if custom fields are set up)
- Select the Sorting tab.
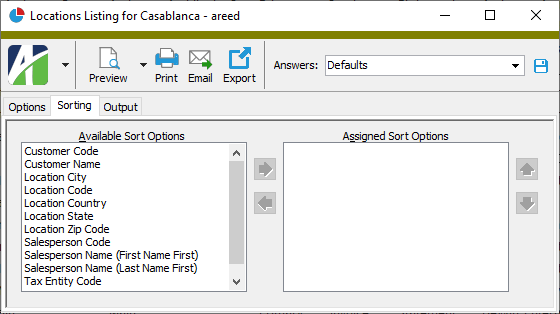
- In the Available Sort Options list box, highlight the field(s) to sort the report by, then click to move your selection(s) to the Assigned Sort Options list box.
- If you selected multiple sort fields, use or to arrange the sort fields in the order you want them applied.
- Select the Output tab.
- In the Design field, look up and select the report design to use.
- In the toolbar, click the icon for the type of output you want:
- - Provides access to two preview options.
- Preview - Click the icon or click the drop-down arrow and select Preview from the drop-down menu to view the report in the Crystal Reports viewer.
- Preview to PDF - Click the drop-down arrow next to the icon and select Preview to PDF to view the report in the PDF reader.
- - Opens the Print dialog so that you can select and configure a printer and then print a paper copy of the report.
- - Opens the dialog so that you can address and compose an email that the report will be attached to. For best results, ensure your email client is running before you attempt to send a report via email.
- - Opens the Export Report dialog so that you can save the report to a file. File types include Crystal Reports (.rpt), PDF (.pdf), Microsoft Excel (.xls), Microsoft Word (.doc), rich text (.rtf), and XML (.xml).
Data extensions
The following data extension is available for the report:
- Locations
Note Types Listing
Purpose
The Note Types Listing provides a list of the AR note types defined in your system.
Content
For each note type included on the report, the listing shows:
- description.
In addition, you can include one or more of the following:
- timestamps
- memos
- custom fields.
The following total appears on the report:
- record count.
Print the report
- In the Navigation pane, highlight the Accounts Receivable > Setup > Note Types folder.
- Start the report set-up wizard.
- To report on all or a filtered subset of note types:
- Right-click the Note Types folder and select Select and Report > Note Types Listing from the shortcut menu.
- On the Selection tab, define any filters to apply to the data.

- To report on specifically selected note types:
- In the HD view, select the note types to include on the report. You can use Ctrl and/or Shift selection to select multiple records.
- Click .
- To report on a particular note type from the Note Type window:
- In the HD view, locate and double-click the note type. The Note Type window opens with the note type loaded.
- Click .
- To report on all or a filtered subset of note types:
- Select the Options tab.
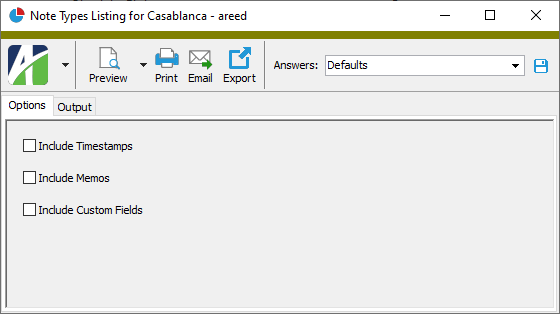
- To include a section at the end of the report with the report settings used to produce the report, leave the Include Report Options checkbox marked. To produce the report without this information, clear the checkbox.
- Mark the checkbox(es) for the additional information to include:
- Timestamps
- Memos
- Custom Fields (only visible if custom fields are set up)
- Select the Output tab.
- In the Design field, look up and select the report design to use.
- In the toolbar, click the icon for the type of output you want:
- - Provides access to two preview options.
- Preview - Click the icon or click the drop-down arrow and select Preview from the drop-down menu to view the report in the Crystal Reports viewer.
- Preview to PDF - Click the drop-down arrow next to the icon and select Preview to PDF to view the report in the PDF reader.
- - Opens the Print dialog so that you can select and configure a printer and then print a paper copy of the report.
- - Opens the dialog so that you can address and compose an email that the report will be attached to. For best results, ensure your email client is running before you attempt to send a report via email.
- - Opens the Export Report dialog so that you can save the report to a file. File types include Crystal Reports (.rpt), PDF (.pdf), Microsoft Excel (.xls), Microsoft Word (.doc), rich text (.rtf), and XML (.xml).
Data extensions
The following data extension is available for the report:
- Note types
Notes Listing
Purpose
The AR Notes Listing provides a list of the notes recorded in Accounts Receivable.
Content
For each note included on the report, the listing shows:
- note number
- note date and time
- note description
- the user who entered the note
- note type
- recall date
- note text.
In addition, you can include one or more of the following:
- references
- timestamps
- memos
- custom fields.
The following total appears on the report:
- record count.
Print the report
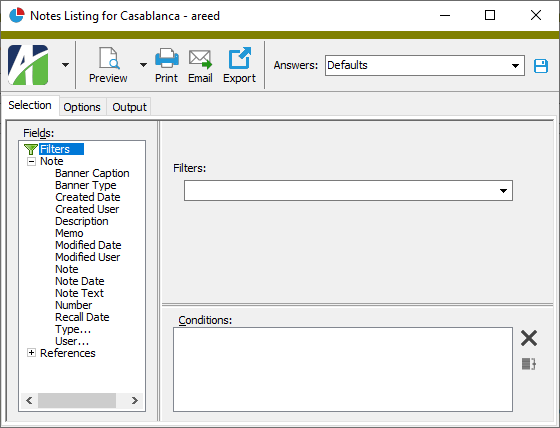
- In the Navigation pane, highlight the Accounts Receivable > Notes folder.
- Start the report set-up wizard.
- To report on all or a filtered subset of notes:
- Right-click the Notes folder and select Select and Report > Notes Listing from the shortcut menu.
- On the Selection tab, define any filters to apply to the data.
- To report on specifically selected notes:
- In the HD view, select the notes to include on the report. You can use Ctrl and/or Shift selection to select multiple records.
- Click and select Notes Listing from the drop-down menu.
- To report on a particular note from the Notes window:
- In the HD view, locate and double-click the note to report on. The Note window opens with the note loaded.
- Click and select Notes Listing from the drop-down menu.
- To report on all or a filtered subset of notes:
- Select the Options tab.
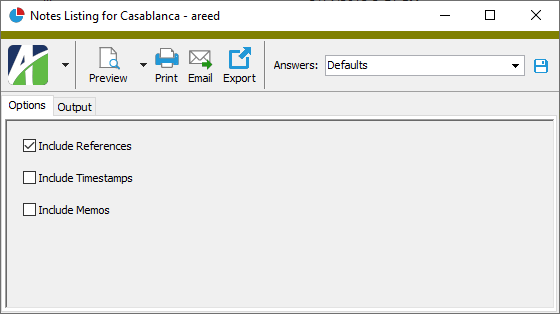
- Mark the checkbox(es) for the additional information to include:
- References
- Report Options. To include a section at the end of the report with the report settings used to produce the report, leave the checkbox marked. To produce the report without this information, clear the checkbox.
- Timestamps
- Memos
- Custom Fields (only visible if custom fields are set up)
- Select the Output tab.
- In the Design field, look up and select the report design to use.
- In the toolbar, click the icon for the type of output you want:
- - Provides access to two preview options.
- Preview - Click the icon or click the drop-down arrow and select Preview from the drop-down menu to view the report in the Crystal Reports viewer.
- Preview to PDF - Click the drop-down arrow next to the icon and select Preview to PDF to view the report in the PDF reader.
- - Opens the Print dialog so that you can select and configure a printer and then print a paper copy of the report.
- - Opens the dialog so that you can address and compose an email that the report will be attached to. For best results, ensure your email client is running before you attempt to send a report via email.
- - Opens the Export Report dialog so that you can save the report to a file. File types include Crystal Reports (.rpt), PDF (.pdf), Microsoft Excel (.xls), Microsoft Word (.doc), rich text (.rtf), and XML (.xml).
Data extensions
The following data extension is available for the report:
- Notes
Receipts Listing
Purpose
The AR Receipts Listing provides a list of receipts recorded in Accounts Receivable.
Content
For each receipt included on the report, the listing shows:
- batch - entry number
- customer code
- customer name
- receipt type
- GL date
- reference
- receipt date
- receipt amount
- merge number
- source
- receipt description
- classification
- GL batch
- deposit.
The report also includes a recap of total receipts and of new invoices.
Note
Invoices created from unapplied payments have an invoice amount of zero. As a result, these invoices only affect the count totals.
In addition, you can include one or more of the following:
- locations
- detail (for each detail line: line number, command [Payment, Unapplied, Miscellaneous], summary invoice number, invoice batch - entry number, invoice number, invoice type, payment terms, invoice date, due date, invoice balance, payment amount, discount amount, adjustment amount)
- miscellaneous payment detail (ARCode and description, whether taxable, customer tax category, item tax category, sales tax amount, tax entity, invoice description, salesperson, attributes, assigned attribute items, attribute item descriptions)
- tax detail (for each tax entity: tax entity code, tax amount)
- GL accounts (bank account, discount account, adjustment account, receivables account [if miscellaneous detail is included], sales account [if miscellaneous detail is included], tax account [if miscellaneous detail is included and there is a tax amount on the receipt detail line], cost account [if miscellaneous detail is included and there is a cost amount on the receipt detail line], inventory account [if miscellaneous detail is included and there is a cost amount on the receipt detail line])
- GL summary (for each GL account: account number and name, unit, source, count, total debits, total credits); optionally include attributes which post to GL
- memos.
The following totals appear on the report:
- receipt totals by receipt type
- new invoice totals by invoice type
- GL summary totals (optional) - (total debits, total credits).
Print the report
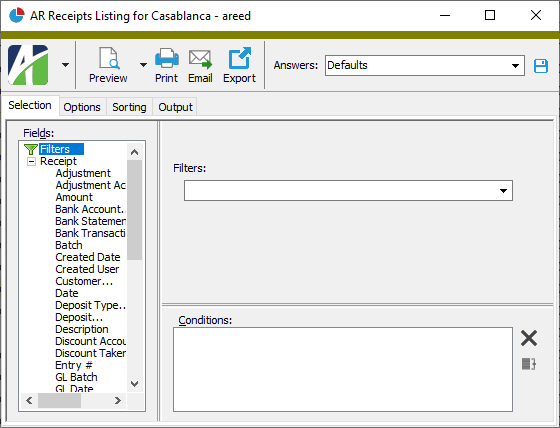
- In the Navigation pane, highlight the Accounts Receivable > Receipts folder.
- Start the report set-up wizard.
- To report on all or a filtered subset of receipts:
- Right-click the Receipts folder and select Select and Report > Receipts Listing from the shortcut menu.
- On the Selection tab, define any filters to apply to the data.
- To report on specifically selected receipts:
- In the HD view, select the receipts to include on the report. You can use Ctrl and/or Shift selection to select multiple records.
- Click .
- To report on a particular receipt from the Receipt window:
- In the HD view, locate and double-click the receipt to report on. The Receipt window opens with the receipt loaded.
- Click .
- To report on all or a filtered subset of receipts:
- Select the Options tab.
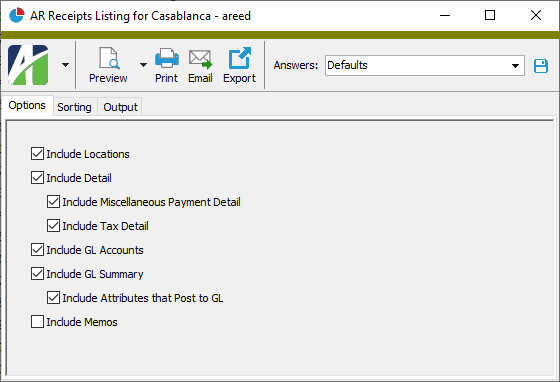
- Mark the checkbox(es) for the additional information to include:
- Locations
- Detail - If you mark this checkbox, the following checkboxes become enabled:
- Miscellaneous Payment Detail
- Tax Detail
- GL Accounts
- GL Summary
- Attributes that Post to GL. This checkbox is enabled if the GL Summary checkbox is marked. Mark this checkbox to include attributes which post to GL in the "GL Summary" section of the report.
- Report Options. To include a section at the end of the report with the report settings used to produce the report, leave the checkbox marked. To produce the report without this information, clear the checkbox.
- Memos
- Custom Fields (only visible if custom fields are set up)
- Select the Sorting tab.

- In the Available Sort Options list box, highlight the field(s) to sort the report by, then click to move your selection(s) to the Assigned Sort Options list box.
- If you selected multiple sort fields, use and to arrange the sort fields in the order you want them applied.
- Select the Output tab.
- In the Design field, look up and select the report design to use.
- In the toolbar, click the icon for the type of output you want:
- - Provides access to two preview options.
- Preview - Click the icon or click the drop-down arrow and select Preview from the drop-down menu to view the report in the Crystal Reports viewer.
- Preview to PDF - Click the drop-down arrow next to the icon and select Preview to PDF to view the report in the PDF reader.
- - Opens the Print dialog so that you can select and configure a printer and then print a paper copy of the report.
- - Opens the dialog so that you can address and compose an email that the report will be attached to. For best results, ensure your email client is running before you attempt to send a report via email.
- - Opens the Export Report dialog so that you can save the report to a file. File types include Crystal Reports (.rpt), PDF (.pdf), Microsoft Excel (.xls), Microsoft Word (.doc), rich text (.rtf), and XML (.xml).
Data extensions
The following data extensions are available for the report:
- Receipts
- Receipt detail
- Miscellaneous details
- Tax details
- Attributes
Recurring Listing
Purpose
The AR Recurring Listing provides a list of recurring invoices set up in Accounts Receivable.
Content
For each recurring invoice on the report, the listing shows:
- recurring invoice code and description
- invoice type
- GL batch name
- "on hold" indicator
- payment terms
- PO number
- processing begin and end dates
- sales tax
- customer code
- customer name
- invoice classification
- GL date option
- "allow duplicates" indicator
- finance method
- invoice number
- invoice amount
- tax entity
- customer tax category
- salesperson
- "Print Invoice" flag
- GL calendar
- posting day
- invoice balance.
In addition, you can include one or more of the following:
- locations and attributes
- tax detail
- invoice detail
- payments
- GL accounts
- GL summary information; optionally also include attributes which post to GL
- timestamps
- memos
- custom fields.
Print the report
- In the Navigation pane, highlight the Accounts Receivable > Invoices > Recurring folder.
- Start the report set-up wizard.
- To report on all or a filtered subset of recurring invoices:
- Right-click the Recurring folder and select Select and Report > AR Recurring Listing from the shortcut menu.
On the Selection tab, define any filters to apply to the data.
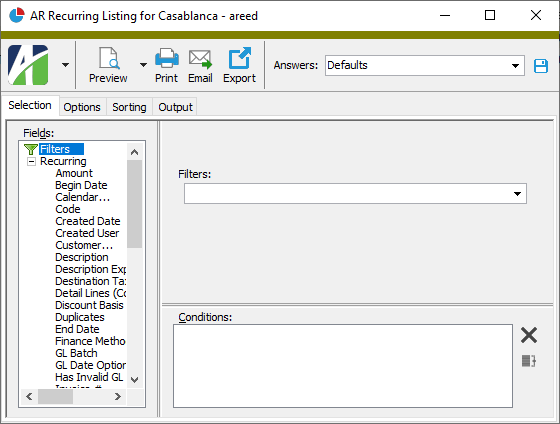
- To report on specifically selected recurring invoices:
- In the HD view, select the recurring invoices to include on the report. You can use Ctrl and/or Shift selection to select multiple records.
- Click .
- To report on a particular recurring invoice from the Recurring AR Invoice window:
- In the HD view, locate and double-click the recurring invoice to report on. The Recurring AR Invoice window opens with the recurring invoice loaded.
- Click .
- To report on all or a filtered subset of recurring invoices:
-
Select the Options tab.

- Mark the checkbox(es) for the additional information to include:
- Locations and Attributes
- Tax Detail
- Detail
- Payments
- GL Accounts
- GL Summary
- Attributes that Post to GL. This checkbox is enabled if the GL Summary checkbox is marked. Mark this checkbox to include attributes which post to GL in the "GL Summary" section of the report.
- Report Options. To include a section at the end of the report with the report settings used to produce the report, leave the checkbox marked. To produce the report without this information, clear the checkbox.
- Memos
- Timestamps
- Custom Fields (only visible if custom fields are set up)
-
Select the Sorting tab.
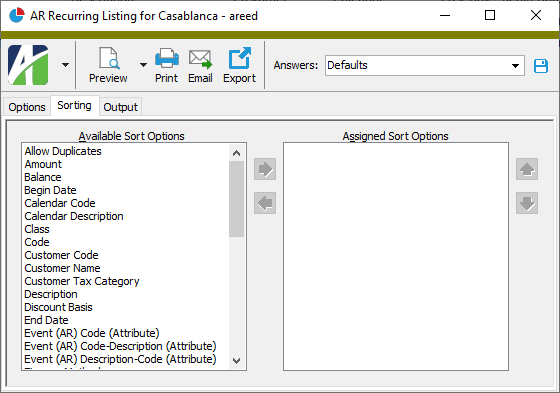
- In the Available Sort Options list box, highlight the field(s) to sort by, then click to move your selection(s) to the Assigned Sort Options list box.
- If you selected multiple sort fields, use and to arrange the sort fields in the order you want them applied.
- Select the Output tab.
- In the Design field, look up and select the report design to use.
- In the toolbar, click the icon for the type of output you want:
- - Provides access to two preview options.
- Preview - Click the icon or click the drop-down arrow and select Preview from the drop-down menu to view the report in the Crystal Reports viewer.
- Preview to PDF - Click the drop-down arrow next to the icon and select Preview to PDF to view the report in the PDF reader.
- - Opens the Print dialog so that you can select and configure a printer and then print a paper copy of the report.
- - Opens the dialog so that you can address and compose an email that the report will be attached to. For best results, ensure your email client is running before you attempt to send a report via email.
- - Opens the Export Report dialog so that you can save the report to a file. File types include Crystal Reports (.rpt), PDF (.pdf), Microsoft Excel (.xls), Microsoft Word (.doc), rich text (.rtf), and XML (.xml).
Data extensions
The following data extensions are available for the report:
- Recurring
- Recurring detail
- Tax details
- Attributes
- Payments
Sales Analysis
Purpose
The Sales Analysis report helps you measure and track sales performance. Using its flexible sorting, subtotaling, and totaling options, you can use the report to analyze sales from a variety of perspectives.
Content
When the report is run showing invoice detail, for each detail line included on the report, the report shows:
- invoice or GL date
- invoice number
- ARCode
- customer code
- salesperson
- quantity sold
- amount of sale.
(If you run the report and do not include detail, the report only shows grand totals for quantity and amount. If you do not include detail but do specify a subtotal option, the report also shows quantity and amount for each subtotal group.)
In addition, you can include information for one or more of the following:
- unmerged invoices not on hold
- credits
- voids.
The following totals appear on the report:
- subtotals (optional, by sort option)
- grand totals.
Print the report
- In the Navigation pane, highlight the Accounts Receivable > Invoices > Invoice Detail folder.
- Start the report set-up wizard.
- To report on all or a filtered subset of invoice detail records:
- Right-click the Invoice Detail folder and select Select and Report > Sales Analysis from the shortcut menu.
- On the Selection tab, define any filters to apply to the data.
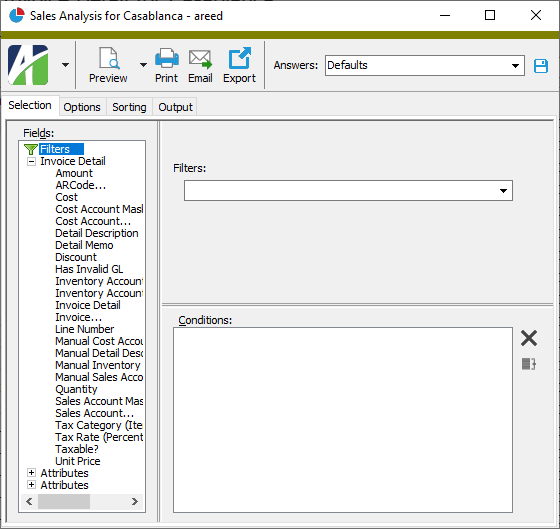
- To report on specifically selected invoice detail records:
- In the HD view, select the invoice detail records to include on the report. You can use Ctrl and/or Shift selection to select multiple records.
- Click .
- To report on a particular invoice detail record from the Invoice Detail window:
- In the HD view, locate and double-click the invoice detail record to report on. The Invoice Detail window opens with the invoice detail record loaded.
- Click .
- To report on all or a filtered subset of invoice detail records:
- Select the Options tab.
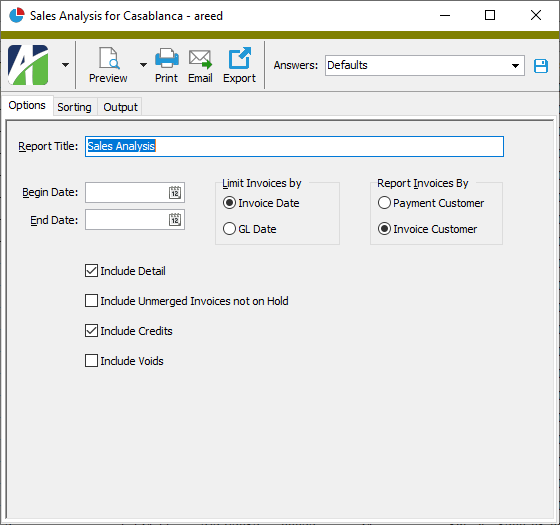
- In the Report Title field, type a title for the report. You can use up to 100 characters.
- In the Begin Date and End Date fields, enter the range of dates for which to include invoice detail records on the report.
- In the Limit Invoices by field, select the type of date to compare against the date range to determine which invoice detail records are included on the report. Your options are:
- Invoice Date
- GL Date
- In the Report Invoices By field, select which customer type to reference on the report. Your options are:
- Payment Customer. Use the payment customer from the customer record.
- Invoice Customer. Use the customer from the invoice record.
- Mark the checkbox(es) for the additional information to include:
- Detail
- Unmerged Invoices Not on Hold
- Credits
- Voids. Mark this checkbox to include voided and reversal invoices on the report. (If you use the original invoice date on reversal invoices when voiding, this option is probably not needed.) This option is most valuable when the original invoice date differs from the reversal date. Voids, reversals, and totals which include a voided and/or reversal amount are indicated by an asterisk (*).
- To include a section at the end of the report with the report settings used to produce the report, leave the Include Report Options checkbox marked. To produce the report without this information, clear the checkbox.
- Select the Sorting tab.
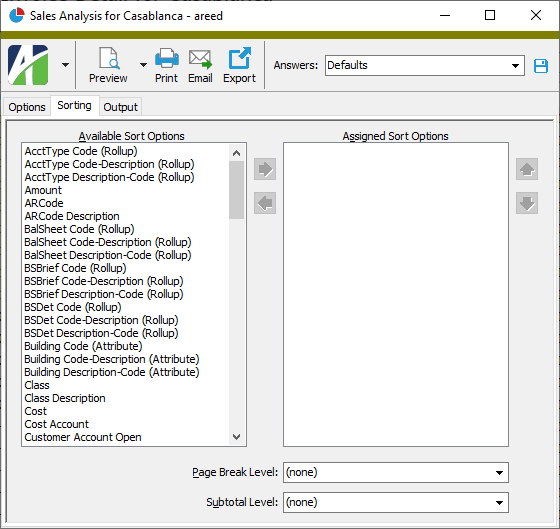
- In the Available Sort Options list box, highlight the field(s) to sort the report by, then click to move your selection(s) to the Assigned Sort Options list box.
- If you selected multiple sort fields, use and to arrange the sort fields in the order you want them applied.
- If you want the report to start a new page for each change in one of the sorting options you specified, select the sorting option to break on from the Page Break Level drop-down list. If you do not want to insert page breaks, accept "(none)".
- If you want the report to subtotal based on one of the sorting options you specified, select the sorting option to subtotal on from the Subtotal Through Level drop-down list. If you do not want to show subtotals, accept "(none)".
- Select the Output tab.
- In the Design field, look up and select the report design to use.
- In the toolbar, click the icon for the type of output you want:
- - Provides access to two preview options.
- Preview - Click the icon or click the drop-down arrow and select Preview from the drop-down menu to view the report in the Crystal Reports viewer.
- Preview to PDF - Click the drop-down arrow next to the icon and select Preview to PDF to view the report in the PDF reader.
- - Opens the Print dialog so that you can select and configure a printer and then print a paper copy of the report.
- - Opens the dialog so that you can address and compose an email that the report will be attached to. For best results, ensure your email client is running before you attempt to send a report via email.
- - Opens the Export Report dialog so that you can save the report to a file. File types include Crystal Reports (.rpt), PDF (.pdf), Microsoft Excel (.xls), Microsoft Word (.doc), rich text (.rtf), and XML (.xml).
Data extensions
The following data extensions are available for the report:
- Customers
- Invoices
- Invoice detail
- Summary invoices
Summary Invoices Listing
Purpose
The Summary Invoices Listing provides a list of the summary invoices created in Accounts Receivable.
Content
For each summary invoice included on the report, the listing shows:
- batch - entry number
- customer code and customer name
- invoice date
- invoice type
- payment terms
- sales tax amount
- invoice amount
- invoice number
- PO number
- invoice description
- due date
- salesperson
- summary invoice status
- invoice balance.
In addition, you can include one or more of the following:
- locations, attributes, and discounts (location address; attributes and assigned values; discount date, discount percentage, discount basis, discount amount)
- payments (receipt - batch entry number, receipt type, deposit ID, GL date, reference, description, payment amount)
- linked invoices (for each linked invoice: batch - entry number, invoice number, customer code, description, invoice date, invoice type, customer tax category, sales tax amount, invoice amount, balance)
- invoice detail for linked invoices (for each detail line: line number, ARCode, description, quantity, unit price, discount, invoice amount, cost, item tax category, whether taxable, sales account)
- tax detail for linked invoices (for each tax entity: tax entity code, tax amount)
- memos
- timestamps
- custom fields.
The following totals appear on the report:
- summary invoice totals by invoice type
- payment totals by receipt type.
Print the report
- In the Navigation pane, highlight the Accounts Receivable > Summary Invoices folder.
- Start the report set-up wizard.
- To report on all or a filtered subset of summary invoices:
- Right-click the Summary Invoices folder and select Select and Report > Summary Invoices Listing from the shortcut menu.
- On the Selection tab, define any filters to apply to the data.
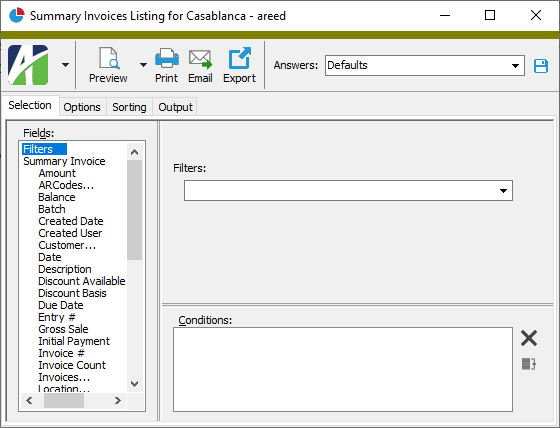
- To report on specifically selected summary invoices:
- In the HD view, select the summary invoices to include on the report. You can use Ctrl and/or Shift selection to select multiple summary invoices.
- Click .
- To report on a particular summary invoice from the Summary Invoice window:
- In the HD view, locate and double-click the summary invoice to report on. The Summary Invoice window opens with the summary invoice loaded.
- Click .
- To report on all or a filtered subset of summary invoices:
- Select the Options tab.
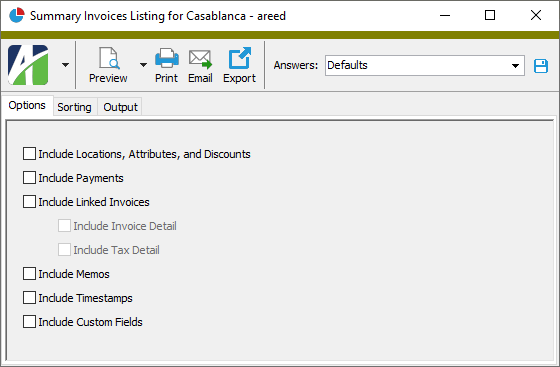
- Mark the checkbox(es) for the additional information to include:
- Locations, Attributes, and Discounts
- Payments
- Linked Invoices. If you select this option, the two checkboxes immediately below are enabled. Mark the checkbox(es) for the type(s) of detail about the linked invoices to show on the report. Your options are:
- Invoice Detail
- Tax Detail
- Report Options. To include a section at the end of the report with the report settings used to produce the report, leave the checkbox marked. To produce the report without this information, clear the checkbox.
- Memos
- Timestamps
- Custom Fields (only visible if custom fields are set up)
- Select the Sorting tab.
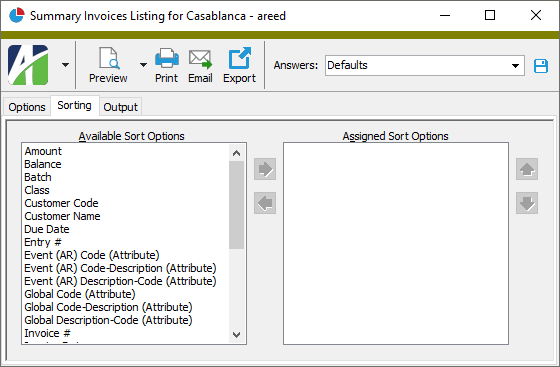
- In the Available Sort Options list box, highlight the field(s) to sort the report by, then click to move your selection(s) to the Assigned Sort Options list box.
- If you selected multiple sort fields, use and to arrange the sort fields in the order you want them applied.
- Select the Output tab.
- In the Design field, look up and select the report design to use.
- In the toolbar, click the icon for the type of output you want:
- - Provides access to two preview options.
- Preview - Click the icon or click the drop-down arrow and select Preview from the drop-down menu to view the report in the Crystal Reports viewer.
- Preview to PDF - Click the drop-down arrow next to the icon and select Preview to PDF to view the report in the PDF reader.
- - Opens the Print dialog so that you can select and configure a printer and then print a paper copy of the report.
- - Opens the dialog so that you can address and compose an email that the report will be attached to. For best results, ensure your email client is running before you attempt to send a report via email.
- - Opens the Export Report dialog so that you can save the report to a file. File types include Crystal Reports (.rpt), PDF (.pdf), Microsoft Excel (.xls), Microsoft Word (.doc), rich text (.rtf), and XML (.xml).
Data extensions
The following data extensions are available for the report:
- Summary invoices
- Invoices
- Invoice detail
- Attributes
- Tax entities
- Discounts
- Receipt detail
Tax Liability Report
Purpose
The Tax Liability Report produces a summary of your tax liability by tax entity.
Most states (or provinces) and some counties and cities levy a tax on the sale of goods and services. The regulations governing these vary. Tax rates also vary and change at frequent intervals. The goods and services taxed in one jurisdiction may not be taxed in another. Each taxing authority establishes its own requirements for tax reporting. ActivityHD AR collects the information necessary for filing sales tax reports.
Tax liability is determined from tax entities in ActivityHD AR. These tax entities define the tax rate (percentage), taxability of certain tax categories, and categorization of customers/items on the Tax Liability Report.
Content
For each tax entity included on the report, the report shows:
- standard code or description for the tax entity
- effective date of tax rate
- tax rate
- gross sales
- tax invoiced
- tax calculated
- breakdown of amounts by tax status.
In addition, you can include the following:
- unmerged invoices not on hold.
When you run the report, you can select among four levels of detail. Each level provides the gross sales, tax invoiced, and tax calculated totals applicable at that level as well as the corresponding totals for higher levels. The totals for each level are derived by summing the amounts from the invoice detail lines that comprise that level.
The gross sales amount is based on the amount from each invoice detail line.
The tax invoiced amount on a detail line is determined using the invoice tax amount from the invoice header in the following calculation:
Invoice Tax Amount * (Invoice Detail Line Tax Calculated / Total Invoice Tax Calculated)
The tax calculated amount is based on the tax rate and taxability definitions when the report is run. Tax rates are based on the effective date of the rate and the invoice date on the invoice.
The following totals appear on the report:
- grand totals.
Print the report
- In the Navigation pane, highlight the Accounts Receivable > Invoices folder.
- Start the report set-up wizard.
- To report on all or a filtered subset of invoices:
- Right-click the Invoices folder and select Select and Report > Tax Liability Report from the shortcut menu.
- On the Selection tab, define any filters to apply to the data.
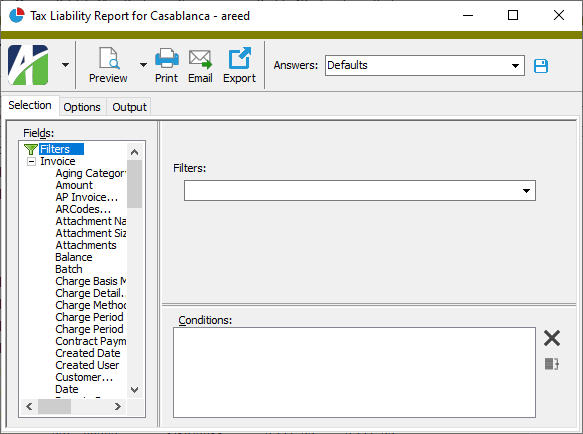
- To report on specifically selected invoices:
- In the HD view, select the invoices to include on the report. You can use Ctrl and/or Shift selection to select multiple records.
- Click and select Tax Liability Report from the drop-down menu.
- To report on a particular invoice from the AR Invoice window:
- In the HD view, locate and double-click the invoice to report on. The AR Invoice window opens with the invoice loaded.
- Click and select Tax Liability Report from the drop-down menu.
- To report on all or a filtered subset of invoices:
- Select the Options tab.
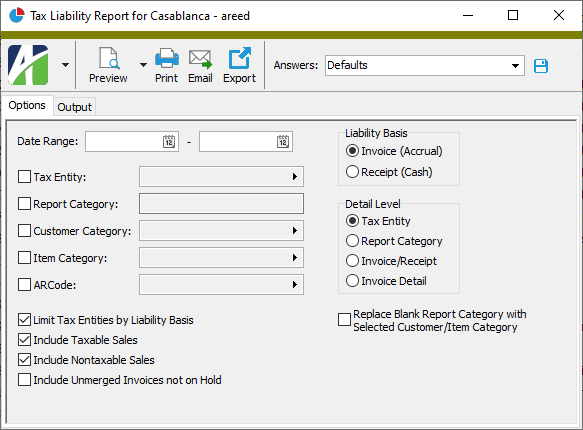
- In the Date Range fields, enter the range of invoice dates for which to include invoices on the report.
- To restrict the report to invoices with certain tax entities, mark the Tax Entity checkbox and enter a tax entity mask or specific tax entity code in the field.
- To restrict the report to invoice details with certain report categories, mark the Report Category checkbox and enter a report category mask or specific report category in the field. If you mark the checkbox and leave the field blank, the report will only show invoice details with no report category specified.
- To restrict the report to invoices with certain customer tax categories, mark the Customer Category checkbox and enter a customer tax category mask or specific customer tax category code in the field. If you mark the checkbox and leave the field blank, the report will only show invoices with no customer category specified.
- To restrict the report to invoice detail lines with certain item tax categories, mark the Item Category checkbox and enter an item tax category mask or specific item tax category code in the field. If you mark the checkbox and leave the field blank, the report will only show invoice detail lines with no item tax category specified.
- To restrict the report to invoice detail lines with certain ARCodes, mark the ARCode checkbox and enter an ARCode mask or specific ARCode in the field.
- To only include tax entities with the same liability basis as you specify in the Liability Basis field, mark the Limit Tax Entities by Liability Basis checkbox.
- Mark the checkbox(es) for the additional information to include:
- Taxable Sales
- Nontaxable Sales
- Unmerged Invoices Not on Hold
- In the Liability Basis field, select the type of amounts to include on the report. Your options are:
- Invoice (Accrual)
- Receipt (Cash)
- In the Detail Level field, select the level of detail to include on the report. Your options are:
- Tax Entity. Invoice detail is summarized by tax entity and tax entity totals are broken down into taxable and nontaxable amounts.
- Report Category. In addition to the detail in the "tax entity" level, totals at this level are also broken down by report category.
- Invoice/Receipt. In addition to the detail in the "report category" level, totals at this level are also broken down by invoice. For each invoice on the report, the report shows invoice date, customer code, gross sales, invoice batch - entry number, and invoice number. Voids and reversals are flagged on the report. If a void and its corresponding reversal do not both occur within the report date range, they will not appear together on the report.
- Invoice Detail. In addition to the detail in the "invoice/receipt" level, totals at this level are also broken down by invoice detail line.
- If the underlying tax detail rate has a blank report category and you want to replace it with the description of the customer tax or item tax category, mark the Replace Blank Report Category with Selected Customer/Item Category checkbox. If you do not mark this checkbox, any tax detail lines with a blank report category will be reported as "**Uncategorized Taxable**" or "**Uncategorized Nontaxable**". Also, if both a customer tax and item tax category are specified on the tax detail rate but no report category is specified, the category will be reported as "**Uncategorized Taxable**" or "**Uncategorized Nontaxable**".
- To include a section at the end of the report with the report settings used to produce the report, leave the Include Report Options checkbox marked. To produce the report without this information, clear the checkbox.
- Select the Output tab.
- In the Design field, look up and select the report design to use.
- In the toolbar, click the icon for the type of output you want:
- - Provides access to two preview options.
- Preview - Click the icon or click the drop-down arrow and select Preview from the drop-down menu to view the report in the Crystal Reports viewer.
- Preview to PDF - Click the drop-down arrow next to the icon and select Preview to PDF to view the report in the PDF reader.
- - Opens the Print dialog so that you can select and configure a printer and then print a paper copy of the report.
- - Opens the dialog so that you can address and compose an email that the report will be attached to. For best results, ensure your email client is running before you attempt to send a report via email.
- - Opens the Export Report dialog so that you can save the report to a file. File types include Crystal Reports (.rpt), PDF (.pdf), Microsoft Excel (.xls), Microsoft Word (.doc), rich text (.rtf), and XML (.xml).
Data extensions
The following data extension is available for the report:
- Invoices