Maintain purchase order options
You can control how certain aspects of the Order tab behave using the Options dialog box for the Purchase Order window. In particular, you can control whether color is used to alert you to changes from default account numbers and default attribute items, where the detail description displays, which attributes to prompt for, and which columns display in the Purchases table.
Maintain purchase order options
- In the Navigation pane, highlight the Purchasing > Orders folder.
- In the HD view, double-click a record to open it. The Purchase Order window opens.
- Click
 (next to the Options dropdown) or select
  > Tools > Options > Maintain Options. The Options dialog box opens.
- To display account numbers in purple whenever the default account number has been overridden, mark the Account Override checkbox.
- To display attribute items in purple whenever the default attribute item has been overridden, mark the Attribute Override checkbox.
- In the
- In Place. Edit the description directly on the purchase line in the Purchases table (provided you do not hide the description by deselecting it in the Detail Columns list box).

- Bottom. Edit the description in a text box below the Purchases table. If you need long descriptions, this option provides the most room for text.

- Right. Edit the description in a text box to the right of the Purchases table.

- In Place. Edit the description directly on the purchase line in the Purchases table (provided you do not hide the description by deselecting it in the Detail Columns list box).
- The Attributes list box shows the order-level attributes available to be prompted for on the Order tab. Use the features of the list box to configure how and whether the attributes display. You can do one or more of the following:
- Add attributes. By default, all order-level attributes are selected. However, if some have previously been deselected, you can add them back. To do so:
- Click Add/Remove. The Attribute Selection dialog box opens.

- In the Available Attributes list box, highlight the attributes to add to the display, then click
 to move your selection(s) to the Assigned Attributes list box.
 - Click OK.
- Click Add/Remove. The Attribute Selection dialog box opens.
- Remove attributes. To do so:
- Click Add/Remove. The Attribute Selection dialog box opens.

- In the Assigned Attribute list box, highlight the attributes to remove from the display, then click
 to move your selection(s) to the Available Attributes list box.
 - Click OK.
- Click Add/Remove. The Attribute Selection dialog box opens.
- Reorder attributes. To do so:
- Highlight an attribute name in the Attributes list box.
- Use
 and
and  to move the attribute to the desired position.
 - Repeat the last step for other attributes you need to move.
- Set tab stops. To do so:
- In the Attributes list box, ensure the checkbox for the attributes that need a tab stop are marked.
- Clear the checkbox for the attributes that do not need a tab stop.
- Add attributes. By default, all order-level attributes are selected. However, if some have previously been deselected, you can add them back. To do so:
- In the Detail Columns section, configure the Purchases table to streamline purchase order entry. You can do one or more of the following:
- Add columns. To do so:
- Click Add/Remove. The Column Selection dialog box opens.

- In the Available Columns list box, highlight the columns to add to the table, then click to move your selection(s) to the Assigned Columns list box.
- Click OK.
- Click Add/Remove. The Column Selection dialog box opens.
- Remove columns. To do so:
- Click Add/Remove. The Column Selection dialog box opens.
- In the Assigned Columns list box, highlight the columns to remove from the table, then click to move your selection(s) to the Available Columns list box.
- Click OK.
- Click Add/Remove. The Column Selection dialog box opens.
- Reorder columns. To do so:
- Highlight a column name in the Detail Columns list box.
- Use and to move the column to the desired position.
- Repeat the last step for other columns you need to move.
- Set tab stops. To do so:
- In the Detail Columns list box, ensure the checkbox for the columns that need a tab stop are marked.
- Clear the checkbox for the columns that do not need a tab stop.
- Add columns. To do so:
- When you finish, click OK. If you started from the "Defaults" profile, you are prompted to save the settings profile.
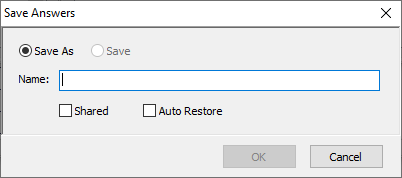
Provide a Name for the profile, mark the Shared and Auto Restore options as appropriate, and click OK.
If you started from an existing profile, you are prompted whether to save the changes. Click Yes.