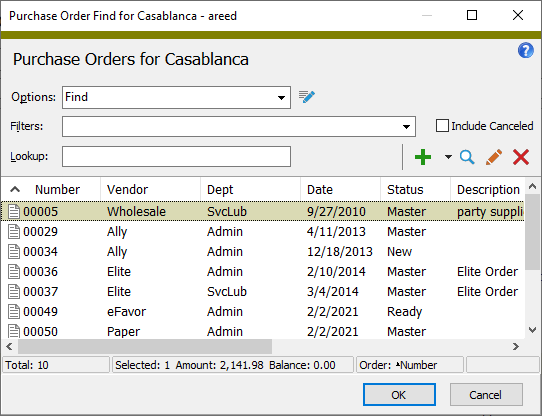
A purchase order represents a contractual agreement between your company and a vendor for the purchase of goods and/or services. ActivityHD assigns each purchase order a unique sequential number to identify it in the system.
The image below depicts the general workflow for a standard purchase order in ActivityHD.
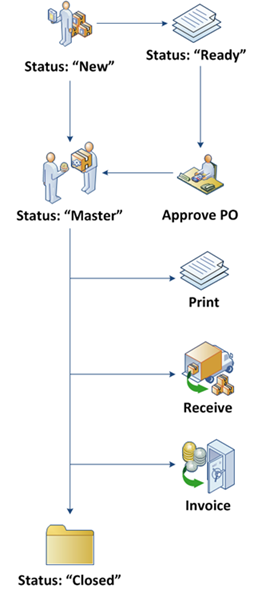
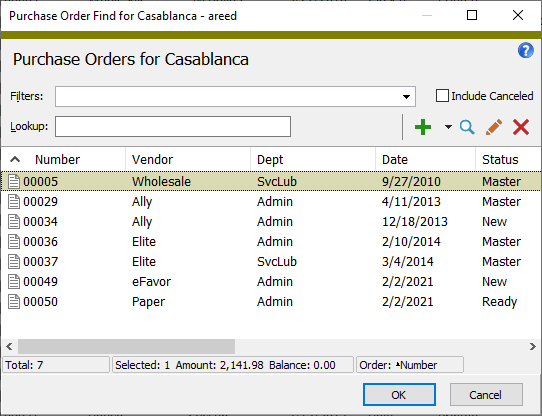
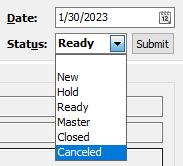
Available statuses for a standard purchase order:
- New. A purchase order that has not been approved for release to the vendor. Depending on your setup, a purchase order may require formal approval steps before it is released.
- Hold. This status prevents processing of a purchase order. A hold purchase order is not ready for approval or release to the vendor. If a purchase order is placed on hold after being released to the vendor, hold status prevents it from being invoiced or received.
- Ready. A purchase order that is ready for approval. If the purchase order does not require approval, you can skip this status. If approval is required, the purchase order must be in "Ready" status in order to be eligible for the approval process.
- Master. A purchase order that is approved and can be released to the vendor. After a purchase order is moved to "Master" status, receipts and invoices can be recorded against it.
- Closed. A purchase order for which all lines have been invoiced and received, or a purchase order that is canceled.
- Canceled. A purchase order for which no further processing (invoicing and receiving) is permitted. If commitments have been posted for the purchase order, they are reversed.


|
Extras\Purchasing\Import Orders.xls |
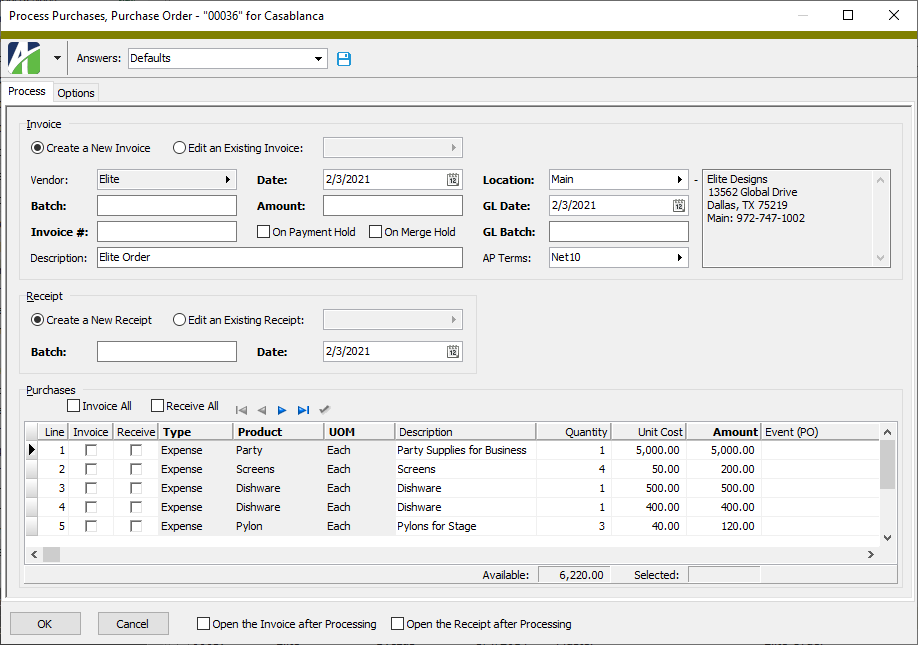
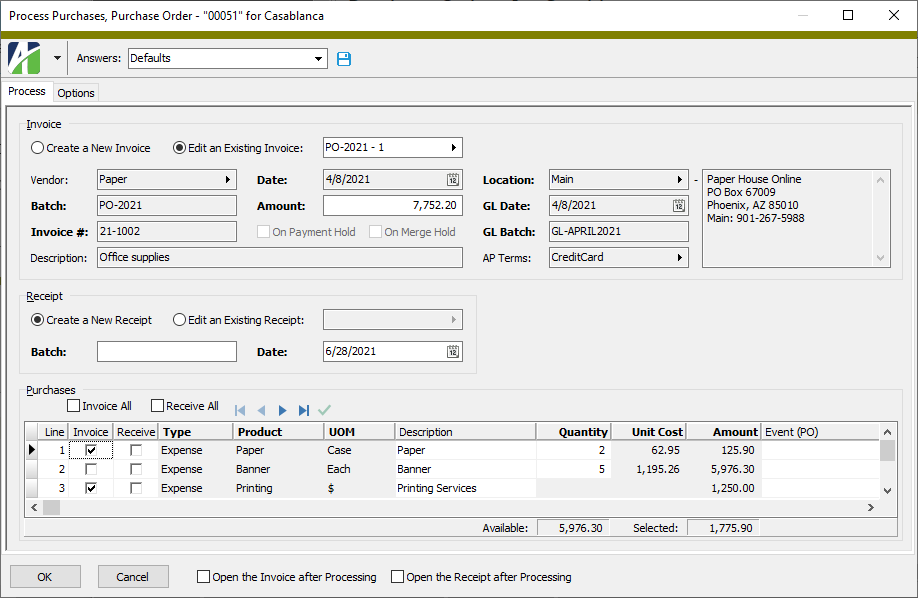
Process Purchases, Purchase Order wizard
Process tab
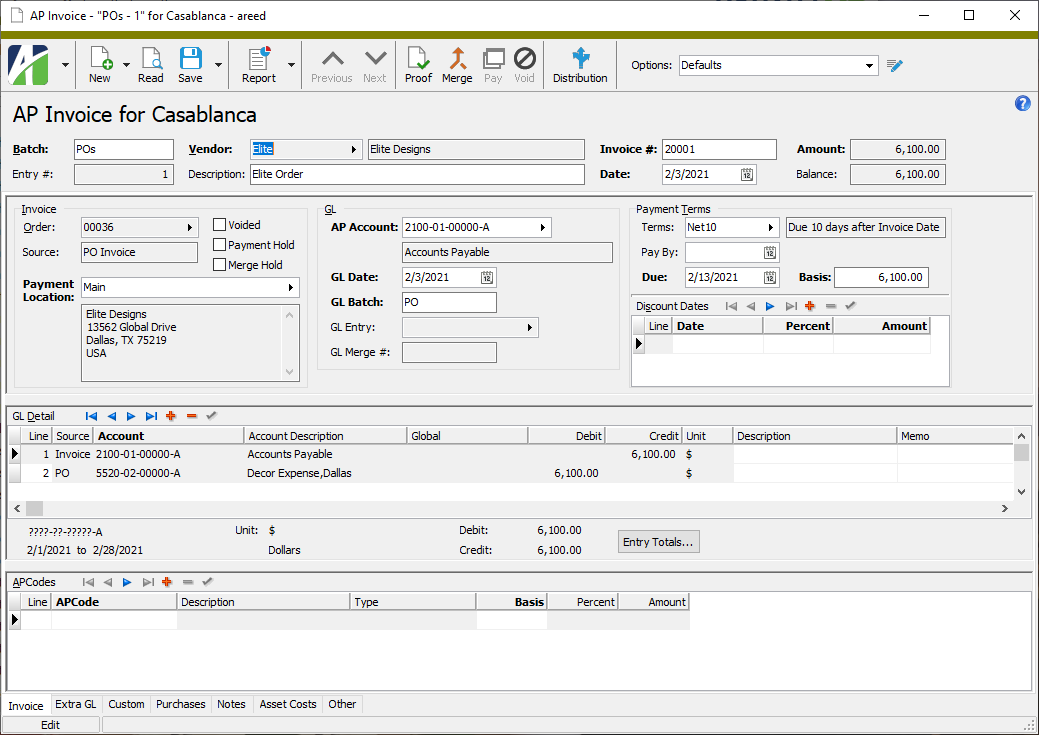
- Create a New Invoice. Create a new invoice for the purchases you select in the Purchases table. The AP invoice is created using the options you specify in the rest of this section.
Example
Suppose you receive an invoice from the vendor electronically and import it into Accounts Payable. You can use this option to edit the unmerged invoice and attach the appropriate purchases to it.
Press F3 to look up the value.
If a value is already selected, you can press F4 to open the record in its native editor.
Displays the PO vendor on the selected purchase order who is to be paid for the invoiced purchases.
Press F3 to look up the value.
If a value is already selected, you can press F4 to open the record in its native editor.
The payment location for the invoice. The default location is the vendor's payment location. The address associated with the selected location displays to the right.
Press F3 to look up the value.
If a value is already selected, you can press F4 to open the record in its native editor.
The payment terms for the invoice. The default payment terms are the vendor's default terms.
Press F3 to look up the value.
If a value is already selected, you can press F4 to open the record in its native editor.
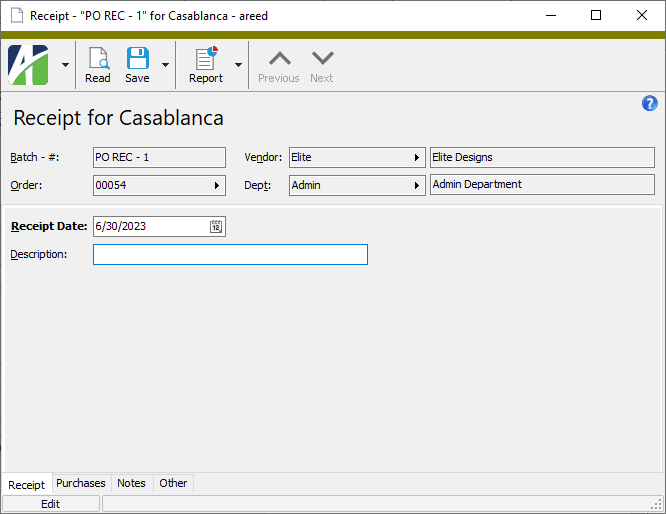
- Create a New Receipt. Create a new receipt for the purchases you select in the Purchases table. The receipt is created using the receipt batch name and receipt date you specify.
Edit an Existing Receipt. Assign purchases to a receipt that already exists. If you select this option, the adjacent field is enabled so that you can select a receipt for the selected purchase order. After you select this option and specify an existing receipt, information for the selected receipt loads in this section and the fields are disabled.
Press F3 to look up the value.
If a value is already selected, you can press F4 to open the record in its native editor.
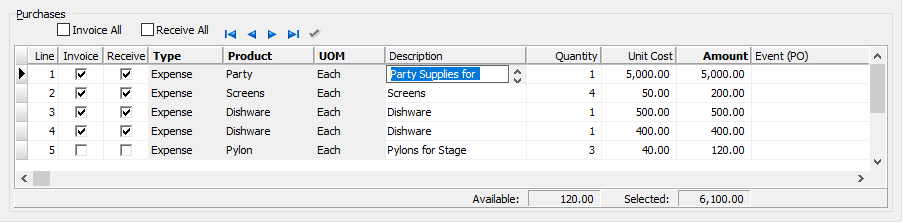
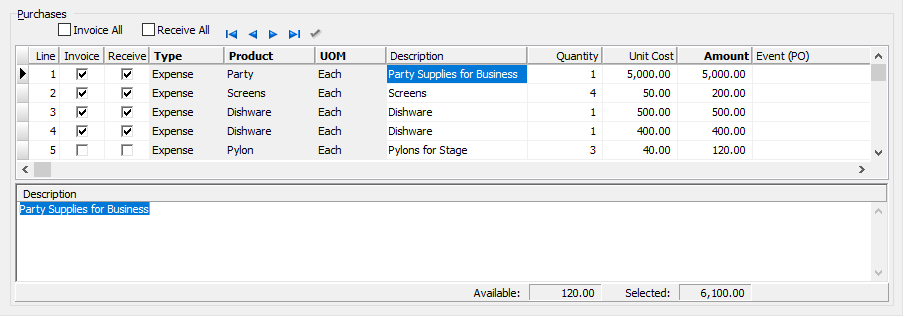
The table shows the purchase detail lines for the selected purchase order.
Note
The visibility and order of the columns in the table are controlled by the settings on the Options tab.
Mark the checkbox to select the purchase in this row for invoice processing.
Note
If the checkbox is marked and disabled, the purchase has already been invoiced.
If the checkbox is clear and disabled, the purchase on the detail line is assigned to a purchasing agent and must be invoiced using the Process Purchases, Purchasing Agent wizard.
Mark the checkbox to select the purchase in this row for receipt processing.
Note
If the checkbox is marked and disabled, the purchase has already been received.
- Expense
- Inventory
The product purchased.
Press F3 to look up the value.
If a value is already selected, you can press F4 to open the record in its native editor.
The unit of measure in which the product was purchased.
Press F3 to look up the value.
If a value is already selected, you can press F4 to open the record in its native editor.
The quantity of the product purchased expressed in terms of the unit of measure. This entry is blank and disabled if the quantity rule on the unit of measure is "Amount Only".
Note
If the actual quantity of a product to be invoiced and/or received is different than the original purchase quantity, you can change the quantity.
- If the quantity is reduced, a new line is created for the quantity you enter, and the original line is reduced by that quantity. If the original line was previously flagged as invoiced or received, both resulting lines are flagged as invoiced or received.
- If the quantity is increased, a new line is created for the difference between the new quantity and the original quantity. If the original quantity had previously been invoiced or received, the line for the original quantity remains flagged as invoiced or received.
The cost of a single unit of measure of the product purchased. The entry is blank and disabled if the quantity rule on the unit of measure is "Amount Only".
Note
If the actual unit cost of a product to be invoiced and/or received is different than the original purchase unit cost, you can change the unit cost unless the purchase has already been invoiced. If the purchase has been invoiced, the entry is disabled. When changes occur to the unit cost, ActivityHD recalculates the extended amount based on the new unit cost and the existing quantity.
The extended purchase cost of the product purchased.
Note
If the actual extended amount of a product to be invoiced and/or received is different than the original purchase extended amount, you can change the amount unless the purchase has already been invoiced. If the purchase has been invoiced, the entry is disabled. When changes occur to the extended amount, ActivityHD recalculates the unit cost based on the new extended amount and the existing quantity.
Depending on your options settings, there may be a column in the table for each active purchase-type attribute with a setting of "Allowed" or "Required". Attributes provide additional ways to categorize purchases and may help determine the GL accounts used during invoice posting.
For each attribute represented, select an attribute item that is appropriate for the corresponding purchase detail line.
Press F3 to look up the value.
If a value is already selected, you can press F4 to open the record in its native editor.
The account to which the purchase is posted when invoiced. This entry is disabled once the purchase is invoiced. The entry is blank and disabled if the product is an allocated product.
Press F2 to open the Account Expand dialog box where you can look up an account number, find an account number by its alias, build the account number by segment, or view setup and setup sources.
Press F3 to look up the account.
If an account is already selected, you can press F4 to open the record in the Account window.
The product's serial number. Use this entry if you need to track specific purchases of the product by serial number.
Note
If the purchase order was written using a single detail line for a quantity instead of a single unit and the line needs to be received by serial number with a unique serial number for each unit, you can use the split function to create multiple single-unit detail lines. This allows you to enter a serial number for each detail line received.
Displays the name of the agent if this is an agent-based purchase.
Press F3 to look up the value.
If a value is already selected, you can press F4 to open the record in its native editor.
After the purchase is invoiced, this entry displays the invoice batch and entry number of the resulting invoice.
Press F3 to look up the value.
If a value is already selected, you can press F4 to open the record in its native editor.
After the purchase is received, this entry displays the receipt batch and entry number of the resulting receipt.
Press F3 to look up the value.
If a value is already selected, you can press F4 to open the record in its native editor.
Additional descriptive information about the purchase. Press F2 to access the Memo popup which makes it easier to enter a long memo.
Options tab
- In Place. Edit the description directly on the purchase line in the Purchases table (provided you do not hide the description by deselecting it in the Detail Columns list box.
- Bottom. Edit the description in a text box below the Purchases table. If you need long descriptions, this option provides the most room for text.
- Right. Edit the description in a text box to the right of the Purchases table.

Use this button to open the Column Selection dialog box where you can add and/or remove columns from the Purchases table.
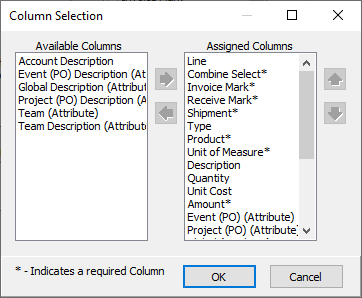
To remove columns from the Purchases table, highlight the column(s) in the Assigned Columns list box and click ![]() to move the selected column(s) to the Available Columns list box.
to move the selected column(s) to the Available Columns list box.
To add columns to the Purchases table, highlight the column(s) in the Available Columns list box and click ![]() to move the selected column(s) to the Assigned Columns list box.
to move the selected column(s) to the Assigned Columns list box.
Split detail lines in the invoicing and receiving process
You can split a purchase detail line into multiple detail lines in the invoicing and receiving process.
If the purchase order detail line you are splitting has a quantity on it, ActivityHD splits the detail line by quantity. If there is no quantity on the detail line, ActivityHD splits the detail line by amount.
Splitting a purchase detail line by quantity
- With purchases loaded in the Process Purchases, Purchase Order wizard, go to the Purchases table, select the detail line to split, right-click, and select Split from the shortcut menu. (You can also select
 > Tools > Split or press Ctrl+T.) The Split - Quantity section is added to the right of the Purchases table.
- In the Split field, enter the quantity to split out to a new purchase detail line.
- Click OK. A new detail line is created, the quantity on the original detail line is reduced by the split quantity, and a new extended amount is calculated for the original detail line.
The new detail line's extended amount is calculated from the split quantity and the unit cost copied from the original detail line. All other details are copied to the new detail line from the original detail line except for the memo. You can change individual fields on the new detail line as needed.
Splitting a purchase detail line by amount
If you need to split a detail line that has no quantity, you must split it by amount.
- With purchases loaded in the Process Purchases, Purchase Order wizard, go to the Purchases table, select the detail line to split, right-click, and select Split from the shortcut menu. (You can also select > Tools > Split or press Ctrl+T.) The Split - Amount section is added to the right of the Purchases table.

- In the Split field, enter the amount to split out to a new purchase detail line.
- Click OK. A new detail line is created and the amount on the original detail line is reduced by the split amount.
All other fields are copied to the new detail line from the original detail line except for the memo. You can change individual fields on the new detail line as needed.
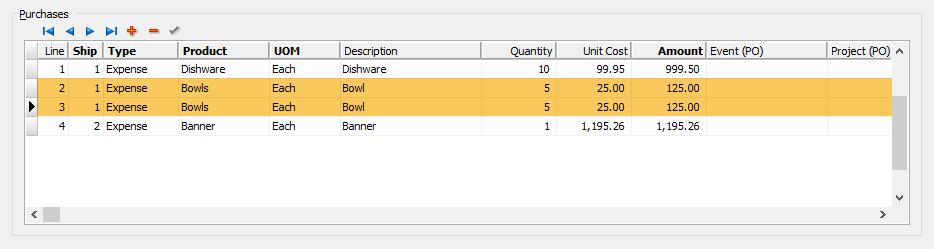
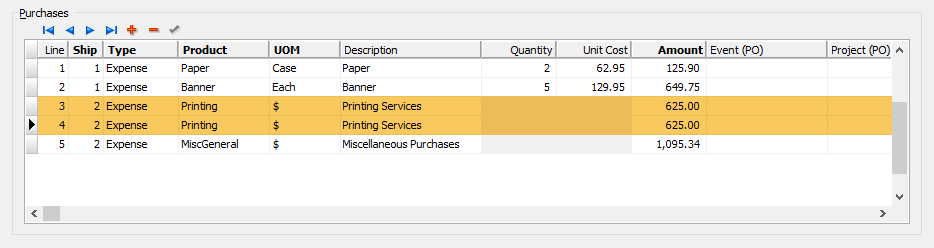
Combine detail lines in the invoicing and receiving process
You can combine purchase detail lines into a single detail line in the invoicing and receiving process provided the purchase has not already been printed.
To combine purchase order detail lines:
- With purchases loaded in the Process Purchases, Purchase Order wizard, go to the Purchases table, select one of the detail lines you want to combine, right-click, and select Combine from the shortcut menu. (You can also select > Tools > Combine or press Ctrl+B.) The Combine section is added to the right of the Purchases table and a Combine column with checkboxes is added to the table. The Combine checkbox for the detail line you clicked on is marked for you.
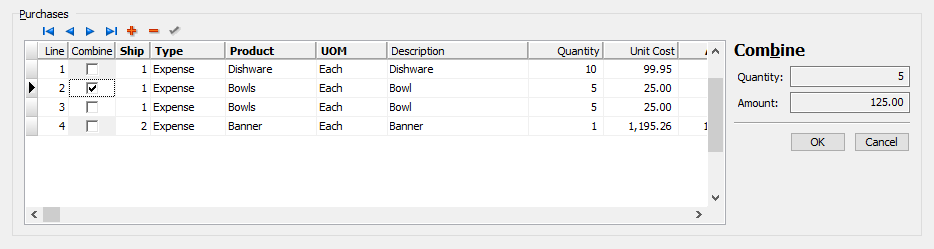
- Mark the Combine checkbox for each detail line to combine.

Note
The checkboxes for detail lines which cannot be combined are disabled. To be eligible for combining, almost all fields in the detail lines must be the same, except:
- Quantity. The Quantity field values on combined lines can differ. All detail lines to be combined must have a quantity or all detail lines to be combined must not have a quantity. You cannot mix quantity and non-quantity detail lines for combining. The Quantity field in the Combine section updates as you select detail lines to combine.
- Amount. The Amount fields on combined lines can differ. The Amount field in the Combine section updates as you select detail lines to combine.
- Memo. The Memo fields on combined lines can differ. When lines are combined, the memo from the initial detail line selected is used on the resulting detail line.
- Click OK. The selected detail lines are combined into one detail line.

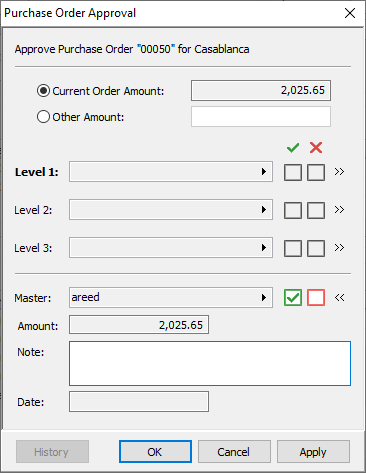
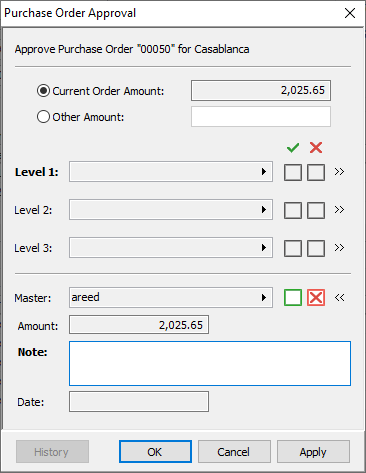
Purchase Order Approval dialog
- Current Order Amount. Leave this option selected to approve the purchase order at the current amount.
- Other Amount. Select this option if you need to approve the purchase order for a smaller or greater amount than the current order amount. In the adjacent field, enter the amount to approve. Approving an amount greater than the current order amount allows for additions and/or changes to the purchase order (up to the approved amount and any buffer amount that applies) without requiring additional approval.


 /collapse buttons
  to expand the detail section. If you need to approve or disapprove at this level, the detail section automatically expands to show the approval amount, aprroval note, and approval date when you click the applicable checkbox; the button state changes to "collapse". To collapse the detail section, click . /collapse buttons to expand the detail section. If you need to approve or disapprove at the master level, the detail section automatically expands to show the approval amount, aprroval note, and approval date when you click the applicable checkbox; the button state changes to "collapse". To collapse the detail section, click .