Follow the link for the report you want to view help for.
Departments Listing
Purpose
The Departments Listing provides a list of departments defined in the Purchasing package.
Content
For each department included on the report, the listing shows:
- description
- approval levels
- whether inventory is enabled
- whether commitments are enabled.
In addition, you can include one or more of the following:
- billing address
- operators (name, approval level, approval limit)
- approval rules (amount, levels)
- timestamps
- memos
- custom fields.
The following total appears on the report:
- record count.
Print the report
- In the Navigation pane, highlight the Purchasing > Setup > Departments folder.
- Start the report set-up wizard.
- To report on all or a filtered subset of departments:
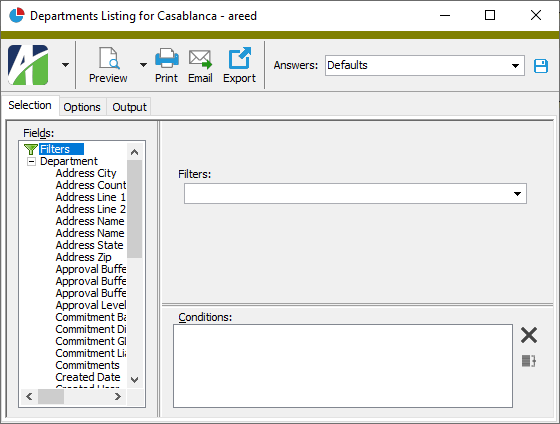
- Right-click the Departments folder and select Select and Report > Departments Listing from the shortcut menu.
- On the Selection tab, define any filters to apply to the data.
- To report on specifically selected departments:
- In the HD view, select the departments to include on the report. You can use Ctrl and/or Shift selection to select multiple records.
- Click
 .
.
- To report on a particular department from the Department window:
- In the HD view, locate and double-click the department to report on. The Department window opens with the department loaded.
- Click .
- To report on all or a filtered subset of departments:
- Select the Options tab.
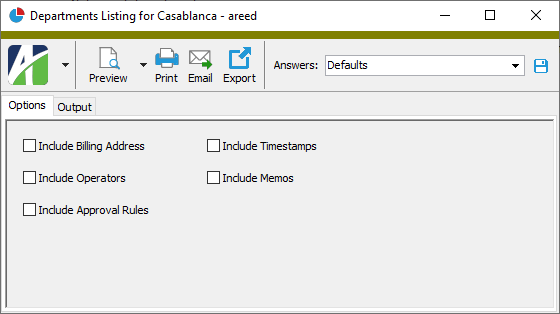
- Mark the checkbox(es) for the additional information to include:
- Billing Address
- Operators
- Approval Rules
- Report Options. To include a section at the end of the report with the report settings used to produce the report, leave the checkbox marked. To produce the report without this information, clear the checkbox.
- Timestamps
- Memos
- Custom Fields (only visible if custom fields are set up)
- Select the Output tab.
- In the Design field, look up and select the report design to use.
- In the toolbar, click the icon for the type of output you want:
 - Provides access to two preview options.
- Preview - Click the icon or click the drop-down arrow and select Preview from the drop-down menu to view the report in the Crystal Reports viewer.
- Preview to PDF - Click the drop-down arrow next to the icon and select Preview to PDF to view the report in the PDF reader.
 - Opens the Print dialog so that you can select and configure a printer and then print a paper copy of the report.
 - Opens the dialog so that you can address and compose an email that the report will be attached to. For best results, ensure your email client is running before you attempt to send a report via email.
 - Opens the Export Report dialog so that you can save the report to a file. File types include Crystal Reports (.rpt), PDF (.pdf), Microsoft Excel (.xls), Microsoft Word (.doc), rich text (.rtf), and XML (.xml).
Data extensions
The following data extensions are available for the report:
- Departments
- Department operators
- Department approval
Freight Terms Listing
Purpose
The Freight Terms Listing provides a list of freight terms defined in Purchasing.
Content
For each freight terms code included on the report, the listing shows:
- description
- FOB
- shipping method.
In addition, you can include one or more of the following:
- timestamps
- memos
- custom fields.
The following total appears on the report:
- record count.
Print the report
- In the Navigation pane, highlight the Purchasing > Setup > Freight Terms folder.
- Start the report set-up wizard.
- To report on all or a filtered subset of freight terms:
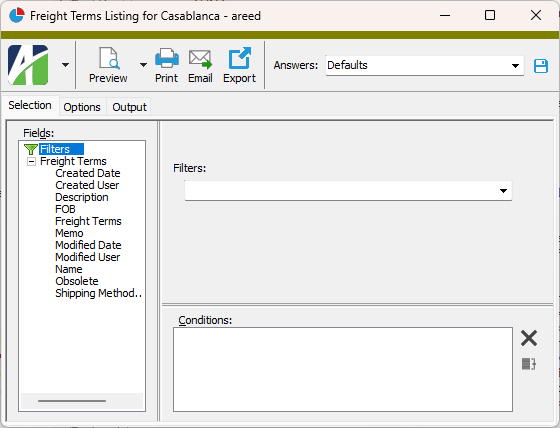
- Right-click the Freight Terms folder and select Select and Report > Freight Terms Listing from the shortcut menu.
- On the Selection tab, define any filters to apply to the data.
- To report on specifically selected freight terms:
- In the HD view, select the freight terms to include on the report. You can use Ctrl and/or Shift selection to select multiple records.
- Click .
- To report on a particular freight terms code from the Freight Terms window:
- In the HD view, locate and double-click the freight terms code to report on. The Freight Terms window opens with the freight terms code loaded.
- Click .
- To report on all or a filtered subset of freight terms:
- Select the Options tab.
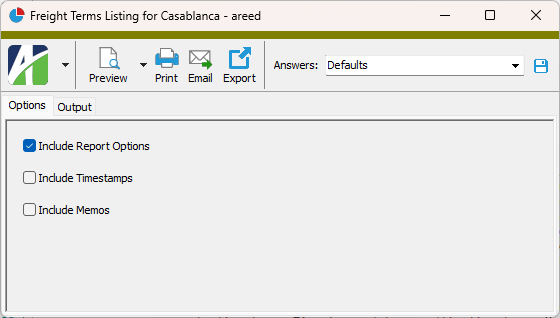
- To include a section at the end of the report with the report settings used to produce the report, leave the Include Report Options checkbox marked. To produce the report without this information, clear the checkbox.
- Mark the checkbox(es) for the additional information to include:
- Timestamps
- Memos
- Custom Fields (only visible if custom fields are set up)
- Select the Output tab.
- In the Design field, look up and select the report design to use.
- In the toolbar, click the icon for the type of output you want:
- - Provides access to two preview options.
- Preview - Click the icon or click the drop-down arrow and select Preview from the drop-down menu to view the report in the Crystal Reports viewer.
- Preview to PDF - Click the drop-down arrow next to the icon and select Preview to PDF to view the report in the PDF reader.
- - Opens the Print dialog so that you can select and configure a printer and then print a paper copy of the report.
- - Opens the dialog so that you can address and compose an email that the report will be attached to. For best results, ensure your email client is running before you attempt to send a report via email.
- - Opens the Export Report dialog so that you can save the report to a file. File types include Crystal Reports (.rpt), PDF (.pdf), Microsoft Excel (.xls), Microsoft Word (.doc), rich text (.rtf), and XML (.xml).
Data extensions
The following data extension is available for the report:
- Freight terms
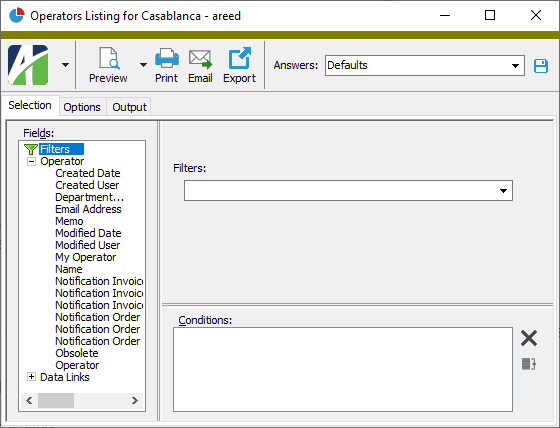
Operators Listing
Purpose
The Operators Listing provides a list of operators defined in Purchasing.
Content
For each operator included on the report, the listing shows:
- department
- email address.
In addition, you can include one or more of the following:
- timestamps
- memos
- custom fields.
The following total appears on the report:
- record count.
Print the report
- In the Navigation pane, highlight the Purchasing > Setup > Operators folder.
- Start the report set-up wizard.
- To report on all or a filtered subset of operators:
- Right-click the Operators folder and select Select and Report > Operators Listing from the shortcut menu.
- On the Selection tab, define any filters to apply to the data.
- To report on specifically selected operators:
- In the HD view, select the operators to include on the report. You can use Ctrl and/or Shift selection to select multiple records.
- Click .
- To report on a particular operator from the Operator window:
- In the HD view, locate and double-click the operator to report on. The Operator window opens with the operator loaded.
- Click .
- To report on all or a filtered subset of operators:
- Select the Options tab.
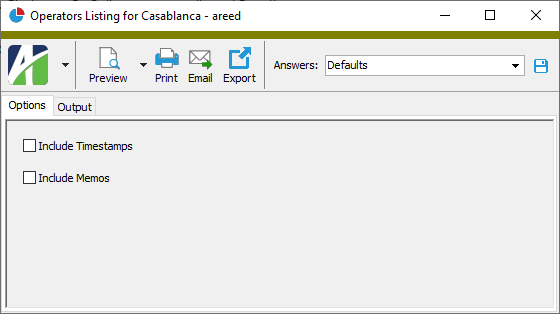
- To include a section at the end of the report with the report settings used to produce the report, leave the Include Report Options checkbox marked. To produce the report without this information, clear the checkbox.
- Mark the checkbox(es) for the additional information to include:
- Timestamps
- Memos
- Custom Fields (only visible if custom fields are set up)
- Select the Output tab.
- In the Design field, look up and select the report design to use.
- In the toolbar, click the icon for the type of output you want:
- - Provides access to two preview options.
- Preview - Click the icon or click the drop-down arrow and select Preview from the drop-down menu to view the report in the Crystal Reports viewer.
- Preview to PDF - Click the drop-down arrow next to the icon and select Preview to PDF to view the report in the PDF reader.
- - Opens the Print dialog so that you can select and configure a printer and then print a paper copy of the report.
- - Opens the dialog so that you can address and compose an email that the report will be attached to. For best results, ensure your email client is running before you attempt to send a report via email.
- - Opens the Export Report dialog so that you can save the report to a file. File types include Crystal Reports (.rpt), PDF (.pdf), Microsoft Excel (.xls), Microsoft Word (.doc), rich text (.rtf), and XML (.xml).
Data extensions
The following data extension is available for the report:
- Operators
Print Records Listing
Purpose
The Print Records Listing shows the PO printing events executed in the Purchasing package.
Content
For each print record included on the report, the listing shows:
- PO number and print type label
- date
- notice type
- notice date
- description.
In addition, you can include one or more of the following:
- timestamps
- memos
- custom fields.
The following total appears on the report:
- record count.
Print the report
- In the Navigation pane, highlight the Purchasing > Orders > Print Records folder.
- Start the report set-up wizard.
- To report on all or a filtered subset of print records:
- Right-click the Print Records folder and select Select and Report > Print Records Listing from the shortcut menu.
- On the Selection tab, define any filters to apply to the data.

- To report on specifically selected print records:
- In the HD view, select the print records to include on the report. You can use Ctrl and/or Shift selection to select multiple records.
- Click .
- To report on a particular print record from the Print Record window:
- In the HD view, locate and double-click the print record to report on. The Print Record window opens with the print record loaded.
- Click .
- To report on all or a filtered subset of print records:
- Select the Options tab.

- To include a section at the end of the report with the report settings used to produce the report, leave the Include Report Options checkbox marked. To produce the report without this information, clear the checkbox.
- Mark the checkbox(es) for the additional information to include:
- Timestamps
- Memos
- Custom Fields (only visible if custom fields are set up)
- Select the Output tab.
- In the Design field, look up and select the report design to use.
- In the toolbar, click the icon for the type of output you want:
- - Provides access to two preview options.
- Preview - Click the icon or click the drop-down arrow and select Preview from the drop-down menu to view the report in the Crystal Reports viewer.
- Preview to PDF - Click the drop-down arrow next to the icon and select Preview to PDF to view the report in the PDF reader.
- - Opens the Print dialog so that you can select and configure a printer and then print a paper copy of the report.
- - Opens the dialog so that you can address and compose an email that the report will be attached to. For best results, ensure your email client is running before you attempt to send a report via email.
- - Opens the Export Report dialog so that you can save the report to a file. File types include Crystal Reports (.rpt), PDF (.pdf), Microsoft Excel (.xls), Microsoft Word (.doc), rich text (.rtf), and XML (.xml).
Data extensions
The following data extension is available for the report:
- Print records
Product Detail Listing
Purpose
The Product Detail Listing provides a list of product detail information defined in the Purchasing package.
Content
For each product detail record included on the report, the listing shows:
- product name
- vendor
- unit of measure
- description
- part number
- unit cost.
In addition, you can include one or more of the following:
- cost detail
- timestamps
- memos
- custom fields.
The following total appears on the report:
- record count.
Print the report
- In the Navigation pane, highlight the Purchasing > Setup > Products > Product Detail folder.
- Start the report set-up wizard.
- To report on all or a filtered subset of product detail lines:
- Right-click the Product Detail folder and select Select and Report > Product Detail Listing from the shortcut menu.
- On the Selection tab, define any filters to apply to the data.

- To report on specifically selected product detail lines:
- In the HD view, select the product detail lines to include on the report. You can use Ctrl and/or Shift selection to select multiple records.
- Click .
- To report on all or a filtered subset of product detail lines:
- Select the Options tab.
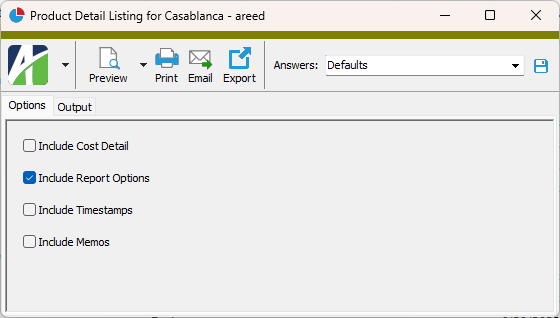
- Mark the checkbox(es) for the additional information to include:
- Cost Detail
- Report Options. To include a section at the end of the report with the report settings used to produce the report, leave the checkbox marked. To produce the report without this information, clear the checkbox.
- Timestamps
- Memos
- Custom Fields (only visible if custom fields are set up)
- Select the Output tab.
- In the Design field, look up and select the report design to use.
- In the toolbar, click the icon for the type of output you want:
- - Provides access to two preview options.
- Preview - Click the icon or click the drop-down arrow and select Preview from the drop-down menu to view the report in the Crystal Reports viewer.
- Preview to PDF - Click the drop-down arrow next to the icon and select Preview to PDF to view the report in the PDF reader.
- - Opens the Print dialog so that you can select and configure a printer and then print a paper copy of the report.
- - Opens the dialog so that you can address and compose an email that the report will be attached to. For best results, ensure your email client is running before you attempt to send a report via email.
- - Opens the Export Report dialog so that you can save the report to a file. File types include Crystal Reports (.rpt), PDF (.pdf), Microsoft Excel (.xls), Microsoft Word (.doc), rich text (.rtf), and XML (.xml).
Data extensions
The following data extensions are available for the report:
- Products
- Product detail
- Product cost
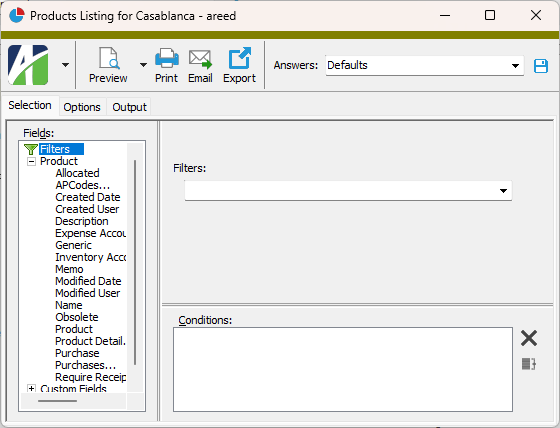
Products Listing
Purpose
The Products Listing provides a list of the products defined in Purchasing.
Content
For each product included on the report, the listing shows:
- description
- whether the amount from the purchase of the product is allocated to purchases of non-allocated products in the same shipment
- whether the product is generic
- whether the product can be purchased from any vendor with any unit of measure (unrestricted). If purchases are restricted, only the vendor-unit of measure combinations defined in the product detail are allowed.
- at what point a receipt is required for the product.
In addition, you can include one or more of the following:
- product detail (vendor, unit of measure, description, part number, unit cost)
- cost detail
- timestamps
- memos
- custom fields.
The following total appears on the report:
- record count.
Print the report
- In the Navigation pane, highlight the Purchasing > Setup > Products folder.
- Start the report set-up wizard.
- To report on all or a filtered subset of products:
- Right-click the Products folder and select Select and Report > Products Listing from the shortcut menu.
- On the Selection tab, define any filters to apply to the data.
- To report on specifically selected products:
- In the HD view, select the products to include on the report. You can use Ctrl and/or Shift selection to select multiple records.
- Click .
- To report on a particular product from the Product window:
- In the HD view, locate and double-click the product to report on. The Product window opens with the product loaded.
- Click .
- To report on all or a filtered subset of products:
- Select the Options tab.
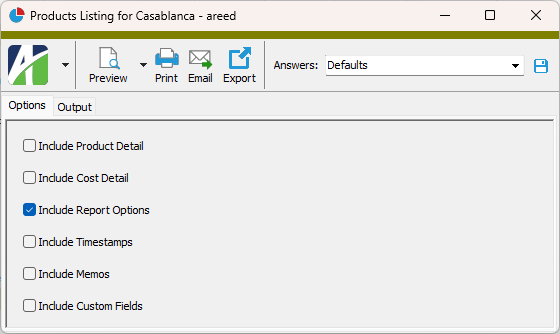
- Mark the checkbox(es) for the additional information to include:
- Product Detail
- Cost Detail
- Report Options. To include a section at the end of the report with the report settings used to produce the report, leave the checkbox marked. To produce the report without this information, clear the checkbox.
- Timestamps
- Memos
- Custom Fields (only visible if custom fields are set up)
- Select the Output tab.
- In the Design field, look up and select the report design to use.
- In the toolbar, click the icon for the type of output you want:
- - Provides access to two preview options.
- Preview - Click the icon or click the drop-down arrow and select Preview from the drop-down menu to view the report in the Crystal Reports viewer.
- Preview to PDF - Click the drop-down arrow next to the icon and select Preview to PDF to view the report in the PDF reader.
- - Opens the Print dialog so that you can select and configure a printer and then print a paper copy of the report.
- - Opens the dialog so that you can address and compose an email that the report will be attached to. For best results, ensure your email client is running before you attempt to send a report via email.
- - Opens the Export Report dialog so that you can save the report to a file. File types include Crystal Reports (.rpt), PDF (.pdf), Microsoft Excel (.xls), Microsoft Word (.doc), rich text (.rtf), and XML (.xml).
Data extensions
The following data extensions are available for the report:
- Products
- Product detail
- Product cost
Purchase Analysis
Purpose
The Purchase Analysis Report lets you analyze your company's purchases over a specific time period.
Content
If you include detail, for each purchase included on the report, the report shows:
- purchase date
- agent and purchase number
- vendor name
- product
- unit of measure
- quantity
- unit cost
- purchase amount.
The following totals appear on the report:
- grand totals.
Print the report
- In the Navigation pane, highlight the Purchasing > Purchases folder.
- Start the report set-up wizard.
- To report on all or a filtered subset of purchases:
- Right-click the Purchases folder and select Select and Report > Purchase Analysis from the shortcut menu.
- On the Selection tab, define any filters to apply to the data.

- To report on specifically selected purchases:
- In the HD view, select the purchases to include on the report. You can use Ctrl and/or Shift selection to select multiple records.
- Click and select Purchase Analysis from the drop-down menu.
- To report on a particular purchase from the Purchase window:
- In the HD view, locate and double-click the purchase to report on. The Purchase window opens with the purchase loaded.
- Click and select Purchase Analysis from the drop-down menu.
- To report on all or a filtered subset of purchases:
- Select the Options tab.

- In the Report Title field, enter the title to print on the report. The default title is "Purchase Analysis". You can use up to 100 characters.
- In the Begin Date and End Date fields, enter the range of purchase dates for which to include information on the report.
- The Include Details checkbox is marked by default. If you want to show grand totals for quantity and purchase amount only, clear the checkbox.
- To include a section at the end of the report with the report settings used to produce the report, leave the Include Report Options checkbox marked. To produce the report without this information, clear the checkbox.
- Select the Sorting tab.

- In the Available Sort Options list box, highlight the field(s) to sort the report by, then click
 to move your selections to the Assigned Sort Options list box.
 - If you selected multiple sort fields, use
 and
and  to arrange the sort fields in the order you want them applied.
 - If you want the report to start a new page for each change in one of the sorting options you specified, select the sort option to break on from the Page Break Level drop-down list. If you do not want to insert page breaks, accept "(none)".
- If you want the report to subtotal based on one of the sorting options you specified, select the sorting option to subtotal on from the Subtotal Through Level drop-down list. If you do not want to show subtotals, accept "(none)".
- Select the Output tab.
- In the Design field, look up and select the report design to use.
- In the toolbar, click the icon for the type of output you want:
- - Provides access to two preview options.
- Preview - Click the icon or click the drop-down arrow and select Preview from the drop-down menu to view the report in the Crystal Reports viewer.
- Preview to PDF - Click the drop-down arrow next to the icon and select Preview to PDF to view the report in the PDF reader.
- - Opens the Print dialog so that you can select and configure a printer and then print a paper copy of the report.
- - Opens the dialog so that you can address and compose an email that the report will be attached to. For best results, ensure your email client is running before you attempt to send a report via email.
- - Opens the Export Report dialog so that you can save the report to a file. File types include Crystal Reports (.rpt), PDF (.pdf), Microsoft Excel (.xls), Microsoft Word (.doc), rich text (.rtf), and XML (.xml).
Data extensions
The following data extensions are available for the report:
- Purchases
- AP invoice GL detail
- Journal detail
Purchase Orders Listing
Purpose
The Purchase Orders Listing provides a list of purchase orders recorded in the Purchasing package.
Content
For each purchase order included on the report, the listing shows:
- PO number
- vendor
- department
- date
- order status
- description
- amount
- balance.
In addition, you can include one or more of the following:
- approval status (approval level, approver, approval date)
- approval history (approval date/time, approval removal, approval level, approver, approval amount, and notes)
- attributes (order-level attribute, value assigned to attribute)
- shipping (shipping address, freight terms, FOB, shipping method)
- purchases (for each product line: line number, product, unit of measure, description, quantity, unit cost, amount)
- purchase details (GL account mask or account number and description, whether the detail line was canceled, invoice batch and entry number, receipt batch and entry number)
- purchase attributes (purchase-level attribute, value assigned to attribute)
- timestamps
- memos
- custom fields.
The following total appears on the report:
- record count.
Print the report
- In the Navigation pane, highlight the Purchasing > Orders folder.
- Start the report set-up wizard.
- To report on all or a filtered subset of purchase orders:
- Right-click the Orders folder and select Select and Report > Purchase Orders Listing from the shortcut menu.
- On the Selection tab, define any filters to apply to the data.

- To report on specifically selected purchase orders:
- In the HD view, select the purchase orders to include on the report. You can use Ctrl and/or Shift selection to select multiple records.
- Click .
- To report on a particular purchase order from the Purchase Order window:
- In the HD view, locate and double-click the purchase order to report on. The Purchase Order window opens with the purchase order loaded.
- Click .
- To report on all or a filtered subset of purchase orders:
- Select the Options tab.

- Mark the checkbox(es) for the additional information to include:
- Approval Status
- Approval History
- Attributes
- Shipping
- Purchases. If you mark this checkbox, the following checkboxes are enabled:
- Purchase Details
- Purchase Attributes
- Report Options. To include a section at the end of the report with the report settings used to produce the report, leave the checkbox marked. To produce the report without this information, clear the checkbox.
- Timestamps
- Memos
- Custom Fields (only visible if custom fields are set up)
- Select the Output tab.
- In the Design field, look up and select the report design to use.
- In the toolbar, click the icon for the type of output you want:
- - Provides access to two preview options.
- Preview - Click the icon or click the drop-down arrow and select Preview from the drop-down menu to view the report in the Crystal Reports viewer.
- Preview to PDF - Click the drop-down arrow next to the icon and select Preview to PDF to view the report in the PDF reader.
- - Opens the Print dialog so that you can select and configure a printer and then print a paper copy of the report.
- - Opens the dialog so that you can address and compose an email that the report will be attached to. For best results, ensure your email client is running before you attempt to send a report via email.
- - Opens the Export Report dialog so that you can save the report to a file. File types include Crystal Reports (.rpt), PDF (.pdf), Microsoft Excel (.xls), Microsoft Word (.doc), rich text (.rtf), and XML (.xml).
Data extensions
The following data extensions are available for the report:
- Orders
- Purchases
- Order approval
- Order approval history
- Order attributes
- Order shipments
- Purchase attributes
Purchases Listing
Purpose
The Purchases Listing provides a list of purchases recorded in the Purchasing package.
Content
For each purchase included on the report, the listing shows:
- PO number
- vendor
- department
- date
- product
- unit of measure
- description
- quantity
- unit cost
- amount.
In addition, you can include one or more of the following:
- details (vendor description, GL account, part number, reference, invoice batch and entry number, extended amount, status, type, GL account description, serial number, purchasing agent, receipt batch and entry number, check-in date)
- attributes (purchase-level attribute, value assigned to attribute)
- subtotals (quantity, amount [by agent for miscellaneous purchases, by order for standard purchase orders])
- timestamps
- memos
- custom fields.
The following total appears on the report:
- record count.
Print the report
- In the Navigation pane, highlight the Purchasing > Purchases folder.
- Start the report set-up wizard.
- To report on all or a filtered subset of purchases:
- Right-click the Purchases folder and select Select and Report > Purchases Listing from the shortcut menu.
- On the Selection tab, define any filters to apply to the data.

- To report on specifically selected purchases:
- In the HD view, select the purchases to include on the report. You can use Ctrl and/or Shift selection to select multiple records.
- Click and select Purchases Listing from the drop-down menu.
- To report on a particular purchase from the Purchase window:
- In the HD view, locate and double-click the purchase to report on. The Purchase window opens with the purchase loaded.
- Click and select Purchases Listing from the drop-down menu.
- To report on all or a filtered subset of purchases:
- Select the Options tab.

- Mark the checkbox(es) for the additional information to include:
- Details
- Attributes
- Subtotals
- Report Options. To include a section at the end of the report with the report settings used to produce the report, leave the checkbox marked. To produce the report without this information, clear the checkbox.
- Timestamps
- Memos
- Custom Fields (only visible if custom fields are set up)
- Select the Output tab.
- In the Design field, look up and select the report design to use.
- In the toolbar, click the icon for the type of output you want:
- - Provides access to two preview options.
- Preview - Click the icon or click the drop-down arrow and select Preview from the drop-down menu to view the report in the Crystal Reports viewer.
- Preview to PDF - Click the drop-down arrow next to the icon and select Preview to PDF to view the report in the PDF reader.
- - Opens the Print dialog so that you can select and configure a printer and then print a paper copy of the report.
- - Opens the dialog so that you can address and compose an email that the report will be attached to. For best results, ensure your email client is running before you attempt to send a report via email.
- - Opens the Export Report dialog so that you can save the report to a file. File types include Crystal Reports (.rpt), PDF (.pdf), Microsoft Excel (.xls), Microsoft Word (.doc), rich text (.rtf), and XML (.xml).
Data extensions
The following data extensions are available for the report:
- Purchases
- Purchase attributes
Purchasing Agents Listing
Purpose
The Purchasing Agents Listing provides a list of purchasing agents defined in the Purchasing package.
Content
For each purchasing agent included on the report, the listing shows:
- name
- description
- AP vendor
- department.
In addition, you can include one or more of the following:
- timestamps
- memos
- custom fields.
The following total appears on the report:
- record count.
Print the report
- In the Navigation pane, highlight the Purchasing > Agents folder.
- Start the report set-up wizard.
- To report on all or a filtered subset of purchasing agents:
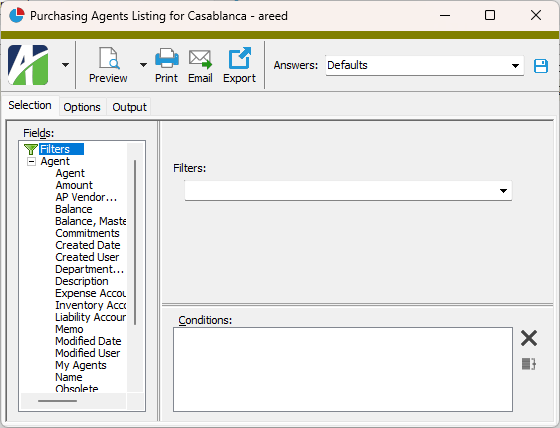
- Right-click the Agents folder and select Select and Report > Purchasing Agents Listing from the shortcut menu.
- On the Selection tab, define any filters to apply to the data.
- To report on specifically selected purchasing agents:
- In the HD view, select the purchasing agents to include on the report. You can use Ctrl and/or Shift selection to select multiple records.
- Click .
- To report on a particular purchasing agent from the Purchasing Agent window:
- In the HD view, locate and double-click the purchasing agent to report on. The Purchasing Agent window opens with the purchasing agent loaded.
- Click .
- To report on all or a filtered subset of purchasing agents:
- Select the Options tab.
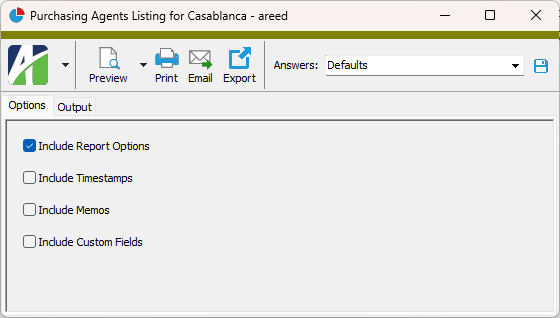
- To include a section at the end of the report with the report settings used to produce the report, leave the Include Report Options checkbox marked. To produce the report without this information, clear the checkbox.
- Mark the checkbox(es) for the additional information to include:
- Timestamps
- Memos
- Custom Fields (only visible if custom fields are set up)
- Select the Output tab.
- In the Design field, look up and select the report design to use.
- In the toolbar, click the icon for the type of output you want:
- - Provides access to two preview options.
- Preview - Click the icon or click the drop-down arrow and select Preview from the drop-down menu to view the report in the Crystal Reports viewer.
- Preview to PDF - Click the drop-down arrow next to the icon and select Preview to PDF to view the report in the PDF reader.
- - Opens the Print dialog so that you can select and configure a printer and then print a paper copy of the report.
- - Opens the dialog so that you can address and compose an email that the report will be attached to. For best results, ensure your email client is running before you attempt to send a report via email.
- - Opens the Export Report dialog so that you can save the report to a file. File types include Crystal Reports (.rpt), PDF (.pdf), Microsoft Excel (.xls), Microsoft Word (.doc), rich text (.rtf), and XML (.xml).
Data extensions
The following data extension is available for the report:
- Agents
Receipts Listing
Purpose
The Receipts Listing provides a list of receipts recorded in the Purchasing package.
Content
For each receipt included on the report, the listing shows:
- batch - entry number
- vendor
- PO number
- date
- description.
In addition, you can include one or more of the following:
- timestamps
- memos
- custom fields.
The following total appears on the report:
- record count.
Print the report
- In the Navigation pane, highlight the Purchasing > Orders > Receipts folder.
- Start the report set-up wizard.
- To report on all or a filtered subset of receipts:
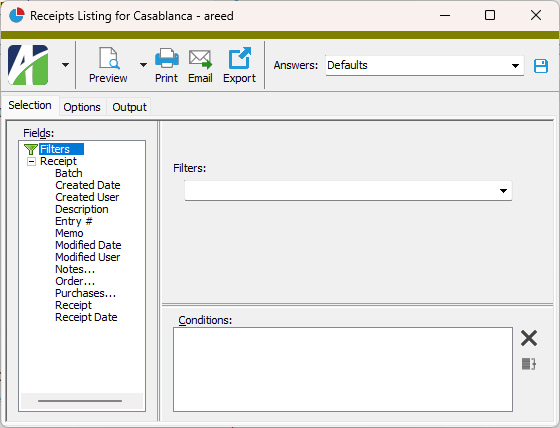
- Right-click the Receipts folder and select Select and Report > Receipts Listing from the shortcut menu.
- On the Selection tab, define any filters to apply to the data.
- To report on specifically selected receipts:
- In the HD view, select the receipts to include on the report. You can use Ctrl and/or Shift selection to select multiple records.
- Click .
- To report on a particular receipt from the Receipt window:
- In the HD view, locate and double-click the receipt to report on. The Receipt window opens with the receipt loaded.
- Click .
- To report on all or a filtered subset of receipts:
- Select the Options tab.
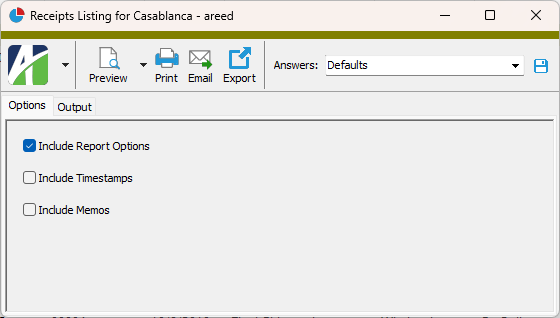
- To include a section at the end of the report with the report settings used to produce the report, leave the Include Report Options checkbox marked. To produce the report without this information, clear the checkbox.
- Mark the checkbox(es) for the additional information to include:
- Timestamps
- Memos
- Custom Fields (only visible if custom fields are set up)
- Select the Output tab.
- In the Design field, look up and select the report design to use.
- In the toolbar, click the icon for the type of output you want:
- - Provides access to two preview options.
- Preview - Click the icon or click the drop-down arrow and select Preview from the drop-down menu to view the report in the Crystal Reports viewer.
- Preview to PDF - Click the drop-down arrow next to the icon and select Preview to PDF to view the report in the PDF reader.
- - Opens the Print dialog so that you can select and configure a printer and then print a paper copy of the report.
- - Opens the dialog so that you can address and compose an email that the report will be attached to. For best results, ensure your email client is running before you attempt to send a report via email.
- - Opens the Export Report dialog so that you can save the report to a file. File types include Crystal Reports (.rpt), PDF (.pdf), Microsoft Excel (.xls), Microsoft Word (.doc), rich text (.rtf), and XML (.xml).
Data extensions
The following data extension is available for the report:
- Receipts
Shipping Addresses Listing
Purpose
The Shipping Addresses Listing provides a list of shipping addresses defined in Purchasing.
Content
For each shipping address included on the report, the listing shows:
- description
- city
- state
- main phone number.
In addition, you can include one or more of the following:
- details (full address, other phone number, fax phone number, email address)
- timestamps
- memos
- custom fields.
The following total appears on the report:
- record count.
Print the report
- In the Navigation pane, highlight the Purchasing > Setup > Shipping Addresses folder.
- Start the report set-up wizard.
- To report on all or a filtered subset of shipping addresses:
- Right-click the Shipping Addresses folder and select Select and Report > Shipping Addresses Listing from the shortcut menu.
- On the Selection tab, define any filters to apply to the data.

- To report on specifically selected shipping addresses:
- In the HD view, select the shipping addresses to include on the report. You can use Ctrl and/or Shift selection to select multiple records.
- Click .
- To report on a particular shipping address from the Shipping Address window:
- In the HD view, locate and double-click the shipping address to report on. The Shipping Address window opens with the shipping address loaded.
- Click .
- To report on all or a filtered subset of shipping addresses:
- Select the Options tab.

- Mark the checkbox(es) for the additional information to include:
- Details
- Report Options. To include a section at the end of the report with the report settings used to produce the report, leave the checkbox marked. To produce the report without this information, clear the checkbox.
- Timestamps
- Memos
- Custom Fields (only visible if custom fields are set up)
- Select the Output tab.
- In the Design field, look up and select the report design to use.
- In the toolbar, click the icon for the type of output you want:
- - Provides access to two preview options.
- Preview - Click the icon or click the drop-down arrow and select Preview from the drop-down menu to view the report in the Crystal Reports viewer.
- Preview to PDF - Click the drop-down arrow next to the icon and select Preview to PDF to view the report in the PDF reader.
- - Opens the Print dialog so that you can select and configure a printer and then print a paper copy of the report.
- - Opens the dialog so that you can address and compose an email that the report will be attached to. For best results, ensure your email client is running before you attempt to send a report via email.
- - Opens the Export Report dialog so that you can save the report to a file. File types include Crystal Reports (.rpt), PDF (.pdf), Microsoft Excel (.xls), Microsoft Word (.doc), rich text (.rtf), and XML (.xml).
Data extensions
The following data extension is available for the report:
- Shipping addresses
Shipping Methods Listing
Purpose
The Shipping Methods Listing provides a list of the shipping methods defined in Purchasing.
Content
For each shipping method included on the report, the listing shows:
- description
- web address
- tracking address.
In addition, you can include one or more of the following:
- timestamps
- memos
- custom fields.
The following total appears on the report:
- record count.
Print the report
- In the Navigation pane, highlight the Purchasing > Setup > Shipping Methods folder.
- Start the report set-up wizard.
- To report on all or a filtered subset of shipping methods:
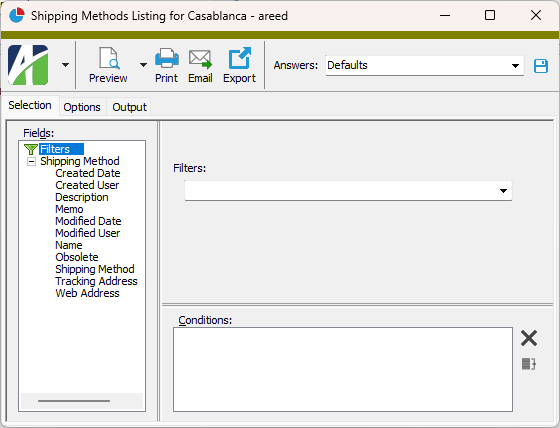
- Right-click the Shipping Methods folder and select Select and Report > Shipping Methods Listing from the shortcut menu.
- On the Selection tab, define any filters to apply to the data.
- To report on specifically selected shipping methods:
- In the HD view, select the shipping methods to include on the report. You can use Ctrl and/or Shift selection to select multiple records.
- Click .
- To report on a particular shipping method from the Shipping Method window:
- In the HD view, locate and double-click the shipping method to report on. The Shipping Method window opens with the shipping method loaded.
- Click .
- To report on all or a filtered subset of shipping methods:
- Select the Options tab.
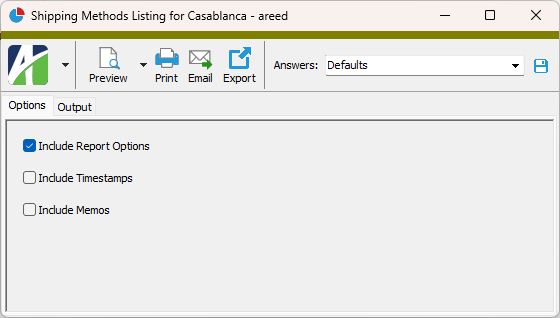
- To include a section at the end of the report with the report settings used to produce the report, leave the Include Report Options checkbox marked. To produce the report without this information, clear the checkbox.
- Mark the checkbox(es) for the additional information to include:
- Timestamps
- Memos
- Custom Fields (only visible if custom fields are set up)
- Select the Output tab.
- In the Design field, look up and select the report design to use.
- In the toolbar, click the icon for the type of output you want:
- - Provides access to two preview options.
- Preview - Click the icon or click the drop-down arrow and select Preview from the drop-down menu to view the report in the Crystal Reports viewer.
- Preview to PDF - Click the drop-down arrow next to the icon and select Preview to PDF to view the report in the PDF reader.
- - Opens the Print dialog so that you can select and configure a printer and then print a paper copy of the report.
- - Opens the dialog so that you can address and compose an email that the report will be attached to. For best results, ensure your email client is running before you attempt to send a report via email.
- - Opens the Export Report dialog so that you can save the report to a file. File types include Crystal Reports (.rpt), PDF (.pdf), Microsoft Excel (.xls), Microsoft Word (.doc), rich text (.rtf), and XML (.xml).
Data extensions
The following data extension is available for the report:
- Shipping methods
Units of Measure Listing
Purpose
The Units of Measure Listing provides a list of the units of measure defined in Purchasing.
Content
For each unit of measure included on the report, the listing shows:
- description
- quantity rule.
In addition, you can include one or more of the following:
- timestamps
- memos
- custom fields.
The following total appears on the report:
- record count.
Print the report
- In the Navigation pane, highlight the Purchasing > Setup > Units of Measure folder.
- Start the report set-up wizard.
- To report on all or a filtered subset of units of measure:
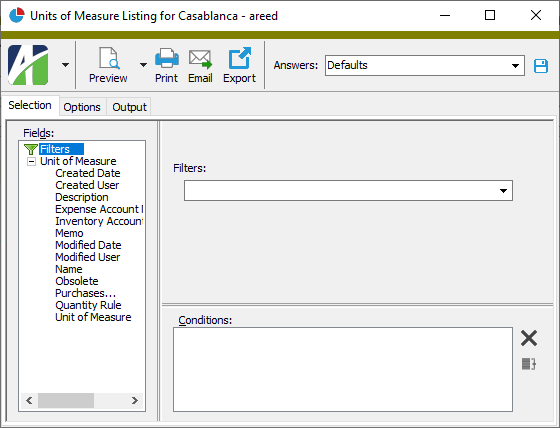
- Right-click the Units of Measure folder and select Select and Report > Units of Measure Listing from the shortcut menu.
- On the Selection tab, define any filters to apply to the data.
- To report on specifically selected units of measure:
- In the HD view, select the units of measure to include on the report. You can use Ctrl and/or Shift selection to select multiple records.
- Click .
- To report on a particular unit of measure from the Unit of Measure window:
- In the HD view, locate and double-click the unit of measure to report on. The Unit of Measure window opens with the unit of measure loaded.
- Click .
- To report on all or a filtered subset of units of measure:
- Select the Options tab.
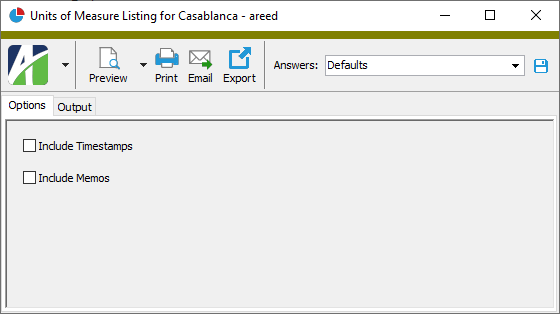
- To include a section at the end of the report with the report settings used to produce the report, leave the Include Report Options checkbox marked. To produce the report without this information, clear the checkbox.
- Mark the checkbox(es) for the additional information to include:
- Timestamps
- Memos
- Custom Fields (only visible if custom fields are set up)
- Select the Output tab.
- In the Design field, look up and select the report design to use.
- In the toolbar, click the icon for the type of output you want:
- - Provides access to two preview options.
- Preview - Click the icon or click the drop-down arrow and select Preview from the drop-down menu to view the report in the Crystal Reports viewer.
- Preview to PDF - Click the drop-down arrow next to the icon and select Preview to PDF to view the report in the PDF reader.
- - Opens the Print dialog so that you can select and configure a printer and then print a paper copy of the report.
- - Opens the dialog so that you can address and compose an email that the report will be attached to. For best results, ensure your email client is running before you attempt to send a report via email.
- - Opens the Export Report dialog so that you can save the report to a file. File types include Crystal Reports (.rpt), PDF (.pdf), Microsoft Excel (.xls), Microsoft Word (.doc), rich text (.rtf), and XML (.xml).
Data extensions
The following data extension is available for the report:
- Units of measure