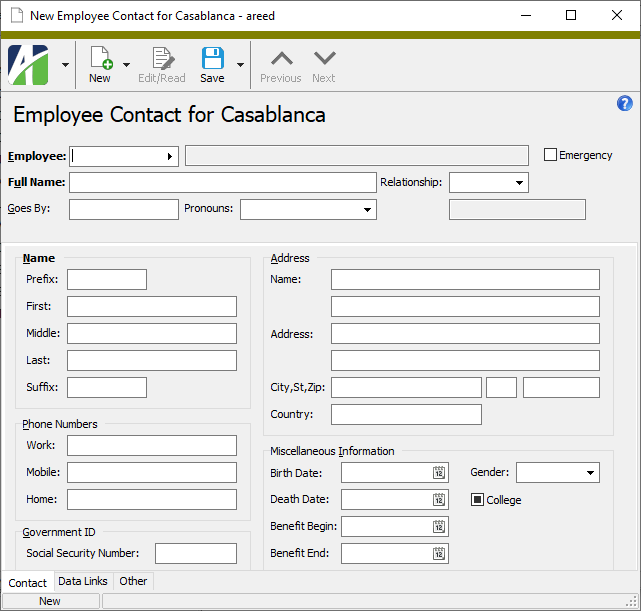
Employee contacts are used to record an employee's family and emergency contact information.

|
Extras\Human Resources\Import HR Contacts.xls; Change HR Contacts.xls |
Employees Listing
Purpose
The Employees Listing provides a list of employees tracked in Payroll.
Content
For each employee included on the report, the listing shows:
- employee code
- employee full name
- employee "goes by" name
- employee's preferred pronouns
- position
- hire date
- birth date
- current employment status.
In addition, you can include one or more of the following:
- employee details including: name and emergency contact, phone and address, email address, gender and marital status, W-2 information, social security number, social insurance number, statuses, employee locations (address lines 1 and 2, name lines 1 and 2, city, state, zip, country), attributes
- calculation details including: parameter references, parameter values, automatics
- disbursement information including: disbursement sets, disbursement rules, bank accounts
- Human Resources information including: job categories, ethnic origins, contacts, position pay rates
- seniority and leave plans
- notes
- timestamps
- memos
- custom fields.
The following total appears on the report:
- record count.
Print the report
- In the Navigation pane, highlight the Payroll/Human Resources > Employees folder.
- Start the report set-up wizard.
- To report on all or a filtered subset of employees:
- Right-click the Employees folder and select Select and Report > Employees Listing from the shortcut menu.
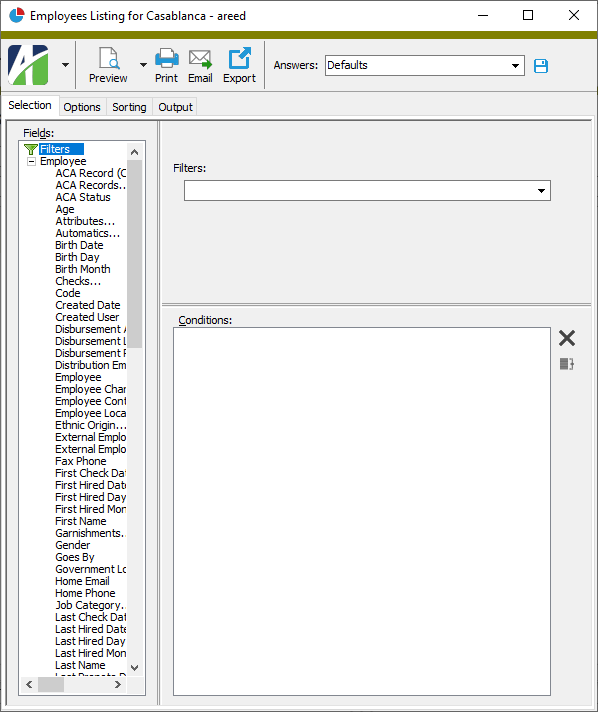
- On the Selection tab, define any filters to apply to the data.
- To report on specifically selected employees:
- In the HD view, select the employees to include on the report. You can use Ctrl and/or Shift selection to select multiple records.
- Click
 and select Employees Listing from the drop-down menu.
- To report on a particular employee from the Employee window:
- In the HD view, locate and double-click the employee to report on. The Employee window opens with the employee record loaded.
- Click and select Employees Listing from the drop-down menu.
- To report on all or a filtered subset of employees:
- Select the Options tab.
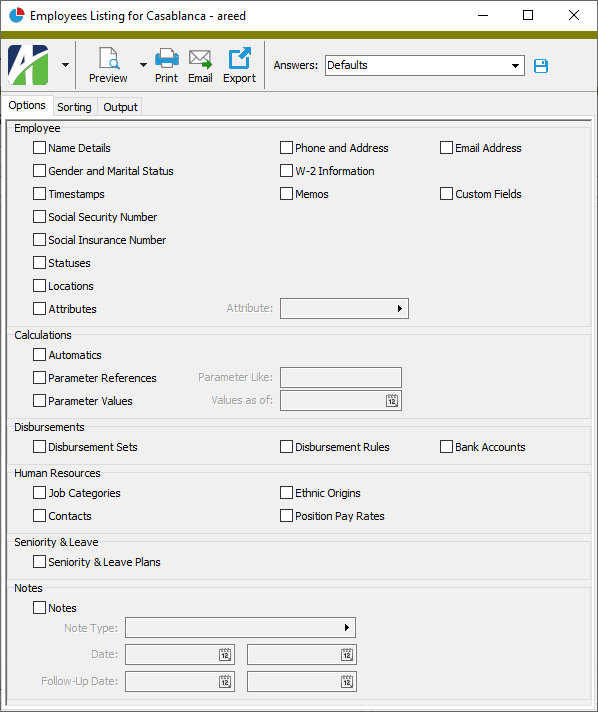
- Mark the checkbox(es) in the Employee section for the additional information to include:
- Name Details
- Phone and Address
- Email Address
- Gender and Marital Status
- W-2 Information
- Timestamps
- Memos
- Custom Fields (only visible if custom fields are set up)
- Social Security Number (only visible if you have the appropriate access)
- Social Insurance Number (only visible if you have the appropriate access)
- Statuses
- Locations
- Attributes - If you mark this checkbox, the Attribute field is enabled. Select the attribute to include.
- Mark the checkbox(es) in the Calculations section for the additional information to include:
- Automatics
- Parameter References - If you mark this checkbox, the Parameter Like field is enabled. Enter a parameter mask or specific parameter to restrict which parameter references appear on the report.
- Parameter Values - If you mark this checkbox, the Parameter Values as of field is enabled. Enter the effective date as of which to include parameter values on the report.
- Mark the checkbox(es) in the Disbursements section for the additional information to include:
- Disbursement Sets
- Disbursement Rules
- Bank Accounts
- Mark the checkbox(es) in the Human Resources section for the additional information to include:
- Job Categories
- Ethnic Origins
- Contacts
- Position Pay Rates (this option is available if the Human Resources package is installed and you have appropriate access)
- Mark the Seniority & Leave Plans checkbox if you want to include seniority and leave plan information on the report.
- Mark the Notes checkbox if you want to include employee notes on the report. If you mark the checkbox, the remaining fields in the Notes section are enabled:
- To restrict notes on the report to a particular type, select the type in the Note Type field.
- To restrict notes to those entered in a particular date range, enter the range of dates in the Date fields.
- To restrict notes to those flagged for follow-up in a particular date range, enter the range of follow-up dates in the Follow-Up Date fields.
- Select the Sorting tab.
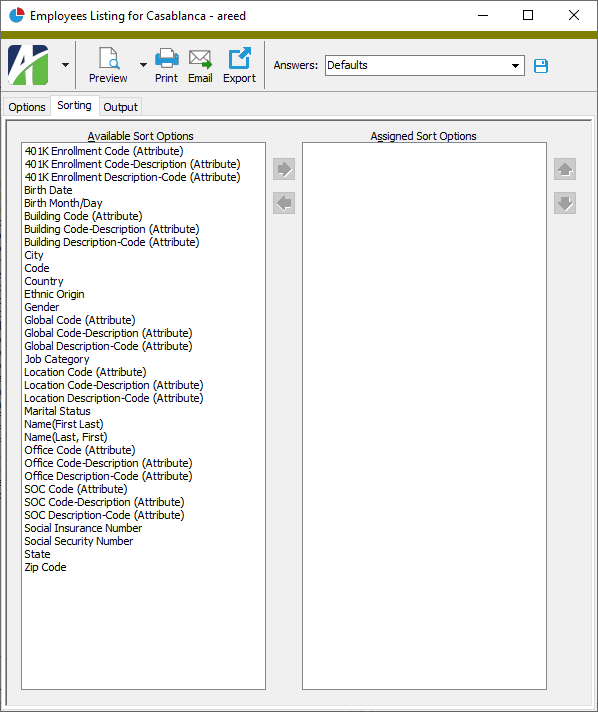
- In the Available Sort Options list box, highlight the field(s) to sort the report by, then click
 to move your selection(s) to the Assigned Sort Options list box.
 - If you selected multiple sort fields, use
 and
and  to arrange the sort fields in the order you want them applied.
 - Select the Output tab.
- In the Design field, look up and select the report design to use.
- In the toolbar, click the icon for the type of output you want:
 - Provides access to two preview options.
- Preview - Click the icon or click the drop-down arrow and select Preview from the drop-down menu to view the report in the Crystal Reports viewer.
- Preview to PDF - Click the drop-down arrow next to the icon and select Preview to PDF to view the report in the PDF reader.
 - Opens the Print dialog so that you can select and configure a printer and then print a paper copy of the report.
 - Opens the dialog so that you can address and compose an email that the report will be attached to. For best results, ensure your email client is running before you attempt to send a report via email.
 - Opens the Export Report dialog so that you can save the report to a file. File types include Crystal Reports (.rpt), PDF (.pdf), Microsoft Excel (.xls), Microsoft Word (.doc), rich text (.rtf), and XML (.xml).
Data extensions
The following data extensions are available for the report:
- Employees
- Locations
- Employee statuses
- Employee bank accounts
- Employee automatics
- Employee parameter values
- Employee attribute items
- Contacts
- Employee leave plans