Follow the link for the report you want to view help for.
ACA Calendars Listing
Purpose
The ACA Calendars Listing provides a list of the ACA calendars defined in Payroll.
Content
For each ACA calendar included on the report, the listing shows:
- calendar code
- description.
If you include detail on the report, the listing shows the following for each calendar period:
- type of calendar period (standard or initial)
- date range for the variable time hiring period
- measurement period basis (monthly or weekly)
- date range for the measurement period
- date range for the administration period
- date range for the stability period
- date range for the full-time hiring period.
In addition, you can include one or more of the following:
- timestamps
- memos
- custom fields.
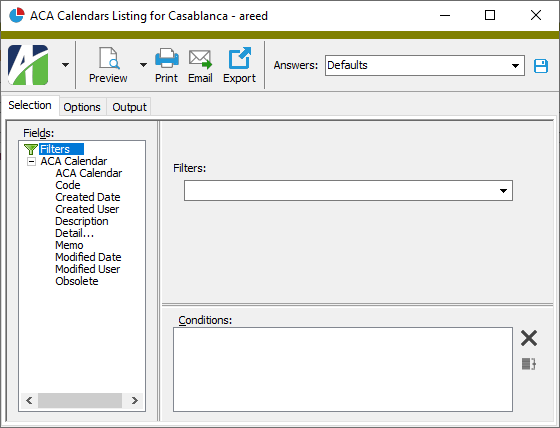
Print the report
- In the Navigation pane, highlight the Payroll/Human Resources > Setup > ACA > Calendars folder.
- Start the report set-up wizard.
- To report on all or a filtered subset of ACA calendars:
- Right-click the Calendars folder and select Select and Report > ACA Calendars Listing from the shortcut menu.
- On the Selection tab, define any filters to apply to the data.
- To report on specifically selected ACA calendars:
- In the HD view, select the ACA calendars to include on the report. You can use Ctrl and/or Shift selection to select multiple records.
- Click
 and select ACA Calendars Listing from the drop-down menu.
- To report on a particular ACA calendar from the ACA Calendar window:
- In the HD view, locate and double-click the ACA calendar to report on. The ACA Calendar window opens with the ACA calendar loaded.
- Click and select ACA Calendars Listing from the drop-down menu.
- To report on all or a filtered subset of ACA calendars:
- Select the Options tab.
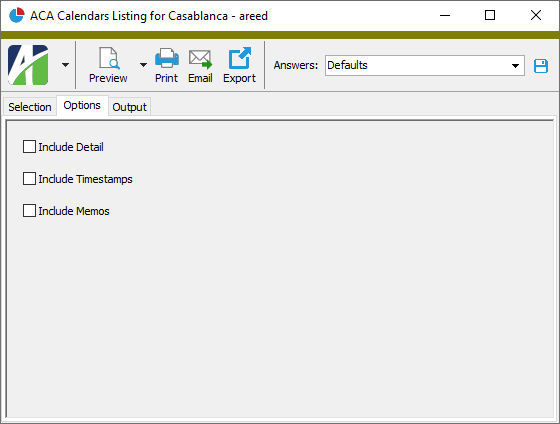
- Mark the checkbox(es) for the additional information to include:
- Detail
- Report Options. To include a section at the end of the report with the report settings used to produce the report, leave the checkbox marked. To produce the report without this information, clear the checkbox.
- Timestamps
- Memos
- Custom Fields (only visible if custom fields are set up)
- Select the Output tab.
- In the Design field, look up and select the report design to use.
- In the toolbar, click the icon for the type of output you want:
 - Provides access to two preview options.
- Preview - Click the icon or click the drop-down arrow and select Preview from the drop-down menu to view the report in the Crystal Reports viewer.
- Preview to PDF - Click the drop-down arrow next to the icon and select Preview to PDF to view the report in the PDF reader.
 - Opens the Print dialog so that you can select and configure a printer and then print a paper copy of the report.
 - Opens the dialog so that you can address and compose an email that the report will be attached to. For best results, ensure your email client is running before you attempt to send a report via email.
 - Opens the Export Report dialog so that you can save the report to a file. File types include Crystal Reports (.rpt), PDF (.pdf), Microsoft Excel (.xls), Microsoft Word (.doc), rich text (.rtf), and XML (.xml).
Data extensions
The following data extensions are available for the report:
- ACA calendars
- ACA calendar detail
Employees Listing
Purpose
The Employees Listing provides a list of employees tracked in Payroll.
Content
For each employee included on the report, the listing shows:
- employee code
- employee full name
- employee "goes by" name
- employee's preferred pronouns
- position
- hire date
- birth date
- current employment status.
In addition, you can include one or more of the following:
- employee details including: name and emergency contact, phone and address, email address, gender and marital status, W-2 information, social security number, social insurance number, statuses, employee locations (address lines 1 and 2, name lines 1 and 2, city, state, zip, country), attributes
- calculation details including: parameter references, parameter values, automatics
- disbursement information including: disbursement sets, disbursement rules, bank accounts
- Human Resources information including: job categories, ethnic origins, contacts, position pay rates
- seniority and leave plans
- notes
- timestamps
- memos
- custom fields.
The following total appears on the report:
- record count.
Print the report
- In the Navigation pane, highlight the Payroll/Human Resources > Employees folder.
- Start the report set-up wizard.
- To report on all or a filtered subset of employees:
- Right-click the Employees folder and select Select and Report > Employees Listing from the shortcut menu.
- On the Selection tab, define any filters to apply to the data.
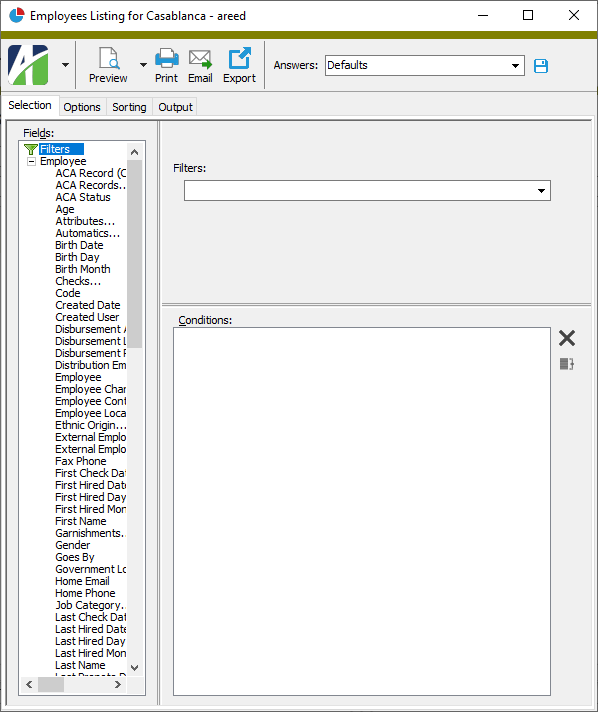
- To report on specifically selected employees:
- In the HD view, select the employees to include on the report. You can use Ctrl and/or Shift selection to select multiple records.
- Click and select Employees Listing from the drop-down menu.
- To report on a particular employee from the Employee window:
- In the HD view, locate and double-click the employee to report on. The Employee window opens with the employee record loaded.
- Click and select Employees Listing from the drop-down menu.
- To report on all or a filtered subset of employees:
- Select the Options tab.
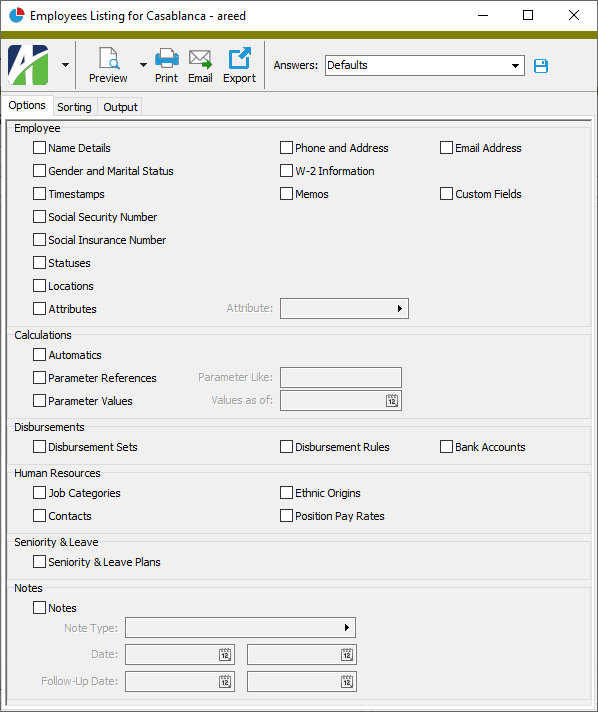
- Mark the checkbox(es) in the Employee section for the additional information to include:
- Name Details
- Phone and Address
- Email Address
- Gender and Marital Status
- W-2 Information
- Timestamps
- Memos
- Custom Fields (only visible if custom fields are set up)
- Social Security Number (only visible if you have the appropriate access)
- Social Insurance Number (only visible if you have the appropriate access)
- Statuses
- Locations
- Attributes - If you mark this checkbox, the Attribute field is enabled. Select the attribute to include.
- Mark the checkbox(es) in the Calculations section for the additional information to include:
- Automatics
- Parameter References - If you mark this checkbox, the Parameter Like field is enabled. Enter a parameter mask or specific parameter to restrict which parameter references appear on the report.
- Parameter Values - If you mark this checkbox, the Parameter Values as of field is enabled. Enter the effective date as of which to include parameter values on the report.
- Mark the checkbox(es) in the Disbursements section for the additional information to include:
- Disbursement Sets
- Disbursement Rules
- Bank Accounts
- Mark the checkbox(es) in the Human Resources section for the additional information to include:
- Job Categories
- Ethnic Origins
- Contacts
- Position Pay Rates (this option is available if the Human Resources package is installed and you have appropriate access)
- Mark the Seniority & Leave Plans checkbox if you want to include seniority and leave plan information on the report.
- Mark the Notes checkbox if you want to include employee notes on the report. If you mark the checkbox, the remaining fields in the Notes section are enabled:
- To restrict notes on the report to a particular type, select the type in the Note Type field.
- To restrict notes to those entered in a particular date range, enter the range of dates in the Date fields.
- To restrict notes to those flagged for follow-up in a particular date range, enter the range of follow-up dates in the Follow-Up Date fields.
- Select the Sorting tab.
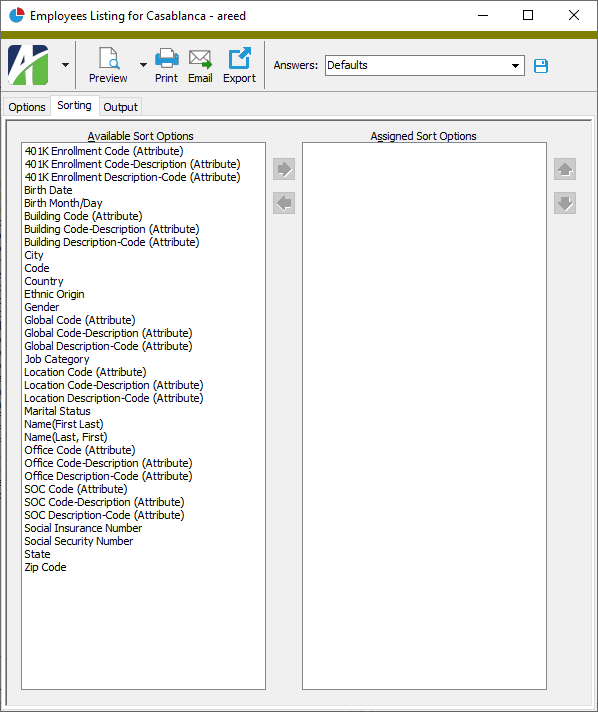
- In the Available Sort Options list box, highlight the field(s) to sort the report by, then click
 to move your selection(s) to the Assigned Sort Options list box.
 - If you selected multiple sort fields, use
 and
and  to arrange the sort fields in the order you want them applied.
 - Select the Output tab.
- In the Design field, look up and select the report design to use.
- In the toolbar, click the icon for the type of output you want:
- - Provides access to two preview options.
- Preview - Click the icon or click the drop-down arrow and select Preview from the drop-down menu to view the report in the Crystal Reports viewer.
- Preview to PDF - Click the drop-down arrow next to the icon and select Preview to PDF to view the report in the PDF reader.
- - Opens the Print dialog so that you can select and configure a printer and then print a paper copy of the report.
- - Opens the dialog so that you can address and compose an email that the report will be attached to. For best results, ensure your email client is running before you attempt to send a report via email.
- - Opens the Export Report dialog so that you can save the report to a file. File types include Crystal Reports (.rpt), PDF (.pdf), Microsoft Excel (.xls), Microsoft Word (.doc), rich text (.rtf), and XML (.xml).
Data extensions
The following data extensions are available for the report:
- Employees
- Locations
- Employee statuses
- Employee bank accounts
- Employee automatics
- Employee parameter values
- Employee attribute items
- Contacts
- Employee leave plans
Employee Balances Report
Purpose
The Employee Balances Report shows accrual and usage amounts by employee.
Content
For each employee on the report, the report shows:
- employee name
- beginning balance
- accrual amount
- usage amount
- balance.
In addition, you can include the following:
- check detail with running balances.
The following totals appear on the report:
- employee count
- grand totals.
Print the report
- In the Navigation pane, highlight the Payroll/Human Resources > Employees folder.
- Start the report set-up wizard.
- To report on all or a filtered subset of employees:
- Right-click the Employees folder and select Select and Report > Employee Balances Report from the shortcut menu.
- On the Selection tab, define any filters to apply to the data.

- To report on specifically selected employees:
- In the HD view, select the employees to include on the report. You can use Ctrl and/or Shift selection to select multiple records.
- Click and select Employee Balances Report from the drop-down menu.
- To report on a particular employee from the Employee window:
- In the HD view, locate and double-click the employee to report on. The Employee window opens with the employee loaded.
- Click and select Employee Balances Report from the drop-down menu.
- To report on all or a filtered subset of employees:
- Select the Options tab.
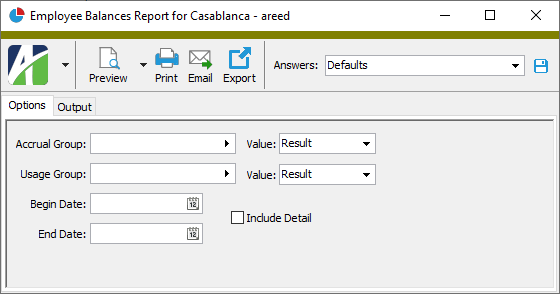
- In the Accrual Group field, select the payroll group to use as the accrual side of the employee balance.
- From the Accrual Group Value drop-down list, select which value to derive the accrual amount from. Your options are:
- Source
- Result
- In the Usage Group field, select the payroll group to use as the usage side of the employee balance.
- From the Usage Group Value drop-down list, select which value to derive the usage amount from. Your options are:
- Source
- Result
- In the Begin Date and End Date fields, enter the range of dates for which to include employee balance information on the report.
- To include the check detail that contributes to the employee balances, mark the Include Detail checkbox.
- To include a section at the end of the report with the report settings used to produce the report, leave the Include Report Options checkbox marked. To produce the report without this information, clear the checkbox.
- Select the Output tab.
- In the Design field, look up and select the report design to use.
- In the toolbar, click the icon for the type of output you want:
- - Provides access to two preview options.
- Preview - Click the icon or click the drop-down arrow and select Preview from the drop-down menu to view the report in the Crystal Reports viewer.
- Preview to PDF - Click the drop-down arrow next to the icon and select Preview to PDF to view the report in the PDF reader.
- - Opens the Print dialog so that you can select and configure a printer and then print a paper copy of the report.
- - Opens the dialog so that you can address and compose an email that the report will be attached to. For best results, ensure your email client is running before you attempt to send a report via email.
- - Opens the Export Report dialog so that you can save the report to a file. File types include Crystal Reports (.rpt), PDF (.pdf), Microsoft Excel (.xls), Microsoft Word (.doc), rich text (.rtf), and XML (.xml).
Data extensions
The following data extension is available for the report:
- Employees
Employee Labels
Purpose
Employee Labels produces a list of employee names or names and addresses formatted for label printing.
Print the report
- In the Navigation pane, highlight the Payroll/Human Resources > Employees folder.
- Start the report set-up wizard.
- To create labels for all or a filtered subset of employees:
- Right-click the Employees folder and select Select and Report > Employee Labels from the shortcut menu.
- On the Selection tab, define any filters to apply to the data.
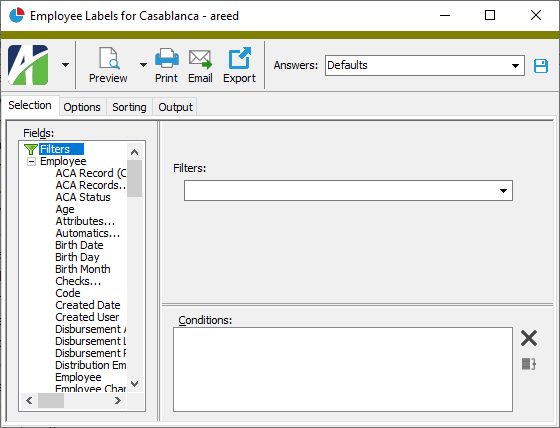
- To create labels for specifically selected employees:
- In the HD view, select the employees to include on the report. You can use Ctrl and/or Shift selection to select multiple records.
- Click and select Employee Labels from the drop-down menu.
- To create a label for a particular employee from the Employee window:
- In the HD view, locate and double-click the employee you want to create a label for. The Employee window opens with the employee loaded.
- Click and select Employee Labels from the drop-down menu.
- To create labels for all or a filtered subset of employees:
- Select the Options tab.
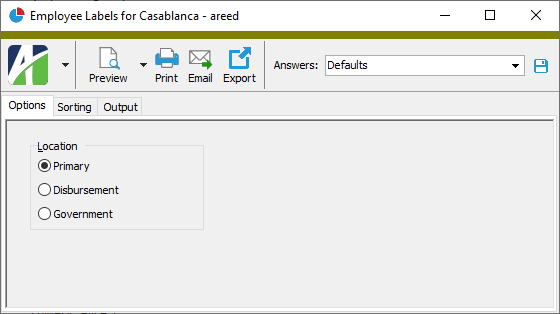
- Select the Location for which to print employee labels. Your options are:
- Primary
- Disbursement
- Government
- Select the Sorting tab.
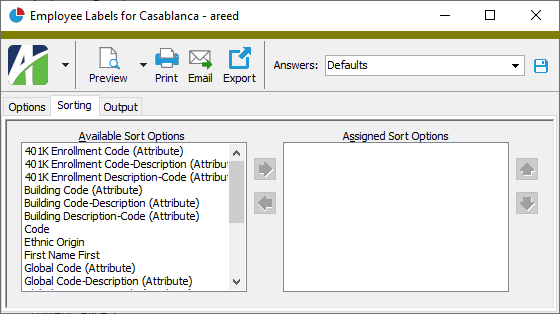
- In the Available Sort Options list box, highlight the field(s) to sort the labels by, then click to move your selection(s) to the Assigned Sort Options list box.
- If you selected multiple sort fields, use and to arrange the sort fields in the order you want them applied.
- Select the Output tab.
- In the Design field, look up and select the report design to use.
There are two built-in report designs for Employee Labels:
- Employee Labels - Produces folder labels.
- Employee Address Labels - Produces mailing labels which include address lines 1 and 2, name lines 1 and 2, city, state, zip, and country.
- In the toolbar, click the icon for the type of output you want:
- - Provides access to two preview options.
- Preview - Click the icon or click the drop-down arrow and select Preview from the drop-down menu to view the report in the Crystal Reports viewer.
- Preview to PDF - Click the drop-down arrow next to the icon and select Preview to PDF to view the report in the PDF reader.
- - Opens the Print dialog so that you can select and configure a printer and then print a paper copy of the report.
- - Opens the dialog so that you can address and compose an email that the report will be attached to. For best results, ensure your email client is running before you attempt to send a report via email.
- - Opens the Export Report dialog so that you can save the report to a file. File types include Crystal Reports (.rpt), PDF (.pdf), Microsoft Excel (.xls), Microsoft Word (.doc), rich text (.rtf), and XML (.xml).
Data extensions
The following data extension is available for the report:
- Employees
Employee History Report
Purpose
The Employee History Report shows note, status, attribute, parameter value, position, pay rate, and/or record history by date for each employee included on the report. Beginning with version 8.26-0, record history includes information for state W-4s, I-9s, 1095-Cs, ACA, insurance coverage, and W-2s plus more information for garnishments and W-4s.
Content
For each employee on the report, the report shows:
- the employee name and code
- the employee's history records.
For each employee history record on the report, the report shows:
- the date
- the item type
- the item value(s) as of the indicated date
- related memos, descriptions, or note content
The following total appears on the report:
- employee count.
Print the report
- In the Navigation pane, highlight the Payroll/Human Resources > Employees folder.
- Start the report set-up wizard.
- To report on all or a filtered subset of employees:
- Right-click the Employees folder and select Select and Report > Employee History from the shortcut menu.
- On the Selection tab, define any filters to apply to the data.
- To report on specifically selected employees:
- In the HD view, select the employees to include on the report. You can use Ctrl and/or Shift selection to select multiple records.
- Click and select Employee History from the drop-down menu.
- To report on a particular employee from the Employee window:
- In the HD view, locate and double-click the employee to report on. The Employee window opens with the employee loaded.
- Click and select Employee History from the drop-down menu.
- To report on all or a filtered subset of employees:
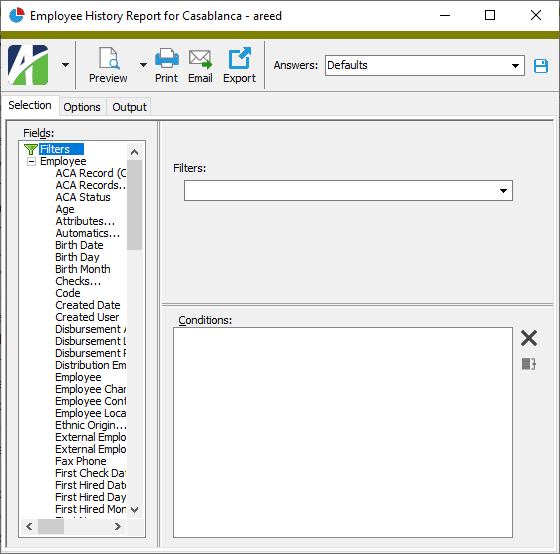
- Select the Options tab.
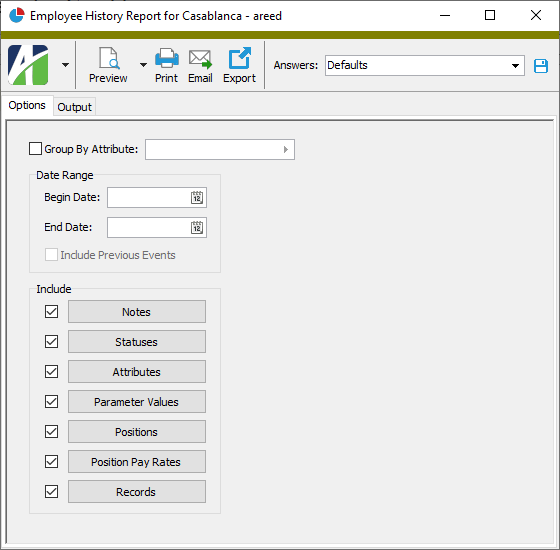
- To group information on the report by a particular attribute, mark the Group by Attribute checkbox and select the attribute in the field to the right.
- In the Begin Date and End Date fields, enter the range of dates for which to include employee history on the report.
- If you entered a begin date, the Include Previous Events checkbox is enabled. Mark this checkbox if you want the report to include history records that show the most recent past value for the same type of record for the same employee on the report (if a previous value exists). Previous events are included for statuses, attributes, parameter values, positions, position pay rates, and W-4 records. Previous events are not available for notes, garnishments, 1095-Cs, ACA records, insurance coverage records, T4s, and W-2s.
Example
Suppose an employee had a pay rate change during the reporting period and the last previous reported pay rate change for the employee occurred before the reporting period. If you mark the Include Previous Events checkbox, both the record with the pay rate change in the reporting period and the most recent past pay rate change would be included on the report.
- In the Include section, ensure that the checkbox(es) next to the type(s) of information you want to include history for are marked. You must include at least one detail type. By default, all checkboxes are marked. The information types include:
- Notes
- Statuses
- Attributes
- Parameter Values
- Positions (only visible if you are licensed for the Human Resources package)
- Position Pay Rates (only visible if you are licensed for the Human Resources package)
- Records
- To limit the information that appears for a selected information type, click the corresponding button to open the Selection dialog box, define any filters to apply to the data, and click OK. Repeat this step for each information type you want to filter.
- To include a section at the end of the report with the report settings used to produce the report, leave the Include Report Options checkbox marked. To produce the report without this information, clear the checkbox.
- Select the Output tab.
- In the Design field, look up and select the report design to use.
- In the toolbar, click the icon for the type of output you want:
- - Provides access to two preview options.
- Preview - Click the icon or click the drop-down arrow and select Preview from the drop-down menu to view the report in the Crystal Reports viewer.
- Preview to PDF - Click the drop-down arrow next to the icon and select Preview to PDF to view the report in the PDF reader.
- - Opens the Print dialog so that you can select and configure a printer and then print a paper copy of the report.
- - Opens the dialog so that you can address and compose an email that the report will be attached to. For best results, ensure your email client is running before you attempt to send a report via email.
- - Opens the Export Report dialog so that you can save the report to a file. File types include Crystal Reports (.rpt), PDF (.pdf), Microsoft Excel (.xls), Microsoft Word (.doc), rich text (.rtf), and XML (.xml).
Data extensions
The following data extension is available for the report:
- Employees
Employee Change Log Analysis
Purpose
The Employee Change Log Analysis report helps you investigate changes to employee records. In particular, the report shows when a change was made, who made the change, and the old and new values.
Content
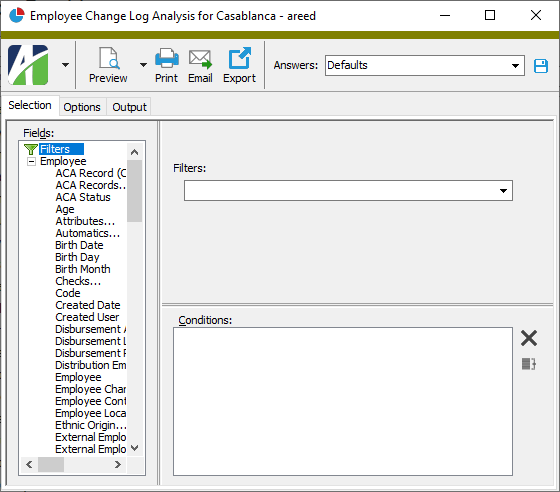
For each employee on the report, the report shows:
- the changes made to the employee record.
For each change record on the report, the report shows:
- log name and sequence number of the change
- identifier
- type of change
- user who made the change
- date and time of the change
- field changed
- value before the change
- value after the change.
The following total appears on the report:
- record count.
Print the report
- In the Navigation pane, highlight the Payroll/Human Resources > Employees folder.
- Start the report set-up wizard.
- To report on all or a filtered subset of employees:
- Right-click the Employees folder and select Select and Report > Employee Change Log Analysis from the shortcut menu.
- On the Selection tab, define any filters to apply to the data.
- To report on specifically selected employees:
- In the HD view, select the employees to include on the report. You can use Ctrl and/or Shift selection to select multiple records.
- Click and select Employee Change Log Analysis from the drop-down menu.
- To report on a particular employee from the Employee window:
- In the HD view, locate and double-click the employee to report on. The Employee window opens with the employee loaded.
- Click and select Employee Change Log Analysis from the drop-down menu.
- To report on all or a filtered subset of employees:
- Select the Options tab.
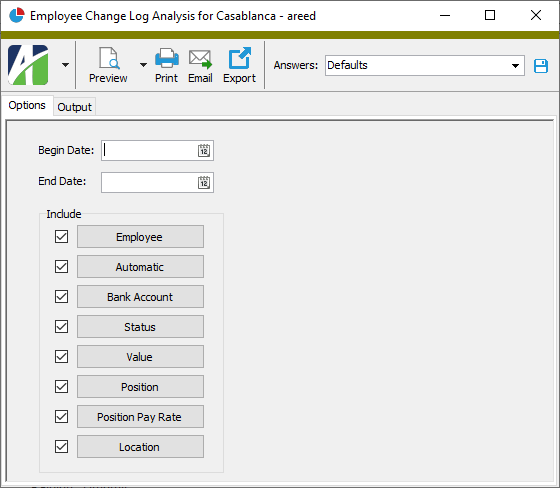
- In the Begin Date and End Date fields, enter the range of dates for which to include changes on the report.
- In the Include section, ensure the checkbox(es) next to the change log(s) you want to include changes for are marked. By default, all checkboxes are marked. The change logs may include:
- Employee
- Automatic
- Bank Account
- Status
- Value
- Position
- Position Pay Rate
- Location
Note
Buttons are only visible for change logs that are currently activated.
- To limit the changes that appear for a selected change log, click the change log button to open the Selection dialog box, define any filters to apply to the data, and click OK. Repeat this step for each change log you want to filter.
- To include a section at the end of the report with the report settings used to produce the report, leave the Include Report Options checkbox marked. To produce the report without this information, clear the checkbox.
- Select the Output tab.
- In the Design field, look up and select the report design to use.
- In the toolbar, click the icon for the type of output you want:
- - Provides access to two preview options.
- Preview - Click the icon or click the drop-down arrow and select Preview from the drop-down menu to view the report in the Crystal Reports viewer.
- Preview to PDF - Click the drop-down arrow next to the icon and select Preview to PDF to view the report in the PDF reader.
- - Opens the Print dialog so that you can select and configure a printer and then print a paper copy of the report.
- - Opens the dialog so that you can address and compose an email that the report will be attached to. For best results, ensure your email client is running before you attempt to send a report via email.
- - Opens the Export Report dialog so that you can save the report to a file. File types include Crystal Reports (.rpt), PDF (.pdf), Microsoft Excel (.xls), Microsoft Word (.doc), rich text (.rtf), and XML (.xml).
Data extensions
The following data extension is available for the report:
- Employees
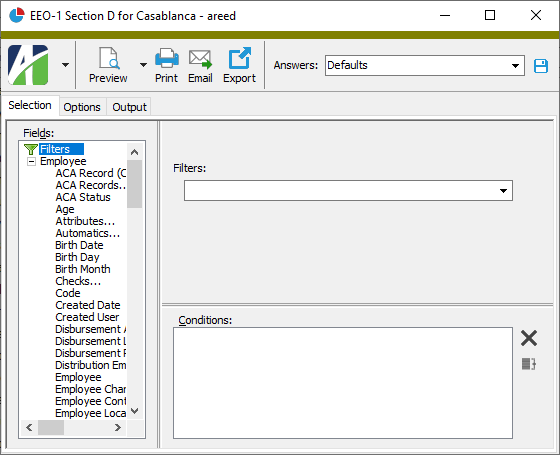
EEO-1 Section D
Purpose
The EEO-1 Section D report categorizes your employees by race/ethnicity, gender, and job category as prescribed by the Equal Employment Opportunity Commission.
Note
Currently, employees with gender set to "Non-Binary" are reflected in the exception detail section of the report. If you have employees classified as non-binary, you should run the report with the Exception Detail checkbox marked and use this information to enter a manual comment when you submit your data.
Content
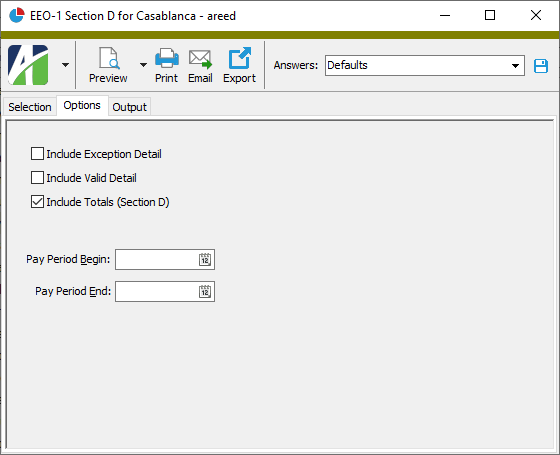
In addition to the Section D information, you can include one or more of the following:
- exception detail
- valid detail (count of employees broken down by job category, sex, and ethnicity).
The following totals appear on the report:
- job category totals
- grand totals.
Print the report
- In the Navigation pane, highlight the Payroll/Human Resources > Employees folder.
- Start the report set-up wizard.
- To report on all or a filtered subset of employees:
- Right-click the Employees folder and select Select and Report > EEO-1 Section D from the shortcut menu.
- On the Selection tab, define any filters to apply to the data.
- To report on specifically selected employees:
- In the HD view, select the employees to include on the report. You can use Ctrl and/or Shift selection to select multiple records.
- Click and select EEO-1 Section D from the drop-down menu.
- To report on a specific employee from the Employee window:
- In the HD view, locate and double-click the employee to report on. The Employee window opens with the employee loaded.
- Click and select EEO-1 Section D from the drop-down menu.
- To report on all or a filtered subset of employees:
- Select the Options tab.
- Mark the checkbox(es) for the additional information to include:
- Exception Detail
- Valid Detail
- Totals (Section D)
- To include a section at the end of the report with the report settings used to produce the report, leave the Include Report Options checkbox marked. To produce the report without this information, clear the checkbox.
- In the Pay Period Begin and Pay Period End fields, enter the start and end dates of the pay period you want to run the report for. (These fields are not visible if you select employees for the report directly from the HD view.)
- Select the Output tab.
- In the Design field, look up and select the report design to use.
- In the toolbar, click the icon for the type of output you want:
- - Provides access to two preview options.
- Preview - Click the icon or click the drop-down arrow and select Preview from the drop-down menu to view the report in the Crystal Reports viewer.
- Preview to PDF - Click the drop-down arrow next to the icon and select Preview to PDF to view the report in the PDF reader.
- - Opens the Print dialog so that you can select and configure a printer and then print a paper copy of the report.
- - Opens the dialog so that you can address and compose an email that the report will be attached to. For best results, ensure your email client is running before you attempt to send a report via email.
- - Opens the Export Report dialog so that you can save the report to a file. File types include Crystal Reports (.rpt), PDF (.pdf), Microsoft Excel (.xls), Microsoft Word (.doc), rich text (.rtf), and XML (.xml).
Data extensions
The following data extension is available for the report:
- Employees
Employee Automatics Listing
Purpose
The Employee Automatics Listing provides a list of the employee-specific automatic lines applied to payroll checks when the checks are created in Process Payroll Run.
Content
For each automatic included on the report, the listing shows:
- employee code
- employee name
- PRCode
- PRCode description
- beginning effective date
- ending effective date.
The following total appears on the report:
- record count.
Print the report
- In the Navigation pane, highlight the Payroll/Human Resources > Employees > Automatics folder.
- Start the report set-up wizard.
- To report on all or a filtered subset of employee automatics:
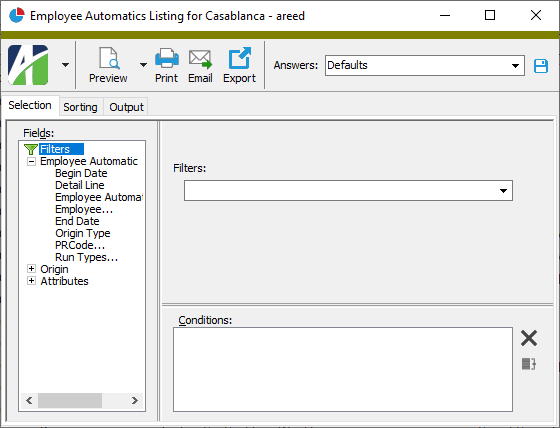
- Right-click the Automatics folder and select Select and Report > Employee Automatics Listing from the shortcut menu.
- On the Selection tab, define any filters to apply to the data.
- To report on specifically selected employee automatics:
- In the HD view, select the employee automatics to include on the report. You can use Ctrl and/or Shift selection to select multiple records.
- Click .
- To report on a particular employee automatic from the Employee Automatic window:
- In the HD view, locate and double-click the employee automatic to report on. The Employee Automatic window opens with the automatic loaded.
- Click .
- To report on all or a filtered subset of employee automatics:
- Select the Options tab.
- To include a section at the end of the report with the report settings used to produce the report, leave the Include Report Options checkbox marked. To produce the report without this information, clear the checkbox.
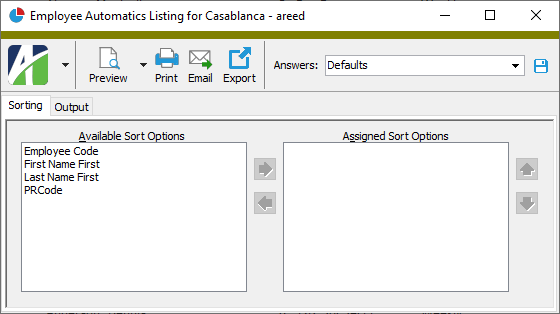
- Select the Sorting tab.
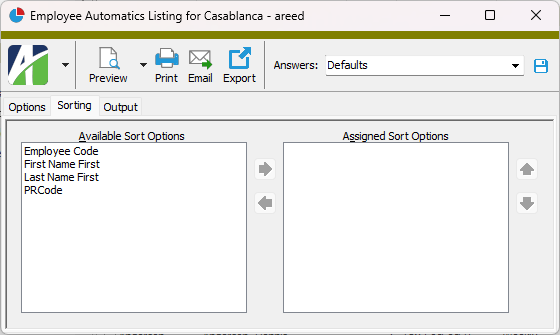
- In the Available Sort Options list box, highlight the field(s) to sort the report by, then click to move your selection(s) to the Assigned Sort Options list box.
- If you selected multiple sort fields, use and to arrange the sort fields in the order you want them applied.
- Select the Output tab.
- In the Design field, look up and select the report design to use.
- In the toolbar, click the icon for the type of output you want:
- - Provides access to two preview options.
- Preview - Click the icon or click the drop-down arrow and select Preview from the drop-down menu to view the report in the Crystal Reports viewer.
- Preview to PDF - Click the drop-down arrow next to the icon and select Preview to PDF to view the report in the PDF reader.
- - Opens the Print dialog so that you can select and configure a printer and then print a paper copy of the report.
- - Opens the dialog so that you can address and compose an email that the report will be attached to. For best results, ensure your email client is running before you attempt to send a report via email.
- - Opens the Export Report dialog so that you can save the report to a file. File types include Crystal Reports (.rpt), PDF (.pdf), Microsoft Excel (.xls), Microsoft Word (.doc), rich text (.rtf), and XML (.xml).
Data extensions
The following data extensions are available for the report:
- Employee automatics
- Employees
- PRCodes
Employee Parameters Listing
Purpose
Content
For each employee included on the report, the listing shows:
- parameter details.
For each parameter listed on the report, the listing shows:
- description
- data type
- effective date
- parameter value as of an effective date you specify.
In addition, you can include the following:
- historical parameter values.
The following total appears on the report:
- record count.
Print the report
- In the Navigation pane, highlight the Payroll/Human Resources > Employees > Parameters folder.
- Start the report set-up wizard.
- To report on all or a filtered subset of employee parameters:
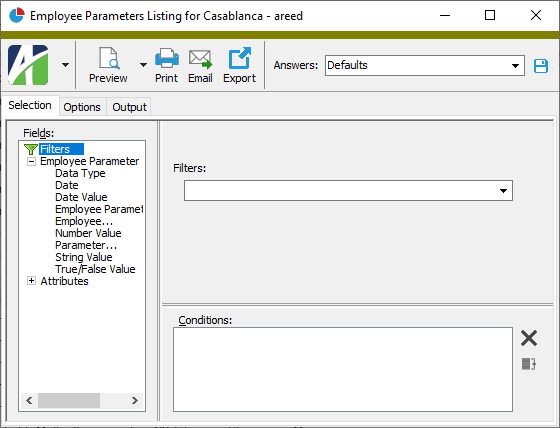
- Right-click the Parameters folder and select Select and Report > Employee Parameters Listing from the shortcut menu.
- On the Selection tab, define any filters to apply to the data.
- To report on specifically selected employee parameters:
- In the HD view, select the employee parameters to include on the report. You can use Ctrl and/or Shift selection to select multiple records.
- Click .
- To report on a particular employee parameter from the Employee Parameter window:
- In the HD view, locate and double-click the employee parameter to report on. The Employee Parameter window opens with the parameter loaded.
- Click .
- To report on all or a filtered subset of employee parameters:
- Select the Options tab.

- In the Effective Date field, enter the date as of which to show the parameter value for the parameters on the report.
- To show the history of parameter values and effective dates for the parameters on the report, mark the Include Parameter Values checkbox.
- To include a section at the end of the report with the report settings used to produce the report, leave the Include Report Options checkbox marked. To produce the report without this information, clear the checkbox.
- Select the Output tab.
- In the Design field, look up and select the report design to use.
- In the toolbar, click the icon for the type of output you want:
- - Provides access to two preview options.
- Preview - Click the icon or click the drop-down arrow and select Preview from the drop-down menu to view the report in the Crystal Reports viewer.
- Preview to PDF - Click the drop-down arrow next to the icon and select Preview to PDF to view the report in the PDF reader.
- - Opens the Print dialog so that you can select and configure a printer and then print a paper copy of the report.
- - Opens the dialog so that you can address and compose an email that the report will be attached to. For best results, ensure your email client is running before you attempt to send a report via email.
- - Opens the Export Report dialog so that you can save the report to a file. File types include Crystal Reports (.rpt), PDF (.pdf), Microsoft Excel (.xls), Microsoft Word (.doc), rich text (.rtf), and XML (.xml).
Data extensions
The following data extensions are available for the report:
- Employee parameters
- Employees
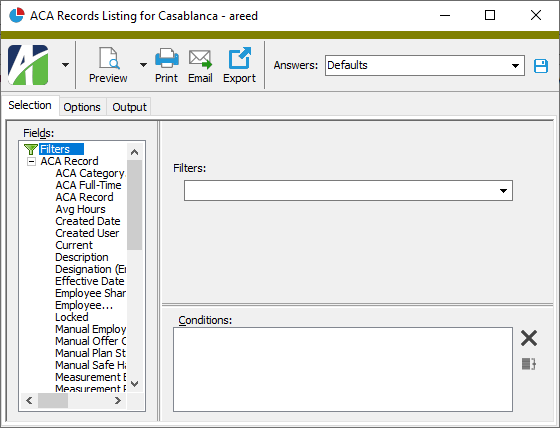
ACA Records Listing
Purpose
The ACA Records Listing provides a list of ACA records created in Payroll.
Content
For each ACA record included on the report, the listing shows:
- employee code and name
- effective date of ACA record
- record number
- record type
- employee designation (PT/FT)
- ACA category
- dates of stability period
- ACA full-time indicator
- record locked indicator
- voided record indicator.
In addition, you can include one or more of the following:
- offer and coverage (including offer code, employee lowest cost, safe harbor code, plan start month)
- description
- measurement and notifications
- timestamps
- memos
- custom fields.
The following totals appear on the report:
- record count
- employee count.
Print the report
- In the Navigation pane, highlight the Payroll/Human Resources > Employees > Records > ACA folder.
- Start the report set-up wizard.
- To report on all or a filtered subset of ACA records:
- Right-click the ACA folder and select Select and Report > ACA Records Listing from the shortcut menu.
- On the Selection tab, define any filters to apply to the data.
- To report on specifically selected ACA records:
- In the HD view, select the ACA records to include on the report. You can use Ctrl and/or Shift selection to select multiple ACA records.
- Click and select ACA Records Listing from the drop-down menu.
- To report on a particular ACA record from the ACA Record window:
- In the HD view, locate and double-click the ACA record to report on. The ACA Record window opens with the ACA record loaded.
- Click and select ACA Records Listing from the drop-down menu.
- To report on all or a filtered subset of ACA records:
- Select the Options tab.
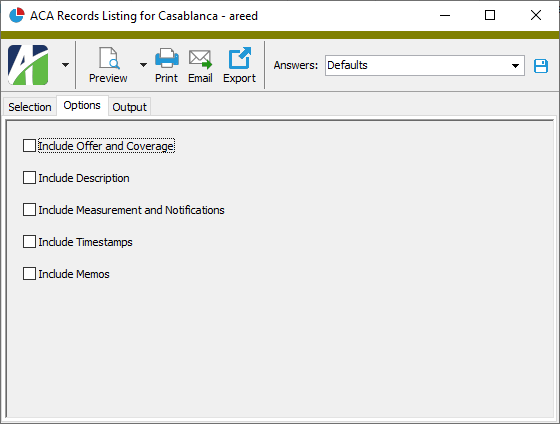
- Mark the checkbox(es) for the additional information to include:
- Offer and Coverage
- Description
- Measurement and Notifications
- Report Options. To include a section at the end of the report with the report settings used to produce the report, leave the checkbox marked. To produce the report without this information, clear the checkbox.
- Timestamps
- Memos
- Custom Fields (only visible if custom fields are set up)
- Select the Output tab.
- In the Design field, look up and select the report design to use.
- In the toolbar, click the icon for the type of output you want:
- - Provides access to two preview options.
- Preview - Click the icon or click the drop-down arrow and select Preview from the drop-down menu to view the report in the Crystal Reports viewer.
- Preview to PDF - Click the drop-down arrow next to the icon and select Preview to PDF to view the report in the PDF reader.
- - Opens the Print dialog so that you can select and configure a printer and then print a paper copy of the report.
- - Opens the dialog so that you can address and compose an email that the report will be attached to. For best results, ensure your email client is running before you attempt to send a report via email.
- - Opens the Export Report dialog so that you can save the report to a file. File types include Crystal Reports (.rpt), PDF (.pdf), Microsoft Excel (.xls), Microsoft Word (.doc), rich text (.rtf), and XML (.xml).
Data extensions
The following data extensions are available for the report:
- ACA records
- Employees
- ACA categories
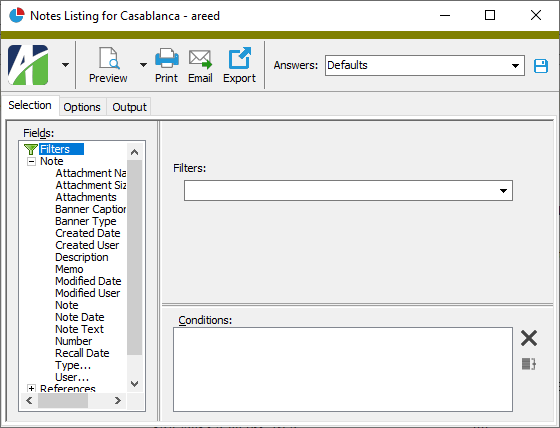
Notes Listing
Purpose
Content
For each note included on the report, the listing shows:
- note number
- note date and time
- note type
- note type description
- recall date and time
- user who entered the note
- reference(s) to other record(s)
- note description
- note text.
In addition, you can include one or more of the following:
- timestamps
- custom fields.
The following total appears on the report:
- record count.
Print the report
- In the Navigation pane, highlight the Payroll/Human Resources > Notes folder.
- Start the report set-up wizard.
- To report on all or a filtered subset of payroll notes:
- Right-click the Notes folder and select Select and Report > Notes Listing from the shortcut menu.
- On the Selection tab, define any filters to apply to the data.
- To report on specifically selected notes:
- In the HD view, select the notes to include on the report. You can use Ctrl and/or Shift selection to select multiple records.
- Click and select Notes Listing from the drop-down menu.
- To report on a particular payroll note from the Note window:
- In the HD view, locate and double-click the note to report on. The Note window opens with the note loaded.
- Click and select Notes Listing from the drop-down menu.
- To report on all or a filtered subset of payroll notes:
- Select the Options tab.
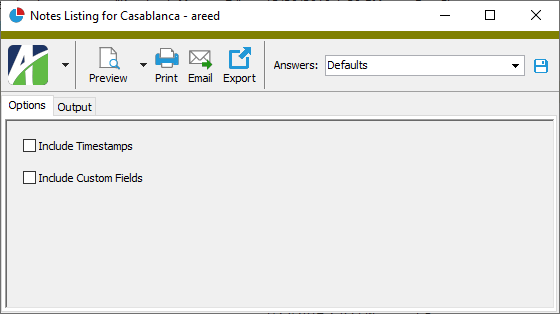
- To include a section at the end of the report with the report settings used to produce the report, leave the Include Report Options checkbox marked. To produce the report without this information, clear the checkbox.
- Mark the checkbox(es) for the additional information to include:
- Timestamps
- Custom Fields (only visible if custom fields are set up)
- Select the Output tab.
- In the Design field, look up and select the report design to use.
- In the toolbar, click the icon for the type of output you want:
- - Provides access to two preview options.
- Preview - Click the icon or click the drop-down arrow and select Preview from the drop-down menu to view the report in the Crystal Reports viewer.
- Preview to PDF - Click the drop-down arrow next to the icon and select Preview to PDF to view the report in the PDF reader.
- - Opens the Print dialog so that you can select and configure a printer and then print a paper copy of the report.
- - Opens the dialog so that you can address and compose an email that the report will be attached to. For best results, ensure your email client is running before you attempt to send a report via email.
- - Opens the Export Report dialog so that you can save the report to a file. File types include Crystal Reports (.rpt), PDF (.pdf), Microsoft Excel (.xls), Microsoft Word (.doc), rich text (.rtf), and XML (.xml).
Data extensions
The following data extensions are available for the report:
- Notes
- Note types
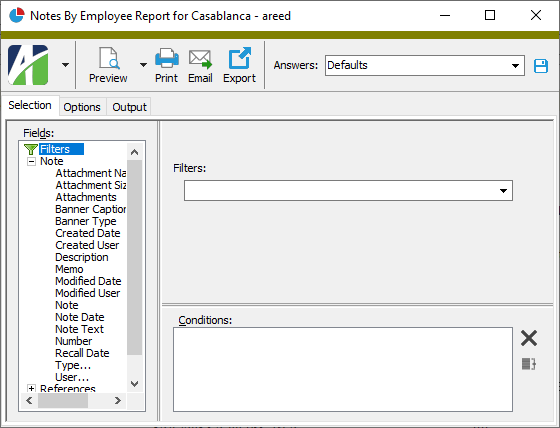
Notes by Employee Report
Purpose
The Notes by Employee Report shows the notes associated with each employee that is referenced in the notes. If a note refers to multiple employees, the note is reported for each employee referenced.
Content
For each employee included on the report, the report shows:
- note details.
For each note included on the report, the report shows:
- note number
- note date
- recall date
- note type
- note type description
- user who entered the note
- note description
- note text.
In addition, you can include one or more of the following:
- timestamps
- custom fields.
The following total appears on the report:
- record count.
Print the report
- In the Navigation pane, highlight the Payroll/Human Resources > Notes folder.
- Start the report set-up wizard.
- To report on all or a filtered subset of notes:
- Right-click the Notes folder and select Select and Report > Notes by Employee Report from the shortcut menu.
- On the Selection tab, define any filters to apply to the data.
- To report on specifically selected notes:
- In the HD view, select the notes to include on the report. You can use Ctrl and/or Shift selection to select multiple records.
- Click and select Notes by Employee Report from the drop-down menu.
- To report on a particular note from the Note window:
- In the HD view, locate and double-click the note to report on. The Note window opens with the note loaded.
- Click and select Notes by Employee Report from the drop-down menu.
- To report on all or a filtered subset of notes:
- Select the Options tab.
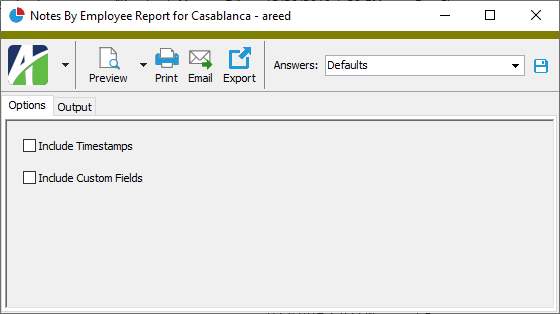
- To include a section at the end of the report with the report settings used to produce the report, leave the Include Report Options checkbox marked. To produce the report without this information, clear the checkbox.
- Mark the checkbox(es) for the additional information to include:
- Timestamps
- Custom Fields (only visible if custom fields are set up)
- Select the Output tab.
- In the Design field, look up and select the report design to use.
- In the toolbar, click the icon for the type of output you want:
- - Provides access to two preview options.
- Preview - Click the icon or click the drop-down arrow and select Preview from the drop-down menu to view the report in the Crystal Reports viewer.
- Preview to PDF - Click the drop-down arrow next to the icon and select Preview to PDF to view the report in the PDF reader.
- - Opens the Print dialog so that you can select and configure a printer and then print a paper copy of the report.
- - Opens the dialog so that you can address and compose an email that the report will be attached to. For best results, ensure your email client is running before you attempt to send a report via email.
- - Opens the Export Report dialog so that you can save the report to a file. File types include Crystal Reports (.rpt), PDF (.pdf), Microsoft Excel (.xls), Microsoft Word (.doc), rich text (.rtf), and XML (.xml).
Data extensions
The following data extensions are available for the report:
- Notes
- Note types
- Employees
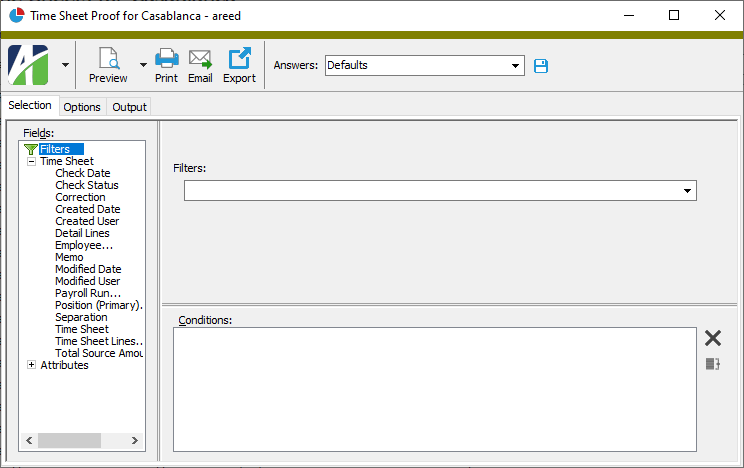
Time Sheet Proof
Purpose
The Time Sheet Proof report provides employees' time sheet hours categorized by check line group. You can specify up to four groups.
Content
For each time sheet record included on the report, the report shows:
- payroll run - employee code
- employee name
- separation flag (if present)
- correction flag (if present)
- source totals by group.
In addition, you can include the following:
- detail (for each time sheet detail line: line number, PRCode, source amount by group).
The following totals appear on the report:
- attribute subtotals (optional)
- grand totals.
Print the report
- In the Navigation pane, highlight the Payroll/Human Resources > Time Sheets folder.
- Start the report set-up wizard.
- To report on all or a filtered subset of time sheets:
- Right-click the Time Sheets folder and select Select and Report > Time Sheet Proof from the shortcut menu.
- On the Selection tab, define any filters to apply to the data.
- To report on specifically selected time sheets:
- In the HD view, select the time sheets to include on the report. You can use Ctrl and/or Shift selection to select multiple records.
- Click and select Time Sheet Proof from the drop-down menu.
- To report on a particular time sheet from the Time Sheet window:
- In the HD view, locate and double-click the time sheet to report on. The Time Sheet window opens with the time sheet loaded.
- Click and select Time Sheet Proof from the drop-down menu.
- To report on all or a filtered subset of time sheets:
- Select the Options tab.
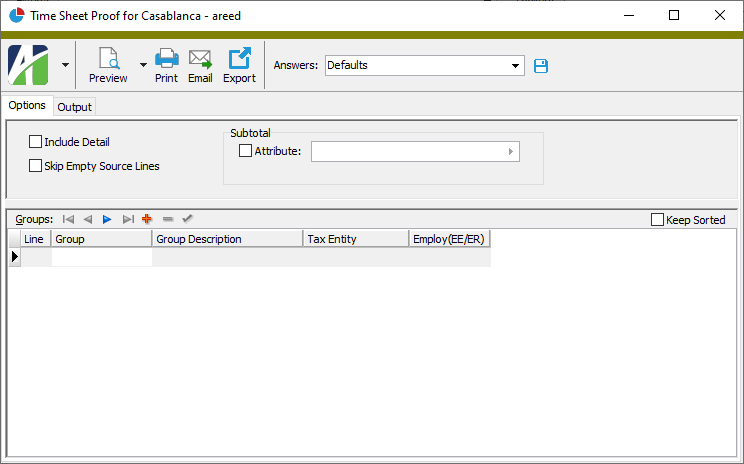
- To include time sheet detail lines on the report, mark the Include Detail checkbox.
- To omit lines with empty source amounts, mark the Skip Empty Source Lines checkbox.
- To include a section at the end of the report with the report settings used to produce the report, leave the Include Report Options checkbox marked. To produce the report without this information, clear the checkbox.
- To group and subtotal time sheet records by attribute values, mark the Attribute checkbox and select the attribute to use.
- In the Groups table, specify up to four check line groups to categorize time by:
- In the Group column, select the check line group to include.
- If you select a group that is qualified by tax entity, the Tax Entity column is enabled. Select the tax entity to use.
- If you select a group that is qualified by employee or employer, the Employ(EE/ER) column is enabled. From the drop-down list, select whose amount to include. Your options are:
- <blank>
- Employee
- Employer
- Select the Output tab.
- In the Design field, look up and select the report design to use.
- In the toolbar, click the icon for the type of output you want:
- - Provides access to two preview options.
- Preview - Click the icon or click the drop-down arrow and select Preview from the drop-down menu to view the report in the Crystal Reports viewer.
- Preview to PDF - Click the drop-down arrow next to the icon and select Preview to PDF to view the report in the PDF reader.
- - Opens the Print dialog so that you can select and configure a printer and then print a paper copy of the report.
- - Opens the dialog so that you can address and compose an email that the report will be attached to. For best results, ensure your email client is running before you attempt to send a report via email.
- - Opens the Export Report dialog so that you can save the report to a file. File types include Crystal Reports (.rpt), PDF (.pdf), Microsoft Excel (.xls), Microsoft Word (.doc), rich text (.rtf), and XML (.xml).
Note
The groups appear on the report in the same order that you add them to the table. If you want the groups to appear alphabetically instead, mark the Keep Sorted checkbox.
Data extensions
The following data extensions are available for the report:
- Time sheets
- Time sheet lines
Time Sheets Listing
Purpose
The Time Sheets Listing provides a list of employee time sheets recorded in Payroll.
Content
For each time sheet included on the report, the listing shows:
- employee name and code
- payroll run
- range of work dates
- separation flag (if present)
- correction flag (if present)
- time sheet detail records.
For each time sheet detail record included on the report, the listing shows:
- line number
- work date
- time code
- PRCode
- source
- rate
- result
- distribution date
- debit account.
In addition, you can include one or more of the following:
- timestamps
- memos
- custom fields.
The following totals appear on the report:
- record count
- grand total.
Print the report
- In the Navigation pane, highlight the Payroll/Human Resources > Time Sheets folder.
- Start the report set-up wizard.
- To report on all or a filtered subset of time sheets:
- Right-click the Time Sheets folder and select Select and Report > Time Sheets Listing from the shortcut menu.
- On the Selection tab, define any filters to apply to the data.
- To report on specifically selected time sheets:
- In the HD view, select the time sheets to include on the report. You can use Ctrl and/or Shift selection to select multiple records.
- Click and select Time Sheets Listing from the drop-down menu.
- To report on a particular time sheet from the Time Sheet window:
- In the HD view, locate and double-click the time sheet to report on. The Time Sheet window opens with the time sheet loaded.
- Click and select Time Sheets Listing from the drop-down menu.
- To report on all or a filtered subset of time sheets:
- Select the Options tab.

- To include a section at the end of the report with the report settings used to produce the report, leave the Include Report Options checkbox marked. To produce the report without this information, clear the checkbox.
- Mark the checkbox(es) for the additional information to include:
- Timestamps
- Memos
- Custom Fields (only visible if custom fields are set up)
- Select the Output tab.
- In the Design field, look up and select the report design to use.
- In the toolbar, click the icon for the type of output you want:
- - Provides access to two preview options.
- Preview - Click the icon or click the drop-down arrow and select Preview from the drop-down menu to view the report in the Crystal Reports viewer.
- Preview to PDF - Click the drop-down arrow next to the icon and select Preview to PDF to view the report in the PDF reader.
- - Opens the Print dialog so that you can select and configure a printer and then print a paper copy of the report.
- - Opens the dialog so that you can address and compose an email that the report will be attached to. For best results, ensure your email client is running before you attempt to send a report via email.
- - Opens the Export Report dialog so that you can save the report to a file. File types include Crystal Reports (.rpt), PDF (.pdf), Microsoft Excel (.xls), Microsoft Word (.doc), rich text (.rtf), and XML (.xml).
Data extensions
The following data extensions are available for the report:
- Time sheets
- Time sheet lines
- Time codes
Payroll Runs Listing
Purpose
The Payroll Runs Listing provides a list of payroll runs recorded in Payroll.
Content
For each payroll run included on the report, the listing shows:
- run type - date
- pay period begin date
- pay period end date
- closed status
- separation flag
- correction flag
- GL batch
- default distribution date
- split period work days through, work days after, date.
In addition, you can include one or more of the following:
- timestamps
- memos
- custom fields.
The following total appears on the report:
- record count.
Print the report
- In the Navigation pane, highlight the Payroll/Human Resources > Payroll Runs folder.
- Start the report set-up wizard.
- To report on all or a filtered subset of payroll runs:
- Right-click the Payroll Runs folder and select Select and Report > Payroll Runs Listing from the shortcut menu.
- On the Selection tab, define any filters to apply to the data.

- To report on specifically selected payroll runs:
- In the HD view, select the payroll runs to include on the report. You can use Ctrl and/or Shift selection to select multiple records.
- Click .
- To report on a particular payroll run from the Payroll Run window:
- In the HD view, locate and double-click the payroll run to report on. The Payroll Run window opens with the payroll run loaded.
- Click .
- To report on all or a filtered subset of payroll runs:
- Select the Options tab.

- To include a section at the end of the report with the report settings used to produce the report, leave the Include Report Options checkbox marked. To produce the report without this information, clear the checkbox.
- Mark the checkbox(es) for the additional information to include:
- Timestamps
- Memos
- Custom Fields (only visible if custom fields are set up)
- Select the Output tab.
- In the Design field, look up and select the report design to use.
- In the toolbar, click the icon for the type of output you want:
- - Provides access to two preview options.
- Preview - Click the icon or click the drop-down arrow and select Preview from the drop-down menu to view the report in the Crystal Reports viewer.
- Preview to PDF - Click the drop-down arrow next to the icon and select Preview to PDF to view the report in the PDF reader.
- - Opens the Print dialog so that you can select and configure a printer and then print a paper copy of the report.
- - Opens the dialog so that you can address and compose an email that the report will be attached to. For best results, ensure your email client is running before you attempt to send a report via email.
- - Opens the Export Report dialog so that you can save the report to a file. File types include Crystal Reports (.rpt), PDF (.pdf), Microsoft Excel (.xls), Microsoft Word (.doc), rich text (.rtf), and XML (.xml).
Data extensions
The following data extensions are available for the report:
- Payroll runs
- Run types
Entries Listing
Purpose
The Entries Listing provides a list of leave entries recorded in Payroll.
Content
For each leave entry included on the report, the listing shows:
- employee code
- employee name
- date
- accrual
- usage
- leave plan
- description
- whether the entry is locked.
In addition, you can include one or more of the following:
- timestamps
- memos
- custom fields.
The following totals appear on the report:
- ledger totals
- grand totals.
Print the report
- In the Navigation pane, highlight the Payroll/Human Resources > Leave Plans > Leave Entries folder.
- Start the report set-up wizard.
- To report on all or a filtered subset of leave entries:
- Right-click the Leave Entries folder and select Select and Report > Entries Listing from the shortcut menu.
- On the Selection tab, define any filters to apply to the data.
- To report on specifically selected leave entries:
- In the HD view, select the leave entries to include on the report. You can use Ctrl and/or Shift selection to select multiple records.
- Click .
- To report on a particular leave entry from the Seniority & Leave Entry window:
- In the HD view, locate and double-click the leave entry to report on. The Seniority & Leave Entry window opens with the leave entry loaded.
- Click .
- To report on all or a filtered subset of leave entries:
- Select the Options tab.
- Mark the checkbox(es) for the additional information to include:
- Timestamps
- Memos
- Custom Fields (only visible if custom fields are set up)
- Select the Output tab.
- In the Design field, look up and select the report design to use.
- In the toolbar, click the icon for the type of output you want:
- - Provides access to two preview options.
- Preview - Click the icon or click the drop-down arrow and select Preview from the drop-down menu to view the report in the Crystal Reports viewer.
- Preview to PDF - Click the drop-down arrow next to the icon and select Preview to PDF to view the report in the PDF reader.
- - Opens the Print dialog so that you can select and configure a printer and then print a paper copy of the report.
- - Opens the dialog so that you can address and compose an email that the report will be attached to. For best results, ensure your email client is running before you attempt to send a report via email.
- - Opens the Export Report dialog so that you can save the report to a file. File types include Crystal Reports (.rpt), PDF (.pdf), Microsoft Excel (.xls), Microsoft Word (.doc), rich text (.rtf), and XML (.xml).
Data extensions
The following data extension is available for the report:
- Leave entries
Leave Ledger Balances Listing
Purpose
The Leave Ledger Balances Listing shows employees' leave accrued, leave used, and beginning and ending leave balances for the reporting period.
Content
For each leave ledger included on the report, the listing shows:
- ledger description
- employee leave balance records.
For each employee leave ledger balance record, the listing shows:
- employee name
- employee code
- beginning leave balance
- leave accrued
- leave used
- ending leave balance.
In addition, you can include one or more of the following:
- detail (leave event date, leave accrued and/or used, ending balance)
- valuation (rate, valuation).
The following totals appear on the report:
- subtotals by attribute value (optional)
- ledger totals
- grand totals.
- In the Navigation pane, highlight the Payroll/Human Resources > Leave Plans > Leave Balances folder.
- Start the report set-up wizard.
- To report on all or a filtered subset of leave ledger balances:
- Right-click the Leave Balances folder and select Select and Report > Leave Ledger Balances Listing from the shortcut menu.
- On the Selection tab, define any filters to apply to the data.
- To report on specifically selected leave ledger balances:
- In the HD view, select the leave ledger balances to include on the report. You can use Ctrl and/or Shift selection to select multiple records.
- Click and select Leave Ledger Balances Listing from the drop-down menu.
- To report on all or a filtered subset of leave ledger balances:
- Select the Options tab.
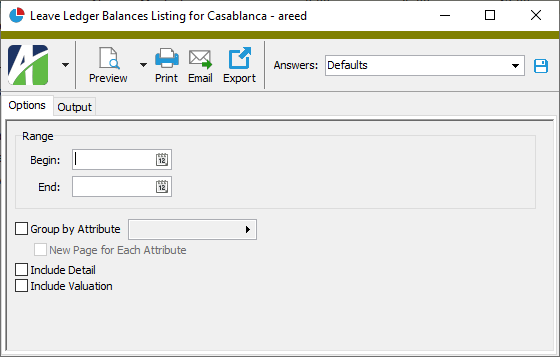
- In the Range section, enter the range of dates for which to include leave ledger balances on the report.
- To group leave balance records by attribute value, mark the Group by Attribute checkbox and select the attribute to group by.
- If you marked the Group by Attribute checkbox and specified an attribute and you want to start a new page for each change in the attribute value, mark the New Page for Each Attribute checkbox.
- Mark the checkbox(es) for the additional information to include:
- Detail
- Valuation
- To include a section at the end of the report with the report settings used to produce the report, leave the Include Report Options checkbox marked. To produce the report without this information, clear the checkbox.
- Select the Output tab.
- In the Design field, look up and select the report design to use.
- In the toolbar, click the icon for the type of output you want:
- - Provides access to two preview options.
- Preview - Click the icon or click the drop-down arrow and select Preview from the drop-down menu to view the report in the Crystal Reports viewer.
- Preview to PDF - Click the drop-down arrow next to the icon and select Preview to PDF to view the report in the PDF reader.
- - Opens the Print dialog so that you can select and configure a printer and then print a paper copy of the report.
- - Opens the dialog so that you can address and compose an email that the report will be attached to. For best results, ensure your email client is running before you attempt to send a report via email.
- - Opens the Export Report dialog so that you can save the report to a file. File types include Crystal Reports (.rpt), PDF (.pdf), Microsoft Excel (.xls), Microsoft Word (.doc), rich text (.rtf), and XML (.xml).
Data extensions
The following data extensions are available for the report:
- Employees
- Leave ledgers
Employee Seniority & Leave Ledger Balances
Purpose
The Employee Seniority & Leave Ledger Balances Report shows beginning and ending balances, accrual, and usage for the ledger-employee combinations in your selection over a specified time period.
Content
When run in detail mode, for each ledger on the report, the report shows:
- ledger name
- employee name
- last accrual date
- beginning balance
- accrual amount
- usage amount
- ending balance.
The following totals appear on the report:
- grand totals (leave entries, beginning balance, accrual, usage, ending balance)
Print the report
- In the Navigation pane, highlight the Payroll/Human Resources > Leave Plans > Leave Balances folder.
- Start the report set-up wizard.
- To report on all or a filtered subset of ledger balances:
- Right-click the Leave Balances folder and select Select and Report > Employee Seniority & Leave Ledger Balances from the shortcut menu.
- On the Selection tab, define any filters to apply to the data.
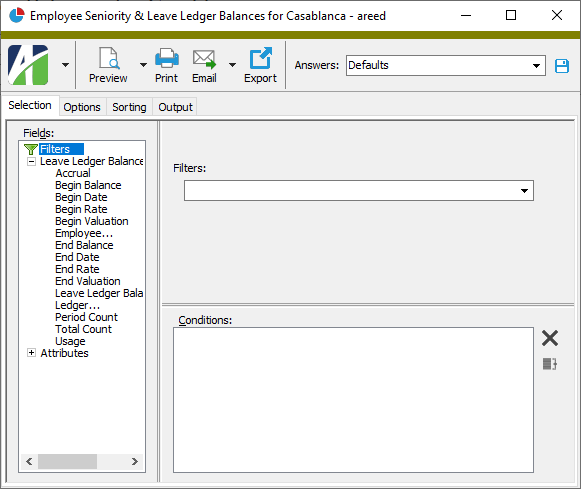
- To report on specifically selected ledger balances:
- In the HD view, select the ledger balances to include on the report. You can use Ctrl and/or Shift selection to select multiple records.
- Click and select Employee Seniority & Leave Ledger Balances from the drop-down menu.
- To report on all or a filtered subset of ledger balances:
- Select the Options tab.

- In the Begin Date and End Date fields, enter the range of dates for which to report ledger balances.
- Mark the Include Detail checkbox if you want the report to show the detail records included in your selection. Otherwise, the report shows grand totals only for beginning balance, accrual, usage, and ending balance.
- To include a section at the end of the report with the report settings used to produce the report, leave the Include Report Options checkbox marked. To produce the report without this information, clear the checkbox.
- Select the Sorting tab.
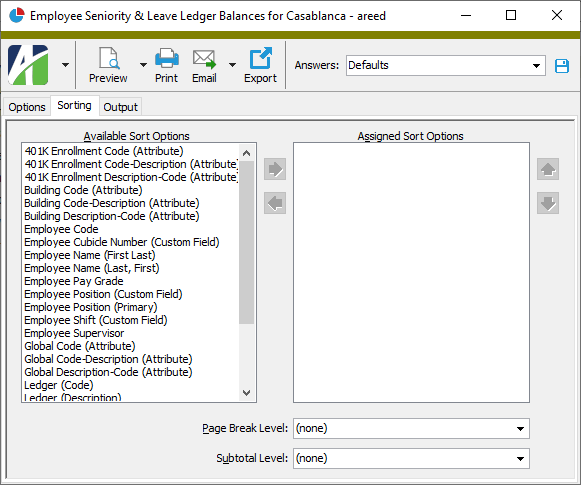
- In the Available Sort Options list box, highlight the field(s) to sort by, then click to move your selection(s) to the Assigned Sort Options list box.
- If you selected multiple sort fields, use and to arrange the sort fields in the order you want them applied.
- To start a new page for each change in one of the sorting options you specified, select the sorting option to break on from the Page Break Level drop-down list. If you do not want to insert page breaks, accept "(none)".
- To subtotal based on one of the sorting options you specified, select the sorting option to subtotal on from the Subtotal Through Level drop-down list. If you do not want to show subtotals, accept "(none)".
- Select the Output tab.
- In the Design field, look up and select the report design to use.
- In the toolbar, click the icon for the type of output you want:
- - Provides access to two preview options.
- Preview - Click the icon or click the drop-down arrow and select Preview from the drop-down menu to view the report in the Crystal Reports viewer.
- Preview to PDF - Click the drop-down arrow next to the icon and select Preview to PDF to view the report in the PDF reader.
- - Opens the Print dialog so that you can select and configure a printer and then print a paper copy of the report.
- - Opens the dialog so that you can address and compose an email that the report will be attached to. For best results, ensure your email client is running before you attempt to send a report via email.
- - Opens the Export Report dialog so that you can save the report to a file. File types include Crystal Reports (.rpt), PDF (.pdf), Microsoft Excel (.xls), Microsoft Word (.doc), rich text (.rtf), and XML (.xml).
Data extensions
The following data extensions are available for the report:
- Employees
- Leave ledgers
Checks Listing
Purpose
The Checks Listing provides a list of checks recorded in Payroll.
Content
For each check included on the report, the listing shows:
- batch - entry number
- employee code and name
- check date
- pay amount
- deduction/tax amount
- net pay
- separation/correction indicator.
In addition, you can include one or more of the following:
- check information (payroll run, description, merge number, liability account, bank account, pay period begin and end dates, pay periods per year, GL batch name)
- check lines (for each check detail line: work date, PRCode and description, source, rate, result)
- check line distributions (for each distribution line: work date, GL account and description, source, result)
- disbursements (whether disbursement has been voided, disbursement method, reference, amount, direct deposit account, account nickname, account type)
- disbursement date, GL date, and GL bank account
- payee
- timestamps
- memos
- custom fields.
The following total appears on the report:
- grand totals.
Print the report
- In the Navigation pane, highlight the Payroll/Human Resources > Checks folder.
- Start the report set-up wizard.
- To report on all or a filtered subset of checks:
- Right-click the Checks folder and select Select and Report > Checks Listing from the shortcut menu.
- On the Selection tab, define any filters to apply to the data.

- To report on specifically selected checks:
- In the HD view, select the checks to include on the report. You can use Ctrl and/or Shift selection to select multiple records.
- Click and select Checks Listing from the drop-down menu.
- To report on a particular check from the Check window:
- In the HD view, locate and double-click the check to report on. The Check window opens with the check loaded.
- Click and select Checks Listing from the drop-down menu.
- To report on all or a filtered subset of checks:
- Select the Options tab.

- Mark the checkbox(es) for the additional information to include:
- Check Information
- Check Lines
- Check Line Distributions
- Disbursements - If you mark this checkbox, the following checkboxes are enabled:
- Dates and GL Accounts - Includes disbursement dates, GL dates, and GL accounts.
- Payee
- Report Options. To include a section at the end of the report with the report settings used to produce the report, leave the checkbox marked. To produce the report without this information, clear the checkbox.
- Timestamps
- Memos
- Custom Fields (only visible if custom fields are set up)
- Select the Sorting tab.

- In the Available Sort Options list box, highlight the field(s) to sort the report by, then click to move your selection(s) to the Assigned Sort Options list box.
- If you selected multiple sort fields, use and to arrange the sort fields in the order you want them applied.
- To start a new page for each change in one of the sorting options you specified, select the sorting option to break on from the Page Break Level drop-down list. If you do not want to insert page breaks, accept "(none)".
- To subtotal based on one of the sorting options you specified, select the sorting option to subtotal on from the Subtotal Level drop-down list. If you do not want to show subtotals, accept "(none)".
- Select the Output tab.
- In the Design field, look up and select the report design to use.
There are four built-in report designs for the Checks Listing:
- Checks - This design shows check information by batch - entry number. For each check, the report shows employee code and name, check date, gross pay, deduction and tax amount, net pay, the void flag, disbursement method, reference information, and the amount disbursed. For direct deposits, the report also shows the account number, account nickname, and account type. This design supports page break and subtotal levels.
- Checks Proof - This design is especially for proofing checks. For each check on the listing, information is broken out by employee and employer. The Employee section has Pay, Deductions, and Taxes subsections; the Employer section has Deductions, Taxes, and Statistics subsections. This design supports page break and subtotal levels.
- Checks Proof Color - This design is the same as the Checks Proof design except that it renders pay amounts in
green ; employee deduction and tax amounts inred ; employer deduction, tax, and statistic amounts inblue , matching the color scheme on the Lines tab of the Check window. This design supports page break and subtotal levels. - Checks Sign-off - This design provides a list of checks for sign-off. For each printed check with a non-blank check number, the report shows employee name and code, check date, check number, and provides space for a signature. This design ignores selections on the Options tab and does NOT support page break and subtotal levels.
- In the toolbar, click the icon for the type of output you want:
- - Provides access to two preview options.
- Preview - Click the icon or click the drop-down arrow and select Preview from the drop-down menu to view the report in the Crystal Reports viewer.
- Preview to PDF - Click the drop-down arrow next to the icon and select Preview to PDF to view the report in the PDF reader.
- - Opens the Print dialog so that you can select and configure a printer and then print a paper copy of the report.
- - Opens the dialog so that you can address and compose an email that the report will be attached to. For best results, ensure your email client is running before you attempt to send a report via email.
- - Opens the Export Report dialog so that you can save the report to a file. File types include Crystal Reports (.rpt), PDF (.pdf), Microsoft Excel (.xls), Microsoft Word (.doc), rich text (.rtf), and XML (.xml).
Data extensions
The following data extensions are available for the report:
- Employees
- Checks
- Check lines
- Check line distributions
- Check disbursements
Check GL Detail Report
Purpose
The Check GL Detail Report shows GL detail for checks recorded in the ActivityHD Payroll package. The report provides insight into the effect of payroll checks on journal detail.
Content
For each check included on the report, the report shows:
- employee code
- employee name
- check date
- batch - entry number
- net check amount
- GL detail records.
For each GL detail record, the report shows:
- GL account number and name
- date
- GL batch - entry - line
- debit amount
- credit amount.
In addition, you can include one or more of the following:
- detail
- attributes which post to GL
- grand totals.
The following totals appear on the report:
- debit and credit totals by journal entry type per employee
- grand totals (optional).
Print the report
- In the Navigation pane, highlight the Payroll/Human Resources > Checks folder.
- Start the report set-up wizard.
- To report on all or a filtered subset of checks:
- Right-click the Checks folder and select Select and Report > Check GL Detail Report from the shortcut menu.
- On the Selection tab, define any filters to apply to the data.

- To report on specifically selected checks:
- In the HD view, select the checks to include on the report. You can use Ctrl and/or Shift selection to select multiple records.
- Click and select Check GL Detail Report from the drop-down menu.
- To report on a particular check from the Check window:
- In the HD view, locate and double-click the check to report on. The Check window opens with the check loaded.
- Click and select Check GL Detail Report from the drop-down menu.
- To report on all or a filtered subset of checks:
- Select the Options tab.

- To run the report for a particular GL batch, enter the batch name in the Batch field.
- To run the report for GL detail records with a particular entry number, type the number in the Entry # field.
- In the Journal Entry Type section, mark the checkbox for each type of journal entry record to include on the report. Your options are:
- Accrual
- Liability
- Cash
- To restrict the report by GL account, enter a GL account mask or a specific GL account number in the GL Account field.
- To restrict the report to GL postings in a particular date range, type the range of GL dates in the GL Begin Date and GL End Date fields.
- Mark the checkbox(es) for the additional information to include:
- Detail
- Attributes that Post to GL
- Grand Totals
- To include a section at the end of the report with the report settings used to produce the report, leave the Include Report Options checkbox marked. To produce the report without this information, clear the checkbox.
- Select the Sorting tab.

- In the Available Sort Options list box, highlight the field(s) to sort the report by, then click to move your selection(s) to the Assigned Sort Options list box.
- If you selected multiple sort fields, use and to arrange the sort fields in the order you want them applied.
- Select the Output tab.
- In the Design field, look up and select the report design to use.
- In the toolbar, click the icon for the type of output you want:
- - Provides access to two preview options.
- Preview - Click the icon or click the drop-down arrow and select Preview from the drop-down menu to view the report in the Crystal Reports viewer.
- Preview to PDF - Click the drop-down arrow next to the icon and select Preview to PDF to view the report in the PDF reader.
- - Opens the Print dialog so that you can select and configure a printer and then print a paper copy of the report.
- - Opens the dialog so that you can address and compose an email that the report will be attached to. For best results, ensure your email client is running before you attempt to send a report via email.
- - Opens the Export Report dialog so that you can save the report to a file. File types include Crystal Reports (.rpt), PDF (.pdf), Microsoft Excel (.xls), Microsoft Word (.doc), rich text (.rtf), and XML (.xml).
Data extensions
The following data extensions are available for the report:
- Employees
- Checks
- Check lines
- Check line distributions
- Check disbursements
- Accounts
Checks GL Summary Report
Purpose
The Checks GL Summary Report summarizes GL information by account for checks recorded in the Payroll package. The report provides insight into the effect of payroll checks on journal detail.
Content
For each GL account represented on the report, the report shows:
- account number and name
- total debits
- total credits.
The following totals appear on the report:
- attribute subtotals (optional)
- grand totals.
Print the report
- In the Navigation pane, highlight the Payroll/Human Resources > Checks folder.
- Start the report set-up wizard.
- To report on all or a filtered subset of checks:
- Right-click the Checks folder and select Select and Report > Checks GL Summary Report from the shortcut menu.
- On the Selection tab, define any filters to apply to the data.

- To report on specifically selected checks:
- In the HD view, select the checks to include on the report. You can use Ctrl and/or Shift selection to select multiple records.
- Click and select Checks GL Summary Report from the drop-down menu.
- To report on a particular check from the Check window:
- In the HD view, locate and double-click the check to report on. The Check window opens with the check loaded.
- Click and select Checks GL Summary Report from the drop-down menu.
- To report on all or a filtered subset of checks:
- Select the Options tab.

- To run the report for a particular GL batch, enter the batch name in the Batch field.
- To run the report for GL entries with a particular entry number, type the number in the Entry # field.
- In the Journal Entry Type section, mark the checkbox for each type of journal entry record to include on the report. Your options are:
- Accrual. Corresponds to distribution lines.
- Liability. Corresponds to check lines.
- Cash. Corresponds to disbursement lines.
- To restrict the report by GL account, enter a GL account mask or a specific GL account number in the GL Account field.
- To restrict the report to GL postings in a particular date range, enter the range of GL dates in the GL Begin Date and GL End Date fields.
- To subtotal summary information by attribute, mark the Subtotal by Employee Attribute checkbox and select the attribute in the field below.
- To show the attributes which post to GL, mark the Display Attributes that Post to GL checkbox.
- To include a section at the end of the report with the report settings used to produce the report, leave the Include Report Options checkbox marked. To produce the report without this information, clear the checkbox.
- Select the Output tab.
- In the Design field, look up and select the report design to use.
- In the toolbar, click the icon for the type of output you want:
- - Provides access to two preview options.
- Preview - Click the icon or click the drop-down arrow and select Preview from the drop-down menu to view the report in the Crystal Reports viewer.
- Preview to PDF - Click the drop-down arrow next to the icon and select Preview to PDF to view the report in the PDF reader.
- - Opens the Print dialog so that you can select and configure a printer and then print a paper copy of the report.
- - Opens the dialog so that you can address and compose an email that the report will be attached to. For best results, ensure your email client is running before you attempt to send a report via email.
- - Opens the Export Report dialog so that you can save the report to a file. File types include Crystal Reports (.rpt), PDF (.pdf), Microsoft Excel (.xls), Microsoft Word (.doc), rich text (.rtf), and XML (.xml).
Outstanding Checks Report
Purpose
The Outstanding Checks Report provides information about the checks that contribute to an outstanding balance on a payroll liability account.
The report answers the question: "Why isn't the balance on the payroll liability account zero?" This situation usually occurs when there are checks with accruals in one GL period and liabilities and disbursements in the subsequent period. This report identifies these outstanding checks to help you in reconciling to GL.
Content
For each outstanding check included on the report, the listing shows:
- batch - entry number
- check date
- employee code
- employee name
- distributions
- liabilities
- disbursements
- balance.
The following totals appear on the report:
- grand totals.
Print the report
- In the Navigation pane, highlight the Payroll/Human Resources > Checks folder.
- Start the report set-up wizard.
- To report on all or a filtered subset of checks:
- Right-click the Checks folder and select Select and Report > Outstanding Checks Report from the shortcut menu.
- On the Selection tab, define any filters to apply to the data.

- To report on specifically selected checks:
- In the HD view, select the checks to include on the report. You can use Ctrl and/or Shift selection to select multiple records.
- Click and select Outstanding Checks Report from the drop-down menu.
- To report on a particular check from the Check window:
- In the HD view, locate and double-click the check to report on. The Check window opens with the check loaded.
- Click and select Outstanding Checks Report from the drop-down menu.
- To report on all or a filtered subset of checks:
- Select the Options tab.

- In the Liability Account field, select the number of the payroll liability account you are trying to reconcile.
-
In the Ending Date field, enter the date as of which to include checks with an outstanding balance.
Note
Though voided checks and reversal checks will have a non-zero balance, they do not appear on this report if the corresponding reversals or voided checks fall within the date range of the report, thus netting to zero.
- To include a section at the end of the report with the report settings used to produce the report, leave the Include Report Options checkbox marked. To produce the report without this information, clear the checkbox.
- Select the Output tab.
- In the Design field, look up and select the report design to use.
- In the toolbar, click the icon for the type of output you want:
- - Provides access to two preview options.
- Preview - Click the icon or click the drop-down arrow and select Preview from the drop-down menu to view the report in the Crystal Reports viewer.
- Preview to PDF - Click the drop-down arrow next to the icon and select Preview to PDF to view the report in the PDF reader.
- - Opens the Print dialog so that you can select and configure a printer and then print a paper copy of the report.
- - Opens the dialog so that you can address and compose an email that the report will be attached to. For best results, ensure your email client is running before you attempt to send a report via email.
- - Opens the Export Report dialog so that you can save the report to a file. File types include Crystal Reports (.rpt), PDF (.pdf), Microsoft Excel (.xls), Microsoft Word (.doc), rich text (.rtf), and XML (.xml).
Data extensions
The following data extensions are available for the report:
- Employees
- Checks
Pay Statements
Purpose
The Pay Statements report produces employee notices about pay, whether printed check or direct deposit. The report is formatted like a direct deposit stub.
If your organization uses employee Self-Serve, you can post employees' pay statements online. ActivityHD makes the primary attachment on check records viewable on the Self-Serve site. By default, the pay statement is set as the primary attachment on check records.
Note
Only pay statements for merged checks with a pay statement attachment can be viewed in Employees Self-Serve.
Tip
Pay statements can be scheduled for background printing. So, if you generate payroll on a Monday but do not want pay statements to go out until Wednesday when the funds are available, you can schedule the pay statements to be emailed automatically on Wednesday morning.
Content
For each check for which you are creating a pay statement, the pay statement shows:
- employee name
- pay period end date
- FINAL/CORRECTION indicator, if applicable
- check date
- employee code
- current and year-to-date taxable gross
- current and year-to-date net pay
- wage information (segment item code, hours, rate, current amount, year-to-date amount, totals)
- deduction information (segment item code, current amount, year-to-date amount, totals)
- paid benefit information (segment item code, current amount, year-to-date amount, totals)
- tax information (segment item code, current amount, year-to-date amount, totals)
- reimbursement information (segment item code, current amount, year-to-date amount, totals)
- disbursements (pay method, account number, account type, current amount, year-to-date amount, source).
In addition, you can include:
- unmerged checks
- unmarked disbursements.
Print the report
- In the Navigation pane, highlight the Payroll/Human Resources > Checks folder.
- Start the report set-up wizard.
- To create pay statements for all or a filtered subset of checks:
- Right-click the Checks folder and select Select and Report > Pay Statements from the shortcut menu.
- On the Selection tab, define any filters to apply to the checks.

- To create pay statements for specifically selected checks:
- In the HD view, select the checks to print pay statements for. You can use Ctrl and/or Shift selection to select multiple checks.
- Click and select Pay Statements from the drop-down menu.
- To create a pay statement for a particular check from the Check window:
- In the HD view, locate and double-click the check you want to print a pay statement for. The Check window opens with the check loaded.
- Click and select Pay Statements from the drop-down menu.
- To create pay statements for all or a filtered subset of checks:
- Select the Options tab.
- Mark the checkbox(es) for the additional information to include:
- Unmerged Checks
- Unmarked Disbursements
- To include a section at the end of the report with the report settings used to produce the report, leave the Include Report Options checkbox marked. To produce the report without this information, clear the checkbox.
- In the Available Sort Options list box, highlight the field(s) to sort the pay statements by, then click to move your selection(s) to the Assigned Sort Options list box.
- If you selected multiple sort fields, use and to arrange the sort fields in the order you want them applied.
-
To include a message on the pay statements (provided the selected pay statement design incorporates it), enter the text in the Message field.
Note
The built-in sample pay statement design, "Pay Statement Sample", incorporates the message field.
-
To send pay statements to employees using the Email > Email to Employees feature, select the Email Defaults tab to set up the default email content. Otherwise, skip to step 13.

- From the From drop-down list, select the email account from which to send the email. Your options are:
- Windows user default account. Sends email using the user's Windows default email account. For most users, this is the account configured in Outlook or another email client application.
- Server personal. Sends email using the email configuration for the system or company server and the email address on the current user's authorized user record. The authorized user record must have a confirmed email address.
- Server generic. Sends email using the email configuration and "from" address for the system or company server. This option requires "Send generic" access to the Server Email resource.
- Use the CC and BCC fields to enter any email addresses to copy and/or blind copy on the pay statement emails. Separate email addresses with semi-colons.
- Enter a Subject and body for the email. You can use keywords to customize the content of the subject line and body text of the email. Keywords are replaced in the resulting email with the corresponding check and employee information. Click to see the keywords available for use when you customize an email for pay statements.
- Select the Output tab.
-
In the Design field, look up and select the report design to use.
Note
Federal W-4 and state W-4 information is available in the data stream for easy inclusion on pay statements. Contact AccountingWare Support for assistance.
- In the toolbar, click the icon for the type of output you want:
- - Provides access to two preview options.
- Preview - Click the icon or click the drop-down arrow and select Preview from the drop-down menu to view the report in the Crystal Reports viewer.
- Preview to PDF - Click the drop-down arrow next to the icon and select Preview to PDF to view the report in the PDF reader.
- - Opens the Print dialog so that you can select and configure a printer and then print a paper copy of the pay statements.
- - Opens a drop-down menu so that you can select whom to send the email to. Select Email to send the pay statements to a list of recipients you specify. Select Email to Employees to send each employee a copy of their pay statement.
- - Opens the Export Report dialog so that you can save the pay statements to a file. File types include Crystal Reports (.rpt), PDF (.pdf), Microsoft Excel (.xls), Microsoft Word (.doc), rich text (.rtf), and XML (.xml).
 - Attaches a copy of the pay statements to the corresponding check records. The PDF attachment can be viewed from an employee Self-Serve system. This command sets the Primary Attachment flag which controls what is seen on the Self-Serve site.
Note
The Attach command in the Print Checks wizard does NOT control the Primary Attachment flag.
Data extensions
The following data extensions are available for the report:
- Checks
- Employees
- Check disbursements
- Check stub items
State Tax Liability Report
Purpose
The State Tax Liability Report shows your state and local income tax, disability, unemployment, family leave, and other tax liability.
Content
For each included tax entity, when run with the default settings, the report shows:
- number of checks
- number of employees
- tax category (income tax, disability, unemployment, other)
- tax responsibility (state, local, employee, or employer)
- total wages
- taxable wages
- excess wages
- total tax liability per tax entity by tax category.
You can include information for one or more of the following tax categories. You must include at least one category.
- income tax
- disability
- unemployment
- family leave
- other.
You can include or exclude one or more of the following:
- detail of local income tax
- detail of "Other" category
- check detail.
When check detail is shown, the following information is also provided:
- batch name and number
- check date
- employee number and name
- tax category
- tax responsibility
- total wages
- taxable wages
- excess wages
- total tax liability per check.
The following totals appear on the report:
- totals by tax entity.
Print the report
- In the Navigation pane, highlight the Payroll/Human Resources > Checks folder.
- Start the report set-up wizard.
- To report on all or a filtered subset of checks:
- Right-click the Checks folder and select Select and Report > State Tax Liability Report from the shortcut menu.
- On the Selection tab, define any filters to apply to the data.

- To report on specifically selected checks:
- In the HD view, select the checks to include on the report. You can use Ctrl and/or Shift selection to select multiple records.
- Click and select State Tax Liability Report from the drop-down menu.
- To report on a particular check from the Check window:
- In the HD view, locate and double-click the check to report on. The Check window opens with the check loaded.
- Click and select State Tax Liability Report from the drop-down menu.
- To report on all or a filtered subset of checks:
- Select the Options tab.

- In the Date Range fields, enter the range of check dates for which to include checks on the report. The report includes both merged and unmerged checks for the date range you specify.
- To limit the report to a single US state, mark the Tax Entity checkbox, then select the tax entity in the adjacent field. Leave the checkbox cleared to report on all tax entities.
- In the Category group, select one or more categories of tax to include on the report. All categories are selected by default. You must include at least one tax category. Your options include:
- Income Tax. Reports on check lines assigned to the "Income Tax" group and assigned to a state or local tax entity.
- Disability. Reports on check lines assigned to the "Disability" group and assigned to a state or local tax entity.
- Unemployment. Reports on check lines assigned to the "Unemployment" group and assigned to a state or local tax entity.
- Family Leave. Reports on check lines assigned to the "FamilyLeaveTax" group and assigned to a state or local tax entity.
- Other. Reports on check lines that have a tax PRCode which is assigned to a state or local tax entity but that are not assigned to one of the preceding groups.
- Mark the checkbox(es) for the additional information to include:
- Detail of Local Income Tax. This checkbox is enabled if the Income Tax category is selected. Mark this checkbox to report local income tax broken down by local tax entity. This option is marked by default.
- Detail of "Other" Category. This checkbox is enabled if the Other category is selected. Mark this checkbox to report other tax broken down by PRCode. This option is marked by default.
- Checks. Mark this checkbox to show the check detail behind the totals on the report.
- To include a section at the end of the report with the report settings used to produce the report, leave the Include Report Options checkbox marked. To produce the report without this information, clear the checkbox.
-
Select the Sorting tab. The sort options affect the order of the check detail. If you do not include check detail on the report, you can skip this tab; the selections here will have no effect on the report output if check detail is not included.

- In the Available Sort Options list box, highlight the field(s) to sort the report by, then click to move your selection(s) to the Assigned Sort Options list box.
- If you selected multiple sort fields, use and to arrange the sort fields in the order you want them applied.
-
Select the Check Line tab.

If you need to further limit check lines, define the filter(s) to apply to check line data. Use of this tab should be rare; however, for example, if you need to exclude tax PRCodes which should not be reported as "Other" taxes, you can define the appropriate filter(s) here.
- Select the Output tab.
- In the Design field, look up and select the report design to use.
- In the toolbar, click the icon for the type of output you want:
- - Provides access to two preview options.
- Preview - Click the icon or click the drop-down arrow and select Preview from the drop-down menu to view the report in the Crystal Reports viewer.
- Preview to PDF - Click the drop-down arrow next to the icon and select Preview to PDF to view the report in the PDF reader.
- - Opens the Print dialog so that you can select and configure a printer and then print a paper copy of the report.
- - Opens the dialog so that you can address and compose an email that the report will be attached to. For best results, ensure your email client is running before you attempt to send a report via email.
- - Opens the Export Report dialog so that you can save the report to a file. File types include Crystal Reports (.rpt), PDF (.pdf), Microsoft Excel (.xls), Microsoft Word (.doc), rich text (.rtf), and XML (.xml).
Data extensions
The following data extensions are available for the report:
- Employees
- Checks
USA Tax Liability Report
Purpose
The USA Tax Liability Report shows your income tax, social security, Medicare, and total tax liability.
Content
For each total or subtotal on the report, the report shows:
- number of checks
- number of employees
- income tax liability
- employee social security liability
- employer social security liability
- total social security liability
- employee Medicare liability
- extra Medicare liability
- employer Medicare liability
- total Medicare liability
- total tax liability.
In addition, you can include one or more of the following:
- taxable wages
- liability by check.
The following totals appear on the report:
- grand totals
- check count
- employee count.
Print the report
- In the Navigation pane, highlight the Payroll/Human Resources > Checks folder.
- Start the report set-up wizard.
- To report on all or a filtered subset of checks:
- Right-click the Checks folder and select Select and Report > USA Tax Liability Report from the shortcut menu.
- On the Selection tab, define any filters to apply to the data.

- To report on specifically selected checks:
- In the HD view, select the checks to include on the report. You can use Ctrl and/or Shift selection to select multiple records.
- Click and select USA Tax Liability Report from the drop-down menu.
- To report on a particular check from the Check window:
- In the HD view, locate and double-click the check to report on. The Check window opens with the check loaded.
- Click and select USA Tax Liability Report from the drop-down menu.
- To report on all or a filtered subset of checks:
- Select the Options tab.

- In the Subtotal by section, mark the checkbox(es) for the subtotal(s) to show on the report. Your options are:
- Day
- Month
- Quarter
- Year
- To show wages subject to each tax, mark the Include Taxable Wages checkbox.
- To subtract group totals for "3rdPartySickPayTax", "3rdPartySickPaySS", and "3rdPartySickPayMed" from the tax liabilities, mark the Subtract Third-party Sick Pay checkbox.
- To show liability breakdown by check, mark the Include Checks checkbox.
- If you mark the Include Checks checkbox, the Employee Order field is enabled. Select how to sort employee checks on the report. Your options are:
- Code. Use the employee code.
- First Name First
- Last Name First
- To include a section at the end of the report with the report settings used to produce the report, leave the Include Report Options checkbox marked. To produce the report without this information, clear the checkbox.
- Select the Output tab.
- In the Design field, look up and select the report design to use.
- In the toolbar, click the icon for the type of output you want:
- - Provides access to two preview options.
- Preview - Click the icon or click the drop-down arrow and select Preview from the drop-down menu to view the report in the Crystal Reports viewer.
- Preview to PDF - Click the drop-down arrow next to the icon and select Preview to PDF to view the report in the PDF reader.
- - Opens the Print dialog so that you can select and configure a printer and then print a paper copy of the report.
- - Opens the dialog so that you can address and compose an email that the report will be attached to. For best results, ensure your email client is running before you attempt to send a report via email.
- - Opens the Export Report dialog so that you can save the report to a file. File types include Crystal Reports (.rpt), PDF (.pdf), Microsoft Excel (.xls), Microsoft Word (.doc), rich text (.rtf), and XML (.xml).
Data extensions
The following data extensions are available for the report:
- Employees
- Checks
Check Lines Listing
Purpose
The Check Lines Listing provides a list of check lines recorded in Payroll.
Content
For each check line included on the report, the listing shows:
- PRCode and description
- batch - entry number
- for garnishments, the garnishment record number
- work date
- source
- rate
- result.
In addition, you can include:
- memos.
The following totals appear on the report:
- employee totals (check line count, pay, deductions, tax, source, result) or PRCode totals (check line count, source, result)
- report totals (check line count, pay, deductions, tax, source, result).
Print the report
- In the Navigation pane, highlight the Payroll/Human Resources > Checks > Check Lines folder.
- Start the report set-up wizard.
- To report on all or a filtered subset of check lines:
- Right-click the Check Lines folder and select Select and Report > Check Lines Listing from the shortcut menu.
- On the Selection tab, define any filters to apply to the data.
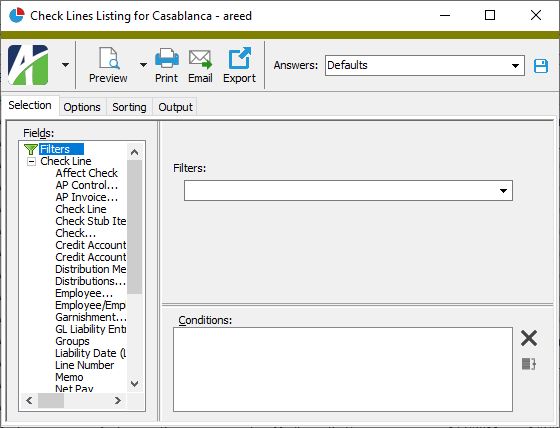
- To report on specifically selected check lines:
- In the HD view, select the check lines to include on the report. You can use Ctrl and/or Shift selection to select multiple records.
- Click and select Check Lines Listing from the drop-down menu.
- To report on a particular check line from the Check Line window:
- In the HD view, locate and double-click the check line to report on. The Check Line window opens with the check line loaded.
- Click and select Check Lines Listing from the drop-down menu.
- To report on all or a filtered subset of check lines:
- Select the Options tab.
- In the Group By field, select how to group check lines on the report. Your options are:
- Employee
- PRCode
- In the Include field, select the information to include on the report. Your options are:
- Detail
- Totals Only
- In the Employee Order field, select the sort order for employee records on the report. Your options are:
- Code - Base the sort order on the employee code.
- First Name First
- Last Name First
- To include a section at the end of the report with the report settings used to produce the report, leave the Include Report Options checkbox marked. To produce the report without this information, clear the checkbox.
- To include check line memos on the report, mark the Include Memos checkbox.
- Select the Sorting tab.

- In the Available Sort Options list box, highlight the field(s) to sort the report by, then click to move your selection(s) to the Assigned Sort Options list box.
- If you selected multiple sort fields, use and to arrange the sort fields in the order you want them applied.
- Select the Output tab.
- In the Design field, look up and select the report design to use.
- In the toolbar, click the icon for the type of output you want:
- - Provides access to two preview options.
- Preview - Click the icon or click the drop-down arrow and select Preview from the drop-down menu to view the report in the Crystal Reports viewer.
- Preview to PDF - Click the drop-down arrow next to the icon and select Preview to PDF to view the report in the PDF reader.
- - Opens the Print dialog so that you can select and configure a printer and then print a paper copy of the report.
- - Opens the dialog so that you can address and compose an email that the report will be attached to. For best results, ensure your email client is running before you attempt to send a report via email.
- - Opens the Export Report dialog so that you can save the report to a file. File types include Crystal Reports (.rpt), PDF (.pdf), Microsoft Excel (.xls), Microsoft Word (.doc), rich text (.rtf), and XML (.xml).
Data extensions
The following data extensions are available for the report:
- Employees
- Checks
- Check lines
Payroll Group Analysis
Purpose
The Payroll Group Analysis report shows payroll details by check line group. You can specify a list of groups and up to five levels of subtotals. You can even subtotal on custom fields defined for employees and checks. This report can produce the numbers you need to fill out Form 940.
Content
When run to show detail, for each check line included on the report, the report shows:
- employee code
- employee name
- check date or work date
- batch - entry number - line number
- PRCode
- garnishment record number (when applicable)
- source
- rate
- result.
The following totals appear on the report:
- grand totals.
Print the report
- In the Navigation pane, highlight the Payroll/Human Resources > Checks > Check Lines folder.
- Start the report set-up wizard.
- To report on all or a filtered subset of check lines:
- Right-click the Check Lines folder and select Select and Report > Payroll Group Analysis from the shortcut menu.
- On the Selection tab, define any filters to apply to the data.
- To report on specifically selected check lines:
- In the HD view, select the check lines to include on the report. You can use Ctrl and/or Shift selection to select multiple records.
- Click and select Payroll Group Analysis from the drop-down menu.
- To report on a particular check line from the Check Line window:
- In the HD view, locate and double-click the check line to report on. The Check Line window opens with the check line loaded.
- Click and select Payroll Group Analysis from the drop-down menu.
- To report on all or a filtered subset of check lines:
- Select the Options tab.
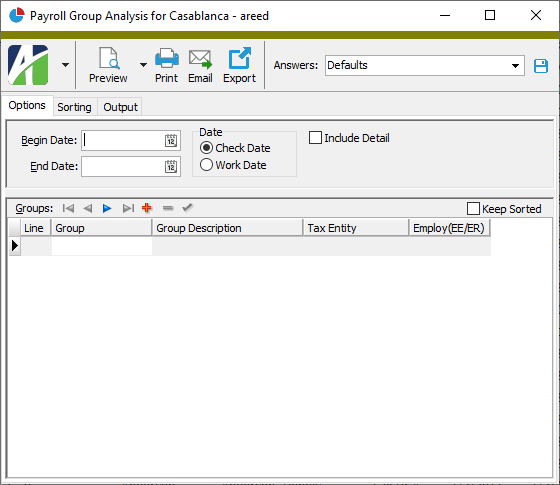
- In the Begin Date and End Date fields, enter the range of dates for which to include information on the report.
- In the Date field, select the type of date to use to select the check lines to include on the report. Your options are:
- Check Date
- Work Date
Note
The type of date you select here affects only the selection of check lines included on the report. Other information reflected on the report (e.g., employee attributes, position, supervisor, pay rate) is always evaluated as of the work date on the check line.
- To see check line detail rather than report totals only, mark the Include Detail checkbox.
- To include a section at the end of the report with the report settings used to produce the report, leave the Include Report Options checkbox marked. To produce the report without this information, clear the checkbox.
- In the Groups table, enter the check line group(s) to include information for on the report.
- Select the Sorting tab.
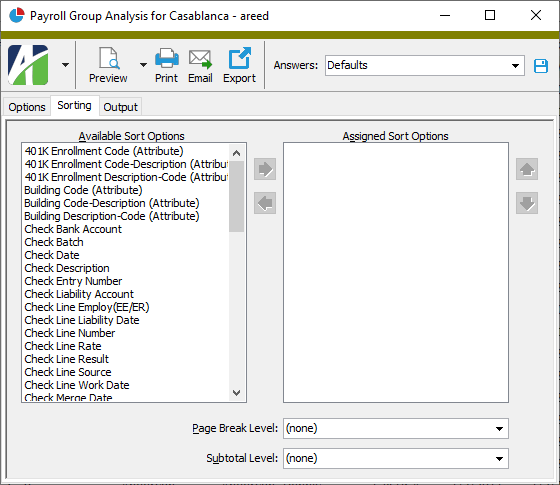
- In the Available Sort Options list box, highlight the field(s) to sort the report by, then click to move your selection(s) to the Assigned Sort Options list box.
- If you selected multiple sort fields, use and to arrange the sort fields in the order you want them applied.
- To start a new page for each change in one of the sorting options you specified, select the sorting option to break on from the Page Break Level drop-down list. If you do not want to insert page breaks, accept "(none)".
- To subtotal on one of the sorting options you specified, select the sorting option to subtotal on from the Subtotal Through Level drop-down list. If you do not want to show subtotals, accept "(none)".
- Select the Output tab.
- In the Design field, look up and select the report design to use.
- In the toolbar, click the icon for the type of output you want:
- - Provides access to two preview options.
- Preview - Click the icon or click the drop-down arrow and select Preview from the drop-down menu to view the report in the Crystal Reports viewer.
- Preview to PDF - Click the drop-down arrow next to the icon and select Preview to PDF to view the report in the PDF reader.
- - Opens the Print dialog so that you can select and configure a printer and then print a paper copy of the report.
- - Opens the dialog so that you can address and compose an email that the report will be attached to. For best results, ensure your email client is running before you attempt to send a report via email.
- - Opens the Export Report dialog so that you can save the report to a file. File types include Crystal Reports (.rpt), PDF (.pdf), Microsoft Excel (.xls), Microsoft Word (.doc), rich text (.rtf), and XML (.xml).
Data extensions
The following data extensions are available for the report:
- Employees
- Checks
- Check lines
- Groups
Check Distributions Listing
Purpose
The Check Distributions Listing provides a list of check distribution records in Payroll.
Content
For each check distribution included on the report, the listing shows:
- batch - entry - line - distribution number
- PRCode
- GL date
- source
- result.
The following totals appear on the report:
- account totals per employee
- distribution line count per account per employee
- source amount per account per employee
- result amount per account per employee
- employee totals or account totals
- grand totals.
Print the report
- In the Navigation pane, highlight the Payroll/Human Resources > Checks > Distributions folder.
- Start the report set-up wizard.
- To report on all or a filtered subset of check distributions:
- Right-click the Distributions folder and select Select and Report > Check Distributions Listing from the shortcut menu.
- On the Selection tab, define any filters to apply to the data.
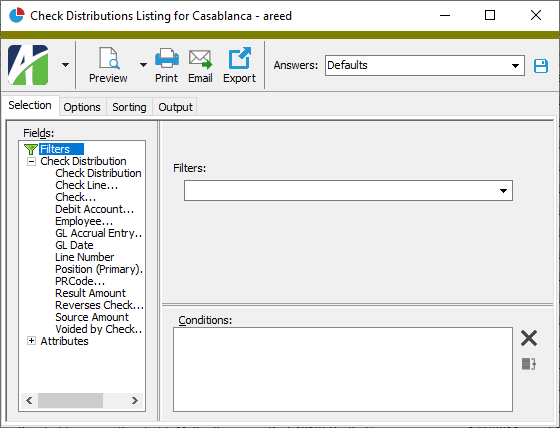
- To report on specifically selected check distributions:
- In the HD view, select the check distributions to include on the report. You can use Ctrl and/or Shift selection to select multiple records.
- Click and select Check Distributions Listing from the drop-down menu.
- To report on a particular check distribution from the Distribution window:
- In the HD view, locate and double-click the check distribution to report on. The Distribution window opens with the check distribution loaded.
- Click and select Check Distributions Listing from the drop-down menu.
- To report on all or a filtered subset of check distributions:
- Select the Options tab.
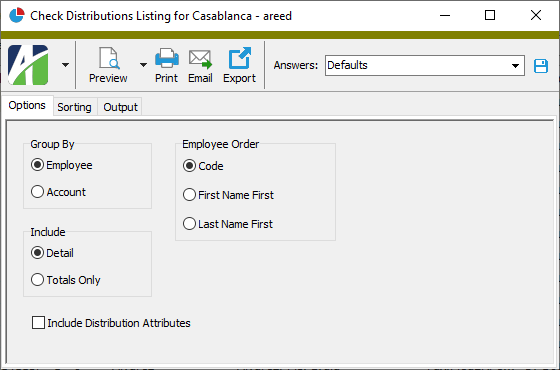
- In the Group By field, select how to group distribution records on the report. Your options are:
- Employee
- Account
- In the Employee Order field, select the sort order for employee records on the report. Your options are:
- Code - Base the sort order on the employee code.
- First Name First
- Last Name First
- In the Include field, select the information to include on the report. Your options are:
- Detail
- Totals Only
- If you selected "Detail" in the Include field, the Include Distribution Attributes checkbox is enabled. Mark the checkbox to include a second line for each distribution line which shows the associated distribution attributes and their values.
- To include a section at the end of the report with the report settings used to produce the report, leave the Include Report Options checkbox marked. To produce the report without this information, clear the checkbox.
- Select the Sorting tab.
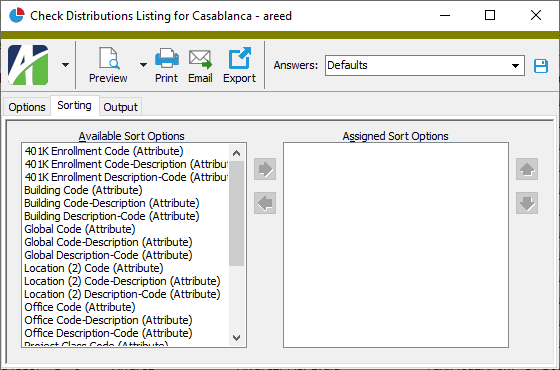
- In the Available Sort Options list box, highlight the field(s) to sort the report by, then click to move your selection(s) to the Assigned Sort Options list box.
- If you selected multiple sort fields, use and to arrange the sort fields in the order you want them applied.
- Select the Output tab.
- In the Design field, look up and select the report design to use.
- In the toolbar, click the icon for the type of output you want:
- - Provides access to two preview options.
- Preview - Click the icon or click the drop-down arrow and select Preview from the drop-down menu to view the report in the Crystal Reports viewer.
- Preview to PDF - Click the drop-down arrow next to the icon and select Preview to PDF to view the report in the PDF reader.
- - Opens the Print dialog so that you can select and configure a printer and then print a paper copy of the report.
- - Opens the dialog so that you can address and compose an email that the report will be attached to. For best results, ensure your email client is running before you attempt to send a report via email.
- - Opens the Export Report dialog so that you can save the report to a file. File types include Crystal Reports (.rpt), PDF (.pdf), Microsoft Excel (.xls), Microsoft Word (.doc), rich text (.rtf), and XML (.xml).
Note
Detail sorts first by the options you specify and then by check batch, check entry number, check line order, and distribution order.
Data extensions
The following data extensions are available for the report:
- Employees
- Checks
- Check lines
- Check line distributions
Distribution Analysis
Purpose
The Distribution Analysis shows individual distribution postings for a specified period.
Content
When printed to include details, for each batch name - entry number - line number - distribution number included on the report, the report shows:
- GL date
- GL account and account name
- source amount
- result amount.
The following totals appear on the report:
- sorting option subtotals (optional)
- grand totals.
Print the report
- In the Navigation pane, highlight the Payroll/Human Resources > Checks > Distributions folder.
- Start the report set-up wizard.
- To report on all or a filtered subset of check distributions:
- Right-click the Distributions folder and select Select and Report > Distribution Analysis from the shortcut menu.
- On the Selection tab, define any filters to apply to the data.
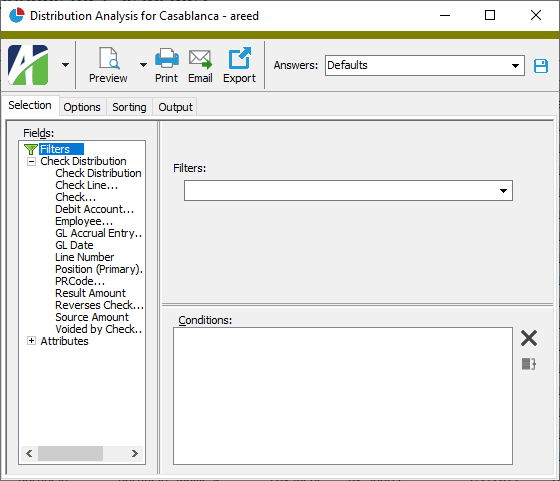
- To report on specifically selected check distributions:
- In the HD view, select the distributions to include on the report. You can use Ctrl and/or Shift selection to select multiple records.
- Click and select Distribution Analysis from the drop-down menu.
- To report on a particular distribution from the Distribution window:
- In the HD view, locate and double-click the check distribution to report on. The Distribution window opens with the check distribution loaded.
- Click and select Distribution Analysis from the drop-down menu.
- To report on all or a filtered subset of check distributions:
- Select the Options tab.
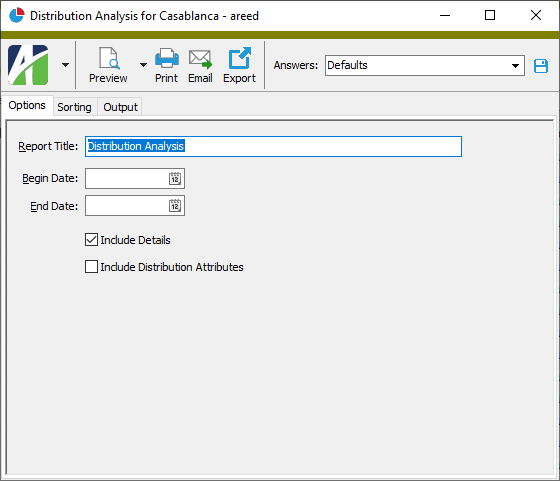
- In the Report Title field, type a title for the report. You can use up to 100 characters.
- In the Begin Date and End Date fields, enter the range of dates for which to include distribution data on the report.
- To include distribution detail on the report, mark the Include Details checkbox. If you do not include detail, the report shows grand totals only for the date range you specified.
- If you marked the Include Details checkbox, the Include Distribution Attributes checkbox is enabled. Mark the checkbox to include a second line for each distribution line which shows the associated distribution attributes and their values.
- To include a section at the end of the report with the report settings used to produce the report, leave the Include Report Options checkbox marked. To produce the report without this information, clear the checkbox.
- Select the Sorting tab.
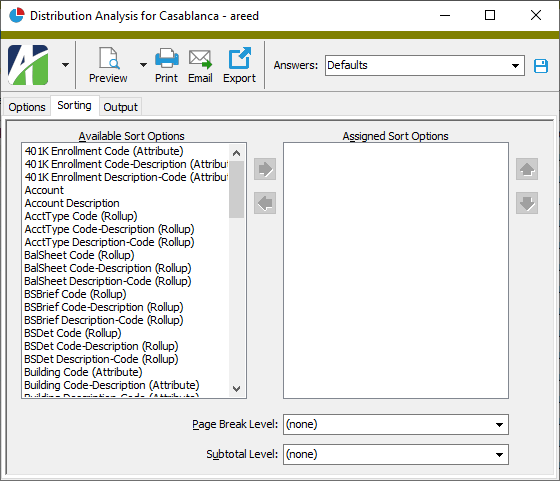
- In the Available Sort Options list box, highlight the field(s) to sort by, then click to move your selection(s) to the Assigned Sort Options list box.
- If you selected multiple sort fields, use and to arrange the sort fields in the order you want them applied.
- To start a new page for each change in one of the sorting options you specified, select the sorting option to break on from the Page Break Level drop-down list. If you do not want to insert page breaks, accept "(none)".
- To subtotal based on one of the sorting options you specified, select the sorting option to subtotal on from the Subtotal Through Level drop-down list. If you do not want to show subtotals, accept "(none)".
- Select the Output tab.
- In the Design field, look up and select the report design to use.
- In the toolbar, click the icon for the type of output you want:
- - Provides access to two preview options.
- Preview - Click the icon or click the drop-down arrow and select Preview from the drop-down menu to view the report in the Crystal Reports viewer.
- Preview to PDF - Click the drop-down arrow next to the icon and select Preview to PDF to view the report in the PDF reader.
- - Opens the Print dialog so that you can select and configure a printer and then print a paper copy of the report.
- - Opens the dialog so that you can address and compose an email that the report will be attached to. For best results, ensure your email client is running before you attempt to send a report via email.
- - Opens the Export Report dialog so that you can save the report to a file. File types include Crystal Reports (.rpt), PDF (.pdf), Microsoft Excel (.xls), Microsoft Word (.doc), rich text (.rtf), and XML (.xml).
Data extensions
The following data extensions are available for the report:
- Employees
- Checks
- Check distributions
Check Disbursements Listing
Purpose
The Check Disbursements Listing provides a list of checks disbursed from Payroll.
Content
For each check disbursement included on the report, the listing shows:
- batch - entry - disbursement number
- disbursement method
- disbursement date
- amount disbursed.
The following totals appear on the report:
- bank account totals
- employee totals
- grand totals.
Print the report
- In the Navigation pane, highlight the Payroll/Human Resources > Checks > Disbursements folder.
- Start the report set-up wizard.
- To report on all or a filtered subset of disbursements:
- Right-click the Disbursements folder and select Select and Report > Check Disbursements Listing from the shortcut menu.
- On the Selection tab, define any filters to apply to the data.
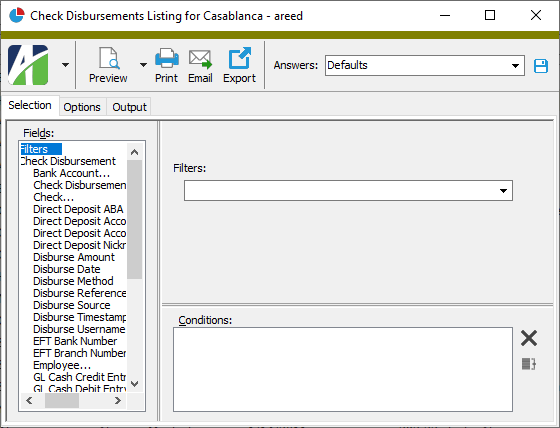
- To report on specifically selected disbursements:
- In the HD view, select the disbursements to include on the report. You can use Ctrl and/or Shift selection to select multiple records.
- Click .
- To report on a particular disbursement from the Disbursement window:
- In the HD view, locate and double-click the disbursement to report on. The Disbursement window opens with the disbursement loaded.
- Click .
- To report on all or a filtered subset of disbursements:
- Select the Options tab.
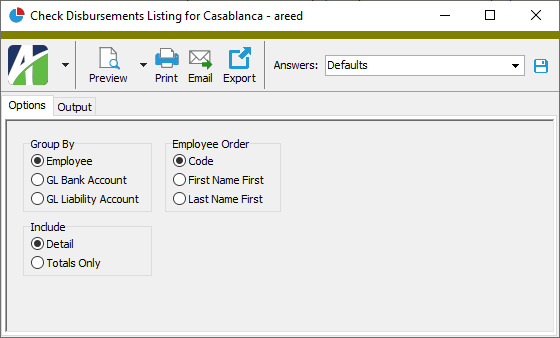
- In the Group By field, select how to group disbursement records on the report. Your options are:
- Employee
- GL Bank Account
- GL Liability Account
- In the Include field, select the information to include on the report. Your options are:
- Detail
- Totals Only
- In the Employee Order field, select the sort order for employee records on the report. Your options are:
- Code - Base the sort order on the employee code.
- First Name First
- Last Name First
- To include a section at the end of the report with the report settings used to produce the report, leave the Include Report Options checkbox marked. To produce the report without this information, clear the checkbox.
- Select the Output tab.
- In the Design field, look up and select the report design to use.
There are two built-in report designs for the Check Disbursements Listing:
- Check Disbursements - This design lists disbursements by employee then by account or by account then by employee (depending on the grouping you select) and shows the batch - entry - disbursement number, disbursement method, disbursement date, and amount disbursed.
- Check Register - This design lists disbursements in check number order followed by direct deposits and shows check number, void flag, check date, employee code and name, and check amount.
- In the toolbar, click the icon for the type of output you want:
- - Provides access to two preview options.
- Preview - Click the icon or click the drop-down arrow and select Preview from the drop-down menu to view the report in the Crystal Reports viewer.
- Preview to PDF - Click the drop-down arrow next to the icon and select Preview to PDF to view the report in the PDF reader.
- - Opens the Print dialog so that you can select and configure a printer and then print a paper copy of the report.
- - Opens the dialog so that you can address and compose an email that the report will be attached to. For best results, ensure your email client is running before you attempt to send a report via email.
- - Opens the Export Report dialog so that you can save the report to a file. File types include Crystal Reports (.rpt), PDF (.pdf), Microsoft Excel (.xls), Microsoft Word (.doc), rich text (.rtf), and XML (.xml).
Data extensions
The following data extensions are available for the report:
- Employees
- Checks
- Check disbursements
ACA Categories Listing
Purpose
The ACA Categories Listing provides a list of the ACA categories defined in Payroll.
Content
For each ACA category included on the report, the listing shows:
- category code
- description.
For each detail record for each ACA category included on the report, the listing shows:
- effective date
- offer code
- safe harbor code
- plan start month
- employee required contribution.
In addition, you can include one or more of the following:
- timestamps
- memos
- custom fields.
Print the report
- In the Navigation pane, highlight the Payroll/Human Resources > Setup > ACA > Categories folder.
- Start the report set-up wizard.
- To report on all or a filtered subset of ACA categories:
- Right-click the Categories folder and select Select and Report > ACA Categories Listing from the shortcut menu.
- On the Selection tab, define any filters to apply to the data.
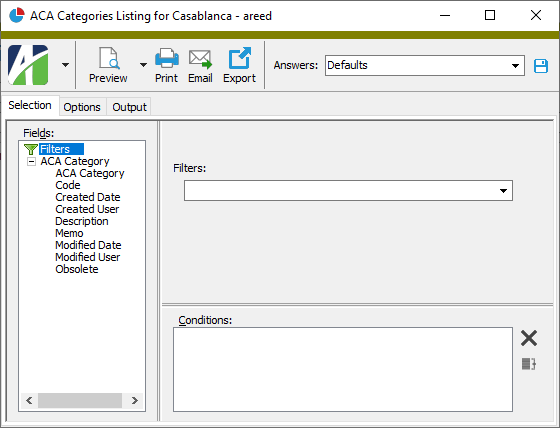
- To report on specifically selected ACA categories:
- In the HD view, select the ACA categories to include on the report. You can use Ctrl and/or Shift selection to select multiple records.
- Click and select ACA Categories Listing from the drop-down menu.
- To report on a particular ACA category from the ACA Category window:
- In the HD view, locate and double-click the ACA category to report on. The ACA Category window opens with the ACA category loaded.
- Click and select ACA Categories Listing from the drop-down menu.
- To report on all or a filtered subset of ACA categories:
- Select the Options tab.
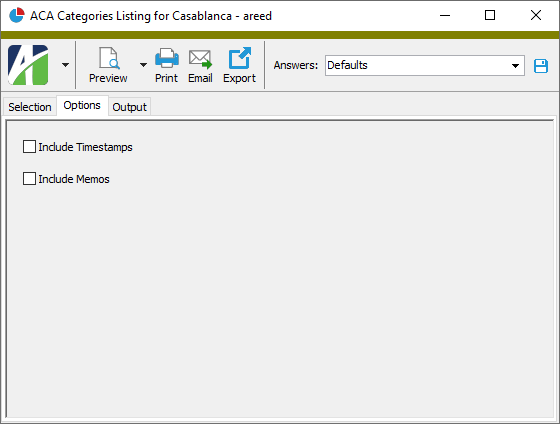
- To include a section at the end of the report with the report settings used to produce the report, leave the Include Report Options checkbox marked. To produce the report without this information, clear the checkbox.
- Mark the checkbox(es) for the additional information to include:
- Timestamps
- Memos
- Custom Fields (only visible if custom fields are set up)
- Select the Output tab.
- In the Design field, look up and select the report design to use.
- In the toolbar, click the icon for the type of output you want:
- - Provides access to two preview options.
- Preview - Click the icon or click the drop-down arrow and select Preview from the drop-down menu to view the report in the Crystal Reports viewer.
- Preview to PDF - Click the drop-down arrow next to the icon and select Preview to PDF to view the report in the PDF reader.
- - Opens the Print dialog so that you can select and configure a printer and then print a paper copy of the report.
- - Opens the dialog so that you can address and compose an email that the report will be attached to. For best results, ensure your email client is running before you attempt to send a report via email.
- - Opens the Export Report dialog so that you can save the report to a file. File types include Crystal Reports (.rpt), PDF (.pdf), Microsoft Excel (.xls), Microsoft Word (.doc), rich text (.rtf), and XML (.xml).
Data extensions
The following data extensions are available for the report:
- ACA categories
- ACA category detail
AP Controls Listing
Purpose
The AP Controls Listing provides a list of the AP controls defined in Payroll. This feature is only available if you have the PR to AP interface installed.
Content
For each AP control included on the report, the listing shows:
- AP control code
- AP control description
- vendor
- frequency
- AP account
- invoice number
- invoice description
- invoice batch
- GL batch
- terms
- PO number
- whether the control combines multiple check lines on an invoice.
In addition, you can include one or more of the following:
- timestamps
- memos
- custom fields.
The following total appears on the report:
- record count.
Print the report
- In the Navigation pane, highlight the Payroll/Human Resources > Setup > AP Controls folder.
- Start the report set-up wizard.
- To report on all or a filtered subset of AP controls:
- Right-click the AP Controls folder and select Select and Report > AP Controls Listing from the shortcut menu.
- On the Selection tab, define any filters to apply to the data.

- To report on specifically selected payroll groups:
- In the HD view, select the AP controls to include on the report. You can use Ctrl and/or Shift selection to select multiple records.
- Click .
- To report on a particular AP control from the AP Control window:
- In the HD view, locate and double-click the AP control to report on. The AP Control window opens with the AP control loaded.
- Click .
- To report on all or a filtered subset of AP controls:
- Select the Options tab.

- To include a section at the end of the report with the report settings used to produce the report, leave the Include Report Options checkbox marked. To produce the report without this information, clear the checkbox.
- Mark the checkbox(es) for the additional information to include:
- Timestamps
- Memos
- Custom Fields (only visible if custom fields are set up)
- Select the Output tab.
- In the Design field, look up and select the report design to use.
- In the toolbar, click the icon for the type of output you want:
- - Provides access to two preview options.
- Preview - Click the icon or click the drop-down arrow and select Preview from the drop-down menu to view the report in the Crystal Reports viewer.
- Preview to PDF - Click the drop-down arrow next to the icon and select Preview to PDF to view the report in the PDF reader.
- - Opens the Print dialog so that you can select and configure a printer and then print a paper copy of the report.
- - Opens the dialog so that you can address and compose an email that the report will be attached to. For best results, ensure your email client is running before you attempt to send a report via email.
- - Opens the Export Report dialog so that you can save the report to a file. File types include Crystal Reports (.rpt), PDF (.pdf), Microsoft Excel (.xls), Microsoft Word (.doc), rich text (.rtf), and XML (.xml).
Data extensions
The following data extension is available for the report:
- AP controls
Tax Deposits Listing
Purpose
The Tax Deposits Listing provides a list of the tax deposits recorded in Payroll.
Content
For each tax deposit included on the report, the listing shows:
- tax deposit type - deposit date
- total tax deposit amount
- tax paid indicator
- confirmation number
- tax amounts by field name.
In addition, you can include one or more of the following:
- field detail (field name, source, result)
- memos
- timestamps
- custom fields.
The following total appears on the report:
- deposit totals by tax type (if you do not include field detail).
Print the report
- In the Navigation pane, highlight the Payroll/Human Resources > Government > Tax Deposits folder.
- Start the report set-up wizard.
- To report on all or a filtered subset of tax deposits:
- Right-click the Tax Deposits folder and select Select and Report > Tax Deposits Listing from the shortcut menu.
- On the Selection tab, define any filters to apply to the data.
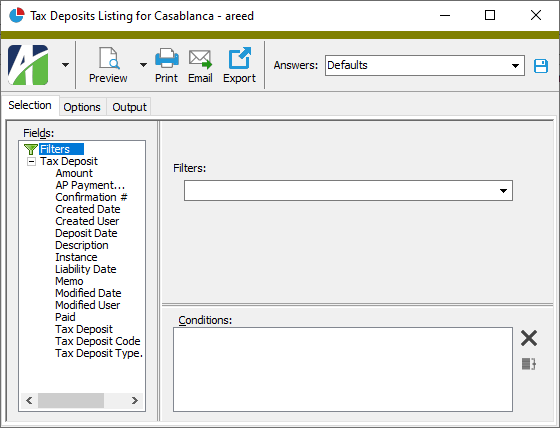
- To report on specifically selected tax deposits:
- In the HD view, select the tax deposits to include on the report. You can use Ctrl and/or Shift selection to select multiple records.
- Click .
- To report on a particular tax deposit from the Tax Deposit window:
- In the HD view, locate and double-click the tax deposit to report on. The Tax Deposit window opens with the tax deposit loaded.
- Click .
- To report on all or a filtered subset of tax deposits:
- Select the Options tab.

- Mark the checkbox(es) for the additional information to include:
- Field Detail
- Report Options. To include a section at the end of the report with the report settings used to produce the report, leave the checkbox marked. To produce the report without this information, clear the checkbox.
- Memos
- Timestamps
- Custom Fields (only visible if custom fields are set up)
- Select the Output tab.
- In the Design field, look up and select the report design to use.
- In the toolbar, click the icon for the type of output you want:
- - Provides access to two preview options.
- Preview - Click the icon or click the drop-down arrow and select Preview from the drop-down menu to view the report in the Crystal Reports viewer.
- Preview to PDF - Click the drop-down arrow next to the icon and select Preview to PDF to view the report in the PDF reader.
- - Opens the Print dialog so that you can select and configure a printer and then print a paper copy of the report.
- - Opens the dialog so that you can address and compose an email that the report will be attached to. For best results, ensure your email client is running before you attempt to send a report via email.
- - Opens the Export Report dialog so that you can save the report to a file. File types include Crystal Reports (.rpt), PDF (.pdf), Microsoft Excel (.xls), Microsoft Word (.doc), rich text (.rtf), and XML (.xml).
Data extensions
The following data extensions are available for the report:
- Tax deposits
- Tax deposit types
- Checks
- Check lines
Check Stub Items Listing
Purpose
The Check Stub Items Listing provides a list of the check stub items defined in Payroll.
Content
For each check stub item included on the report, the listing shows:
- list number
- sort order
- description
- label
- provided totals.
In addition, you can include one or more of the following:
- timestamps
- memos
- custom fields.
The following total appears on the report:
- record count.
Print the report
- In the Navigation pane, highlight the Payroll/Human Resources > Setup > Check Stub Items folder.
- Start the report set-up wizard.
- To report on all or a filtered subset of check stub items:
- Right-click the Check Stub Items folder and select Select and Report > Check Stub Items Listing from the shortcut menu.
- On the Selection tab, define any filters to apply to the data.
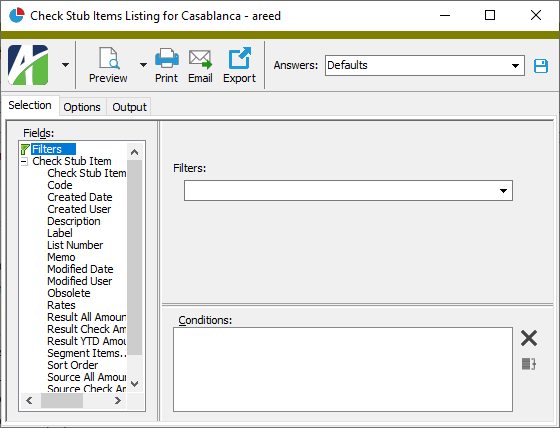
- To report on specifically selected check stub items:
- In the HD view, select the check stub items to include on the report. You can use Ctrl and/or Shift selection to select multiple records.
- Click .
- To report on a particular check stub item from the Check Stub Item window:
- In the HD view, locate and double-click the check stub item to report on. The Check Stub Item window opens with the check stub item loaded.
- Click .
- To report on all or a filtered subset of check stub items:
- Select the Options tab.
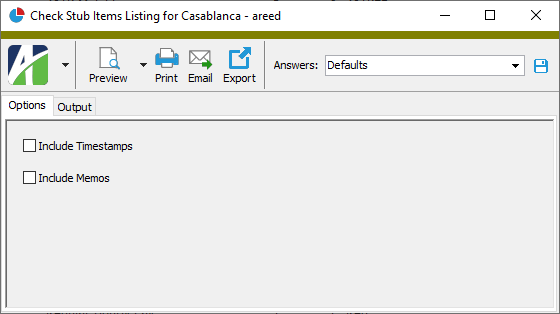
- To include a section at the end of the report with the report settings used to produce the report, leave the Include Report Options checkbox marked. To produce the report without this information, clear the checkbox.
- Mark the checkbox(es) for the additional information to include:
- Timestamps
- Memos
- Custom Fields (only visible if custom fields are set up)
- Select the Output tab.
- In the Design field, look up and select the report design to use.
- In the toolbar, click the icon for the type of output you want:
- - Provides access to two preview options.
- Preview - Click the icon or click the drop-down arrow and select Preview from the drop-down menu to view the report in the Crystal Reports viewer.
- Preview to PDF - Click the drop-down arrow next to the icon and select Preview to PDF to view the report in the PDF reader.
- - Opens the Print dialog so that you can select and configure a printer and then print a paper copy of the report.
- - Opens the dialog so that you can address and compose an email that the report will be attached to. For best results, ensure your email client is running before you attempt to send a report via email.
- - Opens the Export Report dialog so that you can save the report to a file. File types include Crystal Reports (.rpt), PDF (.pdf), Microsoft Excel (.xls), Microsoft Word (.doc), rich text (.rtf), and XML (.xml).
Data extensions
The following data extension is available for the report:
- Check stub items
Check Totals Report
Purpose
For each pay check on the Check Totals Report, the report summarizes total pay, deductions, taxes, benefits, and net pay and itemizes totals by check stub item. In addition, the report can subtotal by an employee attribute and show grand totals.
Content
For each check included on the report, the report shows:
- batch and entry number
- employee number and name
- payroll run
- check date
- net pay amount
- gross pay and year-to-date gross pay
- deductions and year-to-date deductions
- taxes and year-to-date taxes
- net pay and year-to-date net pay
- benefits and year-to-date benefits
- taxable benefits and year-to-date taxable benefits
- total benefits and year-to-date total benefits.
For each check stub item on a check, the report shows:
- item name
- source
- rate
- result
- source year-to-date
- result year-to-date
- source all
- result all
- separation/correction indicator.
In addition, you can include one or more of the following:
- subtotals by employee attribute
- grand totals.
The following totals appear on the report:
- attribute subtotals (optional)
- grand totals (optional).
Print the report
- In the Navigation pane, highlight the Payroll/Human Resources > Checks folder.
- Start the report set-up wizard.
- To report on all or a filtered subset of checks:
- Right-click the Checks folder and select Select and Report > Check Totals Report from the shortcut menu.
- On the Selection tab, define any filters to apply to the data.

- To report on specifically selected checks:
- In the HD view, select the checks to include on the report. You can use Ctrl and/or Shift selection to select multiple records.
- Click and select Check Totals Report from the drop-down menu.
- To report on a particular check from the Check window:
- In the HD view, locate and double-click the check to report on. The Check window opens with the check loaded.
- Click and select Check Totals Report from the drop-down menu.
- To report on all or a filtered subset of checks:
- Select the Options tab.

- In the Begin Date and End Date fields, enter the range of check dates to report on.
- Mark the checkbox(es) for the additional information to include:
Detail. This option is marked by default. If this checkbox is marked, the report includes totals for individual checks. Checks are sorted by employee last name and then by check date.
Note
If no checkboxes are marked, the report is blank.
Subtotal by Attribute. If you mark this checkbox, select the employee attribute to subtotal on. Checks are listed under the attribute item that was in effect on the check's pay period end date.
Note
This option is only available if the Human Resources package is installed and you have Employee HR security access.
- Grand Totals
- To include a section at the end of the report with the report settings used to produce the report, leave the Include Report Options checkbox marked. To produce the report without this information, clear the checkbox.
- Select the Output tab.
- In the Design field, look up and select the report design to use.
There are three built-in report designs for Check Totals:
- Check Totals - For each check, shows check details and check stub items.
- Register Sample by Check - For each check, breaks down details by wages, taxes, deductions, and employer paid amounts.
- Register Sample by Employee - For each employee, breaks down details by wages, taxes, deductions, and employer paid amounts.
- In the toolbar, click the icon for the type of output you want:
- - Provides access to two preview options.
- Preview - Click the icon or click the drop-down arrow and select Preview from the drop-down menu to view the report in the Crystal Reports viewer.
- Preview to PDF - Click the drop-down arrow next to the icon and select Preview to PDF to view the report in the PDF reader.
- - Opens the Print dialog so that you can select and configure a printer and then print a paper copy of the report.
- - Opens the dialog so that you can address and compose an email that the report will be attached to. For best results, ensure your email client is running before you attempt to send a report via email.
- - Opens the Export Report dialog so that you can save the report to a file. File types include Crystal Reports (.rpt), PDF (.pdf), Microsoft Excel (.xls), Microsoft Word (.doc), rich text (.rtf), and XML (.xml).
Data extensions
The following data extensions are available for the report:
- Employees
- Checks
- Check stub items
Export Controls Listing
Purpose
The Export Controls Listing provides a list of the export controls defined in Payroll.
Content
For each export control included on the report, the listing shows:
- description
- tax entity mask
- PRCode mask
- whether a carriage return/line feed is to be appended to records
- output type.
In addition, you can include one or more of the following:
- export records (record name, type, XPath, order, length)
- fields (field name, order, size, begin position, end position, origin, source, whether required, whether duplicates are allowed, whether to check field for zero when determining whether to skip records)
- formats and parameters
- timestamps
- memos
- custom fields.
The following total appears on the report:
- record count.
Print the report
- In the Navigation pane, highlight the Payroll/Human Resources > Setup > Export Controls folder.
- Start the report set-up wizard.
- To report on all or a filtered subset of export controls:
- Right-click the Export Controls folder and select Select and Report > Export Controls Listing from the shortcut menu.
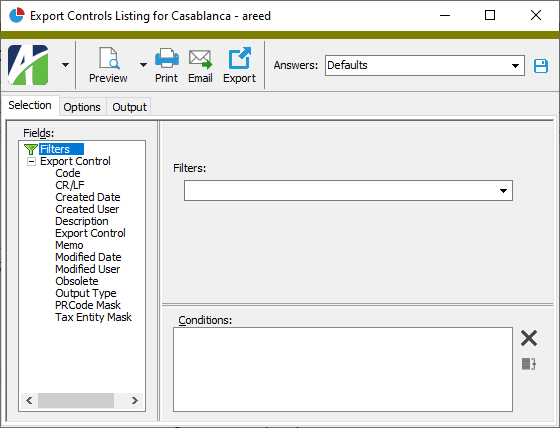
- On the Selection tab, define any filters to apply to the data.
- Right-click the Export Controls folder and select Select and Report > Export Controls Listing from the shortcut menu.
- To report on specifically selected export controls:
- In the HD view, select the export controls to include on the report. You can use Ctrl and/or Shift selection to select multiple records.
- Click .
- To report on a particular export control from the Export Control window:
- In the HD view, locate and double-click the export control to report on. The Export Control window opens with the export control loaded.
- Click .
- To report on all or a filtered subset of export controls:
- Select the Options tab.
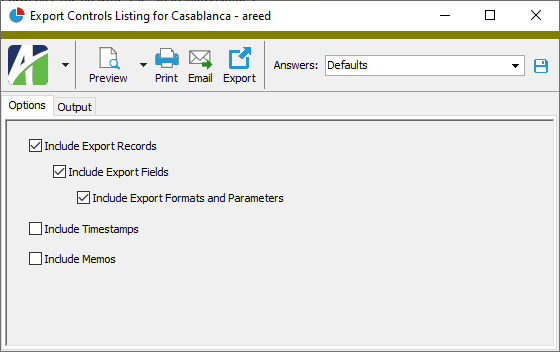
- Mark the checkbox(es) for the additional information to include:
- Export Records - If this checkbox is marked, the following checkbox is enabled:
- Export Fields - If this checkbox is marked, the following checkbox is enabled:
- Export Formats and Parameters
- Export Fields - If this checkbox is marked, the following checkbox is enabled:
- Report Options. To include a section at the end of the report with the report settings used to produce the report, leave the checkbox marked. To produce the report without this information, clear the checkbox.
- Timestamps
- Memos
- Custom Fields (only visible if custom fields are set up)
- Export Records - If this checkbox is marked, the following checkbox is enabled:
- Select the Output tab.
- In the Design field, look up and select the report design to use.
- In the toolbar, click the icon for the type of output you want:
- - Provides access to two preview options.
- Preview - Click the icon or click the drop-down arrow and select Preview from the drop-down menu to view the report in the Crystal Reports viewer.
- Preview to PDF - Click the drop-down arrow next to the icon and select Preview to PDF to view the report in the PDF reader.
- - Opens the Print dialog so that you can select and configure a printer and then print a paper copy of the report.
- - Opens the dialog so that you can address and compose an email that the report will be attached to. For best results, ensure your email client is running before you attempt to send a report via email.
- - Opens the Export Report dialog so that you can save the report to a file. File types include Crystal Reports (.rpt), PDF (.pdf), Microsoft Excel (.xls), Microsoft Word (.doc), rich text (.rtf), and XML (.xml).
Data extensions
The following data extensions are available for the report:
- Export controls
- Export records
- Export fields
Employee Totals File Report
Purpose
The Employee Totals File Report shows employee totals for the export file and the export control you designate.
Content
For each record represented on the report, the report shows:
- record number
- defined fields.
For each field represented on the report, the report shows:
- field number
- beginning position of field
- ending position of field
- length of field
- field name
- field value
- formatted number (when the field value is a number).
The following totals appear on the report:
- total records reported
- total fields reported.
Print the report
- In the Navigation pane, highlight the Payroll/Human Resources > Employees folder.
- Right-click the Employees folder and select Report Totals File from the shortcut menu.
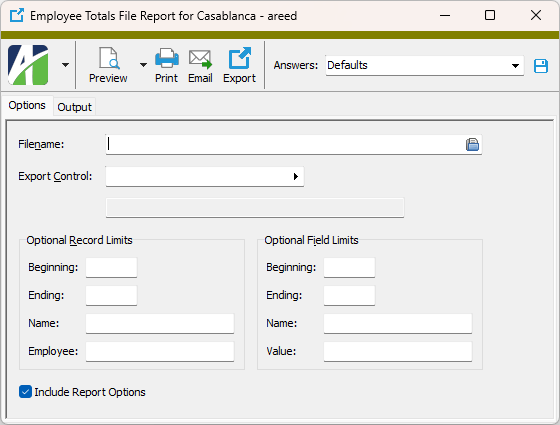
- On the Options tab in the Filename field, enter the path and file name of the export totals file or browse to it and select it.
- Select the Export Control to use for the report. The export control specifies the record and field definitions used for the totals file.
- The fields in the Optional Record Limits section let you filter by one or more of the following fields:
- Beginning. Enter the smallest record number to include on the report.
- Ending. Enter the largest record number to include on the report.
- Name. To filter by record name, enter the value or partial value to match.
Employee. To filter by employee name, enter the value or partial value to match.
Note
In the past, the Name and Employee fields often required wildcarding to produce the desired result. As of version 9.4-0, wildcarding is built into these fields. Wildcards are assumed at the beginning, end, and between words of the value entered.
- The fields in the Optional Field Limits section let you filter by one or more of the following fields:
- Beginning. Enter the smallest field number to include on the report.
- Ending. Enter the largest field number to include on the report.
Name. To filter by field name, enter the value or partial value to match.
Value. To filter by field value, enter the value or partial value to match.
Note
In the past, the Name and Employee fields often required wildcarding to produce the desired result. As of version 9.4-0, wildcarding is built into these fields. Wildcards are assumed at the beginning, end, and between words of the value entered.
- To include a section at the end of the report with the report settings used to produce the report, leave the Include Report Options checkbox marked. To produce the report without this information, clear the checkbox.
- Select the Output tab.
- In the Design field, look up and select the report design to use.
- In the toolbar, click the icon for the type of output you want:
- - Provides access to two preview options.
- Preview - Click the icon or click the drop-down arrow and select Preview from the drop-down menu to view the report in the Crystal Reports viewer.
- Preview to PDF - Click the drop-down arrow next to the icon and select Preview to PDF to view the report in the PDF reader.
- - Opens the Print dialog so that you can select and configure a printer and then print a paper copy of the report.
- - Opens the dialog so that you can address and compose an email that the report will be attached to. For best results, ensure your email client is running before you attempt to send a report via email.
- - Opens the Export Report dialog so that you can save the report to a file. File types include Crystal Reports (.rpt), PDF (.pdf), Microsoft Excel (.xls), Microsoft Word (.doc), rich text (.rtf), and XML (.xml).
Export Employers Listing
Purpose
The Export Employers Listing provides a list of the export employer records defined in Payroll.
Content
For each export employer record included on the report, the listing shows:
- description
- other EIN
- establishment number
- kind of employer
- employment code
- tax jurisdiction
- name control code
- third-party sick pay indicator.
In addition, you can include one or more of the following:
- address information
- ACA information
- other members of an Aggregated ALE Group the employer belongs to
- timestamps
- memos
- custom fields.
The following total appears on the report:
- record count.
Print the report
- In the Navigation pane, highlight the Payroll/Human Resources > Setup > Export Employers folder.
- Start the report set-up wizard.
- To report on all or a filtered subset of export employers:
- Right-click the Export Employers folder and select Select and Report > Export Employers Listing from the shortcut menu.
- On the Selection tab, define any filters to apply to the data.
- To report on specifically selected export employers:
- In the HD view, select the export employers to include on the report. You can use Ctrl and/or Shift selection to select multiple records.
- Click .
- To report on a particular export employer record from the Export Employer window:
- In the HD view, locate and double-click the export employer to report on. The Export Employer window opens.
- Click .
- To report on all or a filtered subset of export employers:
- Select the Options tab.

- Mark the checkbox(es) for the additional information to include:
- Address Information
- ACA Information
- Other Members Detail
- Report Options. To include a section at the end of the report with the report settings used to produce the report, leave the checkbox marked. To produce the report without this information, clear the checkbox.
- Timestamps
- Memos
- Custom Fields (only visible if custom fields are set up)
- Select the Output tab.
- In the Design field, look up and select the report design to use.
- In the toolbar, click the icon for the type of output you want:
- - Provides access to two preview options.
- Preview - Click the icon or click the drop-down arrow and select Preview from the drop-down menu to view the report in the Crystal Reports viewer.
- Preview to PDF - Click the drop-down arrow next to the icon and select Preview to PDF to view the report in the PDF reader.
- - Opens the Print dialog so that you can select and configure a printer and then print a paper copy of the report.
- - Opens the dialog so that you can address and compose an email that the report will be attached to. For best results, ensure your email client is running before you attempt to send a report via email.
- - Opens the Export Report dialog so that you can save the report to a file. File types include Crystal Reports (.rpt), PDF (.pdf), Microsoft Excel (.xls), Microsoft Word (.doc), rich text (.rtf), and XML (.xml).
Data extensions
The following data extensions are available for the report:
- Export employers
- ACA group members
Export Submitters Listing
Purpose
The Export Submitters Listing provides a list of export submitter records defined in Payroll.
Content
For each export submitter record included on the report, the listing shows:
- submitter code
- description
- submitter EIN.
In addition, you can include one or more of the following:
- address information
- contact information
- ACA information
- timestamps
- memos
- custom fields.
The following total appears on the report:
- record count.
Print the report
- In the Navigation pane, highlight the General Ledger > Setup > Export Submitters folder.
- Start the report set-up wizard.
- To report on all or a filtered subset of export submitters:
- Right-click the Export Submitters folder and select Select and Report > Export Submitters Listing from the shortcut menu.
- On the Selection tab, define any filters to apply to the data.
- To report on specifically selected export submitters:
- In the HD view, select the export submitters to include on the report. You can use Ctrl and/or Shift selection to select multiple records.
- Click .
- To report on a particular export submitter record from the Export Submitter window:
- In the HD view, locate and double-click the export submitter to report on. The Export Submitter window opens with the export submitter record loaded.
- Click .
- To report on all or a filtered subset of export submitters:
- Select the Options tab.
- Mark the checkbox(es) for the additional information to include:
- Address Information
- Contact Information
- ACA Information
- Report Options. To include a section at the end of the report with the report settings used to produce the report, leave the checkbox marked. To produce the report without this information, clear the checkbox.
- Timestamps
- Memos
- Custom Fields (only visible if custom fields are set up)
- Select the Output tab.
- In the Design field, look up and select the report design to use.
- In the toolbar, click the icon for the type of output you want:
- - Provides access to two preview options.
- Preview - Click the icon or click the drop-down arrow and select Preview from the drop-down menu to view the report in the Crystal Reports viewer.
- Preview to PDF - Click the drop-down arrow next to the icon and select Preview to PDF to view the report in the PDF reader.
- - Opens the Print dialog so that you can select and configure a printer and then print a paper copy of the report.
- - Opens the dialog so that you can address and compose an email that the report will be attached to. For best results, ensure your email client is running before you attempt to send a report via email.
- - Opens the Export Report dialog so that you can save the report to a file. File types include Crystal Reports (.rpt), PDF (.pdf), Microsoft Excel (.xls), Microsoft Word (.doc), rich text (.rtf), and XML (.xml).
Data extensions
The following data extension is available for the report:
- Export submitters
Groups Listing
Purpose
The Groups Listing provides a list of the check line groups defined in Payroll.
Content
For each check line group included on the report, the listing shows:
- description
- calculation qualifier
- source name
- source scale
- result name
- result scale
- whether the group is a built-in group.
In addition, you can include one or more of the following:
- segment items
- timestamps
- memos
- custom fields.
The following total appears on the report:
- record count.
Print the report
- In the Navigation pane, highlight the Payroll/Human Resources > Setup > Groups folder.
- Start the report set-up wizard.
- To report on all or a filtered subset of check line groups:
- Right-click the Groups folder and select Select and Report > Groups Listing from the shortcut menu.
- On the Selection tab, define any filters to apply to the data.
- To report on specifically selected check line groups:
- In the HD view, select the check line groups to include on the report. You can use Ctrl and/or Shift selection to select multiple records.
- Click .
- To report on a particular check line group from the Group window:
- In the HD view, locate and double-click the check line group to report on. The Group window opens with the check line group loaded.
- Click .
- To report on all or a filtered subset of check line groups:
- Select the Options tab.
- Mark the checkbox(es) for the additional information to include:
- Segment Items
- Report Options. To include a section at the end of the report with the report settings used to produce the report, leave the checkbox marked. To produce the report without this information, clear the checkbox.
- Timestamps
- Memos
- Custom Fields (only visible if custom fields are set up)
- Select the Output tab.
- In the Design field, look up and select the report design to use.
- In the toolbar, click the icon for the type of output you want:
- - Provides access to two preview options.
- Preview - Click the icon or click the drop-down arrow and select Preview from the drop-down menu to view the report in the Crystal Reports viewer.
- Preview to PDF - Click the drop-down arrow next to the icon and select Preview to PDF to view the report in the PDF reader.
- - Opens the Print dialog so that you can select and configure a printer and then print a paper copy of the report.
- - Opens the dialog so that you can address and compose an email that the report will be attached to. For best results, ensure your email client is running before you attempt to send a report via email.
- - Opens the Export Report dialog so that you can save the report to a file. File types include Crystal Reports (.rpt), PDF (.pdf), Microsoft Excel (.xls), Microsoft Word (.doc), rich text (.rtf), and XML (.xml).
Data extensions
The following data extensions are available for the report:
- Groups
- Segment items
Ledgers Listing
Purpose
The Leave Ledgers Listing provides a list of leave ledgers defined in Payroll.
Content
For each leave ledger included on the report, the listing shows:
- description
- scale
- rate function
- rate scale
- sort order.
In addition, you can include one or more of the following:
- timestamps
- memos
- custom fields.
The following total appears on the report:
- record count.
Print the report
- In the Navigation pane, highlight the Payroll/Human Resources > Setup > Leave Ledgers folder.
- Start the report set-up wizard.
- To report on all or a filtered subset of leave ledgers:
- Right-click the Leave Ledgers folder and select Select and Report > Ledgers Listing from the shortcut menu.
- On the Selection tab, define any filters to apply to the data.
- To report on specifically selected leave ledgers:
- In the HD view, select the leave ledgers to include on the report. You can use Ctrl and/or Shift selection to select multiple records.
- Click .
- To report on a particular leave ledger from the Seniority & Leave Ledger window:
- In the HD view, locate and double-click the leave ledger to report on. The Seniority & Leave Ledger window opens with the leave ledger loaded.
- Click .
- To report on all or a filtered subset of leave ledgers:
- Select the Options tab.
- To include a section at the end of the report with the report settings used to produce the report, leave the Include Report Options checkbox marked. To produce the report without this information, clear the checkbox.
- Mark the checkbox(es) for the additional information to include:
- Timestamps
- Memos
- Custom Fields (only visible if custom fields are set up)
- Select the Output tab.
- In the Design field, look up and select the report design to use.
- In the toolbar, click the icon for the type of output you want:
- - Provides access to two preview options.
- Preview - Click the icon or click the drop-down arrow and select Preview from the drop-down menu to view the report in the Crystal Reports viewer.
- Preview to PDF - Click the drop-down arrow next to the icon and select Preview to PDF to view the report in the PDF reader.
- - Opens the Print dialog so that you can select and configure a printer and then print a paper copy of the report.
- - Opens the dialog so that you can address and compose an email that the report will be attached to. For best results, ensure your email client is running before you attempt to send a report via email.
- - Opens the Export Report dialog so that you can save the report to a file. File types include Crystal Reports (.rpt), PDF (.pdf), Microsoft Excel (.xls), Microsoft Word (.doc), rich text (.rtf), and XML (.xml).
Data extensions
The following data extension is available for the report:
- Leave ledgers
Plans Listing
Purpose
The Plans Listing provides a list of leave plans defined in Payroll.
Content
For each leave plan included on the report, the listing shows:
- description
- step level
- calendar
- SQL procedure.
In addition, you can include one or more of the following:
- timestamps
- memos
- custom fields.
The following total appears on the report:
- record count.
Print the report
- In the Navigation pane, highlight the Payroll/Human Resources > Leave Plans folder.
- Start the report set-up wizard.
- To report on all or a filtered subset of leave plans:
- Right-click the Leave Plans folder and select Select and Report > Plans Listing from the shortcut menu.
- On the Selection tab, define any filters to apply to the data.
- To report on specifically selected leave plans:
- In the HD view, select the leave plans to include on the report. You can use Ctrl and/or Shift selection to select multiple records.
- Click .
- To report on a particular leave plan from the Seniority & Leave Plan window:
- In the HD view, locate and double-click the leave plan to report on. The Seniority & Leave Plan window opens with the leave plan loaded.
- Click .
- To report on all or a filtered subset of leave plans:
- Select the Options tab.

- To include a section at the end of the report with the report settings used to produce the report, leave the Include Report Options checkbox marked. To produce the report without this information, clear the checkbox.
- Mark the checkbox(es) for the additional information to include:
- Timestamps
- Memos
- Custom Fields (only visible if custom fields are set up)
- Select the Output tab.
- In the Design field, look up and select the report design to use.
- In the toolbar, click the icon for the type of output you want:
- - Provides access to two preview options.
- Preview - Click the icon or click the drop-down arrow and select Preview from the drop-down menu to view the report in the Crystal Reports viewer.
- Preview to PDF - Click the drop-down arrow next to the icon and select Preview to PDF to view the report in the PDF reader.
- - Opens the Print dialog so that you can select and configure a printer and then print a paper copy of the report.
- - Opens the dialog so that you can address and compose an email that the report will be attached to. For best results, ensure your email client is running before you attempt to send a report via email.
- - Opens the Export Report dialog so that you can save the report to a file. File types include Crystal Reports (.rpt), PDF (.pdf), Microsoft Excel (.xls), Microsoft Word (.doc), rich text (.rtf), and XML (.xml).
Data extensions
The following data extension is available for the report:
- Leave plans
Note Types Listing
Purpose
Content
For each note type included on the report, the listing shows:
- description.
In addition, you can include one or more of the following:
- timestamps
- memos
- custom fields.
The following total appears on the report:
- record count.
Print the report
- In the Navigation pane, highlight the Payroll/Human Resources > Setup > Note Types folder.
- Start the report set-up wizard.
- To report on all or a filtered subset of note types:
- Right-click the Note Types folder and select Select and Report > Note Types Listing from the shortcut menu.
- On the Selection tab, define any filters to apply to the data.
- To report on specifically selected note types:
- In the HD view, select the note types to include on the report. You can use Ctrl and/or Shift selection to select multiple records.
- Click .
- To report on a particular note type from the Note Type window:
- In the HD view, locate and double-click the note type to report on. The Note Type window opens with the note type loaded.
- Click .
- To report on all or a filtered subset of note types:
- Select the Options tab.
- To include a section at the end of the report with the report settings used to produce the report, leave the Include Report Options checkbox marked. To produce the report without this information, clear the checkbox.
- Mark the checkbox(es) for the additional information to include:
- Timestamps
- Memos
- Custom Fields (only visible if custom fields are set up)
- Select the Output tab.
- In the Design field, look up and select the report design to use.
- In the toolbar, click the icon for the type of output you want:
- - Provides access to two preview options.
- Preview - Click the icon or click the drop-down arrow and select Preview from the drop-down menu to view the report in the Crystal Reports viewer.
- Preview to PDF - Click the drop-down arrow next to the icon and select Preview to PDF to view the report in the PDF reader.
- - Opens the Print dialog so that you can select and configure a printer and then print a paper copy of the report.
- - Opens the dialog so that you can address and compose an email that the report will be attached to. For best results, ensure your email client is running before you attempt to send a report via email.
- - Opens the Export Report dialog so that you can save the report to a file. File types include Crystal Reports (.rpt), PDF (.pdf), Microsoft Excel (.xls), Microsoft Word (.doc), rich text (.rtf), and XML (.xml).
Data extensions
The following data extension is available for the report:
- Note types
Pay Grades Listing
Purpose
Content
For each pay grade included on the report, the listing shows:
- pay grade code and description
- unit of pay
- effective date
- minimum wage or salary for the pay grade as of the effective date you specify
- maximum wage or salary for the pay grade as of the effective date you specify.
In addition, you can include one or more of the following:
- history
- timestamps
- memos
- custom fields.
The following total appears on the report:
- record count.
Print the report
- In the Navigation pane, highlight the Payroll/Human Resources > Setup > Position Pay Grades folder.
- Start the report set-up wizard.
- To report on all or a filtered subset of pay grades:
- Right-click the Position Pay Grades folder and select Select and Report > Pay Grades Listing from the shortcut menu.
- On the Selection tab, define any filters to apply to the data.
- To report on specifically selected pay grades:
- In the HD view, select the pay grades to include on the report. You can use Ctrl and/or Shift selection to select multiple records.
- Click .
- To report on a particular pay grade from the Pay Grade window:
- In the HD view, locate and double-click the pay grade to report on. The Pay Grade window opens with the pay grade loaded.
- Click .
- To report on all or a filtered subset of pay grades:
- Select the Options tab.
- In the Effective Date field, enter the date as of which you want to see pay grade pay ranges.
- Mark the checkbox(es) for the additional information to include:
- History
- Report Options. To include a section at the end of the report with the report settings used to produce the report, leave the checkbox marked. To produce the report without this information, clear the checkbox.
- Timestamps
- Memos
- Custom Fields (only visible if custom fields are set up)
- Select the Output tab.
- In the Design field, look up and select the report design to use.
- In the toolbar, click the icon for the type of output you want:
- - Provides access to two preview options.
- Preview - Click the icon or click the drop-down arrow and select Preview from the drop-down menu to view the report in the Crystal Reports viewer.
- Preview to PDF - Click the drop-down arrow next to the icon and select Preview to PDF to view the report in the PDF reader.
- - Opens the Print dialog so that you can select and configure a printer and then print a paper copy of the report.
- - Opens the dialog so that you can address and compose an email that the report will be attached to. For best results, ensure your email client is running before you attempt to send a report via email.
- - Opens the Export Report dialog so that you can save the report to a file. File types include Crystal Reports (.rpt), PDF (.pdf), Microsoft Excel (.xls), Microsoft Word (.doc), rich text (.rtf), and XML (.xml).
Data extensions
The following data extensions are available for the report:
- Pay grades
- Units of pay
Units of Pay Listing
Purpose
Content
For each unit of pay code included on the report, the listing shows:
- description.
In addition, you can include one or more of the following:
- timestamps
- memos
- custom fields.
The following total appears on the report:
- record count.
Print the report
- In the Navigation pane, highlight the Payroll/Human Resources > Setup > Position Units of Pay folder.
- Start the report set-up wizard.
- To report on all or a filtered subset of units of pay:
- Right-click the Position Units of Pay folder and select Select and Report > Units of Pay Listing from the shortcut menu.
- On the Selection tab, define any filters to apply to the data.
- To report on specifically selected units of pay:
- In the HD view, select the units of pay to include on the report. You can use Ctrl and/or Shift selection to select multiple records.
- Click .
- To report on a particular unit of pay from the Unit of Pay window:
- In the HD view, locate and double-click the unit of pay to report on. The Unit of Pay window opens with the unit of pay loaded.
- Click .
- To report on all or a filtered subset of units of pay:
- Select the Options tab.
- To include a section at the end of the report with the report settings used to produce the report, leave the Include Report Options checkbox marked. To produce the report without this information, clear the checkbox.
- Mark the checkbox(es) for the additional information to include:
- Timestamps
- Memos
- Custom Fields (only visible if custom fields are set up)
- Select the Output tab.
- In the Design field, look up and select the report design to use.
- In the toolbar, click the icon for the type of output you want:
- - Provides access to two preview options.
- Preview - Click the icon or click the drop-down arrow and select Preview from the drop-down menu to view the report in the Crystal Reports viewer.
- Preview to PDF - Click the drop-down arrow next to the icon and select Preview to PDF to view the report in the PDF reader.
- - Opens the Print dialog so that you can select and configure a printer and then print a paper copy of the report.
- - Opens the dialog so that you can address and compose an email that the report will be attached to. For best results, ensure your email client is running before you attempt to send a report via email.
- - Opens the Export Report dialog so that you can save the report to a file. File types include Crystal Reports (.rpt), PDF (.pdf), Microsoft Excel (.xls), Microsoft Word (.doc), rich text (.rtf), and XML (.xml).
Data extensions
The following data extension is available for the report:
- Units of pay
Positions Listing
Purpose
The Positions Listing provides a list of the positions defined in Human Resources.
Content
For each position included on the report, the listing shows:
- position code and description
- position held by the supervisor of the position
- level
- pay grade
- seats
- unit of pay
- pay rate effective date
- pay rate.
In addition, you can include one or more of the following:
- timestamps
- memos
- custom fields.
The following total appears on the report:
- record count.
Print the report
- In the Navigation pane, highlight the Payroll/Human Resources > Setup > Positions folder.
- Start the report set-up wizard.
- To report on all or a filtered subset of positions:
- Right-click the Positions folder and select Select and Report > Positions Listing from the shortcut menu.
- On the Selection tab, define any filters to apply to the data.

- To report on specifically selected positions:
- In the HD view, select the positions to include on the report. You can use Ctrl and/or Shift selection to select multiple records.
- Click and select Positions Listing from the drop-down menu.
- To report on a particular position from the Position window:
- In the HD view, locate and double-click the position to report on. The Position window opens with the position loaded.
- Click and select Positions Listing from the drop-down menu.
- To report on all or a filtered subset of positions:
- Select the Options tab.
- To include a section at the end of the report with the report settings used to produce the report, leave the Include Report Options checkbox marked. To produce the report without this information, clear the checkbox.
- Mark the checkbox(es) for the additional information to include:
- Timestamps
- Memos
- Custom Fields (only visible if custom fields are set up)
- Select the Output tab.
- In the Design field, look up and select the report design to use.
- In the toolbar, click the icon for the type of output you want:
- - Provides access to two preview options.
- Preview - Click the icon or click the drop-down arrow and select Preview from the drop-down menu to view the report in the Crystal Reports viewer.
- Preview to PDF - Click the drop-down arrow next to the icon and select Preview to PDF to view the report in the PDF reader.
- - Opens the Print dialog so that you can select and configure a printer and then print a paper copy of the report.
- - Opens the dialog so that you can address and compose an email that the report will be attached to. For best results, ensure your email client is running before you attempt to send a report via email.
- - Opens the Export Report dialog so that you can save the report to a file. File types include Crystal Reports (.rpt), PDF (.pdf), Microsoft Excel (.xls), Microsoft Word (.doc), rich text (.rtf), and XML (.xml).
Data extensions
The following data extensions are available for the report:
- Positions
- Position pay rates
- Pay grades
- Units of pay
Organizational Chart
Purpose
The Organizational Chart shows the hierarchy of positions as tracked in the Human Resources package. Positions are staggered on the chart according to their assigned level.
Content
For each position included on the report, the report shows:
- position code and description
- position level.
In addition, you can include one or more of the following:
- timestamps
- memos
- custom fields.
The following total appears on the report:
- record count.
Print the report
- In the Navigation pane, highlight the Payroll/Human Resources > Setup > Positions folder.
- Start the report set-up wizard.
- To report on all or a filtered subset of positions:
- Right-click the Positions folder and select Select and Report > Organizational Chart from the shortcut menu.
- On the Selection tab, define any filters to apply to the data.

- To report on specifically selected positions:
- In the HD view, select the positions to include on the report. You can use Ctrl and/or Shift selection to select multiple records.
- Click and select Organizational Chart from the drop-down menu.
- To report on a particular position from the Position window:
- In the HD view, locate and double-click the position to report on. The Position window opens with the position loaded.
- Click and select Organizational Chart from the drop-down menu.
- To report on all or a filtered subset of positions:
- Select the Options tab.

- To include a section at the end of the report with the report settings used to produce the report, leave the Include Report Options checkbox marked. To produce the report without this information, clear the checkbox.
- Mark the checkbox(es) for the additional information to include:
- Timestamps
- Memos
- Custom Fields (only visible if custom fields are set up)
- Select the Output tab.
- In the Design field, look up and select the report design to use.
- In the toolbar, click the icon for the type of output you want:
- - Provides access to two preview options.
- Preview - Click the icon or click the drop-down arrow and select Preview from the drop-down menu to view the report in the Crystal Reports viewer.
- Preview to PDF - Click the drop-down arrow next to the icon and select Preview to PDF to view the report in the PDF reader.
- - Opens the Print dialog so that you can select and configure a printer and then print a paper copy of the report.
- - Opens the dialog so that you can address and compose an email that the report will be attached to. For best results, ensure your email client is running before you attempt to send a report via email.
- - Opens the Export Report dialog so that you can save the report to a file. File types include Crystal Reports (.rpt), PDF (.pdf), Microsoft Excel (.xls), Microsoft Word (.doc), rich text (.rtf), and XML (.xml).
Data extensions
The following data extension is available for the report:
- Positions
Position Vacancies
Purpose
The Position Vacancies report shows the positions with available openings and the number of openings as of a date that you specify.
Content
For each position included on the report, the report shows:
- position code and description
- the position that supervises the listed position
- pay grade
- unit of pay
- pay range
- number of available openings.
In addition, you can include one or more of the following:
- timestamps
- memos
- custom fields.
The following total appears on the report:
- record count.
Print the report
- In the Navigation pane, highlight the Payroll/Human Resources > Setup > Positions folder.
- Start the report set-up wizard.
- To report on all or a filtered subset of positions:
- Right-click the Positions folder and select Select and Report > Position Vacancies from the shortcut menu.
- On the Selection tab, define any filters to apply to the data.
- To report on specifically selected positions:
- In the HD view, select the positions to include on the report. You can use Ctrl and/or Shift selection to select multiple records.
- Click and select Position Vacancies from the drop-down menu.
- To report on a particular position from the Position window:
- In the HD view, locate and double-click the position to report on. The Position window opens with the position loaded.
- Click and select Position Vacancies from the drop-down menu.
- To report on all or a filtered subset of positions:
- Select the Options tab.
- In the Effective Date field, enter the date as of which to include position vacancy information on the report.
- To include a section at the end of the report with the report settings used to produce the report, leave the Include Report Options checkbox marked. To produce the report without this information, clear the checkbox.
- Mark the checkbox(es) for the additional information to include:
- Timestamps
- Memos
- Custom Fields (only visible if custom fields are set up)
- Select the Output tab.
- In the Design field, look up and select the report design to use.
- In the toolbar, click the icon for the type of output you want:
- - Provides access to two preview options.
- Preview - Click the icon or click the drop-down arrow and select Preview from the drop-down menu to view the report in the Crystal Reports viewer.
- Preview to PDF - Click the drop-down arrow next to the icon and select Preview to PDF to view the report in the PDF reader.
- - Opens the Print dialog so that you can select and configure a printer and then print a paper copy of the report.
- - Opens the dialog so that you can address and compose an email that the report will be attached to. For best results, ensure your email client is running before you attempt to send a report via email.
- - Opens the Export Report dialog so that you can save the report to a file. File types include Crystal Reports (.rpt), PDF (.pdf), Microsoft Excel (.xls), Microsoft Word (.doc), rich text (.rtf), and XML (.xml).
Data extensions
The following data extensions are available for the report:
- Positions
- Pay grades
PRCodes Listing
Purpose
The PRCodes Listing provides a list of the PRCodes defined in Payroll.
Content
For each PRCode included on the report, the listing shows:
- description
- an indication if the PRCode has been flagged as obsolete.
In addition, you can include one or more of the following:
- items (for each item: PRCode type and description, segment or segment item and description, an indication if segment item is obsolete)
- properties (description, run types, groups, whether employee or employer is responsible for amount, credit account, type of liability date, check stub item, source scale, rate scale, result scale)
- parameters and parameter values (for each parameter: data type, scale, description, current value; for each parameter value: effective date, value, description, item)
- expressions (source expression, rate expression, result expression)
- timestamps
- memos
- custom fields.
The following count appears on the report:
- record count.
Print the report
- In the Navigation pane, highlight the Payroll/Human Resources > Setup > PRCodes folder.
- Start the report set-up wizard.
- To report on all or a filtered subset of PRCodes:
- Right-click the PRCodes folder and select Select and Report > PRCode Listing from the shortcut menu.
- On the Selection tab, define any filters to apply to the data.
- To report on specifically selected PRCodes:
- In the HD view, select the PRCodes to include on the report. You can use Ctrl and/or Shift selection to select multiple records.
- Click .
- To report on a particular PRCode from the PRCode window:
- In the HD view, locate and double-click the PRCode to report on. The PRCode window opens with the PRCode loaded.
- Click .
- To report on all or a filtered subset of PRCodes:
- Select the Options tab.

- Mark the checkbox(es) for the additional information to include:
- Items
- Properties
- Parameters and Parameter Values
- Expressions
- Report Options. To include a section at the end of the report with the report settings used to produce the report, leave the checkbox marked. To produce the report without this information, clear the checkbox.
- Timestamps
- Memos
- Custom Fields (only visible if custom fields are set up)
- Select the Output tab.
- In the Design field, look up and select the report design to use.
- In the toolbar, click the icon for the type of output you want:
- - Provides access to two preview options.
- Preview - Click the icon or click the drop-down arrow and select Preview from the drop-down menu to view the report in the Crystal Reports viewer.
- Preview to PDF - Click the drop-down arrow next to the icon and select Preview to PDF to view the report in the PDF reader.
- - Opens the Print dialog so that you can select and configure a printer and then print a paper copy of the report.
- - Opens the dialog so that you can address and compose an email that the report will be attached to. For best results, ensure your email client is running before you attempt to send a report via email.
- - Opens the Export Report dialog so that you can save the report to a file. File types include Crystal Reports (.rpt), PDF (.pdf), Microsoft Excel (.xls), Microsoft Word (.doc), rich text (.rtf), and XML (.xml).
Data extensions
The following data extension is available for the report:
- PRCodes
Run Types Listing
Purpose
The Run Types Listing provides a list of the payroll run types defined in Payroll.
Content
For each run type included on the report, the listing shows:
- description
- periods per year
- whether split periods are supported
- whether time sheets are required
- separation flag indicator
- correction flag indicator
- GL batch
- liability account
- bank account.
In addition, you can include one or more of the following:
- timestamps
- memos
- custom fields.
The following total appears on the report:
- record count.
Print the report
- In the Navigation pane, highlight the Payroll/Human Resources > Setup > Run Types folder.
- Start the report set-up wizard.
- To report on all or a filtered subset of run types:
- Right-click the Run Types folder and select Select and Report > Run Types Listing from the shortcut menu.
- On the Selection tab, define any filters to apply to the data.
- To report on specifically selected run types:
- In the HD view, select the run types to include on the report. You can use Ctrl and/or Shift selection to select multiple records.
- Click .
- To report on a particular run type from the Run Type window:
- In the HD view, locate and double-click the run type to report on. The Run Type window opens with the run type loaded.
- Click .
- To report on all or a filtered subset of run types:
- Select the Options tab.

- To include a section at the end of the report with the report settings used to produce the report, leave the Include Report Options checkbox marked. To produce the report without this information, clear the checkbox.
- Mark the checkbox(es) for the additional information to include:
- Timestamps
- Memos
- Custom Fields (only visible if custom fields are set up)
- Select the Output tab.
- In the Design field, look up and select the report design to use.
- In the toolbar, click the icon for the type of output you want:
- - Provides access to two preview options.
- Preview - Click the icon or click the drop-down arrow and select Preview from the drop-down menu to view the report in the Crystal Reports viewer.
- Preview to PDF - Click the drop-down arrow next to the icon and select Preview to PDF to view the report in the PDF reader.
- - Opens the Print dialog so that you can select and configure a printer and then print a paper copy of the report.
- - Opens the dialog so that you can address and compose an email that the report will be attached to. For best results, ensure your email client is running before you attempt to send a report via email.
- - Opens the Export Report dialog so that you can save the report to a file. File types include Crystal Reports (.rpt), PDF (.pdf), Microsoft Excel (.xls), Microsoft Word (.doc), rich text (.rtf), and XML (.xml).
Data extensions
The following data extension is available for the report:
- Run types
PRCode Segments Listing
Purpose
The PRCode Segments Listing provides a list of the PRCode segments defined in Payroll.
Content
For each PRCode segment included on the report, the listing shows:
- segment name
- plural name
- segment description
- parent segment
- parent segment item
- segment type
- whether the segment is active
- display order.
In addition, you can include one or more of the following:
- timestamps
- memos
- custom fields.
The following total appears on the report:
- record count.
Print the report
- In the Navigation pane, highlight the Payroll/Human Resources > Setup > Segments folder.
- Start the report set-up wizard.
- To report on all or a filtered subset of segments:
- Right-click the Segments folder and select Select and Report > PRCode Segments Listing from the shortcut menu.
- On the Selection tab, define any filters to apply to the data.
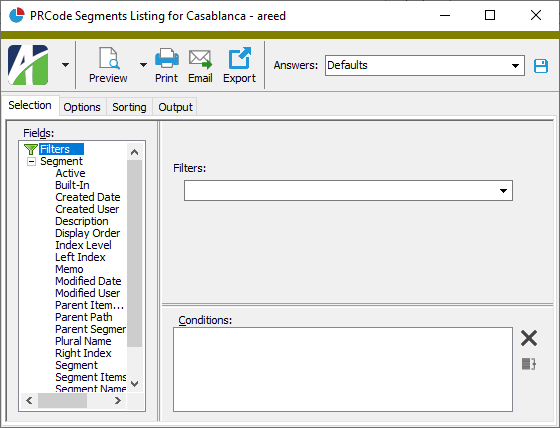
- To report on specifically selected segments:
- In the HD view, select the segments to include on the report. You can use Ctrl and/or Shift selection to select multiple records.
- Click .
- To report on a particular segment from the Segment window:
- In the HD view, locate and double-click the segment to report on. The Segment window opens with the segment loaded.
- Click .
- To report on all or a filtered subset of segments:
- Select the Options tab.

- To include a section at the end of the report with the report settings used to produce the report, leave the Include Report Options checkbox marked. To produce the report without this information, clear the checkbox.
- Mark the checkbox(es) for the additional information to include:
- Timestamps
- Memos
- Custom Fields (only visible if custom fields are set up)
- Select the Sorting tab.
- In the Available Sort Options list box, highlight the field(s) to sort the report by, then click to move your selection(s) to the Assigned Sort Options list box.
- If you selected multiple sort fields, use and to arrange the sort fields in the order you want them applied.
- Select the Output tab.
- In the Design field, look up and select the report design to use.
- In the toolbar, click the icon for the type of output you want:
- - Provides access to two preview options.
- Preview - Click the icon or click the drop-down arrow and select Preview from the drop-down menu to view the report in the Crystal Reports viewer.
- Preview to PDF - Click the drop-down arrow next to the icon and select Preview to PDF to view the report in the PDF reader.
- - Opens the Print dialog so that you can select and configure a printer and then print a paper copy of the report.
- - Opens the dialog so that you can address and compose an email that the report will be attached to. For best results, ensure your email client is running before you attempt to send a report via email.
- - Opens the Export Report dialog so that you can save the report to a file. File types include Crystal Reports (.rpt), PDF (.pdf), Microsoft Excel (.xls), Microsoft Word (.doc), rich text (.rtf), and XML (.xml).
Data extensions
The following data extensions are available for the report:
- Segments
- Segment items
Segment Items Listing
Purpose
The Payroll Segment Items Listing provides a list of segment items defined in Payroll.
Content
For each segment item included on the report, the listing shows:
- segment code: item code
- short description
- whether the calculated amount is deducted from employee wages or is paid by the employer
- debit account (accrual)
- credit account (liability)
- type of date used as liability date
- tax entity.
In addition, you can include one or more of the following:
- segment item information (pay type, follows pay group, position, check stub item, run types, groups, source scale, rate scale, result scale)
- expressions (source expression, rate expression, result expression)
- parameter declarations (for each declaration: parameter, description, data type, scale, date source, whether the parameter is obsolete)
- parameter values (for each parameter: parameter, effective date, value, description)
- timestamps
- memos
- custom fields.
The following total appears on the report:
- record count.
Print the report
- In the Navigation pane, highlight the Payroll/Human Resources > Setup > Segment Items folder.
- Start the report set-up wizard.
- To report on all or a filtered subset of payroll segment items:
- Right-click the Segment Items folder and select Select and Report > PR Segment Items Listing from the shortcut menu.
- On the Selection tab, define any filters to apply to the data.

- To report on specifically selected payroll segment items:
- In the HD view, select the payroll segment items to include on the report. You can use Ctrl and/or Shift selection to select multiple records.
- Click .
- To report on a particular segment item from the Segment Item window:
- In the HD view, locate and double-click the segment item to report on. The Segment Item window opens with the segment item loaded.
- Click .
- To report on all or a filtered subset of payroll segment items:
- Select the Options tab.
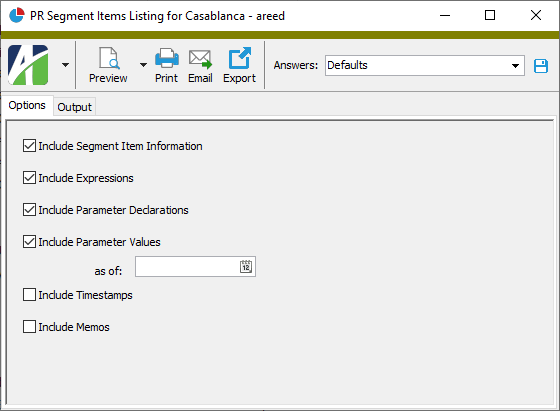
- Mark the checkbox(es) for the additional information to include:
- Segment Item Information
- Expressions
- Parameter Declarations
- Parameter Values - If this checkbox is marked, the as of field is enabled. Enter the parameter value effective date as of which to include parameter values on the report.
- Report Options. To include a section at the end of the report with the report settings used to produce the report, leave the checkbox marked. To produce the report without this information, clear the checkbox.
- Timestamps
- Memos
- Custom Fields (only visible if custom fields are set up)
- Select the Output tab.
- In the Design field, look up and select the report design to use.
- In the toolbar, click the icon for the type of output you want:
- - Provides access to two preview options.
- Preview - Click the icon or click the drop-down arrow and select Preview from the drop-down menu to view the report in the Crystal Reports viewer.
- Preview to PDF - Click the drop-down arrow next to the icon and select Preview to PDF to view the report in the PDF reader.
- - Opens the Print dialog so that you can select and configure a printer and then print a paper copy of the report.
- - Opens the dialog so that you can address and compose an email that the report will be attached to. For best results, ensure your email client is running before you attempt to send a report via email.
- - Opens the Export Report dialog so that you can save the report to a file. File types include Crystal Reports (.rpt), PDF (.pdf), Microsoft Excel (.xls), Microsoft Word (.doc), rich text (.rtf), and XML (.xml).
Data extensions
The following data extensions are available for the report:
- Segments
- Segment items
Segment Item Parameters Listing
Purpose
The Segment Item Parameters Listing provides a list of segment item parameters defined in Payroll.
Content
For each segment item parameter included on the report, the listing shows:
- description
- data type
- scale
- date source
- whether the parameter is obsolete.
In addition, you can include:
- parameter values (segment item, effective date, value).
The following total appears on the report:
- record count.
Print the report
- In the Navigation pane, highlight the Payroll/Human Resources > Setup > Segment Items > Parameters folder.
- Start the report set-up wizard.
- To report on all or a filtered subset of segment item parameters:
- Right-click the Parameters folder and select Select and Report > Segment Item Parameters Listing from the shortcut menu.
- On the Selection tab, define any filters to apply to the data.
- To report on specifically selected segment item parameters:
- In the HD view, select the segment item parameters to include on the report. You can use Ctrl and/or Shift selection to select multiple records.
- Click .
- To report on a particular segment item parameter from the Parameter window:
- In the HD view, locate and double-click the segment item parameter to report on. The Parameter window opens with the segment item parameter loaded.
- Click .
- To report on all or a filtered subset of segment item parameters:
- Select the Options tab.
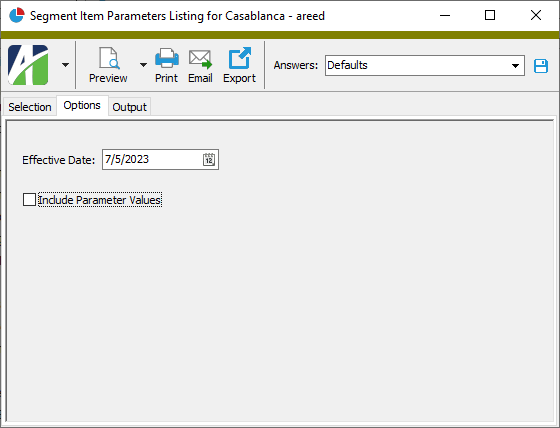
- In the Effective Date field, enter the date to compare with the parameter value effective dates to determine which parameters to include on the report.
- To include values for the parameters on the report, mark the Include Parameter Values checkbox.
- To include a section at the end of the report with the report settings used to produce the report, leave the Include Report Options checkbox marked. To produce the report without this information, clear the checkbox.
- Select the Output tab.
- In the Design field, look up and select the report design to use.
- In the toolbar, click the icon for the type of output you want:
- - Provides access to two preview options.
- Preview - Click the icon or click the drop-down arrow and select Preview from the drop-down menu to view the report in the Crystal Reports viewer.
- Preview to PDF - Click the drop-down arrow next to the icon and select Preview to PDF to view the report in the PDF reader.
- - Opens the Print dialog so that you can select and configure a printer and then print a paper copy of the report.
- - Opens the dialog so that you can address and compose an email that the report will be attached to. For best results, ensure your email client is running before you attempt to send a report via email.
- - Opens the Export Report dialog so that you can save the report to a file. File types include Crystal Reports (.rpt), PDF (.pdf), Microsoft Excel (.xls), Microsoft Word (.doc), rich text (.rtf), and XML (.xml).
Data extensions
The following data extensions are available for the report:
- Segment item parameters
- Segment item parameter values
Checks Proof Report
Purpose
The Checks Proof Report provides a list of check lines subtotaled by type (Pay, Deduction, Tax, Statistic) with the result amounts in color to match the check form:
The Checks Proof Report is functionally identical to running the Checks Listing with the "Checks Proof Color" design. This design is no longer built in.
Content
For each check included on the report, the report shows:
- batch - entry number
- employee code and name
- check date
- pay amount
- deduction/tax amount
- net pay
- separation/correction indicator.
In addition, you can include one or more of the following:
- check information (payroll run, description, merge number, liability account, bank account, pay period begin and end dates, pay periods per year, GL batch name)
- check lines (for each check detail line: work date, PRCode and description, source, rate, result)
- check line distributions (for each distribution line: work date, GL account and description, source, result)
- disbursements (whether disbursement has been voided, disbursement method, reference, amount, direct deposit account, account nickname, account type)
- disbursement date, GL date, and GL bank account
- payee
- timestamps
- memos
- custom fields.
The following total appears on the report:
- grand totals.
Preinstalled saved answers
For your convenience, ActivityHD includes a preinstalled saved answer for a common reporting scenario:
- "Proof Checks"
Print the report
- In the Navigation pane, highlight the Payroll/Human Resources > Checks folder.
- Start the report set-up wizard.
- To report on all or a filtered subset of checks:
- Right-click the Checks folder and select Select and Report > Checks Proof Report from the shortcut menu.
- On the Selection tab, define any filters to apply to the data.

- To report on specifically selected checks:
- In the HD view, select the checks to include on the report. You can use Ctrl and/or Shift selection to select multiple records.
- Click and select Checks Proof Report from the drop-down menu.
- To report on a particular check from the Check window:
- In the HD view, locate and double-click the check to report on. The Check window opens with the check loaded.
- Click and select Checks Proof Report from the drop-down menu.
- To report on all or a filtered subset of checks:
- Select the Options tab.

- Mark the checkbox(es) for the additional information to include:
- Check Information
- Check Lines
- Check Line Distributions
- Disbursements - If you mark this checkbox, the following checkboxes are enabled:
- Dates and GL Accounts - Includes disbursement dates, GL dates, and GL accounts.
- Payee
- Report Options. To include a section at the end of the report with the report settings used to produce the report, leave the checkbox marked. To produce the report without this information, clear the checkbox.
- Timestamps
- Memos
- Custom Fields (only visible if custom fields are set up)
- Select the Sorting tab.

- In the Available Sort Options list box, highlight the field(s) to sort the report by, then click to move your selection(s) to the Assigned Sort Options list box.
- If you selected multiple sort fields, use and to arrange the sort fields in the order you want them applied.
- To start a new page for each change in one of the sorting options you specified, select the sorting option to break on from the Page Break Level drop-down list. If you do not want to insert page breaks, accept "(none)".
- To subtotal based on one of the sorting options you specified, select the sorting option to subtotal on from the Subtotal Level drop-down list. If you do not want to show subtotals, accept "(none)".
- Select the Output tab.
-
In the Design field, look up and select the report design to use.
There are two built-in designs for the Checks Proof Report:
- Checks Proof - This design is especially for proofing checks. For each check on the listing, information is broken out by employee and employer. The Employee section has Pay, Deductions, and Taxes subsections; the Employer section has Deductions, Taxes, and Statistics subsections. This design supports page break and subtotal levels.
- Checks Proof Color - This design is the same as the Checks Proof design except that it renders pay amounts in
green ; employee deduction and tax amounts inred ; employer deduction, tax, and statistic amounts inblue , matching the color scheme on the Lines tab of the Check window. This design supports page break and subtotal levels.
- In the toolbar, click the icon for the type of output you want:
- - Provides access to two preview options.
- Preview - Click the icon or click the drop-down arrow and select Preview from the drop-down menu to view the report in the Crystal Reports viewer.
- Preview to PDF - Click the drop-down arrow next to the icon and select Preview to PDF to view the report in the PDF reader.
- - Opens the Print dialog so that you can select and configure a printer and then print a paper copy of the report.
- - Opens the dialog so that you can address and compose an email that the report will be attached to. For best results, ensure your email client is running before you attempt to send a report via email.
- - Opens the Export Report dialog so that you can save the report to a file. File types include Crystal Reports (.rpt), PDF (.pdf), Microsoft Excel (.xls), Microsoft Word (.doc), rich text (.rtf), and XML (.xml).
Data extensions
The following data extensions are available for the report:
- Employees
- Checks
- Check lines
- Check line distributions
- Check disbursements
Tax Entities Listing
Purpose
The Tax Entities Listing provides a list of the tax entities defined in Payroll.
Content
For each tax entity code included on the report, the listing shows:
- parent entity
- description
- employer ID
- unemployment ID
- SUTA maximum
- year the current SUTA maximum took effect
- whether the entity is a built-in entity.
In addition, you can include one or more of the following:
- timestamps
- memos
- custom fields.
The following total appears on the report:
- record count.
Print the report
- In the Navigation pane, highlight the Payroll/Human Resources > Setup > Tax Entities folder.
- Start the report set-up wizard.
- To report on all or a filtered subset of tax entities:
- Right-click the Tax Entities folder and select Select and Report > Tax Entities Listing from the shortcut menu.
- On the Selection tab, define any filters to apply to the data.
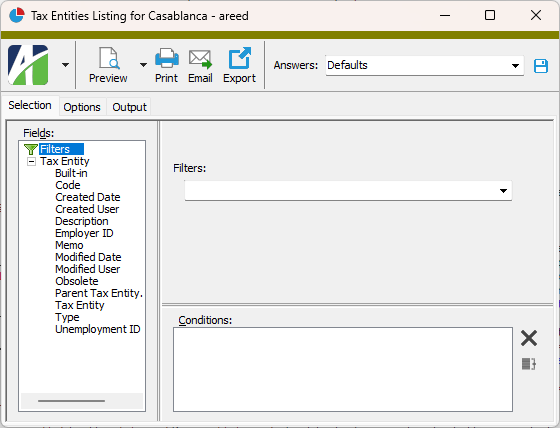
- To report on specifically selected tax entities:
- In the HD view, select the tax entities to include on the report. You can use Ctrl and/or Shift selection to select multiple records.
- Click .
- To report on a particular tax entity from the Tax Entity window:
- In the HD view, locate and double-click the tax entity to report on. The Tax Entity window opens with the tax entity loaded.
- Click .
- To report on all or a filtered subset of tax entities:
- Select the Options tab.
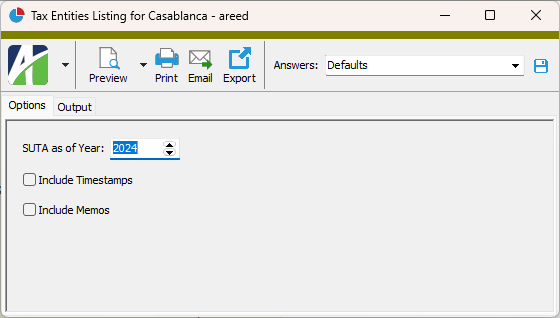
- In the SUTA as of Year field, enter the year for which you want to view SUTA taxable wage base amounts on the report. If the current date falls in January through September, the field defaults to the current year. In October through December, the field defaults to the next year. To get the latest dated values, leave the field blank. For example, some states announce SUTA taxable wages a few years in advance. Leaving the field blank would show the latest future value for these states.
- To include a section at the end of the report with the report settings used to produce the report, leave the Include Report Options checkbox marked. To produce the report without this information, clear the checkbox.
- Mark the checkbox(es) for the additional information to include:
- Timestamps
- Memos
- Custom Fields (only visible if custom fields are set up)
- Select the Output tab.
- In the Design field, look up and select the report design to use.
- In the toolbar, click the icon for the type of output you want:
- - Provides access to two preview options.
- Preview - Click the icon or click the drop-down arrow and select Preview from the drop-down menu to view the report in the Crystal Reports viewer.
- Preview to PDF - Click the drop-down arrow next to the icon and select Preview to PDF to view the report in the PDF reader.
- - Opens the Print dialog so that you can select and configure a printer and then print a paper copy of the report.
- - Opens the dialog so that you can address and compose an email that the report will be attached to. For best results, ensure your email client is running before you attempt to send a report via email.
- - Opens the Export Report dialog so that you can save the report to a file. File types include Crystal Reports (.rpt), PDF (.pdf), Microsoft Excel (.xls), Microsoft Word (.doc), rich text (.rtf), and XML (.xml).
Data extensions
The following data extension is available for the report:
- Tax entities