Fixed assets are the tangible items purchased by your company for long-term use in the production of income. Fixed assets include items such as land, buildings, and equipment. In ActivityHD, fixed assets are tracked using the asset entity. An asset record is used to record the acquisition of an asset, its acquisition costs, improvements to the asset, and its eventual retirement. One or more ledgers can be associated with an asset and are used to calculate depreciation, apply bonus depreciation, track added costs, and record retirement transactions by ledger.
Using the “As of” date in the HD view
The values in some columns of the Assets HD view can change depending on the value in the As of date field. These columns are calculated using only postings which occurred on or before the date entered in the As of field. The field defaults to today’s date.
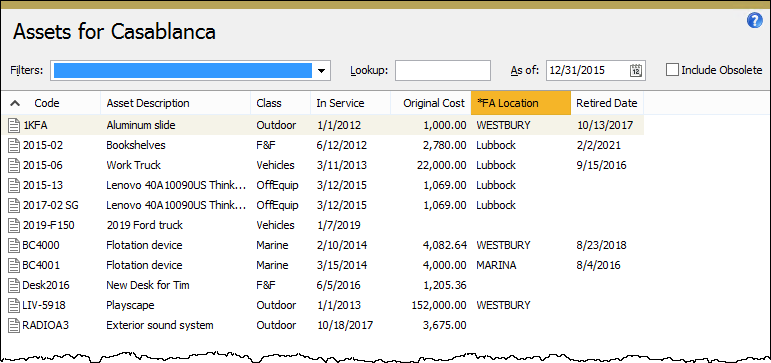
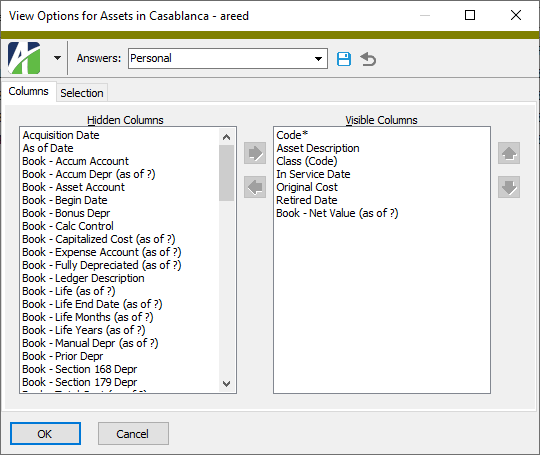
Columns that are affected by the “As of” date are indicated by an asterisk (*) at the beginning of the column heading. They also have “(as of ?)” in their descriptions in the Columns tab of the View Options dialog.
Create an asset
- In the Navigation pane, highlight the Fixed Assets > Assets folder.
- Click
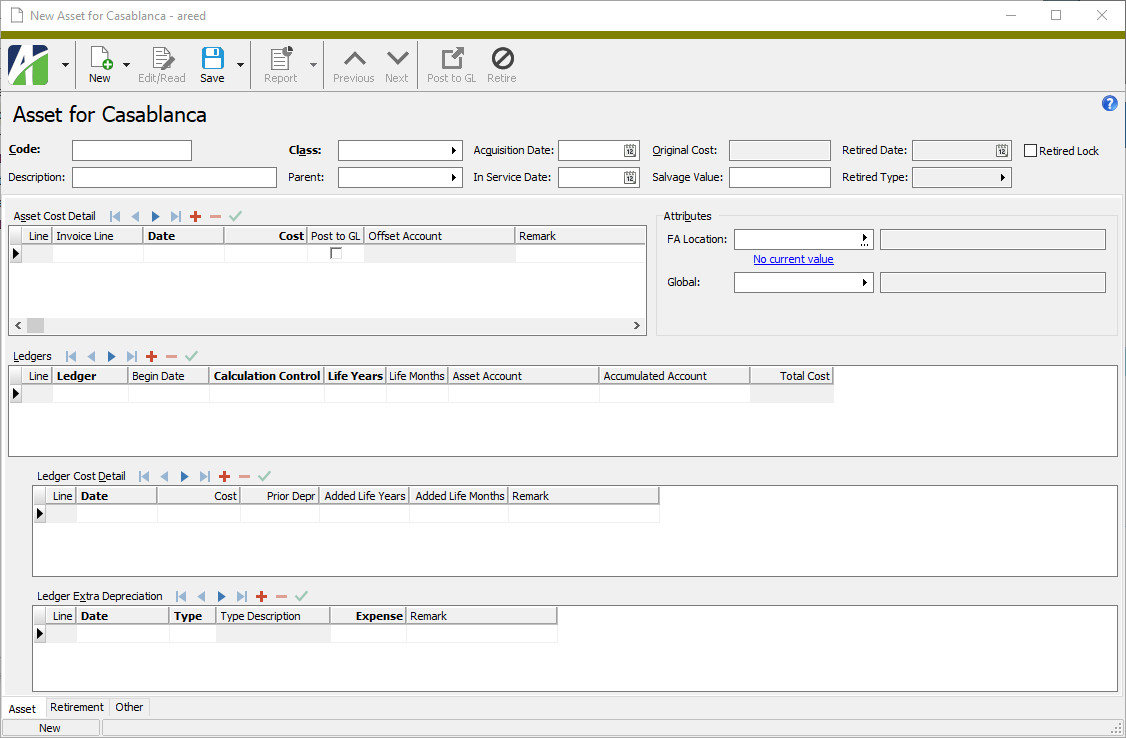
 . The New Asset window opens.
-
Enter a unique Code for the asset.
Tip
AccountingWare suggests that you develop a systematic naming convention to make your assets readily identifiable.
- Enter a Description of the asset.
- In the Class field, select the asset class to which the asset belongs. An asset class can provide defaults for asset posting accounts, the calculation control, and asset life.
Note
At this point, you have entered the minimum information needed to save an asset record.
- If the asset is a separable component of another asset, select the Parent asset.
- In the Acquisition Date field, enter the date that the asset was acquired.
- In the In Service Date field, enter the date the asset was first ready and available for use.
- In the Asset Cost Detail table, enter the following details for each cost related to the asset.
- If the FA to AP interface is installed and there is an AP invoice GL detail line that corresponds to the cost detail item, do the following:
- In the Invoice Line column, select the AP invoice GL detail line. The Date and Cost columns are populated from the invoice GL detail line. The Date defaults to the invoice date and the Cost defaults to the remaining invoice line amount.
Tip
The Find dialog (F3) in the Invoice Line column allows selection of multiple invoice lines at once. In the Find dialog, use Ctrl and/or Shift selection to select multiple lines.
If you need to create a GL posting to move the cost amount from the original account that was debited by an earlier transaction (such as an AP invoice distribution or other GL entry) to the asset's GL asset account when the asset is capitalized, mark the Post to GL checkbox. If you do not need to create a GL posting, skip to step d.
Use Post to GL to replace manual entries. It is particularly useful when adding assets from CIP (construction-in-progress) or when adding a previously expensed asset. You do not need to use Post to GL if the asset cost has already been posted to the asset account.
- If you marked the Post to GL checkbox, the Offset Account column is enabled and required. Select the credit account to use when generating asset cost postings to GL. The Post to GL process optionally creates asset cost postings to debit the asset account and credit the offset account for asset cost detail. The asset account may default to the account on the row with a source of "Invoice" in the AP invoice's GL Detail table.
- Suppose you want to accumulate ongoing expenses for an asset that is under construction into a WIP (work-in-progress) account until the asset is placed in service. Costs in the Asset Cost Detail table which are dated before the asset's in-service date will be posted to the asset's GL asset account as of its in-service date.
- Suppose AP operators do not know whether a purchase should be capitalized or expensed. Operators could enter a "suspense" account on the AP invoice distribution line. Later, a GL manager can review unhandled expenses in the suspense account and create an asset for the purchases which should be capitalized, creating an asset cost detail line which credits the suspense account and debits the asset's GL asset account.
- In the Remark column enter any additional information you want to record about this asset cost detail line.
 To learn about circumstances where you might want to specify an offset account, expand this link.
Examples
- In the Invoice Line column, select the AP invoice GL detail line. The Date and Cost columns are populated from the invoice GL detail line. The Date defaults to the invoice date and the Cost defaults to the remaining invoice line amount.
- Otherwise, if you are not associating an AP invoice GL detail line with the cost detail item, provide the following information for the cost detail item:
- Enter the Date the cost was incurred.
- Enter the Cost amount.
- If you need to create a GL posting to move the cost amount from the original account that was debited by an earlier transaction (such as an AP invoice distribution or other GL entry) to the asset's GL asset account when the asset is capitalized, mark the Post to GL checkbox. If you do not need to create a GL posting, skip to step e.
- If you marked the Post to GL checkbox, the Offset Account column is enabled and required. Select the credit account to use when generating asset cost postings to GL. The Post to GL process optionally creates asset cost postings to debit the asset account and credit the offset account for asset cost detail.
- Suppose you want to accumulate ongoing expenses for an asset that is under construction into a WIP (work-in-progress) account until the asset is placed in service. Costs in the Asset Cost Detail table which are dated before the asset's in-service date will be posted to the asset's GL asset account as of its in-service date.
- Suppose AP operators do not know whether a purchase should be capitalized or expensed. Operators could enter a "suspense" account on the AP invoice distribution line. Later, a GL manager can review unhandled expenses in the suspense account and create an asset for the purchases which should be capitalized, creating an asset cost detail line which credits the suspense account and debits the asset's GL asset account.
- In the Remark column enter any additional information you want to record about this asset cost detail line.
 To learn about circumstances where you might want to specify an offset account, expand this link.
Examples
- If the FA to AP interface is installed and there is an AP invoice GL detail line that corresponds to the cost detail item, do the following:
-
In the Attributes section, specify the attribute values which apply to the asset.
Fixed Assets attributes can be date driven or not date driven. The entry field for date-driven attributes culminates in
 , while the entry field for an attribute that is not date driven culminates in
  .
.For each attribute which is not date driven, enter or select the attribute value.
For each date-driven attribute, do the following:
-
In the <Attribute Name> field, press F2 or click
 and select Detail. The Asset Attribute Detail dialog box opens.
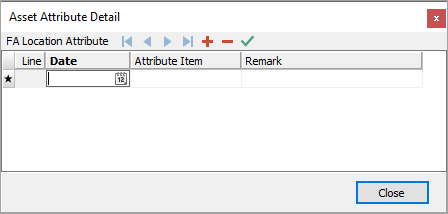
- In the Date column, enter the date the attribute item takes effect.
- In the Attribute Item column, select the attribute item to apply as of the specified date.
- In the Remark column, enter any additional information you want to record about the attribute item selected.
- Click Close.
Note
"FA Location" is a built-in date-driven attribute. It replaces the former location entity to track the movement of an asset from place to place.
-
- In the Ledgers table, set up the depreciation details for each ledger you want to track depreciation of this asset in. If the asset class you specified has default ledger information defined on it, that detail is loaded in this table.
- In the Ledger column, select the ledger to set up depreciation for. (If only one non-obsolete ledger exists, that ledger is loaded for you.)
- In the Begin Date column, enter the date to start depreciating the asset. The Begin Date must be on or after the In Service Date. The default date is the in-service date.
- In the Calculation Control column, select the calculation control to use to calculate depreciation for the asset.
In the Life Years and Life Months columns, enter the asset's initial life in terms of years and months.
Note
For financial ledgers, the projected life is simply an estimate. For tax ledgers, the projected life is determined by statute and based on the type of asset.
In the Asset Account field, select the account to post acquisition costs, added value, cost adjustments, disposal transactions, and retirement to for this ledger. The default asset account is derived from the combination of asset account masks from the asset class and ledger. If the asset account contains blanks or is invalid, the field is shaded yellow. If you override the default account number, the account number displays in purple.
Note
The asset account should not be changed during the life of an asset unless appropriate GL postings are made.
- In the Accumulated Account column, select the account to post accumulated depreciation to for this ledger. The account number defaults from the account/account masks specified on the asset class and ledger. If the accumulated depreciation account contains blanks or is invalid, the field is shaded yellow. If you override the default account number, the account number displays in purple.
- When you finish, save the new asset. ActivityHD validates the data entered.
![]() Validate GL accounts on assets
Validate GL accounts on assets
The Validate GL action simplifies the process of fixing invalid accounts on an asset once the accounts themselves have been created or updated. It is not sufficient to merely create or correct the accounts.
To validate accounts on assets:
- In the Navigation pane, highlight Fixed Assets > Assets > Ledgers.
- In the HD view, apply the "Has invalid accounts" filter. For the resulting assets, verify the accounts exist or create them if necessary.
- In the Navigation pane, highlight Fixed Assets > Assets > Ledger Retirement.
- In the HD view, apply the "Has invalid accounts" filter. For the resulting assets, verify the accounts exist or create them if necessary.
- In the Navigation pane, highlight Fixed Assets > Assets.
- In the HD view, apply the "Has Invalid Accounts" filter.
- Select all the resulting invoices (Ctrl+A).
- In the toolbar, click
 . You are prompted to confirm that you want to validate the accounts on the assets.
- Click Yes. The Validate GL Accounts on Assets process starts.
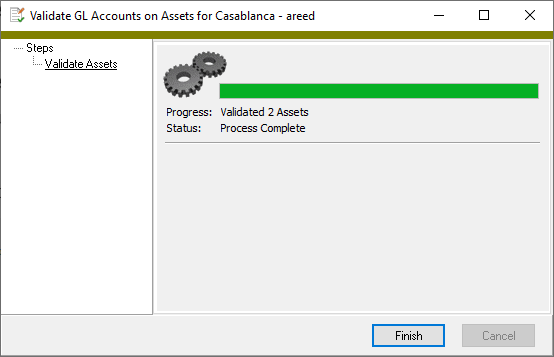
- When the process completes, click Finish.
![]() Post depreciation, asset cost detail, and/or retirement to GL
Post depreciation, asset cost detail, and/or retirement to GL
Note
Until version 8.20-0, the depreciation calculation did not calculate depreciation in the month of retirement since lifetime total depreciation was going to be backed out of accumulated depreciation in the same month; however, because total depreciation is significant for both book and tax purposes, depreciation for the month of retirement is now included in the calculation.
Post depreciation, asset cost detail, or retirement to GL
- In the Navigation pane, highlight the Fixed Assets > Assets folder.
- Start the Post FA to GL wizard.
- To post depreciation, asset costs, or retirement for all or a filtered subset of assets:
- Right-click the Assets folder and select Select and Post to GL from the shortcut menu.
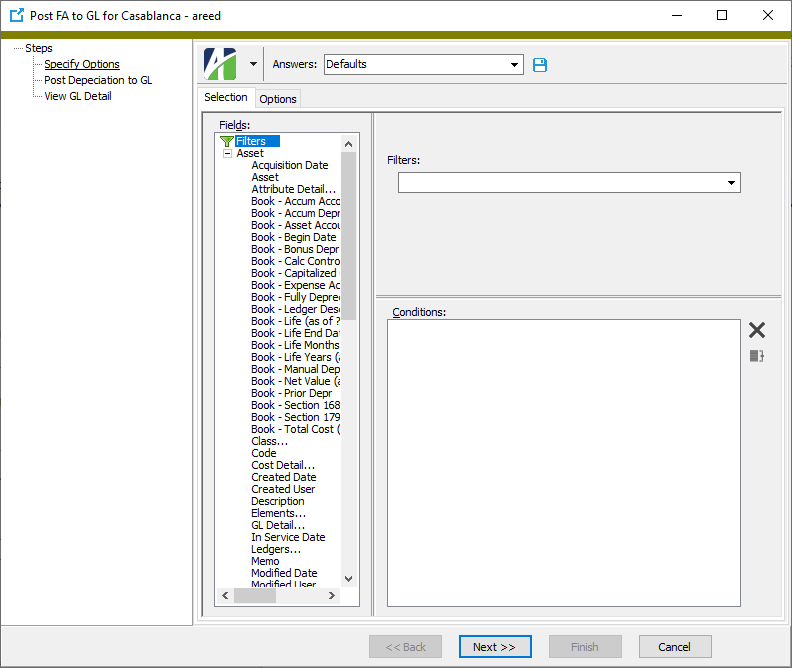
- On the Selection tab, define any filters to apply to the data.
- Right-click the Assets folder and select Select and Post to GL from the shortcut menu.
- To post depreciation, asset costs, and/or retirement for specifically selected assets:
- In the HD view, select the assets to post depreciation, asset costs, and/or retirement for. You can use Ctrl and/or Shift selection to select multiple assets.
- Click
 .
.
- To post for a particular asset from the Asset window:
- In the HD view, locate and double-click the asset you want to post depreciation, asset costs, and/or retirement for. The Asset window opens with the asset loaded.
- Click
 .
.
- To post depreciation, asset costs, or retirement for all or a filtered subset of assets:
- Select the Options tab.
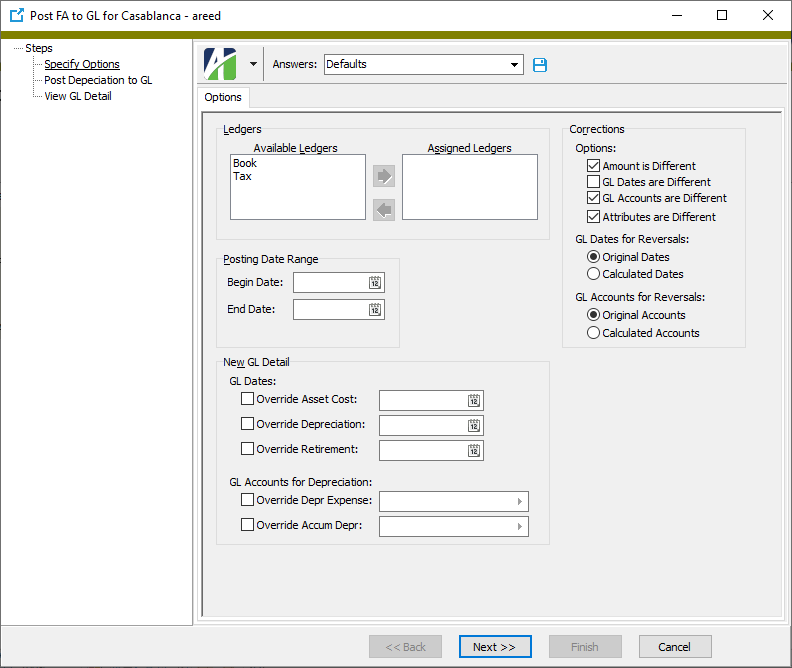
- In the Ledgers section, select the ledgers to post depreciation, asset costs, and/or retirement for. To do so:
- In the Available Ledgers list box, highlight the ledger(s) to post for. You can use Ctrl and/or Shift selection to select multiple records.
- Click
 to move your selection(s) to the Assigned Ledgers list box.
If only one non-obsolete ledger exists, it is preselected for you.
- In the Posting Date Range fields, enter the range of dates for which to post.
- The options in the GL Dates area of the New GL Detail section affect the handling of asset costs, depreciation, and retirement. Mark the checkbox for each source for which you want to override the default GL date on postings with a manual date. If you mark a checkbox, the adjacent date field is enabled. Enter the manual date to use. Your options include:
- Override Asset Cost
- Override Depreciation
- Override Retirement
- Use the fields in the GL Accounts for Depreciation area to indicate which accounts to use for depreciation expense and accumulated depreciation. Your options are:
- Override Depr Expense. Mark this checkbox to override the depreciation expense accounts built from the masks set up on the asset class, ledger, and asset location. If you mark the checkbox, the adjacent account field is enabled. Enter the partial account mask or full account number of the depreciation expense account to use.
- Override Accum Depr. Mark this checkbox to override the accumulated depreciation accounts built from the masks set up on the asset class, ledger, and asset location. If you mark the checkbox, the adjacent account field is enabled. Enter the partial account mask or full account number of the accumulated depreciation account to use.
- In the Corrections section, mark how to determine which existing GL detail postings to correct. Your options include:
- Amount is Different. This option is marked by default. Ensure this checkbox is marked to correct postings when the amount is different than the new calculation.
GL Dates are Different. Mark this checkbox to correct existing GL detail if the GL date is different than the new calculation.
Note
If you previously posted correcting entries to a different GL date for a historical time period, you may not want to change those postings if you repost to the same period.
- GL Accounts are Different. This option is marked by default. Ensure this checkbox is marked to correct existing GL detail if either of the accounts is different than the new calculation.
- Attributes are Different. This option is marked by default. Ensure this checkbox is marked to correct existing GL detail if the attribute value is different than the new calculation.
 To learn more about corrections in the Post FA to GL process, expand this link.
You can rerun the Post FA to GL process over a historical date range to generate correcting postings after changes are made to asset or setup information.
Example
If the depreciation expense account on an asset class changes, you may need to reclassify existing postings from an old expense account to a new one. For merged GL journal entries, running Post FA to GL generates reversal postings to the old account and new postings to the new expense account.
However, because you may not want to generate correcting entries simply because the depreciation account changed, Post FA to GL provides correction options so you have control over what gets corrected when Post FA to GL is run over a historical period.
- In the GL Dates for Reversals field, select which dates to use for any reversing entries that are created. Your options are:
- Original Dates. Use the same dates which were used on the voided entries.
- Calculated Dates. Use the dates that are on the new calculated entries.
- In the GL Accounts for Reversals field, select which accounts to use for any reversing entries that are created. Your options are:
- Original Accounts. Use the same accounts which were used on the voided entries.
Calculated Accounts. Use the accounts that are on the new calculated entries.
Note
AccountingWare discourages using the "Calculated Accounts" option if the accumulated depreciation account is overridden since it can cause accounts to be out of balance.
- Click Next >>. ActivityHD prompts you to confirm that you want to post.
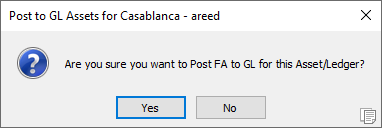
- Click Yes. ActivityHD posts to the general ledger.
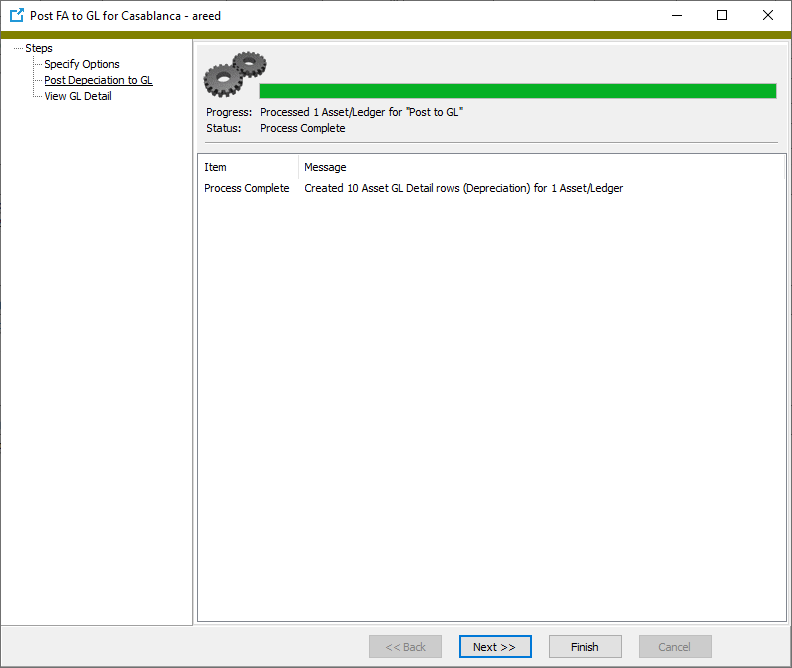
- Click Next >> to view GL posting detail.
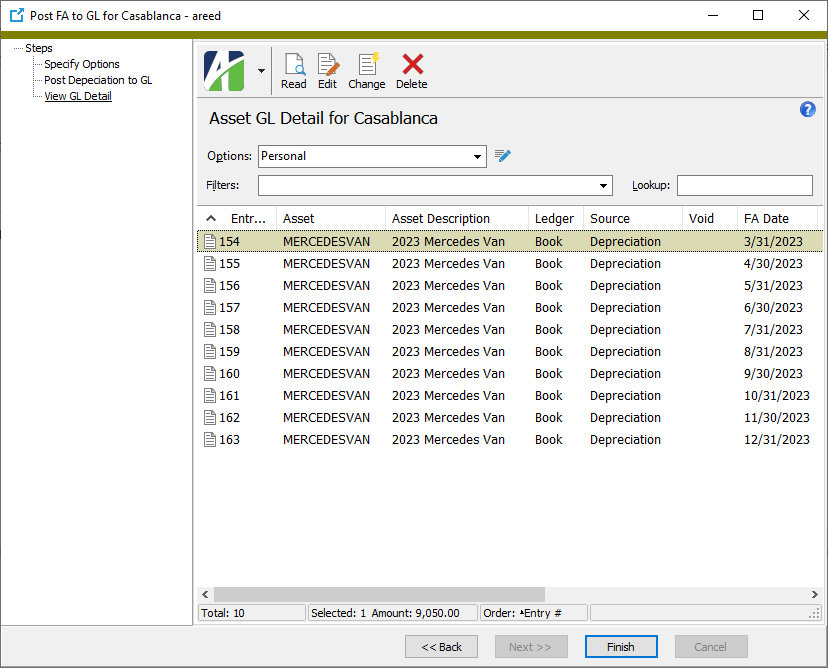
At this point, you can drill down on GL detail records to view details in the Asset GL Detail window.
Click here for information about troubleshooting common Post FA to GL errors.
- When you finish viewing GL detail, click Finish.
The remaining options pertain to corrections only.
The final depreciation posting for a retired asset uses the retirement date, NOT the period end date, as the posting date.
A note about Post FA to GL and WIP accounts
Post FA to GL does not post any asset cost until the asset is placed in service. The implication is that asset cost posting is for capitalized costs. Posting moves the asset cost from the WIP (work-in-progress) account to the asset account (or from an expense/suspense account to the asset account).
If the in-service date is blank, the asset has not been capitalized; therefore, no depreciation is calculated and no asset costs are capitalized.
When an asset is placed in service, the in-service date triggers depreciation to begin and asset costs dated on or before the in-service date are moved from the offset account to the asset account with a GL posting date of the in-service date.
Asset costs dated after the in-service date are considered added costs. Added costs changes calculated depreciation (based on the in-service convention) to be depreciated over the remaining life of the asset. The GL posting for the added cost moves the added cost from the offset account to the asset account with a GL posting date of the added cost date.
Typically, you would not use a WIP account for an added value purchase on the AP invoice; however, since the AP invoice may have an expense account or some sort of suspense account, the added value asset cost posting could be used to move it from whatever account is on the invoice to the asset account.
In sum, the GL posting for asset cost detail credits the offset account and debits the asset account. The GL posting date is the in-service date if the asset cost date is before the in-service date; otherwise, if the asset cost date is after the in-service date, the GL posting date is the asset cost date.
![]() Record positive added value to an asset
Record positive added value to an asset
When costs which increase the value of an asset are incurred, the costs should be recorded in the Ledger Cost Detail table for the appropriate ledger(s). ActivityHD adds 100% of the added value to the remaining depreciation amount for the asset and depreciates the new value over the remaining life of the asset. Use this procedure when you want to capitalize additional costs such as improvements and repairs.
Record positive added value to an asset
- In the Navigation pane, highlight the Fixed Assets > Assets folder.
- In the HD view, locate and double-click the asset you need to record added value for to open it in the Asset window.
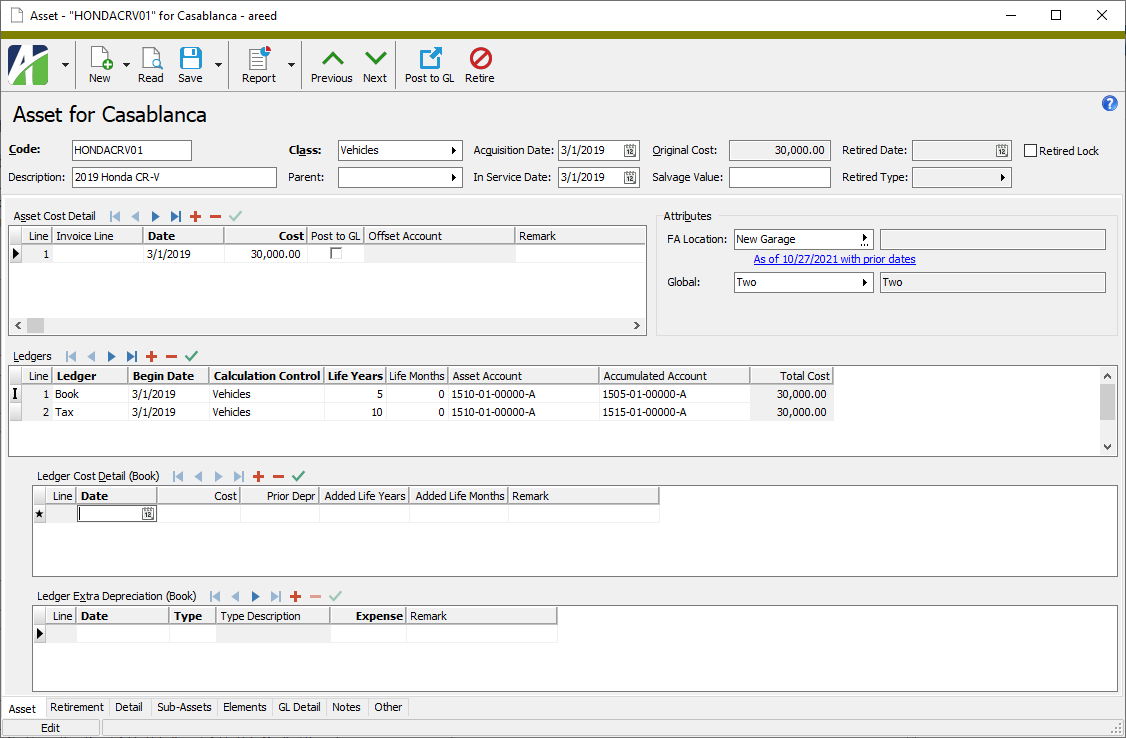
- In the Ledgers table, select the ledger to enter added value for.
- In the Ledger Cost Detail table, record the added value:
- In the Date column, enter the date the added value should start affecting the depreciation calculation.
- In the Cost field, enter the added cost amount.
- In the Added Life Years and Added Life Months columns, enter the years and months of added life for the asset due to the cost recorded on this line.
- In the Remark column, enter any comments pertinent to the added value entry.
- If you need to include the added value in other ledgers, repeat steps 3-4.
- When you finish, save your changes.
![]() Record negative added value to partially dispose of an asset
Record negative added value to partially dispose of an asset
Entering a negative added value for an asset implies that you are disposing of part of the asset. In essence, this is equivalent to partial retirement of the asset. Unlike positive added value, where the added value amount is simply added to the remaining depreciation amount, negative added value must take into account the prior depreciation on the disposed part of the asset. ![]() Click to see an example of how negative added value works.
Click to see an example of how negative added value works.
Example
Suppose you have a $1000 asset being depreciated using the straight-line convention over a period of five years. At the beginning of the fourth year, you need to dispose of 75% of the asset and continue depreciating the remainder of the asset for the remaining two years.
For the first three years of the asset's life, the annual depreciation is $200 ($1000/5 years); therefore, after three years, the total depreciation is $600 and the remaining amount to be depreciated is $400. At the start of year 4, when the asset is partially disposed, the cost basis of the remainder of the asset becomes $250 (25% of $1000). We also need to adjust the amount of prior depreciation so that it only reflects depreciation on the portion of the asset that remains in service. The prior depreciation on the "whole" asset was $600, so the prior depreciation on the remaining 25% of the asset is $150 (25% of $600). To arrive at these new values, we need to adjust off the cost ($750) and depreciation ($450) of the disposed portion of the original asset. To do so, enter a cost of -$750 and prior depreciation of -$450 in the Ledger Cost Detail table for the ledger(s) affected.

So, over the life of the asset, the depreciation looks like this:
| Year | Cost Basis | Accumulated Depreciation | Annual Depreciation | Total Depreciation | Remaining Cost to Depreciate |
|---|---|---|---|---|---|
| 1 | $1000 | $0.00 | $200.00 | $200.00 | $800.00 |
| 2 | $1000 | $200.00 | $200.00 | $400.00 | $600.00 |
| 3 | $1000 | $400.00 | $200.00 | $600.00 | $400.00 |
| 4 | $250 | $150.00 | $50.00 | $200.00 | $50.00 |
| 5 | $250 | $200.00 | $50.00 | $250.00 | $0.00 |
Note that the depreciation of $50 per year in the last two years is the same as if we'd depreciated the partial asset (of $250) over 5 years ($50 = $250/5 years).
Record negative added value to partially dispose of an asset
- In the Navigation pane, highlight the Fixed Assets > Assets folder.
- In the HD view, locate and double-click the asset you need to record negative added value for to open it in the Asset window.
- In the Ledgers table, select the ledger to enter negative added value for.
- In the Ledger Cost Detail table, record the negative added value:
- In the Date column, enter the date the negative added value should start being included in the depreciation calculation.
In the Cost column, enter the amount by which to reduce the cost basis. Enter the amount as a negative number.
Note
While you can enter a negative amount here, the negative added cost must be less than or equal to the amount required to make the remaining depreciation on the asset zero.
Example
If the original cost of the asset is $1200 and 30% of the asset is being disposed of, enter -$360 ($1200 x 30%).
In the Prior Depr column, enter the amount by which to reduce the prior depreciation of the "whole" asset. Enter the amount as a negative number.
Example
Suppose you have an asset with an original cost of $1200 and a useful life of 5 years. You use a straight-line convention for depreciation and 30% of the asset is being disposed of at the beginning of its fourth year of useful life. To adjust the prior depreciation on the asset to account for the disposal, take the annual depreciation on the "whole" asset of $240 ($1200/5 years), and multiply it by 3 years of depreciation resulting in $720 prior depreciation. To determine the amount by which to reduce the prior depreciation to account for the disposal, multiply $720 by 30% resulting in $216, then enter -$216 in this field.
- In the Remark column, enter any comments pertinent to the negative added value amount.
- If you need to include the negative added value for other ledgers, repeat steps 3-4.
- When you finish, save your changes.
![]() Record extra depreciation on an asset
Record extra depreciation on an asset
There are a few types of depreciation that ActivityHD does not calculate for you, but that you can record amounts for and post to the general ledger nonetheless. Among these are prior, bonus, manual, Section 168, and Section 179 depreciation. To record these types of depreciation, enter them in the Extra Depreciation table on the Asset tab of the asset.
ActivityHD validates extra depreciation entries to ensure consistency with other asset information. When you are performing data entry, ActivityHD warns you of discrepancies but allows you to proceed, making it easy to correct conflicts with in-service date, asset/ledger begin date, or asset/ledger depreciation method. When you attempt to save your changes, however, ActivityHD insists that any unresolved conflicts be corrected.
Note: Bonus depreciation
Bonus depreciation is figured on a year-by-year basis. At the beginning of each year, the year's entire bonus depreciation is subtracted from the asset's remaining depreciation. The month and day of the bonus depreciation only affects the tax ledger in General Ledger.
Record extra depreciation on an asset
- In the Navigation pane, highlight the Fixed Assets > Assets folder.
- In the HD view, locate and double-click the asset you need to record extra depreciation for to open it in the Asset window.
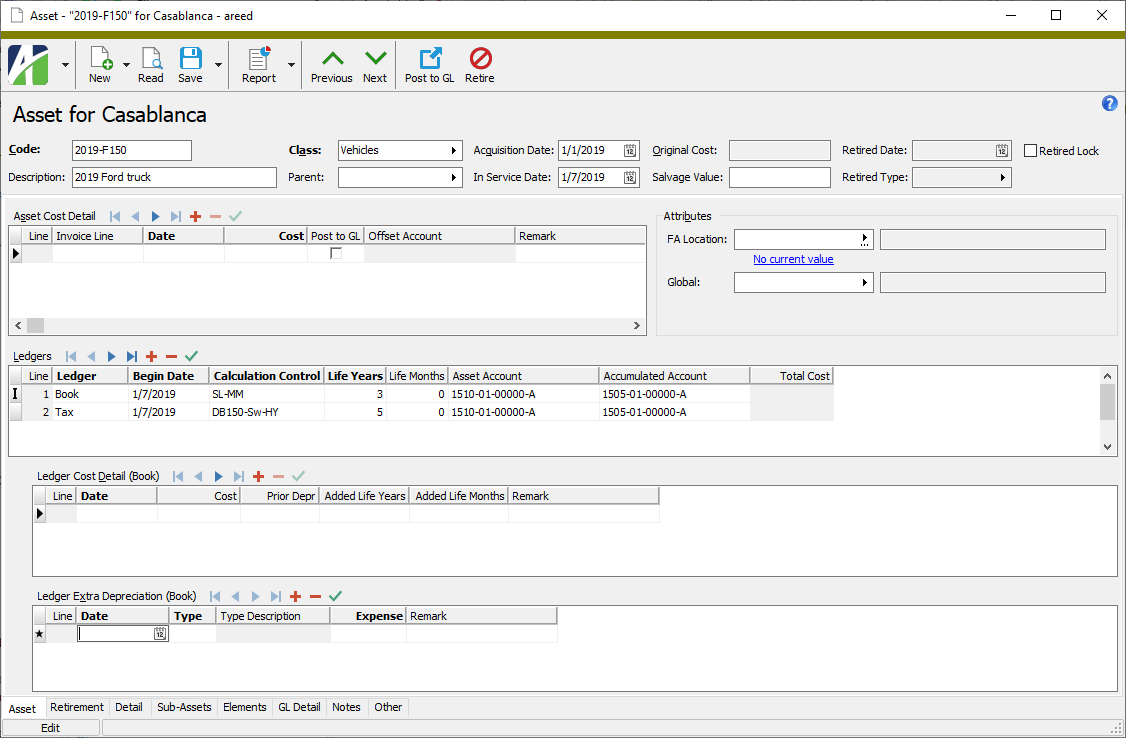
- In the Ledgers table, select the ledger for which to enter extra depreciation.
- In the Ledger Extra Depreciation table, record the extra depreciation line for the asset:
- In the Date column, enter the date to apply the extra depreciation expense.
- In the Type column, select the type of extra depreciation the entry represents.
- In the Expense column, enter the amount of the depreciation expense.
- In the Remark column, enter any comments pertinent to the extra depreciation line.
- If you need to enter additional extra depreciation lines for the asset, repeat steps a-d.
- If you need to add extra depreciation on other ledgers, repeat steps 3-4.
- When you finish, save your changes.
![]() Expense the remaining depreciation of a Section 162 asset
Expense the remaining depreciation of a Section 162 asset
A change to IRS Code Section 162 in 2013 allowed for the expensing of previously capitalized repair and maintenance items (IRS Bulletin 2013-43). With this change, the need arose to allow write-off of remaining depreciation on an asset.
If you have assets which are eligible for Section 162 bonus depreciation, you can expense their remaining value for tax purposes.
- Create a new extra depreciation type for Section 162 expense if one does not already exist.
- Run the Bonus Depreciation Report to determine the net value of the asset for which you want to expense depreciation.
- Open the asset.
- In the Ledger Extra Depreciation table, do the following:
- Enter the Date of the expense.
- In the Type column, select the Section 162 extra depreciation type.
- In the Expense column, enter the net value of the asset as determined in step 2.
- Save your changes.
![]() Make an asset a sub-asset of another asset
Make an asset a sub-asset of another asset
- If it doesn't already exist, create the parent asset record.
- Create an asset record for the "child" asset.
- With the child asset record open in edit mode, on the Asset tab in the Parent Asset field, select the asset code of the parent asset.
- Save your changes.
Note
Until version 8.20-0, the depreciation calculation did not calculate depreciation in the month of retirement since lifetime total depreciation was going to be backed out of accumulated depreciation in the same month; however, because total depreciation is significant for both book and tax purposes, depreciation for the month of retirement is now included in the calculation.
Note
You must have "Retire" access on assets to run the retirement process.
This process allows you to retire multiple assets in a single operation; however, all assets that you retire at one time must have the same retirement date, retirement type, proceeds amount, Post to GL flag, and remark. When you retire assets using this process, a new row is created in each asset's Retirement Detail table.
When you retire an asset, journal entries are created for the following amounts:
- Depreciation. Life-to-date depreciation is posted. The depreciation calculation includes depreciation for the month of retirement. A debit is made to the accumulated depreciation account; a credit, to the asset account. There is no posting if the amount is zero.
- Net Value. Net value is posted. A debit is made to the gain/loss account; a credit, to the asset account. There is no posting if the net value is zero.
- Proceeds. The proceeds amount is posted. A debit is made to the bank account; a credit, to the gain/loss account. There is no posting if the proceeds amount is zero or if no bank account is specified.
The sources for the accounts affected in the retirement process are as follows:
- Asset account: asset ledger
- Accumulated depreciation account: asset ledger
- Gain/loss account: retirement type, asset class, ledger
- Bank account: retirement type, ledger
To maintain the integrity of the accumulated depreciation account in the General Ledger, it is essential that the calculated accumulated depreciation amount at retirement is the same as the amount of GL postings made to the account over the life of the asset. It is possible to see a difference in the amounts when depreciation for an earlier period is not posted to GL or when changes to the asset cause a difference which should have been posted.
Life-to-date depreciation postings for an asset can be corrected at any time, even after retirement. Simply run the Post to GL process over the life of the asset; correcting and missing entries are created as needed. If you do not want correction postings to affect earlier periods, you can select the currently open GL period as the GL posting date.
When you run the Retirement process, a validation occurs to ensure that the calculated life-to-date accumulated depreciation matches the postings to GL.
If you find you need to "unretire" an asset, go to the Retirement Detail folder and delete the retirement detail rows.
To retire assets:
Fully retire an asset
- In the Navigation pane, highlight the Fixed Assets > Assets folder.
- Start the Retire Assets wizard:
- To retire all assets or a filtered subset of assets:
- Right-click the Assets folder and select Select and Retire from the shortcut menu.
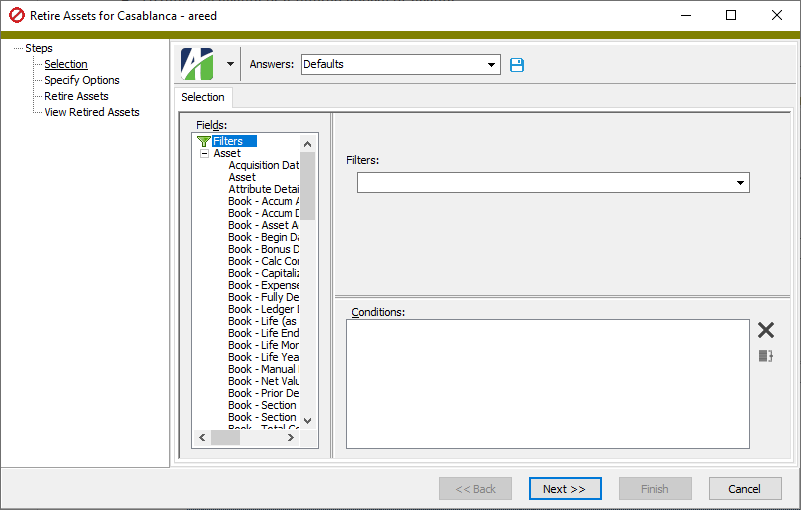
- On the Selection tab, define any filters to apply to the data.
- Right-click the Assets folder and select Select and Retire from the shortcut menu.
- To retire specifically selected assets:
- In the HD view, select the assets to retire. You can use Ctrl and/or Shift selection to select multiple assets.
- Click
 .
.
- To retire a particular asset from the Asset window:
- In the HD view, locate and double-click the asset to retire. The Asset window opens with the asset loaded.
- Click
 .
.
- To retire all assets or a filtered subset of assets:
- Select the Options tab.
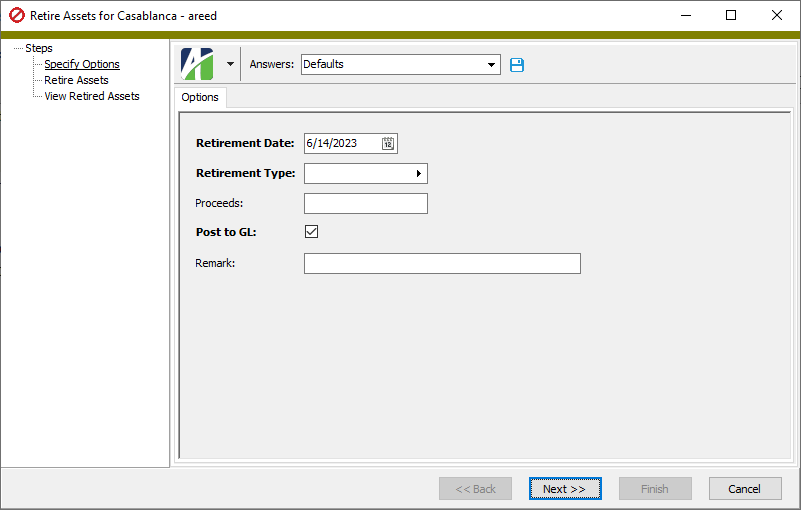
- In Retirement Date field, enter the date the asset was permanently withdrawn from use.
- Select the Retirement Type.
- If the selected retirement type allows proceeds and there were proceeds from the disposal of the assets, enter the amount in the Proceeds field.
- To post GL entries for the retirement of the selected assets, leave the Post to GL checkbox marked. If you do not want to post to GL, clear the checkbox. Retirement detail is always generated for asset retirement lines.
- In the Remark field, enter any comments you want to add about the retirement of the selected assets.
- Click Next >>. ActivityHD prompts you to confirm that you want to retire the selected assets.
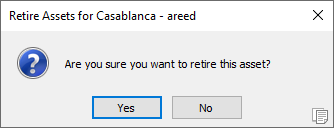
- Click Yes. ActivityHD reports the results of the retirement process.
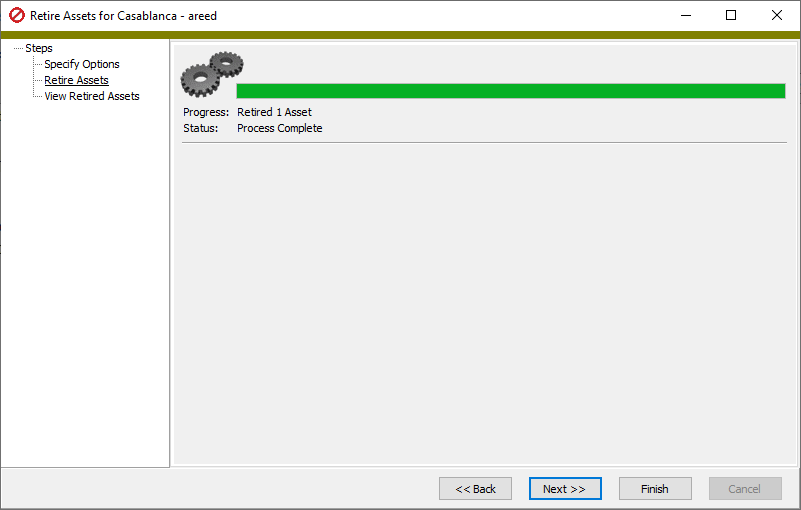
If the process returns errors or warnings, ActivityHD lists the reasons why.
- Click Next >>. ActivityHD shows the assets which were retired.
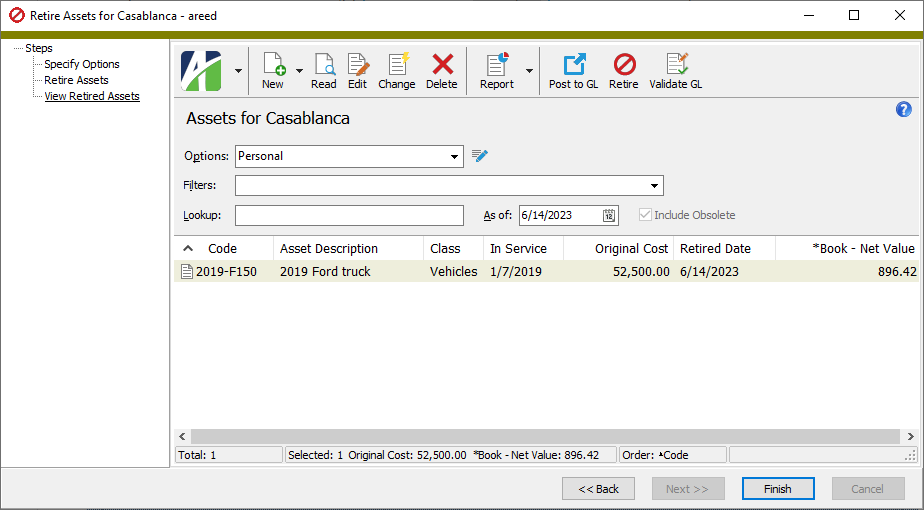
At this point, you can double-click an asset to drill down to its asset record, or print one of several asset reports.
- When you finish viewing or working with the retired assets, click Finish.
To partially retire an asset:
Partially retire an asset
- Open the asset to partially retire.
- Select the Retirement tab.
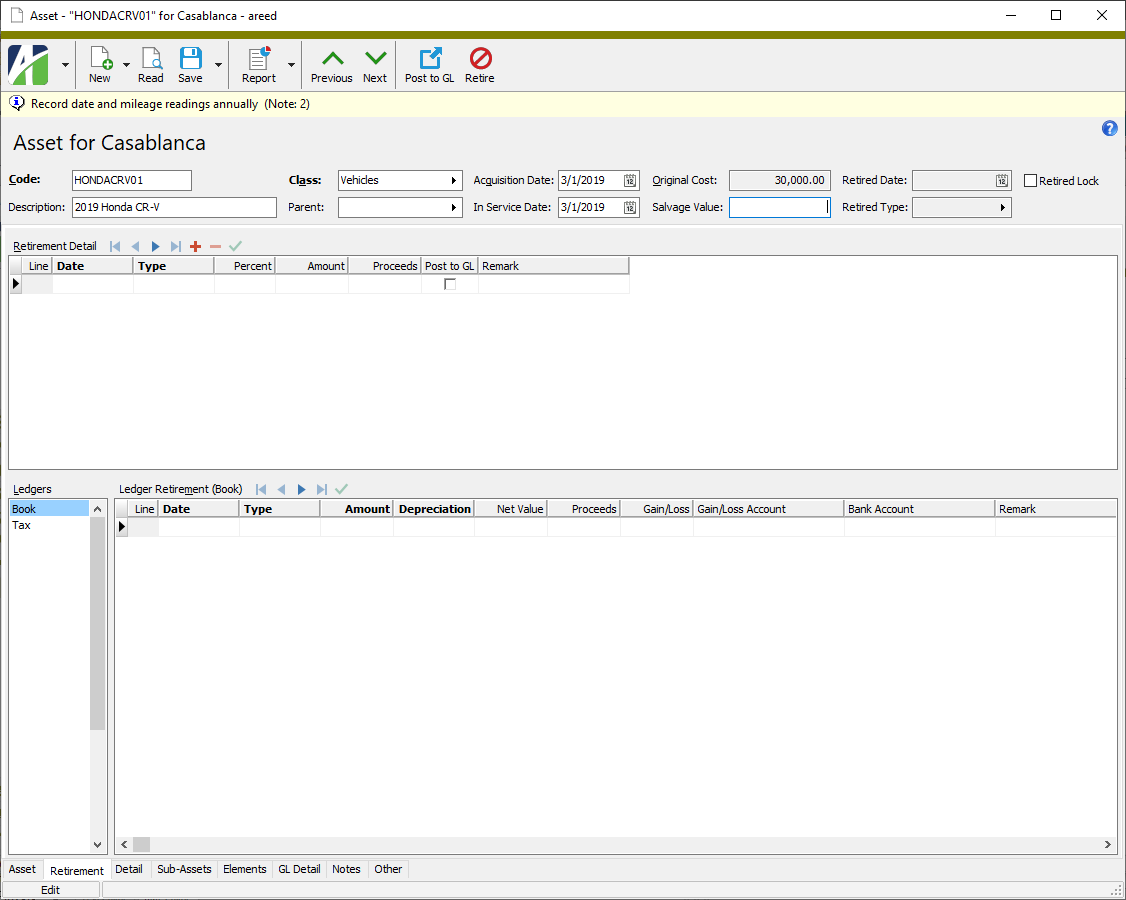
- In the Retirement Detail table, select a blank line.
- Enter the Date of the partial retirement.
- Select the Type of retirement. You must choose a type that allows partial retirement.
-
Enter either the Percent of the asset you want to retire, or the dollar Amount you want to retire. Entering a value in one field clears out the other.
Note
When using a percent for partial retirement, use the percent of the current cost, not the original cost. For example, to retire half of an asset in one year and the other half in the next year, enter 50% for the first year and 100% for the second year.
- Enter any Proceeds gained from the partial retirement.
- To post the partial retirement to GL, leave the Post to GL checkbox marked. If you do not want to post to GL, clear the checkbox.
- In the Remark field, enter any comments you want to add about the partial retirement of the asset.
- Save your changes.
Did you retire the wrong asset? Do you need a way to revert the asset to its pre-retired state? Here's how:
"Unretire" an asset
- Open the asset record to "unretire".
- In the Retirement Detail table, select the row that represents the retirement to undo.
- Click
 . ActivityHD prompts you to confirm that you want to delete the retirement detail line.
 - Click Yes. You'll notice that the Retired Date and Retired Type fields are emptied. Entries in the Ledger Retirement table(s) are cleaned up after you save your changes and reopen the record.
- Save your changes.
![]() Prevent further entry or calculation of retirement
Prevent further entry or calculation of retirement
Making changes to a retired asset results in the recalculation of retirement amounts. This is not always desirable, for instance, if tax ledger amounts have already been reported to the IRS. Even with book ledgers you may not want to recalculate retirement amounts if amounts have been posted to a closed period and you do not want to adjust GL.
Note
The Retired Lock checkbox is disabled until there is at least one row of retirement detail in the Retirement Detail table.
Prevent further entry or calculation of retirement
To prevent further retirement entries and further calculation of retirement amounts, you can lock retired assets to changes. To do so:
- Open the asset record to lock.
- On the far right of the asset header, mark the Retired Lock checkbox.
- Save your changes.
If you later find you need to recalculate retirement for an asset, clear the checkbox temporarily.
Assets Listing
Purpose
The Assets Listing provides a list of the assets tracked in Fixed Assets.
Content
For each asset included on the report, the listing shows:
- asset code
- asset description
- asset class
- acquisition date
- "in service" date
- original cost
- total cost
- salvage value
- timestamps
- memos
- custom fields.
In addition, you can include one or more of the following:
- cost detail including: cost date, cost amount, offset account, and remarks for each detail line
- retirement detail including: retirement date, retirement type, percent or amount retired, proceeds from retirement, Post to GL flag setting, and remarks for each detail line
- asset ledger detail including: ledger name, begin date, calculation method, asset's life in years and months, asset account, accumulated depreciation account, and total cost for each ledger
- asset attribute history including: attribute, effective date, attribute item, and remarks for each attribute change.
In addition, if you include asset ledgers, you can include one or more of the following:
- ledger cost detail including: cost date, cost amount, prior depreciation, added years and months of life, and remarks for each detail line
- ledger extra depreciation detail including: extra depreciation date, extra depreciation type and type description, expense amount, and remarks for each detail line
- ledger retirement detail including: retirement date, retirement type, amount retired, depreciation amount, net value, proceeds from retirement, gain/loss amount, gain/loss account, bank account, and remarks for each detail line.
The following total appears on the report:
- grand totals for assets, original cost, and total cost.
Print the report
- In the Navigation pane, highlight the Fixed Assets > Assets folder.
- Start the report set-up wizard.
- To report on all or a filtered subset of assets:
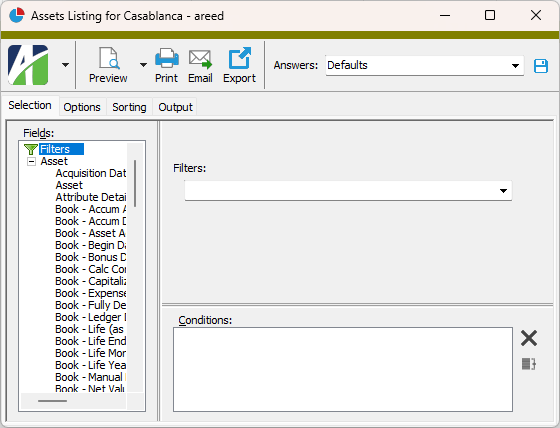
- Right-click the Assets folder and select Select and Report > Assets Listing from the shortcut menu.
- On the Selection tab, define any filters to apply to the data.
- To report on specifically selected assets:
- In the HD view, select the assets to include on the report. You can use Ctrl and/or Shift selection to select multiple records.
- Click
 and select Assets Listing from the drop-down menu.
- To report on a particular asset from the Asset window:
- In the HD view, locate and double-click the asset to report on. The Asset window opens with the asset loaded.
- Click
 and select Assets Listing from the drop-down menu.
- To report on all or a filtered subset of assets:
- Select the Options tab.
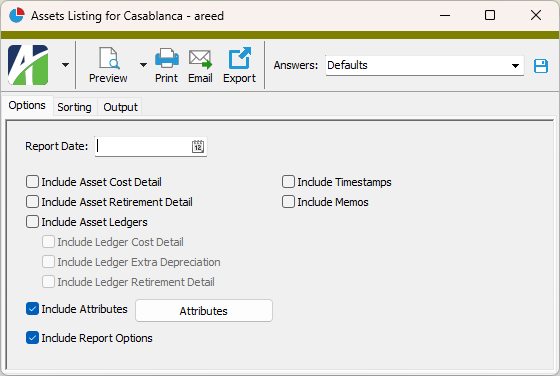
- In the Report Date field, select the date as of which to report asset information.
- Mark the checkbox(es) for the additional information to include:
- Asset Cost Detail
- Asset Retirement Detail
- Asset Ledgers. If you mark this checkbox, the three options below are enabled. Mark one or more of these checkboxes to include additional information about the asset ledger. Your options are:
- Ledger Cost Detail
- Ledger Extra Depreciation
- Ledger Retirement Detail
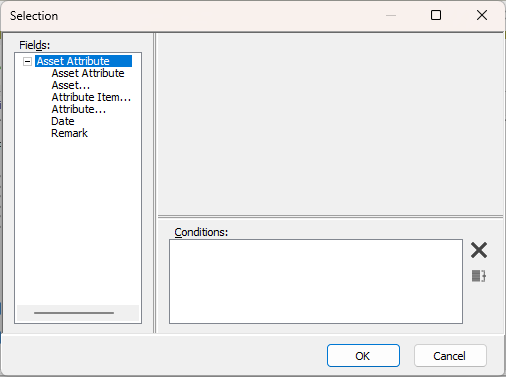
Attributes. If you mark this checkbox and want to limit the attributes which are reported, click Attributes to open the Selection dialog where you can specify selection conditions to determine which attributes are reported.
- Report Options. To include a section at the end of the report with the report settings used to produce the report, leave the checkbox marked. To produce the report without this information, clear the checkbox.
- Timestamps
- Memos
- Custom Fields (only visible if custom fields are set up)
- Select the Sorting tab.
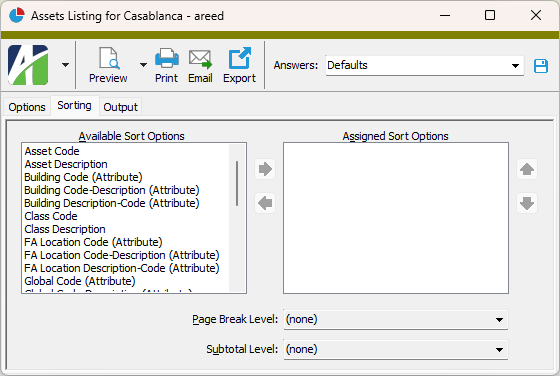
- In the Available Sort Options list box, highlight the field(s) to sort the report by, then click
 to move your selection(s) to the Assigned Sort Options list box.
 - If you selected multiple sort fields, use
 and
and  to arrange the sort fields in the order you want them applied.
 - If you want the report to start a new page for each change in one of the sorting options you specified, select the sorting option to break on from the Page Break Level drop-down list.
-
If you want the report to subtotal based on one of the sorting options you specified, select the sorting option to subtotal on from the Subtotal Level drop-down list. If you do not want to show subtotals, accept "(none)".
Tip
To see your assets grouped and totaled by location, select the location code attribute as a sorting option and then subtotal by it.
- Select the Output tab.
- In the Design field, look up and select the report design to use.
- In the toolbar, click the icon for the type of output you want:
 - Provides access to two preview options.
- Preview - Click the icon or click the drop-down arrow and select Preview from the drop-down menu to view the report in the Crystal Reports viewer.
- Preview to PDF - Click the drop-down arrow next to the icon and select Preview to PDF to view the report in the PDF reader.
 - Opens the Print dialog so that you can select and configure a printer and then print a paper copy of the report.
 - Opens the Report Email dialog so that you can address and compose an email that the report will be attached to. For best results, ensure your email client is running before you attempt to send a report via email.
 - Opens the Export Report dialog so that you can save the report to a file. File types include Crystal Reports (.rpt), PDF (.pdf), Microsoft Excel (.xls), Microsoft Word (.doc), rich text (.rtf), and XML (.xml).
Data extensions
The following data extensions are available for the report:
- Assets
- Asset Ledgers
- Asset Ledger Retirement
- Asset Ledger Extra Depreciation
- Asset Ledger Cost Detail
Asset Retirement Report
Purpose
The Assets Retirement Report lets you review assets which were fully or partially retired within a specified range of dates.
Content
For each asset included on the report, the listing shows:
- asset code
- asset description
- "in service" date
- retired date
- retirement type
- retired proceeds
- retired depreciation
- retired cost
- retired net value
- retired gain/loss.
The columns indicated in bold type represent values for Part I, Line 2 of IRS Form 4797 "Sales of Business Property".
In addition, you can include one or more of the following:
- partial retirements
- retirements with zero gain/loss.
The following totals appear on the report:
- record count
- totals for proceeds, depreciation, retired cost, net value, and gain/loss.
Print the report
- In the Navigation pane, highlight the Fixed Assets > Assets folder.
- Start the report set-up wizard.
- To report on all or a filtered subset of assets:
- Right-click the Assets folder and select Select and Report > Asset Retirement Report from the shortcut menu.
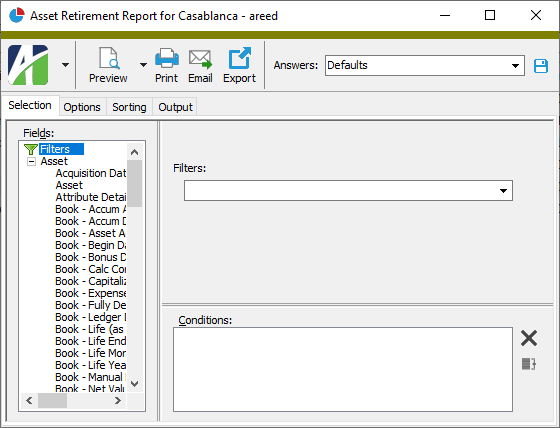
- On the Selection tab, define any filters to apply to the data.
- To report on specifically selected assets:
- In the HD view, select the assets to include on the report. You can use Ctrl and/or Shift selection to select multiple records.
- Click
 and select Asset Retirement Report from the drop-down menu.
- To report on a particular asset from the Asset window:
- In the HD view, locate and double-click the asset to report on. The Asset window opens with the asset loaded.
- Click
 and select Asset Retirement Report from the drop-down menu.
- To report on all or a filtered subset of assets:
- Select the Options tab.
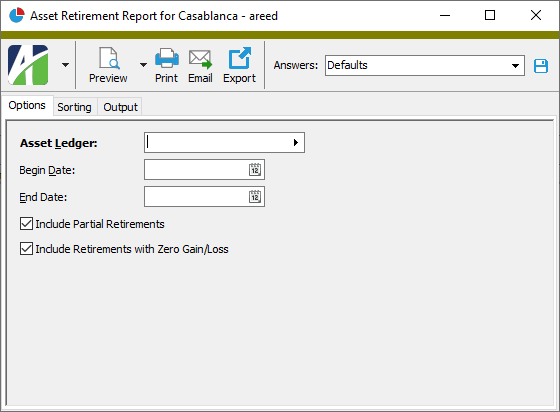
- Select the Asset Ledger to report on. (If only one non-obsolete ledger exists, that ledger is loaded for you.)
- In the Begin Date and End Date fields, select the range of retirement dates for which to report asset retirement information.
- Mark the checkbox(es) for the additional information to include:
- Partial Retirements
- Retirements with Zero Gain/Lost
- To include a section at the end of the report with the report settings used to produce the report, leave the Include Report Options checkbox marked. To produce the report without this information, clear the checkbox.
- Select the Sorting tab.
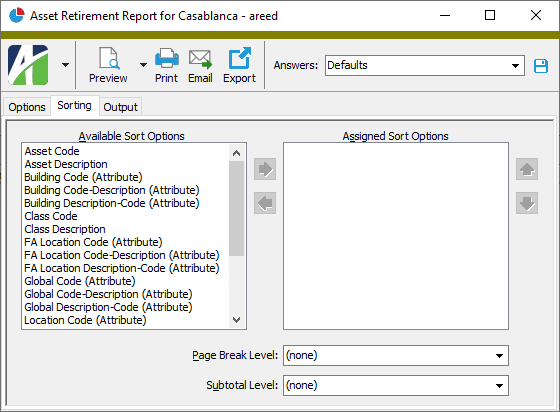
- In the Available Sort Options list box, highlight the field(s) to sort the report by, then click
 to move your selection(s) to the Assigned Sort Options list box.
 - If you selected multiple sort fields, use
 and
and  to arrange the sort fields in the order you want them applied.
 - If you want the report to start a new page for each change in one of the sorting options you specified, select the sorting option to break on from the Page Break Level drop-down list.
- If you want the report to subtotal based on one of the sorting options you specified, select the sorting option to subtotal on from the Subtotal Level drop-down list. If you do not want to show subtotals, accept "(none)".
- Select the Output tab.
- In the Design field, look up and select the report design to use.
- In the toolbar, click the icon for the type of output you want:
 - Provides access to two preview options.
- Preview - Click the icon or click the drop-down arrow and select Preview from the drop-down menu to view the report in the Crystal Reports viewer.
- Preview to PDF - Click the drop-down arrow next to the icon and select Preview to PDF to view the report in the PDF reader.
 - Opens the Print dialog so that you can select and configure a printer and then print a paper copy of the report.
 - Opens the Report Email dialog so that you can address and compose an email that the report will be attached to. For best results, ensure your email client is running before you attempt to send a report via email.
 - Opens the Export Report dialog so that you can save the report to a file. File types include Crystal Reports (.rpt), PDF (.pdf), Microsoft Excel (.xls), Microsoft Word (.doc), rich text (.rtf), and XML (.xml).
Data extensions
The following data extension is available for the report:
- Asset retirement
Bonus Depreciation Report
Purpose
The Bonus Depreciation Report shows bonus depreciation for selected assets in a specified ledger (usually the tax ledger) over a specified range of depreciation dates. Whereas the Depreciation Schedule combines all bonus depreciation in one column, the Bonus Depreciation Report differentiates bonus depreciation by type so that you have the numbers necessary for tax reporting.
Content
For each asset included on the report, the report shows:
- asset code and description
- "in service" date
- original cost
- calculation control
- life of the asset in years
- amount of Section 168 depreciation
- amount of Section 179 depreciation
- amount of bonus depreciation
- amount of all other bonus depreciation types
- total bonus depreciation.
In addition, you can include one or more of the following:
- yearly totals for all bonus depreciation types and total bonus depreciation
- bonus depreciation for assets retired on or before an end date you specify.
The following totals appear on the report:
- record count
- report totals for original cost, bonus depreciation by type, and total bonus depreciation.
Print the report
- In the Navigation pane, highlight the Fixed Assets > Assets folder.
- Start the report set-up wizard.
- To report on all or a filtered subset of assets:
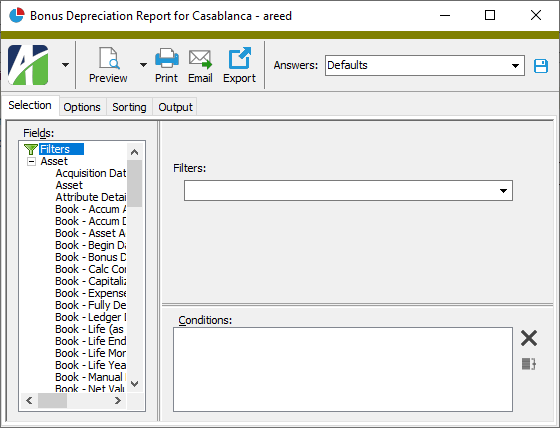
- Right-click the Assets folder and select Select and Report > Bonus Depreciation Report from the shortcut menu.
- On the Selection tab, define any filters to apply to the data.
- To report on specifically selected assets:
- In the HD view, select the assets to include on the report. You can use Ctrl and/or Shift selection to select multiple records.
- Click
 and select Bonus Depreciation Report from the drop-down menu.
- To report on a particular entity from the Asset window:
- In the HD view, locate and double-click the asset to report on. The Asset window opens with the asset loaded.
- Click
 and select Bonus Depreciation Report from the drop-down menu.
- To report on all or a filtered subset of assets:
- Select the Options tab.
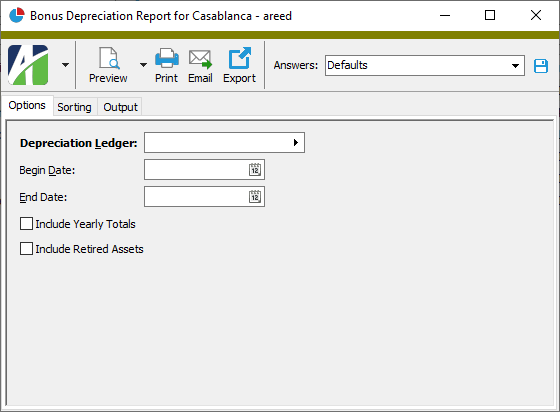
- Select the Depreciation Ledger to report on. Typically, you would report on the tax ledger. (If only one non-obsolete ledger exists, that ledger is loaded for you.)
- In the Begin Date and End Date fields, enter the range of dates to report bonus depreciation for.
- Mark the checkbox(es) for the additional information to include:
- Yearly Totals. Mark this checkbox if your report spans multiple years and your assets have bonus depreciation in each year.
- Retired Assets. Mark this checkbox to include assets which were retired on or before the end date you specified.
- To include a section at the end of the report with the report settings used to produce the report, leave the Include Report Options checkbox marked. To produce the report without this information, clear the checkbox.
- Select the Sorting tab.
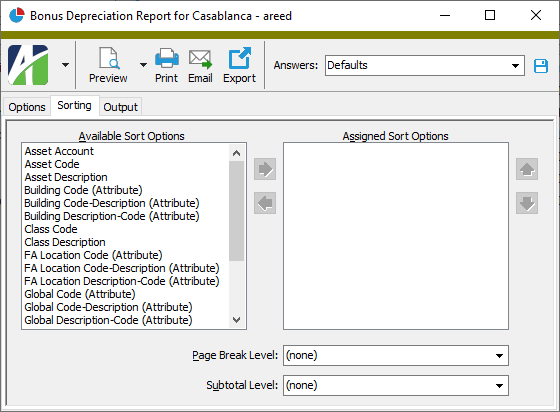
- In the Available Sort Options list box, highlight the field(s) to sort the report by, then click
 to move your selection(s) to the Assigned Sort Options list box.
 - If you selected multiple sort fields, use
 and
and  to arrange the sort fields in the order you want them applied.
 - If you want the report to start a new page for each change in one of the sorting options you specified, select the sorting option to break on from the Page Break Level drop-down list.
- If you want the report to subtotal based on one of the sorting options you specified, select the sorting option to subtotal on from the Subtotal Level drop-down list. If you do not want to show subtotals, accept "(none)".
- Select the Output tab.
- In the Design field, look up and select the report design to use.
- In the toolbar, click the icon for the type of output you want:
 - Provides access to two preview options.
- Preview - Click the icon or click the drop-down arrow and select Preview from the drop-down menu to view the report in the Crystal Reports viewer.
- Preview to PDF - Click the drop-down arrow next to the icon and select Preview to PDF to view the report in the PDF reader.
 - Opens the Print dialog so that you can select and configure a printer and then print a paper copy of the report.
 - Opens the Report Email dialog so that you can address and compose an email that the report will be attached to. For best results, ensure your email client is running before you attempt to send a report via email.
 - Opens the Export Report dialog so that you can save the report to a file. File types include Crystal Reports (.rpt), PDF (.pdf), Microsoft Excel (.xls), Microsoft Word (.doc), rich text (.rtf), and XML (.xml).
Data extensions
The following data extension is available for the report:
- Assets
Which report do I choose: Depreciation Schedule vs Asset GL History Report?
Note
Until version 8.20-0, the depreciation calculation did not calculate depreciation in the month of retirement since lifetime total depreciation was going to be backed out of accumulated depreciation in the same month; however, because total depreciation is significant for both book and tax purposes, depreciation for the month of retirement is now included in the calculation.
Depreciation Schedule
Purpose
The Depreciation Schedule shows projected depreciation for a selected ledger over the range of depreciation dates you specify.
Content
For each asset on the report, the report shows:
- asset code and description
- in-service date
- calculation control
- asset life
- salvage value
- begin and end depreciation dates
- running cost
- prior, period, bonus, total, and remaining depreciation.
In addition, you can include the following:
- detail section with rows showing added cost; cost, prior depreciation, and added life; or bonus expense
- depreciation totals by period
- yearly depreciation totals.
The following totals appear on the report:
- record count
- salvage value for all reported assets
- original cost for all reported assets
- prior depreciation for all reported assets
- period depreciation for all reported assets
- bonus depreciation for all reported assets
- total depreciation for all reported assets
- remaining depreciation for all reported assets.
Print the report
- In the Navigation pane, highlight the Fixed Assets > Assets folder.
- Start the report set-up wizard.
- To report on all or a filtered subset of assets:
- Right-click the Assets folder and select Select and Report > Depreciation Schedule from the shortcut menu.
- On the Selection tab, define any filters to apply to the data.
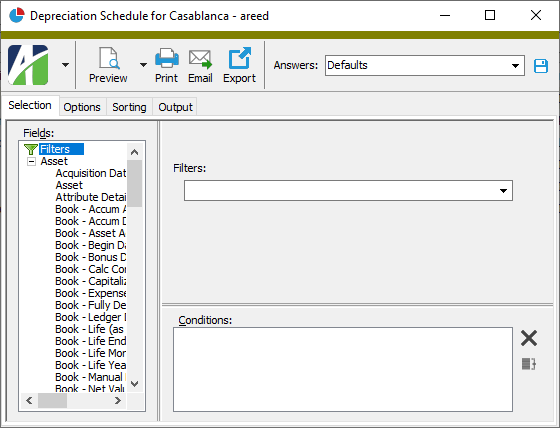
- To report on specifically selected assets:
- In the HD view, select the assets to include on the report. You can use Ctrl and/or Shift selection to select multiple records.
- Click
 and select Depreciation Schedule from the drop-down menu.
- To report on a particular asset from the Asset window:
- In the HD view, locate and double-click the asset to report on. The Asset window opens with the asset loaded.
- Click
 and select Depreciation Schedule from the drop-down menu.
- To report on all or a filtered subset of assets:
- Select the Options tab.
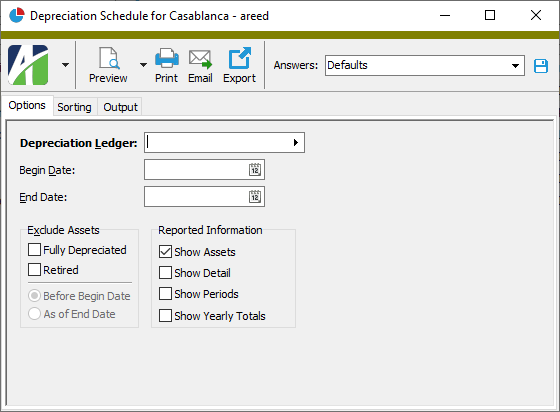
- Select the Depreciation Ledger to report on. (If only one non-obsolete ledger exists, that ledger is loaded for you.)
- In the Begin Date and End Date fields, enter the range of dates for which to include depreciation information on the report. If you leave the Begin Date field blank, the report shows depreciation from the beginning of each asset's life through the end date. If you leave the End Date field blank, the report shows depreciation from the begin date through each asset's end-of-life.
- In the Exclude Assets section, mark the checkbox(es) for the assets you do not want to include on the report. Your options include:
- Fully Depreciated. Mark this checkbox to exclude fully depreciated assets from the report. If you mark this checkbox, the Retired checkbox is marked for you and disabled.
- Retired. This checkbox is enabled if the Fully Depreciated checkbox is not marked. Mark this checkbox to exclude retired assets from the report.
- If you marked the Fully Depreciated checkbox or the Retired checkbox, the date options in the Exclude Assets section are enabled. Select the date criterion to use to determine which fully depreciated and/or retired assets to exclude. Your options are:
- Before Begin Date. If you select this option, assets fully depreciated and/or retired before the begin date you specified are excluded from the report.
- As of End Date. If you select this option, assets fully depreciated and/or retired as of the end date you specified are excluded from the report.
- Mark the checkbox(es) in the Reported Information section to indicate the additional information to include:
- Assets. This checkbox is marked by default. Ensure this checkbox is marked if you want to show assets on the report. The remaining checkboxes in this section are disabled unless you mark this checkbox. If you clear the checkbox, only totals are reported for the selected assets.
- Detail. Mark this checkbox to include detail rows showing added cost; cost, prior depreciation, and added life; retirement detail; and bonus expense.
Periods. Mark this checkbox to show depreciation totals for every period and year in the report date range.
Note
For most periods, the report shows the begin and end date for the period. However, if an asset was retired during a period, that period reflects the retirement date instead of the period end date.
- Yearly Totals. Mark this checkbox to show depreciation subtotals by year.
- To include a section at the end of the report with the report settings used to produce the report, leave the Include Report Options checkbox marked. To produce the report without this information, clear the checkbox.
- Select the Sorting tab.
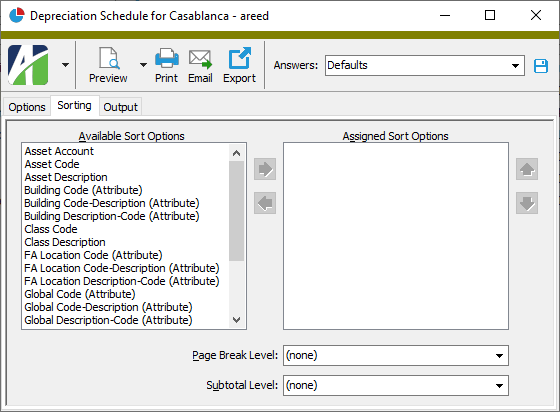
- In the Available Sort Options list box, highlight the field(s) to sort the report by, then click
 to move your selection(s) to the Assigned Sort Options list box.
Note
If you assign any of the FA Location sort options, assets that were assigned to multiple locations during the date range are reported in their location as of the report end date. These assets are marked with an asterisk on the report, and an explanatory note appears at the bottom of the report.
- If you selected multiple sort fields, use
 and
and  to arrange the sort fields in the order you want them applied.
 - If you want the report to start a new page for each change in one of the sorting options you specified, select the sorting option to break on from the Page Break Level drop-down list. If you do not want to insert page breaks, accept "(none)".
- If you want the report to subtotal based on one of the sorting options you specified, select the sorting option to subtotal on from the Subtotal Level drop-down list. If you do not want to show subtotals, accept "(none)".
- Select the Output tab.
- In the Design field, look up and select the report design to use.
- In the toolbar, click the icon for the type of output you want:
 - Provides access to two preview options.
- Preview - Click the icon or click the drop-down arrow and select Preview from the drop-down menu to view the report in the Crystal Reports viewer.
- Preview to PDF - Click the drop-down arrow next to the icon and select Preview to PDF to view the report in the PDF reader.
 - Opens the Print dialog so that you can select and configure a printer and then print a paper copy of the report.
 - Opens the Report Email dialog so that you can address and compose an email that the report will be attached to. For best results, ensure your email client is running before you attempt to send a report via email.
 - Opens the Export Report dialog so that you can save the report to a file. File types include Crystal Reports (.rpt), PDF (.pdf), Microsoft Excel (.xls), Microsoft Word (.doc), rich text (.rtf), and XML (.xml).
Data extensions
The following data extensions are available for the report:
- Assets
- Asset Ledgers
Asset GL History Report
Which report do I choose: Depreciation Schedule vs Asset GL History Report?
Purpose
The Asset GL History Report shows posted depreciation, asset cost, and retirement information for a particular ledger for a historical range of dates. Use this report to help you reconcile general ledger postings. In particular, you can use the capitalized cost amount to reconcile the GL asset account, and the accumulated depreciation amount to reconcile the GL accumulated depreciation account.
Note
The Asset GL History Report does not calculate depreciation. It shows the historical GL detail for posted depreciation.
Because asset costs are only posted to GL when (1) a ledger GL batch is specified, (2) a ledger asset account is specified, (3) an asset cost offset account is specified, and (4) the offset account and the asset account are not the same, the GL History Report expects GL posting detail to be created by the Post to GL process and, therefore, doesn't report the asset cost record directly. Accordingly, you must run Post to GL over the asset cost date range in order to create the detail records for inclusion on the report. If the asset cost is not to be posted to GL, the report assumes the GL posting to the asset account was created by a manual GL entry (or with an AP invoice) and automatically creates a row in the report for the asset cost so that you can reconcile the GL asset account.
Note
Costs are not included on the report if the asset has not been placed in service. If the in-service date is blank, the capitalized cost of the asset is zero, even if there are entries in the asset's Cost Detail table. Those costs will not be posted to the GL asset account until the asset is placed in service. Any costs dated before the in-service date when costs are posted will be posted as of the in-service date.
For retirement postings, the retired asset cost amount is subtracted from the capitalized cost and retired accumulated depreciation is subtracted from accumulated depreciation. As a result, when an asset is fully retired, its capitalized cost, accumulated depreciation, and net value should all be zero.
Content
For each asset on the report, the report shows:
- asset code and description
- in-service date
- beginning totals for capitalized cost, accumulated depreciation, and net value
- detail totals for cost and depreciation
- ending totals for capitalized cost, accumulated depreciation, and net value.
By default the report includes all fully depreciated assets including retired assets. You have the options to exclude all fully depreciated assets or to exclude retired assets only.
In addition, you can include the following:
- original cost, asset class, acquisition date, salvage value, asset location, and retirement date
- GL detail postings for asset costs, depreciation, and extra depreciation, as well as generated entries for asset costs, depreciation, and extra depreciation, with or without summarized details by date or by date/account
- detail for attributes posted to GL
- yearly totals (based on the FA calendar).
The following totals appear on the report:
- asset totals
- grand totals.
Preinstalled saved answers
For your convenience, ActivityHD includes two preinstalled saved answers for common reporting scenarios:
- "By Accumulated Account without Assets"
- "By Asset Account with Assets"
Print the report
- In the Navigation pane, highlight the Fixed Assets > Assets folder.
- Start the report set-up wizard.
- To report on all or a filtered subset of assets:
- Right-click the Assets folder and select Select and Report > Asset GL History Report from the shortcut menu.
- On the Selection tab, define any filters to apply to the data.
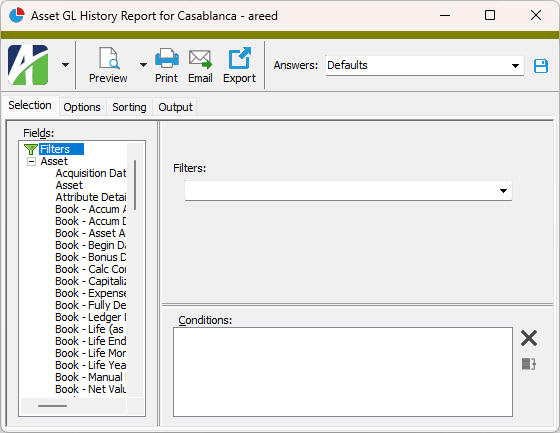
- To report on specifically selected assets:
- In the HD view, select the assets to include on the report. You can use Ctrl and/or Shift selection to select multiple records.
- Click
 and select Asset GL History Report from the drop-down menu.
- To report on a particular asset from the Asset window:
- In the HD view, locate and double-click the asset to report on. The Asset window opens with the asset loaded.
- Click
 and select Asset GL History Report from the drop-down menu.
- To report on all or a filtered subset of assets:
- Select the Options tab.
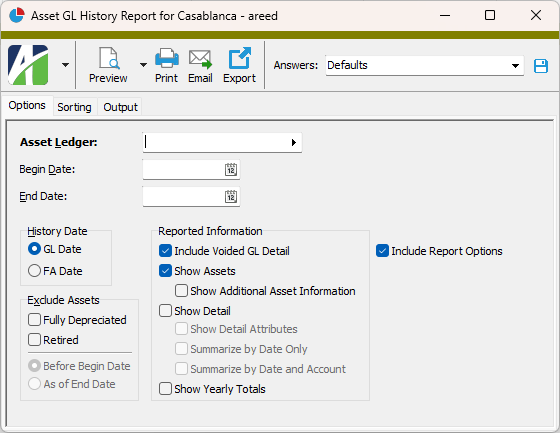
- Select the Asset Ledger to report on. Only ledgers which post to GL (i.e., ledgers with a GL batch specified) can be selected for reporting. (If only one non-obsolete ledger exists, that ledger is loaded for you.)
- In the Begin Date and End Date fields, enter the range of dates for which to include GL history on the report. The "Beginning Totals" column on the report shows the totals up to the Begin Date.
- In the History Date field, select the type of date you want the date range you entered to represent. Your options are:
- GL Date. Uses the GL posting date.
- FA Date. Uses the asset depreciation date.
- In the Exclude Assets section, select which, if any, assets you want to exclude from the report. Your options are:
- Fully Depreciated. Mark this checkbox to exclude all fully depreciated assets from the report. If you mark this checkbox, the Retired checkbox is marked and disabled. If you mark this checkbox, the date options below are enabled. Select which fully depreciated assets to exclude based on date. Your options are:
- Before Begin Date. Exclude assets that were fully depreciated before the report begin date.
- As of End Date. Exclude assets that were fully depreciated as of the report end date.
- Retired. This checkbox is enabled unless you marked the Fully Depreciated checkbox. Mark this checkbox if you want to exclude retired assets from the report but not other fully depreciated assets. If you mark this checkbox, the date options below are enabled. Select which retired assets to exclude based on date. Your options are:
- Before Begin Date. Exclude assets that were retired before the report begin date.
- As of End Date. Exclude assets that were retired as of the report end date.
- Fully Depreciated. Mark this checkbox to exclude all fully depreciated assets from the report. If you mark this checkbox, the Retired checkbox is marked and disabled. If you mark this checkbox, the date options below are enabled. Select which fully depreciated assets to exclude based on date. Your options are:
- Mark the checkbox(es) for the additional information to include:
- Include Voided GL Detail. This option is marked by default and causes the report to include voided GL detail. If you are using this report to reconcile GL balances, you should include voided GL detail because reversal entries may have been posted to different dates and to different accounts than the original voided entries. On the other hand, if you are using the report to see the current state of asset cost and depreciation history, you may want to exclude voided GL detail in order to simplify the report. If that is the case, clear the checkbox.
- Show Assets. This option is marked by default and causes the report to show totals by asset. If this checkbox is marked, the following checkbox is enabled:
- Show Additional Asset Information. Mark this checkbox to include asset class, asset location, acquisition date, and retirement date for each asset on the report.
- Show Detail. Mark this checkbox to include detail transactions on the report. If you mark this checkbox, the following checkboxes are enabled, but you can select only one of them:
- Show Detail Attributes. Mark this checkbox to include detail of attributes posted to GL.
- Summarize by Date Only. Mark this checkbox to summarize detail by date only.
- Summarize by Date/Account. Mark this checkbox to summarize detail by date and account.
- Show Yearly Totals. Mark this checkbox to show annual totals on the report. Yearly totals use the FA calendar specified on the asset's ledger to summarize depreciation detail so that totals match your organization's fiscal year.
- To include a section at the end of the report with the report settings used to produce the report, leave the Include Report Options checkbox marked. To produce the report without this information, clear the checkbox.
- Select the Sorting tab.
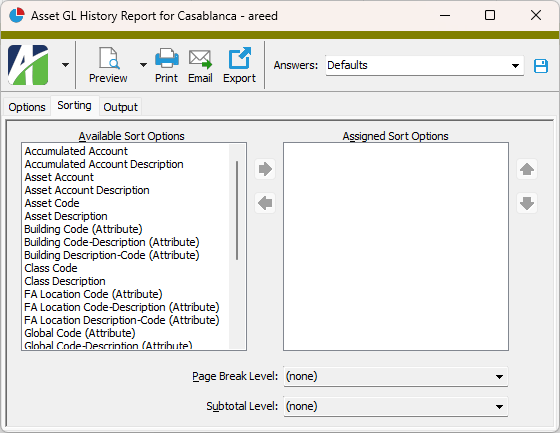
- In the Available Sort Options list box, highlight the field(s) to sort the report by, then click
 to move your selection(s) to the Assigned Sort Options list box.
 - If you selected multiple sort fields, use
 and
and  to arrange the sort fields in the order you want them applied.
 - If you want the report to start a new page for each change in one of the sorting options you specified, select the sorting option to break on from the Page Break Level drop-down list. If you do not want to insert page breaks, accept "(none)".
- If you want the report to subtotal based on one of the sorting options you specified, select the sorting option to subtotal on from the Subtotal Level drop-down list. If you do not want to show subtotals, accept "(none)".
- Select the Output tab.
- In the Design field, look up and select the report design to use.
- In the toolbar, click the icon for the type of output you want:
 - Provides access to two preview options.
- Preview - Click the icon or click the drop-down arrow and select Preview from the drop-down menu to view the report in the Crystal Reports viewer.
- Preview to PDF - Click the drop-down arrow next to the icon and select Preview to PDF to view the report in the PDF reader.
 - Opens the Print dialog so that you can select and configure a printer and then print a paper copy of the report.
 - Opens the Report Email dialog so that you can address and compose an email that the report will be attached to. For best results, ensure your email client is running before you attempt to send a report via email.
 - Opens the Export Report dialog so that you can save the report to a file. File types include Crystal Reports (.rpt), PDF (.pdf), Microsoft Excel (.xls), Microsoft Word (.doc), rich text (.rtf), and XML (.xml).
Data extensions
The following data extensions are available for the report:
- Assets
- Asset Cost Detail
- Asset GL Detail
- Asset Ledgers
- Asset Ledger Retirement
- Asset Ledger Extra Depreciation
- Asset Ledger Cost Detail
Asset Record ID
The asset class the asset belongs to. An asset class can provide defaults for asset posting accounts, the calculation control, and asset life. If you are creating a new asset and the asset class you select has one or more default ledgers defined on it, the default ledger(s) load in the Ledgers table.
If you are working with an existing asset and change the asset class, ActivityHD prompts you whether to change the class and replace any existing ledgers with the ledgers defined on the new asset class (or to change the class and delete the existing ledgers if no ledgers are defined on the new asset class). Select Yes to change the class and replace or delete the ledgers; select No to change the class but leave the existing ledgers intact; select Cancel to leave the asset class and ledgers unchanged.
Press F3 to look up the value.
If a value is already selected, you can press F4 to open the record in its native editor.
Press F3 to look up the value.
If a value is already selected, you can press F4 to open the record in its native editor.
Press F3 to look up the value.
If a value is already selected, you can press F4 to open the record in its native editor.
Asset tab
Tip
The Find dialog (F3) in the Invoice Line column allows selection of multiple invoice lines at once. In the Find dialog, use Ctrl and/or Shift selection to select multiple lines.
If marked, indicates that a GL posting will be created to move the cost amount from the original account that was debited by an earlier transaction (such as an AP invoice distribution or other GL entry) to the asset's GL asset account when the asset is capitalized.
Use Post to GL to replace manual entries. It is particularly useful when adding assets from CIP (construction-in-progress) or when adding a previously expensed asset. You do not need to use Post to GL if the asset cost has already been posted to the asset account.
Press F2 to open the Account Expand dialog box where you can look up an account number, find an account number by its alias, build the account number by segment, or view setup and setup sources.
Press F3 to look up the account.
If an account is already selected, you can press F4 to open the record in the Account window.
This field shows the current attribute item assigned to the attribute. If this field is blank, there is no current value set for the attribute. Fixed Assets attributes can be date driven or not date driven. Entry fields for date-driven attributes culminate in ![]() , while fields for attributes which are not date driven culminate in
, while fields for attributes which are not date driven culminate in ![]() .
.
To set the attribute item for an attribute that is not date driven, enter or select the attribute as usual.
To set the attribute or to view the history of values assigned to a date-driven attribute, click ![]() or click the hyperlink below this field to open the Asset Attribute Detail dialog box.
or click the hyperlink below this field to open the Asset Attribute Detail dialog box.
Press F3 to look up the value.
If a value is already selected, you can press F4 to open the record in its native editor.
The date to begin tracking depreciation of the asset in the selected ledger. The date defaults to the in-service date, and cannot be earlier than the in-service date.
Note
If you change the date in the In Service Date field, any rows in this table with a begin date that is the same as the original in-service date are updated to the new in-service date.
Press F3 to look up the value.
If a value is already selected, you can press F4 to open the record in its native editor.
The GL account to post acquisition costs, added value, cost adjustments, disposal transactions, and retirement to for the selected ledger. The default asset account is derived from the combination of asset account masks from the asset class and ledger. If the asset account contains blanks or is invalid, the field is shaded yellow. If you override the default account number, the account number displays in purple.
Note
The asset account should not be changed during the life of an asset unless appropriate GL postings are made.
Press F2 to open the Account Expand dialog box where you can look up an account number, find an account number by its alias, build the account number by segment, or view setup and setup sources.
Press F3 to look up the account.
If an account is already selected, you can press F4 to open the record in the Account window.
The cost amount.
Note
While you can enter a negative amount here, the negative added cost must be less than or equal to the amount required to make the remaining depreciation on the asset zero.
Press F3 to look up the value.
If a value is already selected, you can press F4 to open the record in its native editor.
Retirement tab
Press F3 to look up the value.
If a value is already selected, you can press F4 to open the record in its native editor.
Press F3 to look up the value.
If a value is already selected, you can press F4 to open the record in its native editor.
Press F2 to open the Account Expand dialog box where you can look up an account number, find an account number by its alias, build the account number by segment, or view setup and setup sources.
Press F3 to look up the account.
If an account is already selected, you can press F4 to open the record in the Account window.
Custom tab
This tab is visible if custom fields exist for the entity. At a minimum, if there are custom fields, a Fields subtab will be present. One or more additional categories of subtabs may also be visible.
Fields subtab
This tab prompts for values for any custom fields set up for entity records of this entity type. Respond to the prompts as appropriate.
References subtab
This tab is visible if other records reference the current record.
Example
Suppose a custom field exists on PRCodes that references an ARCode. On the ARCode record, on the Custom > References subtab, you can view all the PRCodes which reference that ARCode.
Exchange Folder subtab
This tab is visible only if you set up a custom field with a data type of "Exchange Folder". The label on this tab is the name assigned to the custom field.
This tab shows the contents of the specified Exchange folder.
File subtab
This tab is visible only if you set up a custom field with a data type of "File". The label on the tab is the name assigned to the custom field.
This tab renders the contents of the specified file according to its file type.
Internet Address subtab
This tab is visible only if you set up a custom field with a data type of "Internet Address". The label on this tab is the name assigned to the custom field.
This tab shows the contents of the specified web page.
Network Folder subtab
This tab is visible only if you set up a custom field with a data type of "Network Folder". The label on this tab is the name assigned to the custom field.
This tab shows the contents of the specified network folder.
Detail tab
A collection of subtabs with various asset details.
Sub-Assets tab
The Assets pane shows the Assets HD view filtered to show all sub-assets of the selected asset.
Double-click a row in the pane to drill down to its record in the Asset window.
Elements tab
The Elements pane shows the Elements HD view in CRM filtered to show all elements associated with the selected asset.
Double-click a row in the pane to drill down to its record in the Element window.
GL Detail tab
The Asset GL Detail pane shows the Asset GL Detail HD view filtered to show all GL detail records for the selected asset.
Double-click a row in the pane to drill down to its record in the Asset GL Detail window.
Notes tab
The Notes pane shows the Notes HD view filtered to show all notes for the selected asset.
Double-click a row in the pane to drill down to its record in the Note window.
Attachments tab
The Attachments tab is visible if any record for a given entity has an attachment. If the Attachments tab is not visible, this implies that no record of the entity type has an attachment on it; however, once an attachment is added to any record of the entity type, the Attachments tab will become available.
Change Logs tab
This tab is visible if the user has "Change Logs" access to the associated data folder resource.
The Change Logs pane shows the Change Logs HD view filtered to show all change logs for the selected entity record.
Double-click a row in the pane to drill down to its record in the Change Log window.
Other tab
Developer tab
This tab is visible only when developer features are enabled.
Automation subtab
This subtab shows field names and values for the current data record. Use the information in the subtab to assist when creating automation objects such as bots and import files. The field names and field values can be copied from the text box and pasted directly into your code or application. To copy content from the text box, highlight the content to copy and press Ctrl+C or right-click your selection and select Copy from the context menu.
Export (XML) subtab
This subtab shows the XML syntax for exporting the selected data record. The syntax can be copied from the text box as an exemplar for creating your own automation objects for bots, import files, ActivWebAPI, etc. To copy content from the text box, highlight the content to copy and press Ctrl+C or right-click your selection and select Copy from the context menu.
Import (XML) subtab
This subtab allows you to select a file for import and shows the XML syntax for importing data records. Use the subtab to explore the XML syntax for importing data records. In particular, you can investigate the syntax which results when using Data.Import and ActivWebAPI data POST and DELETE routes.
Change Log (XML) subtab
This subtab is visible only when the Enable Change Logs option is marked in System Options or Company Options (depending on whether the feature applies at the system or the company level). This is the default setting when developer features are enabled.
This subtab allows you to investigate changes to the current data record. The syntax can be copied for use in bots, dashboards, ActivWebAPI, and other automation. To copy content from the text box, highlight the content to copy and press Ctrl+C or right-click your selection and select Copy from the context menu.
Select Statement (SQL) subtab
This subtab allows you to investigate the SQL select statement used to retrieve the current data record. The syntax can be copied as an exemplar for data sources and other automation. To copy content from the text box, highlight the content to copy and press Ctrl+C or right-click your selection and select Copy from the context menu.
Retirement process
Error:
Calculated depreciation as of mm/dd/yyyy (##,###.##) does not match posted depreciation (##,###.##).
To correct posted depreciation, run "Post to GL" over the entire asset life (setting GL dates as needed).
Follow the instructions in the error message.
Retirement in the asset window
Error:
Calculated depreciation as of mm/dd/yyyy does not match posted depreciation:
Calculated: (##,###.##)
Posted: (##,###.##)
To correct posted depreciation, run "Post to GL" over the entire asset life (setting GL dates as needed).
If you proceed with the retirement, then the calculated accumulated depreciation amount will be used for the retirement posting which will cause a difference between the posted and calculated accumulated depreciation.
Do you want to continue the retirement with inconsistent posted and calculated accumulated depreciation?
Follow the instructions in the error message.

|
Extras\Fixed Assets\Import Assets.xls; Import Extra Depreciation.xls; Import Asset Locations.xls |
Bonus Depreciation Report
Purpose
The Bonus Depreciation Report shows bonus depreciation for selected assets in a specified ledger (usually the tax ledger) over a specified range of depreciation dates. Whereas the Depreciation Schedule combines all bonus depreciation in one column, the Bonus Depreciation Report differentiates bonus depreciation by type so that you have the numbers necessary for tax reporting.
Content
For each asset included on the report, the report shows:
- asset code and description
- "in service" date
- original cost
- calculation control
- life of the asset in years
- amount of Section 168 depreciation
- amount of Section 179 depreciation
- amount of bonus depreciation
- amount of all other bonus depreciation types
- total bonus depreciation.
In addition, you can include one or more of the following:
- yearly totals for all bonus depreciation types and total bonus depreciation
- bonus depreciation for assets retired on or before an end date you specify.
The following totals appear on the report:
- record count
- report totals for original cost, bonus depreciation by type, and total bonus depreciation.
Print the report
- In the Navigation pane, highlight the Fixed Assets > Assets folder.
- Start the report set-up wizard.
- To report on all or a filtered subset of assets:
- Right-click the Assets folder and select Select and Report > Bonus Depreciation Report from the shortcut menu.
- On the Selection tab, define any filters to apply to the data.

- To report on specifically selected assets:
- In the HD view, select the assets to include on the report. You can use Ctrl and/or Shift selection to select multiple records.
- Click
 and select Bonus Depreciation Report from the drop-down menu.
- To report on a particular entity from the Asset window:
- In the HD view, locate and double-click the asset to report on. The Asset window opens with the asset loaded.
- Click
 and select Bonus Depreciation Report from the drop-down menu.
- To report on all or a filtered subset of assets:
- Select the Options tab.

- Select the Depreciation Ledger to report on. Typically, you would report on the tax ledger. (If only one non-obsolete ledger exists, that ledger is loaded for you.)
- In the Begin Date and End Date fields, enter the range of dates to report bonus depreciation for.
- Mark the checkbox(es) for the additional information to include:
- Yearly Totals. Mark this checkbox if your report spans multiple years and your assets have bonus depreciation in each year.
- Retired Assets. Mark this checkbox to include assets which were retired on or before the end date you specified.
- To include a section at the end of the report with the report settings used to produce the report, leave the Include Report Options checkbox marked. To produce the report without this information, clear the checkbox.
- Select the Sorting tab.

- In the Available Sort Options list box, highlight the field(s) to sort the report by, then click
 to move your selection(s) to the Assigned Sort Options list box.
 - If you selected multiple sort fields, use
 and
and  to arrange the sort fields in the order you want them applied.
 - If you want the report to start a new page for each change in one of the sorting options you specified, select the sorting option to break on from the Page Break Level drop-down list.
- If you want the report to subtotal based on one of the sorting options you specified, select the sorting option to subtotal on from the Subtotal Level drop-down list. If you do not want to show subtotals, accept "(none)".
- Select the Output tab.
- In the Design field, look up and select the report design to use.
- In the toolbar, click the icon for the type of output you want:
 - Provides access to two preview options.
- Preview - Click the icon or click the drop-down arrow and select Preview from the drop-down menu to view the report in the Crystal Reports viewer.
- Preview to PDF - Click the drop-down arrow next to the icon and select Preview to PDF to view the report in the PDF reader.
 - Opens the Print dialog so that you can select and configure a printer and then print a paper copy of the report.
 - Opens the Report Email dialog so that you can address and compose an email that the report will be attached to. For best results, ensure your email client is running before you attempt to send a report via email.
 - Opens the Export Report dialog so that you can save the report to a file. File types include Crystal Reports (.rpt), PDF (.pdf), Microsoft Excel (.xls), Microsoft Word (.doc), rich text (.rtf), and XML (.xml).
Data extensions
The following data extension is available for the report:
- Assets
Assets security
Common accesses available on assets
| Access | A user with this access can... |
|---|---|
| Change | Use the mass change action on assets. |
| Change Logs | |
| Custom Fields | Create and edit custom fields for assets. |
| Data | Have read-only access to assets from anywhere in the software (e.g., field validations, filters, date expressions). |
| Delete | Delete assets. |
| Edit | Edit asset records. |
| Export | Export asset records from ActivityHD. |
| Import | Import asset records into ActivityHD. |
| New | Create new asset records. |
| Read | Have read-only access to asset records. |
| Report | Run reports with asset information. |
| Report Designs | Create and edit report designs with asset information. This access enables the Report Designs button on the Output tab of report dialogs. |
| Shared Answers | Create and edit saved answers related to assets. |
| Shared Filters | Create and edit shared filters on assets. |
| Visible | View the Assets folder in the Navigation pane. |
Special accesses available on assets
| Access | A user with this access can... |
|---|---|
| Post To GL | Post depreciation to the General Ledger. |
| Retire | Run the retirement process. |
Asset filters
The following built-in filters are available for fixed assets:
| Filter Name | Effect |
|---|---|
| ? Acquisition Date | Prompts for a range of dates and lists the assets acquired in that date range. |
| ? Active Assets | Prompts for a date and lists the assets with a non-blank in-service date that falls on or before the date specified. |
| ? Asset Code | Prompts for an asset code and lists the assets with an asset code that contains the specified search string. |
| ? Asset Description | Prompts for an asset description and lists the assets with a description that contains the specified search string. |
| ? Book - Accum Acount | Prompts for an account mask and lists the assets with a book ledger that references an accumulated depreciation account which matches the specified account mask. |
| ? Book - Asset Account |
Prompts for an account mask and lists the assets with a book ledger that references an asset account which matches the specified account mask. |
| ? Book - Begin Date | Prompts for a range of dates and lists the assets with a book ledger begin date in that date range. |
| ? Book - Depr Expense Account (as of ?) | Prompts for an account mask and lists information as of the date entered in the As of filter for the assets with a book ledger depreciation expense account that matches the specified mask. |
| ? Book - Life End Date (as of ?) | Prompts for a range of dates and lists information as of the date entered in the As of filter for the assets with a life end date in that date range. |
| ? Class Code | Prompts for an asset class code and lists the assets with a class code that contains the search string specified. |
| ? Class Description | Prompts for an asset class description and lists the assets with a class description that contains the search string specified. |
| ? Has Note Type | Prompts for a note type and lists the assets that have a note with a note type that contains the specified search string. |
| ? In Service Date | Prompts for a range of dates and lists the assets with an in-service date in that date range. |
| ? Retired Assets | Prompts for a retirement date and lists assets that were retired on or before that date. |
| Has Invalid Accounts | Lists assets with invalid GL accounts. |
| Retired Assets with Net Book Value | Lists assets that are fully retired but are still calculating a non-zero net book value. |
Depreciation Schedule vs Asset GL History Report
It can be confusing to know which asset report to run in particular situations. Here's a short rundown for determining which report suits your needs better:
- Use the Depreciation Schedule when you need to:
- Project depreciation for future periods, or
- Preview how changes to your setup will affect remaining life and amounts.
- Use the Asset GL History Report when you need to:
- Reconcile capitalized costs to asset account balances in GL,
- Report actual totals from setup and actual totals posted to GL, or
- Reconcile total fixed asset depreciation to accumulated depreciation balances in GL.
Report Email dialog
- Windows user default account. Sends email using the user's Windows default email account. For most users, this is the account configured in Outlook or another email client application.
- Server personal. Sends email using the email configuration for the system or company server and the email address on the current user's authorized user record. The authorized user record must have a confirmed email address.
- Server generic. Sends email using the email configuration and "from" address for the system or company server. This option requires "Send generic" access to the Server Email resource.
Validation messages when an asset is saved
- Asset Ledger (xxxxx) Begin Date is required if the In Service Date is defined.
- Asset Ledger (xxxxx) Begin Date cannot precede the In Service Date.
- Asset Ledger (xxxxx) requires prior depreciation since its Begin Date is later than the In Service Date.
- Asset Ledger (xxxxx) has invalid resulting Life (xx years, xx months) on (xx/xx/xxxx).
Validation messages for extra depreciation
- Prior Depreciation Date (xx/xx/xxxx) cannot precede Asset In Service Date (xx/xx/xxxx).
- Prior Depreciation Date (xx/xx/xxxx) must precede Asset/Ledger Begin Date (xx/xx/xxxx).
- Bonus Depreciation Date (xx/xx/xxxx) cannot precede Asset In Service Date (xx/xx/xxxx).
- Bonus Depreciation Date (xx/xx/xxxx) cannot exceed Asset In Service year-end date (xx/xx/xxxx).
- Manual Depreciation Date (xx/xx/xxxx) cannot precede Asset/Ledger Begin Date (xx/xx/xxxx).
- Manual extra depreciation requires the "Manual" depreciation method.
- Ledger: xxxxx
- Calculation Control: xxxxx
Asset Attribute Detail
[Attribute Name] Attribute
Troubleshoot common Post FA to GL errors
| Error | Explanation | Troubleshooting |
|---|---|---|
| Earlier calculated depreciation does not match the posted total | One or more months of depreciation may be missing. | Review asset GL detail to locate any missing month(s). Run the Post FA to GL process to post depreciation for the date range(s) needed. |
| Earlier calculated asset costs do not match the posted total | The assets costs were not posted in Fixed Assets. | Verify there is no manual entry for the asset. If not, run the Post FA to GL process using the acquisition date for the date range to post asset costs. |
| GL Date not found in GL Calendar | The GL calendar period is not available for posting, or the asset end-of-life date extends beyond the last calendar period available. | Check the GL calendar setup to ensure the period(s) you are posting to are set up and open. If they are not, add or open the missing/closed/unopen periods. |
| Invalid Account code for either an Asset, Depreciation, or Retirement Posting | The account is either invalid or has been flagged as obsolete. | Locate the account in the error on either the Asset or Retirement tab and correct it. Invalid accounts are indicated by yellow highlighting. |
|
5225 S Loop 289, #207 Lubbock, TX 79424 806.687.8500 | 800.354.7152 |
© 2025 AccountingWare, LLC All rights reserved. |