Follow the link for the report you want to view help for.
Assets Listing
Purpose
The Assets Listing provides a list of the assets tracked in Fixed Assets. When you specify a report date, the listing provides a snapshot of your fixed assets inventory as of that date.
Content
For each asset included on the report, the listing shows:
- asset code
- asset description
- asset class
- acquisition date
- "in service" date
- original cost
- total cost
- salvage value
- timestamps
- memos
- custom fields.
In addition, you can include one or more of the following:
- cost detail including: cost date, cost amount, offset account, and remarks for each detail line
- retirement detail including: retirement date, retirement type, percent or amount retired, proceeds from retirement, Post to GL flag setting, and remarks for each detail line
- asset ledger detail including: ledger name, begin date, calculation method, asset's life in years and months, asset account, accumulated depreciation account, and total cost for each ledger
- asset attribute history including: attribute, effective date, attribute item, and remarks for each attribute change.
In addition, if you include asset ledgers, you can include one or more of the following:
- ledger cost detail including: cost date, cost amount, prior depreciation, added years and months of life, and remarks for each detail line
- ledger extra depreciation detail including: extra depreciation date, extra depreciation type and type description, expense amount, and remarks for each detail line
- ledger retirement detail including: retirement date, retirement type, amount retired, depreciation amount, net value, proceeds from retirement, gain/loss amount, gain/loss account, bank account, and remarks for each detail line.
The following total appears on the report:
- grand totals for assets, original cost, and total cost.
Print the report
- In the Navigation pane, highlight the Fixed Assets > Assets folder.
- Start the report set-up wizard.
- To report on all or a filtered subset of assets:
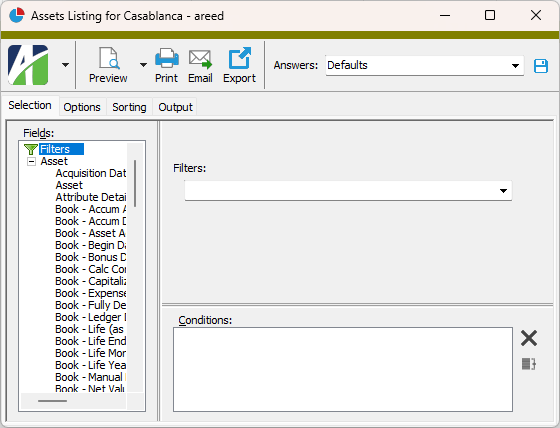
- Right-click the Assets folder and select Select and Report > Assets Listing from the shortcut menu.
- On the Selection tab, define any filters to apply to the data.
- To report on specifically selected assets:
- In the HD view, select the assets to include on the report. You can use Ctrl and/or Shift selection to select multiple records.
- Click
 and select Assets Listing from the drop-down menu.
- To report on a particular asset from the Asset window:
- In the HD view, locate and double-click the asset to report on. The Asset window opens with the asset loaded.
- Click and select Assets Listing from the drop-down menu.
- To report on all or a filtered subset of assets:
- Select the Options tab.
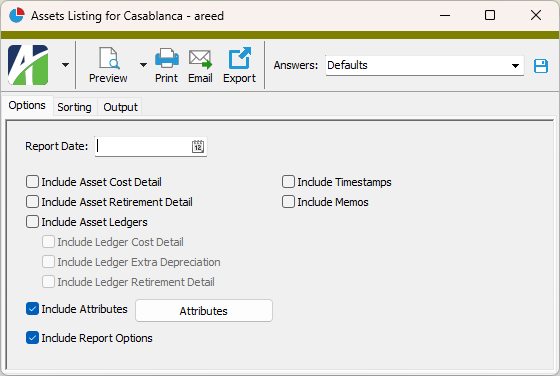
- In the Report Date field, select the date as of which to report asset information.
- Mark the checkbox(es) for the additional information to include:
- Asset Cost Detail
- Asset Retirement Detail
- Asset Ledgers. If you mark this checkbox, the three options below are enabled. Mark one or more of these checkboxes to include additional information about the asset ledger. Your options are:
- Ledger Cost Detail
- Ledger Extra Depreciation
- Ledger Retirement Detail
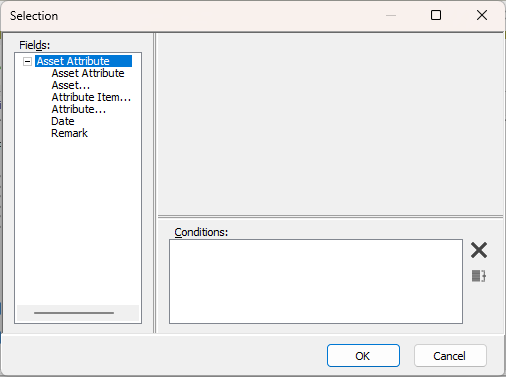
Attributes. If you mark this checkbox and want to limit the attributes which are reported, click Attributes to open the Selection dialog where you can specify selection conditions to determine which attributes are reported.
- Report Options. To include a section at the end of the report with the report settings used to produce the report, leave the checkbox marked. To produce the report without this information, clear the checkbox.
- Timestamps
- Memos
- Custom Fields (only visible if custom fields are set up)
- Select the Sorting tab.
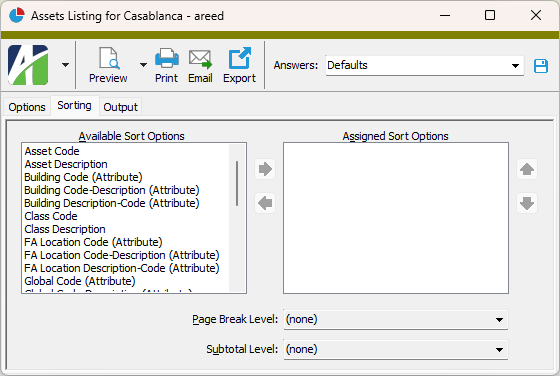
- In the Available Sort Options list box, highlight the field(s) to sort the report by, then click
 to move your selection(s) to the Assigned Sort Options list box.
 - If you selected multiple sort fields, use
 and
and  to arrange the sort fields in the order you want them applied.
 - If you want the report to start a new page for each change in one of the sorting options you specified, select the sorting option to break on from the Page Break Level drop-down list.
-
If you want the report to subtotal based on one of the sorting options you specified, select the sorting option to subtotal on from the Subtotal Level drop-down list. If you do not want to show subtotals, accept "(none)".
Tip
To see your assets grouped and totaled by location, select the location code attribute as a sorting option and then subtotal by it.
- Select the Output tab.
- In the Design field, look up and select the report design to use.
- In the toolbar, click the icon for the type of output you want:
 - Provides access to two preview options.
- Preview - Click the icon or click the drop-down arrow and select Preview from the drop-down menu to view the report in the Crystal Reports viewer.
- Preview to PDF - Click the drop-down arrow next to the icon and select Preview to PDF to view the report in the PDF reader.
 - Opens the Print dialog so that you can select and configure a printer and then print a paper copy of the report.
 - Opens the dialog so that you can address and compose an email that the report will be attached to. For best results, ensure your email client is running before you attempt to send a report via email.
 - Opens the Export Report dialog so that you can save the report to a file. File types include Crystal Reports (.rpt), PDF (.pdf), Microsoft Excel (.xls), Microsoft Word (.doc), rich text (.rtf), and XML (.xml).
Data extensions
The following data extensions are available for the report:
- Assets
- Asset Ledgers
- Asset Ledger Retirement
- Asset Ledger Extra Depreciation
- Asset Ledger Cost Detail
Asset Retirement Report
Purpose
The Assets Retirement Report lets you review assets which were fully or partially retired within a specified range of dates.
Content
For each asset included on the report, the listing shows:
- asset code
- asset description
- "in service" date
- retired date
- retirement type
- retired proceeds
- retired depreciation
- retired cost
- retired net value
- retired gain/loss.
The columns indicated in bold type represent values for Part I, Line 2 of IRS Form 4797 "Sales of Business Property".
In addition, you can include one or more of the following:
- partial retirements
- retirements with zero gain/loss.
The following totals appear on the report:
- record count
- totals for proceeds, depreciation, retired cost, net value, and gain/loss.
Print the report
- In the Navigation pane, highlight the Fixed Assets > Assets folder.
- Start the report set-up wizard.
- To report on all or a filtered subset of assets:
- Right-click the Assets folder and select Select and Report > Asset Retirement Report from the shortcut menu.
- On the Selection tab, define any filters to apply to the data.
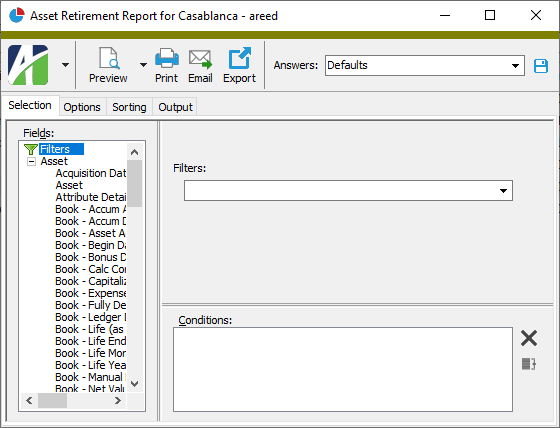
- To report on specifically selected assets:
- In the HD view, select the assets to include on the report. You can use Ctrl and/or Shift selection to select multiple records.
- Click and select Asset Retirement Report from the drop-down menu.
- To report on a particular asset from the Asset window:
- In the HD view, locate and double-click the asset to report on. The Asset window opens with the asset loaded.
- Click and select Asset Retirement Report from the drop-down menu.
- To report on all or a filtered subset of assets:
- Select the Options tab.
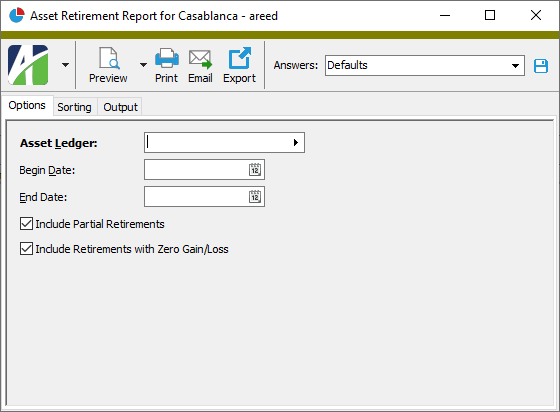
- Select the Asset Ledger to report on. (If only one non-obsolete ledger exists, that ledger is loaded for you.)
- In the Begin Date and End Date fields, select the range of retirement dates for which to report asset retirement information.
- Mark the checkbox(es) for the additional information to include:
- Partial Retirements
- Retirements with Zero Gain/Lost
- To include a section at the end of the report with the report settings used to produce the report, leave the Include Report Options checkbox marked. To produce the report without this information, clear the checkbox.
- Select the Sorting tab.
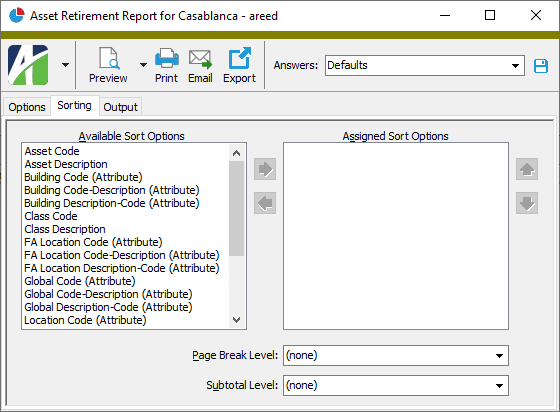
- In the Available Sort Options list box, highlight the field(s) to sort the report by, then click to move your selection(s) to the Assigned Sort Options list box.
- If you selected multiple sort fields, use and to arrange the sort fields in the order you want them applied.
- If you want the report to start a new page for each change in one of the sorting options you specified, select the sorting option to break on from the Page Break Level drop-down list.
- If you want the report to subtotal based on one of the sorting options you specified, select the sorting option to subtotal on from the Subtotal Level drop-down list. If you do not want to show subtotals, accept "(none)".
- Select the Output tab.
- In the Design field, look up and select the report design to use.
- In the toolbar, click the icon for the type of output you want:
- - Provides access to two preview options.
- Preview - Click the icon or click the drop-down arrow and select Preview from the drop-down menu to view the report in the Crystal Reports viewer.
- Preview to PDF - Click the drop-down arrow next to the icon and select Preview to PDF to view the report in the PDF reader.
- - Opens the Print dialog so that you can select and configure a printer and then print a paper copy of the report.
- - Opens the dialog so that you can address and compose an email that the report will be attached to. For best results, ensure your email client is running before you attempt to send a report via email.
- - Opens the Export Report dialog so that you can save the report to a file. File types include Crystal Reports (.rpt), PDF (.pdf), Microsoft Excel (.xls), Microsoft Word (.doc), rich text (.rtf), and XML (.xml).
Data extensions
The following data extension is available for the report:
- Asset retirement
Bonus Depreciation Report
Purpose
The Bonus Depreciation Report shows bonus depreciation for selected assets in a specified ledger (usually the tax ledger) over a specified range of depreciation dates. Whereas the Depreciation Schedule combines all bonus depreciation in one column, the Bonus Depreciation Report differentiates bonus depreciation by type so that you have the numbers necessary for tax reporting.
Content
For each asset included on the report, the report shows:
- asset code and description
- "in service" date
- original cost
- calculation control
- life of the asset in years
- amount of Section 168 depreciation
- amount of Section 179 depreciation
- amount of bonus depreciation
- amount of all other bonus depreciation types
- total bonus depreciation.
In addition, you can include one or more of the following:
- yearly totals for all bonus depreciation types and total bonus depreciation
- bonus depreciation for assets retired on or before an end date you specify.
The following totals appear on the report:
- record count
- report totals for original cost, bonus depreciation by type, and total bonus depreciation.
Print the report
- In the Navigation pane, highlight the Fixed Assets > Assets folder.
- Start the report set-up wizard.
- To report on all or a filtered subset of assets:
- Right-click the Assets folder and select Select and Report > Bonus Depreciation Report from the shortcut menu.
- On the Selection tab, define any filters to apply to the data.

- To report on specifically selected assets:
- In the HD view, select the assets to include on the report. You can use Ctrl and/or Shift selection to select multiple records.
- Click and select Bonus Depreciation Report from the drop-down menu.
- To report on a particular entity from the Asset window:
- In the HD view, locate and double-click the asset to report on. The Asset window opens with the asset loaded.
- Click and select Bonus Depreciation Report from the drop-down menu.
- To report on all or a filtered subset of assets:
- Select the Options tab.
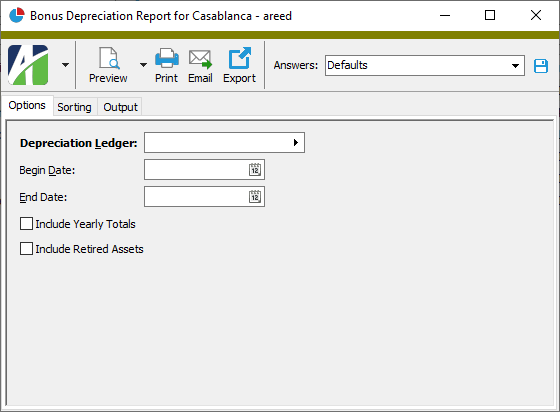
- Select the Depreciation Ledger to report on. Typically, you would report on the tax ledger. (If only one non-obsolete ledger exists, that ledger is loaded for you.)
- In the Begin Date and End Date fields, enter the range of dates to report bonus depreciation for.
- Mark the checkbox(es) for the additional information to include:
- Yearly Totals. Mark this checkbox if your report spans multiple years and your assets have bonus depreciation in each year.
- Retired Assets. Mark this checkbox to include assets which were retired on or before the end date you specified.
- To include a section at the end of the report with the report settings used to produce the report, leave the Include Report Options checkbox marked. To produce the report without this information, clear the checkbox.
- Select the Sorting tab.
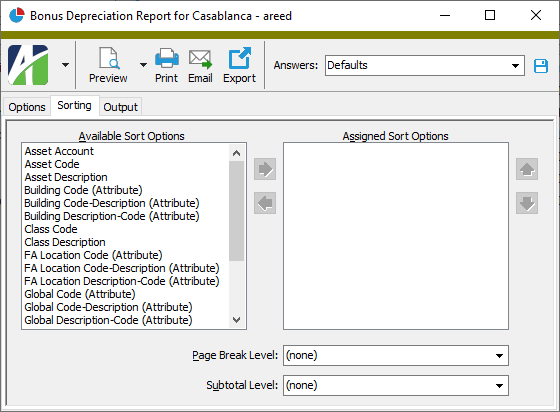
- In the Available Sort Options list box, highlight the field(s) to sort the report by, then click to move your selection(s) to the Assigned Sort Options list box.
- If you selected multiple sort fields, use and to arrange the sort fields in the order you want them applied.
- If you want the report to start a new page for each change in one of the sorting options you specified, select the sorting option to break on from the Page Break Level drop-down list.
- If you want the report to subtotal based on one of the sorting options you specified, select the sorting option to subtotal on from the Subtotal Level drop-down list. If you do not want to show subtotals, accept "(none)".
- Select the Output tab.
- In the Design field, look up and select the report design to use.
- In the toolbar, click the icon for the type of output you want:
- - Provides access to two preview options.
- Preview - Click the icon or click the drop-down arrow and select Preview from the drop-down menu to view the report in the Crystal Reports viewer.
- Preview to PDF - Click the drop-down arrow next to the icon and select Preview to PDF to view the report in the PDF reader.
- - Opens the Print dialog so that you can select and configure a printer and then print a paper copy of the report.
- - Opens the dialog so that you can address and compose an email that the report will be attached to. For best results, ensure your email client is running before you attempt to send a report via email.
- - Opens the Export Report dialog so that you can save the report to a file. File types include Crystal Reports (.rpt), PDF (.pdf), Microsoft Excel (.xls), Microsoft Word (.doc), rich text (.rtf), and XML (.xml).
Data extensions
The following data extension is available for the report:
- Assets
Depreciation Schedule
Note
Until version 8.20-0, the depreciation calculation did not calculate depreciation in the month of retirement since lifetime total depreciation was going to be backed out of accumulated depreciation in the same month; however, because total depreciation is significant for both book and tax purposes, depreciation for the month of retirement is now included in the calculation.
Depreciation Schedule
Purpose
The Depreciation Schedule shows projected depreciation for a selected ledger over the range of depreciation dates you specify.
Content
For each asset on the report, the report shows:
- asset code and description
- in-service date
- calculation control
- asset life
- salvage value
- begin and end depreciation dates
- running cost
- prior, period, bonus, total, and remaining depreciation.
In addition, you can include the following:
- detail section with rows showing added cost; cost, prior depreciation, and added life; or bonus expense
- depreciation totals by period
- yearly depreciation totals.
The following totals appear on the report:
- record count
- salvage value for all reported assets
- original cost for all reported assets
- prior depreciation for all reported assets
- period depreciation for all reported assets
- bonus depreciation for all reported assets
- total depreciation for all reported assets
- remaining depreciation for all reported assets.
Print the report
- In the Navigation pane, highlight the Fixed Assets > Assets folder.
- Start the report set-up wizard.
- To report on all or a filtered subset of assets:
- Right-click the Assets folder and select Select and Report > Depreciation Schedule from the shortcut menu.
- On the Selection tab, define any filters to apply to the data.

- To report on specifically selected assets:
- In the HD view, select the assets to include on the report. You can use Ctrl and/or Shift selection to select multiple records.
- Click and select Depreciation Schedule from the drop-down menu.
- To report on a particular asset from the Asset window:
- In the HD view, locate and double-click the asset to report on. The Asset window opens with the asset loaded.
- Click and select Depreciation Schedule from the drop-down menu.
- To report on all or a filtered subset of assets:
- Select the Options tab.
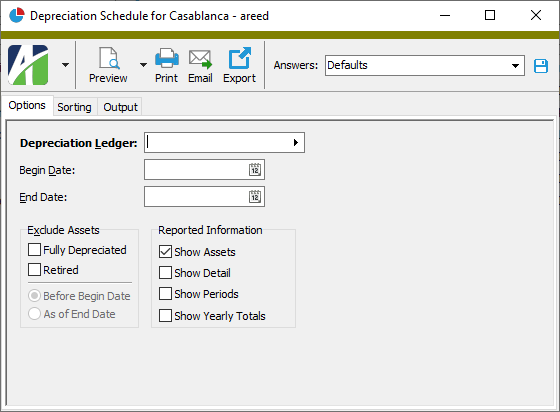
- Select the Depreciation Ledger to report on. (If only one non-obsolete ledger exists, that ledger is loaded for you.)
- In the Begin Date and End Date fields, enter the range of dates for which to include depreciation information on the report. If you leave the Begin Date field blank, the report shows depreciation from the beginning of each asset's life through the end date. If you leave the End Date field blank, the report shows depreciation from the begin date through each asset's end-of-life.
- In the Exclude Assets section, mark the checkbox(es) for the assets you do not want to include on the report. Your options include:
- Fully Depreciated. Mark this checkbox to exclude fully depreciated assets from the report. If you mark this checkbox, the Retired checkbox is marked for you and disabled.
- Retired. This checkbox is enabled if the Fully Depreciated checkbox is not marked. Mark this checkbox to exclude retired assets from the report.
- If you marked the Fully Depreciated checkbox or the Retired checkbox, the date options in the Exclude Assets section are enabled. Select the date criterion to use to determine which fully depreciated and/or retired assets to exclude. Your options are:
- Before Begin Date. If you select this option, assets fully depreciated and/or retired before the begin date you specified are excluded from the report.
- As of End Date. If you select this option, assets fully depreciated and/or retired as of the end date you specified are excluded from the report.
- Mark the checkbox(es) in the Reported Information section to indicate the additional information to include:
- Assets. This checkbox is marked by default. Ensure this checkbox is marked if you want to show assets on the report. The remaining checkboxes in this section are disabled unless you mark this checkbox. If you clear the checkbox, only totals are reported for the selected assets.
- Detail. Mark this checkbox to include detail rows showing added cost; cost, prior depreciation, and added life; retirement detail; and bonus expense.
Periods. Mark this checkbox to show depreciation totals for every period and year in the report date range.
Note
For most periods, the report shows the begin and end date for the period. However, if an asset was retired during a period, that period reflects the retirement date instead of the period end date.
- Yearly Totals. Mark this checkbox to show depreciation subtotals by year.
- To include a section at the end of the report with the report settings used to produce the report, leave the Include Report Options checkbox marked. To produce the report without this information, clear the checkbox.
- Select the Sorting tab.
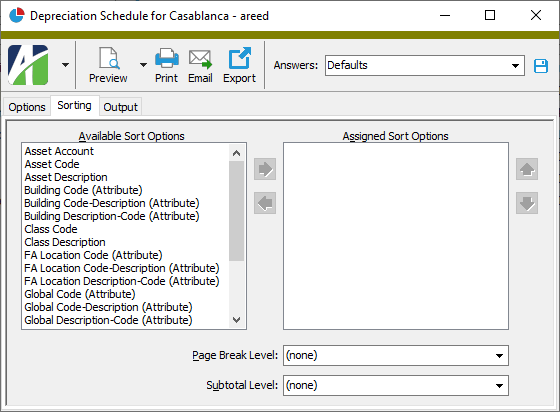
- In the Available Sort Options list box, highlight the field(s) to sort the report by, then click to move your selection(s) to the Assigned Sort Options list box.
Note
If you assign any of the FA Location sort options, assets that were assigned to multiple locations during the date range are reported in their location as of the report end date. These assets are marked with an asterisk on the report, and an explanatory note appears at the bottom of the report.
- If you selected multiple sort fields, use and to arrange the sort fields in the order you want them applied.
- If you want the report to start a new page for each change in one of the sorting options you specified, select the sorting option to break on from the Page Break Level drop-down list. If you do not want to insert page breaks, accept "(none)".
- If you want the report to subtotal based on one of the sorting options you specified, select the sorting option to subtotal on from the Subtotal Level drop-down list. If you do not want to show subtotals, accept "(none)".
- Select the Output tab.
- In the Design field, look up and select the report design to use.
- In the toolbar, click the icon for the type of output you want:
- - Provides access to two preview options.
- Preview - Click the icon or click the drop-down arrow and select Preview from the drop-down menu to view the report in the Crystal Reports viewer.
- Preview to PDF - Click the drop-down arrow next to the icon and select Preview to PDF to view the report in the PDF reader.
- - Opens the Print dialog so that you can select and configure a printer and then print a paper copy of the report.
- - Opens the dialog so that you can address and compose an email that the report will be attached to. For best results, ensure your email client is running before you attempt to send a report via email.
- - Opens the Export Report dialog so that you can save the report to a file. File types include Crystal Reports (.rpt), PDF (.pdf), Microsoft Excel (.xls), Microsoft Word (.doc), rich text (.rtf), and XML (.xml).
Data extensions
The following data extensions are available for the report:
- Assets
- Asset Ledgers
Asset GL History Report
Purpose
The Asset GL History Report shows posted depreciation, asset cost, and retirement information for a particular ledger for a historical range of dates. Use this report to help you reconcile general ledger postings. In particular, you can use the capitalized cost amount to reconcile the GL asset account, and the accumulated depreciation amount to reconcile the GL accumulated depreciation account.
Note
The Asset GL History Report does not calculate depreciation. It shows the historical GL detail for posted depreciation.
Because asset costs are only posted to GL when (1) a ledger GL batch is specified, (2) a ledger asset account is specified, (3) an asset cost offset account is specified, and (4) the offset account and the asset account are not the same, the GL History Report expects GL posting detail to be created by the Post to GL process and, therefore, doesn't report the asset cost record directly. Accordingly, you must run Post to GL over the asset cost date range in order to create the detail records for inclusion on the report. If the asset cost is not to be posted to GL, the report assumes the GL posting to the asset account was created by a manual GL entry (or with an AP invoice) and automatically creates a row in the report for the asset cost so that you can reconcile the GL asset account.
Note
Costs are not included on the report if the asset has not been placed in service. If the in-service date is blank, the capitalized cost of the asset is zero, even if there are entries in the asset's Cost Detail table. Those costs will not be posted to the GL asset account until the asset is placed in service. Any costs dated before the in-service date when costs are posted will be posted as of the in-service date.
For retirement postings, the retired asset cost amount is subtracted from the capitalized cost and retired accumulated depreciation is subtracted from accumulated depreciation. As a result, when an asset is fully retired, its capitalized cost, accumulated depreciation, and net value should all be zero.
Content
For each asset on the report, the report shows:
- asset code and description
- in-service date
- beginning totals for capitalized cost, accumulated depreciation, and net value
- detail totals for cost and depreciation
- ending totals for capitalized cost, accumulated depreciation, and net value.
By default the report includes all fully depreciated assets including retired assets. You have the options to exclude all fully depreciated assets or to exclude retired assets only.
In addition, you can include the following:
- original cost, asset class, acquisition date, salvage value, asset location, and retirement date
- GL detail postings for asset costs, depreciation, and extra depreciation, as well as generated entries for asset costs, depreciation, and extra depreciation, with or without summarized details by date or by date/account
- detail for attributes posted to GL
- yearly totals (based on the FA calendar).
The following totals appear on the report:
- asset totals
- grand totals.
Preinstalled saved answers
For your convenience, ActivityHD includes two preinstalled saved answers for common reporting scenarios:
- "By Accumulated Account without Assets"
- "By Asset Account with Assets"
Print the report
- In the Navigation pane, highlight the Fixed Assets > Assets folder.
- Start the report set-up wizard.
- To report on all or a filtered subset of assets:
- Right-click the Assets folder and select Select and Report > Asset GL History Report from the shortcut menu.
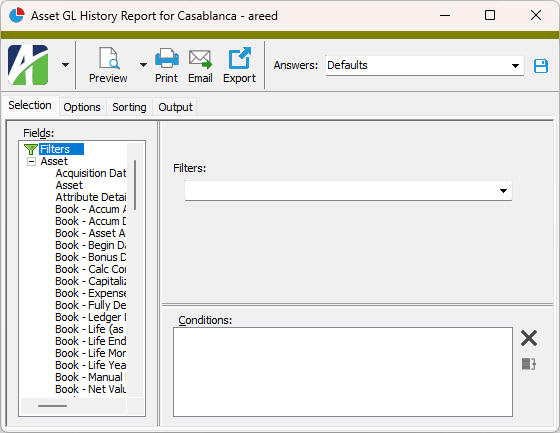
- On the Selection tab, define any filters to apply to the data.
- To report on specifically selected assets:
- In the HD view, select the assets to include on the report. You can use Ctrl and/or Shift selection to select multiple records.
- Click and select Asset GL History Report from the drop-down menu.
- To report on a particular asset from the Asset window:
- In the HD view, locate and double-click the asset to report on. The Asset window opens with the asset loaded.
- Click and select Asset GL History Report from the drop-down menu.
- To report on all or a filtered subset of assets:
- Select the Options tab.
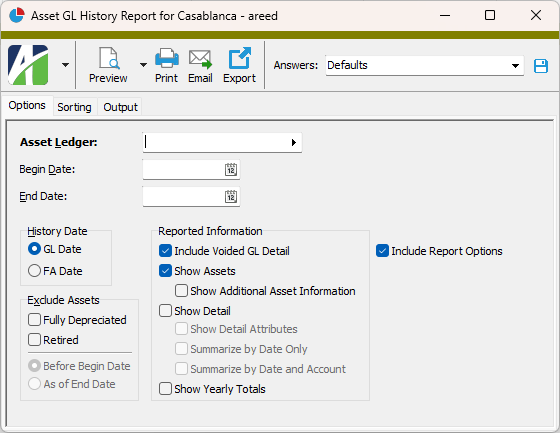
- Select the Asset Ledger to report on. Only ledgers which post to GL (i.e., ledgers with a GL batch specified) can be selected for reporting. (If only one non-obsolete ledger exists, that ledger is loaded for you.)
- In the Begin Date and End Date fields, enter the range of dates for which to include GL history on the report. The "Beginning Totals" column on the report shows the totals up to the Begin Date.
- In the History Date field, select the type of date you want the date range you entered to represent. Your options are:
- GL Date. Uses the GL posting date.
- FA Date. Uses the asset depreciation date.
- In the Exclude Assets section, select which, if any, assets you want to exclude from the report. Your options are:
- Fully Depreciated. Mark this checkbox to exclude all fully depreciated assets from the report. If you mark this checkbox, the Retired checkbox is marked and disabled. If you mark this checkbox, the date options below are enabled. Select which fully depreciated assets to exclude based on date. Your options are:
- Before Begin Date. Exclude assets that were fully depreciated before the report begin date.
- As of End Date. Exclude assets that were fully depreciated as of the report end date.
- Retired. This checkbox is enabled unless you marked the Fully Depreciated checkbox. Mark this checkbox if you want to exclude retired assets from the report but not other fully depreciated assets. If you mark this checkbox, the date options below are enabled. Select which retired assets to exclude based on date. Your options are:
- Before Begin Date. Exclude assets that were retired before the report begin date.
- As of End Date. Exclude assets that were retired as of the report end date.
- Fully Depreciated. Mark this checkbox to exclude all fully depreciated assets from the report. If you mark this checkbox, the Retired checkbox is marked and disabled. If you mark this checkbox, the date options below are enabled. Select which fully depreciated assets to exclude based on date. Your options are:
- Mark the checkbox(es) for the additional information to include:
- Include Voided GL Detail. This option is marked by default and causes the report to include voided GL detail. If you are using this report to reconcile GL balances, you should include voided GL detail because reversal entries may have been posted to different dates and to different accounts than the original voided entries. On the other hand, if you are using the report to see the current state of asset cost and depreciation history, you may want to exclude voided GL detail in order to simplify the report. If that is the case, clear the checkbox.
- Show Assets. This option is marked by default and causes the report to show totals by asset. If this checkbox is marked, the following checkbox is enabled:
- Show Additional Asset Information. Mark this checkbox to include asset class, asset location, acquisition date, and retirement date for each asset on the report.
- Show Detail. Mark this checkbox to include detail transactions on the report. If you mark this checkbox, the following checkboxes are enabled, but you can select only one of them:
- Show Detail Attributes. Mark this checkbox to include detail of attributes posted to GL.
- Summarize by Date Only. Mark this checkbox to summarize detail by date only.
- Summarize by Date/Account. Mark this checkbox to summarize detail by date and account.
- Show Yearly Totals. Mark this checkbox to show annual totals on the report. Yearly totals use the FA calendar specified on the asset's ledger to summarize depreciation detail so that totals match your organization's fiscal year.
- To include a section at the end of the report with the report settings used to produce the report, leave the Include Report Options checkbox marked. To produce the report without this information, clear the checkbox.
- Select the Sorting tab.
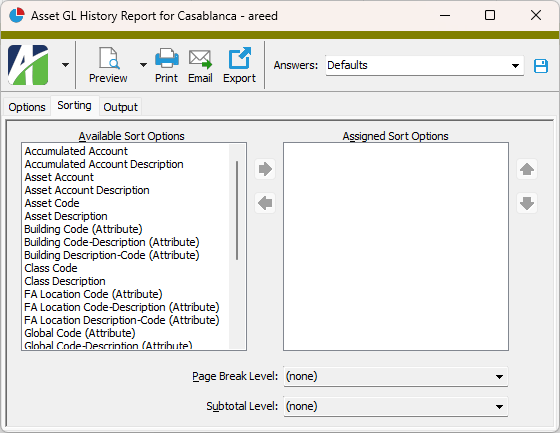
- In the Available Sort Options list box, highlight the field(s) to sort the report by, then click to move your selection(s) to the Assigned Sort Options list box.
- If you selected multiple sort fields, use and to arrange the sort fields in the order you want them applied.
- If you want the report to start a new page for each change in one of the sorting options you specified, select the sorting option to break on from the Page Break Level drop-down list. If you do not want to insert page breaks, accept "(none)".
- If you want the report to subtotal based on one of the sorting options you specified, select the sorting option to subtotal on from the Subtotal Level drop-down list. If you do not want to show subtotals, accept "(none)".
- Select the Output tab.
- In the Design field, look up and select the report design to use.
- In the toolbar, click the icon for the type of output you want:
- - Provides access to two preview options.
- Preview - Click the icon or click the drop-down arrow and select Preview from the drop-down menu to view the report in the Crystal Reports viewer.
- Preview to PDF - Click the drop-down arrow next to the icon and select Preview to PDF to view the report in the PDF reader.
- - Opens the Print dialog so that you can select and configure a printer and then print a paper copy of the report.
- - Opens the dialog so that you can address and compose an email that the report will be attached to. For best results, ensure your email client is running before you attempt to send a report via email.
- - Opens the Export Report dialog so that you can save the report to a file. File types include Crystal Reports (.rpt), PDF (.pdf), Microsoft Excel (.xls), Microsoft Word (.doc), rich text (.rtf), and XML (.xml).
Data extensions
The following data extensions are available for the report:
- Assets
- Asset Cost Detail
- Asset GL Detail
- Asset Ledgers
- Asset Ledger Retirement
- Asset Ledger Extra Depreciation
- Asset Ledger Cost Detail
Note Types Listing
Purpose
The Note Types Listing provides a list of the note types defined in Fixed Assets.
Content
For each note type included on the report, the listing shows:
- description.
In addition, you can include one or more of the following:
- timestamps
- memos
- custom fields.
The following total appears on the report:
- record count.
Print the report
- In the Navigation pane, highlight the Fixed Assets > Setup > Note Types folder.
- Start the report set-up wizard.
- To report on all or a filtered subset of note types:
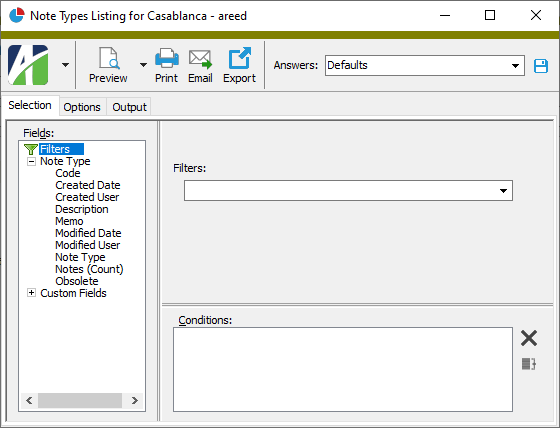
- Right-click the Note Types folder and select Select and Report > Note Types Listing from the shortcut menu.
- On the Selection tab, define any filters to apply to the data.
- To report on specifically selected note types:
- In the HD view, select the note types to include on the report. You can use Ctrl and/or Shift selection to select multiple records.
- Click .
- To report on a particular note type from the Note Type window:
- In the HD view, locate and double-click the note type to report on. The Note Type window opens with the note type loaded.
- Click .
- To report on all or a filtered subset of note types:
- Select the Options tab.
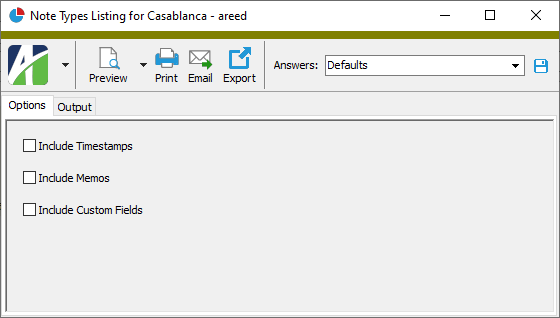
- To include a section at the end of the report with the report settings used to produce the report, leave the Include Report Options checkbox marked. To produce the report without this information, clear the checkbox.
- Mark the checkbox(es) for the additional information to include:
- Timestamps
- Memos
- Custom Fields (only visible if custom fields are set up)
- Select the Output tab.
- In the Design field, look up and select the report design to use.
- In the toolbar, click the icon for the type of output you want:
- - Provides access to two preview options.
- Preview - Click the icon or click the drop-down arrow and select Preview from the drop-down menu to view the report in the Crystal Reports viewer.
- Preview to PDF - Click the drop-down arrow next to the icon and select Preview to PDF to view the report in the PDF reader.
- - Opens the Print dialog so that you can select and configure a printer and then print a paper copy of the report.
- - Opens the dialog so that you can address and compose an email that the report will be attached to. For best results, ensure your email client is running before you attempt to send a report via email.
- - Opens the Export Report dialog so that you can save the report to a file. File types include Crystal Reports (.rpt), PDF (.pdf), Microsoft Excel (.xls), Microsoft Word (.doc), rich text (.rtf), and XML (.xml).
Data extensions
The following data extension is available for the report:
- Notes
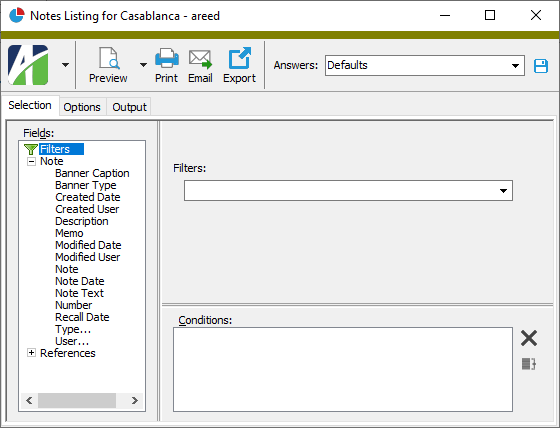
Note Listing
Purpose
The Notes Listing provides a list of the notes recorded in Fixed Assets.
Content
For each note included on the report, the listing shows:
- number
- date and time
- description
- user
- note type
- note text.
In addition, you can include one or more of the following:
- references
- timestamps
- memos
- custom fields.
The following total appears on the report:
- record count.
Print the report
- In the Navigation pane, highlight the Fixed Assets > Notes folder.
- Start the report set-up wizard.
- To report on all or a filtered subset of notes:
- Right-click the Notes folder and select Select and Report > Notes Listing from the shortcut menu.
- On the Selection tab, define any filters to apply to the data.
- To report on specifically selected notes:
- In the HD view, select the notes to include on the report. You can use Ctrl and/or Shift selection to select multiple records.
- Click .
- To report on a particular note from the Note window:
- In the HD view, locate and double-click the note to report on. The Note window opens with the note loaded.
- Click .
- To report on all or a filtered subset of notes:
- Select the Options tab.

- Mark the checkbox(es) for the additional information to include:
- References
- Report Options. To include a section at the end of the report with the report settings used to produce the report, leave the checkbox marked. To produce the report without this information, clear the checkbox.
- Timestamps
- Memos
- Custom Fields (only visible if custom fields are set up)
- Select the Output tab.
- In the Design field, look up and select the report design to use.
- In the toolbar, click the icon for the type of output you want:
- - Provides access to two preview options.
- Preview - Click the icon or click the drop-down arrow and select Preview from the drop-down menu to view the report in the Crystal Reports viewer.
- Preview to PDF - Click the drop-down arrow next to the icon and select Preview to PDF to view the report in the PDF reader.
- - Opens the Print dialog so that you can select and configure a printer and then print a paper copy of the report.
- - Opens the dialog so that you can address and compose an email that the report will be attached to. For best results, ensure your email client is running before you attempt to send a report via email.
- - Opens the Export Report dialog so that you can save the report to a file. File types include Crystal Reports (.rpt), PDF (.pdf), Microsoft Excel (.xls), Microsoft Word (.doc), rich text (.rtf), and XML (.xml).
Data extensions
The following data extension is available for the report:
- Notes