Recurring invoices let you duplicate an invoice every calendar period for a specified time span. Recurring invoices are useful for recording and paying expenses which your company incurs on a regular basis. Each recurring invoice is assigned a calendar and a range of dates which control when the recurring invoice can be processed. If the amount of the recurring invoice is the same from period to period, you can enter the amount and the actual distribution. If the invoice amount varies, you can enter an amount of 0.00 and a skeleton distribution and fill in the actual values at processing time. When a recurring invoice is processed, an actual invoice is produced.
Create recurring AP invoices
- In the Navigation pane, highlight the Accounts Payable > Invoices > Recurring folder.
- Click
 . The New Recurring AP Invoice window opens.
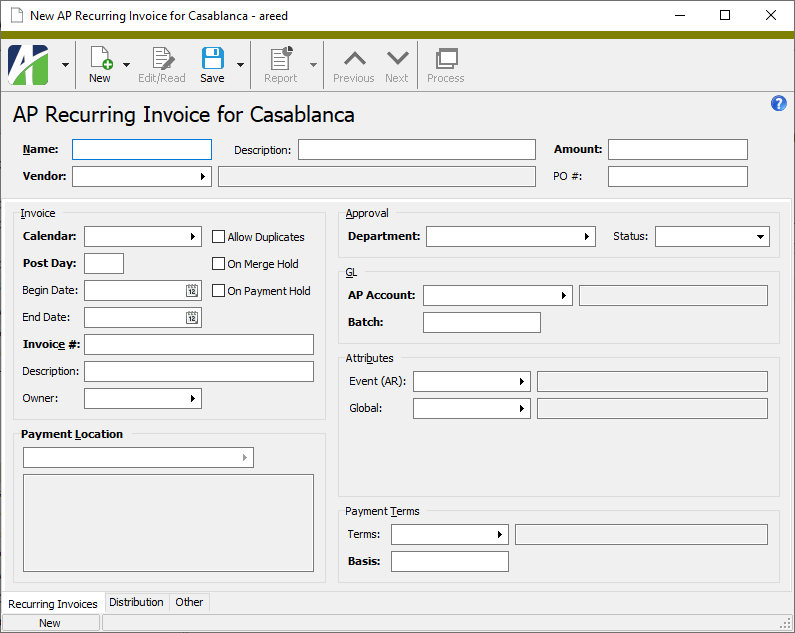
- Enter a unique Name for the recurring invoice. You can use up to 20 characters.
- Enter a Description of the recurring invoice.
- Select the Vendor to associate with the recurring invoice.
- In the Amount field, enter the total amount of the recurring invoice. The amount should include tax, freight charges, handling charges, and all other items billed on the invoice before payment discounts are applied. (Use the Distribution tab to distribute these extra expenses.) Enter 0.00 to use the recurring invoice as a template.
- In the PO # field, enter the purchase order associated with the recurring invoice, if one.
- Select the Calendar that has the appropriate accounting period structure for the recurring invoice. The calendar controls the posting frequency and entry date. A recurring invoice can only be processed once per calendar period unless you mark the Allow Duplicates checkbox.
- In the Post Day field, enter the day of the accounting period to post the recurring invoice on. To force the invoice to post to the last day of the period, enter a number greater than the number of days in the period. Enter zero to use the posting date specified in the Post Recurring Invoices process.
- In the Begin Date field, enter the earliest date that the recurring invoice can be processed. This date must be a valid period begin date for the specified calendar.
- In the End Date field, enter the latest date that the recurring invoice can be processed. This date must be a valid period end date for the specified calendar.
- Enter the Invoice # to assign to the recurring invoice. This could be the customer number or the vendor's account number. You can use literal text and/or keywords to derive the recurring invoice number.
- Enter a Description of the invoice that is created in the recurring process. You can use literal text and/or keywords to derive the recurring invoice description.
- If the Purchasing package is installed, The Owner field is visible. Select the purchasing operator responsible for the recurring invoice.
- Mark the Allow Duplicates checkbox if you want to be able to process the recurring invoice multiple times in the same accounting period.
- To prevent the invoice from being merged when it is processed, mark the On Merge Hold checkbox. This feature is useful for flagging invoices that need further attention before they can be merged into an actual AP invoice.
- To place the invoice on payment hold when it is processed, mark the On Payment Hold checkbox. Invoices on payment hold are skipped in the group pay process.
- In the Payment Location field, select the vendor payment location for the recurring invoice.
- If invoice approval is enabled, the Approval section is visible. In the Department field, select the purchasing department responsible for the recurring invoice.
- In the AP Account field, enter the account to credit for the recurring invoice. Partial or invalid accounts are allowed in this field. Partial or invalid accounts are highlighted in yellow.
- In the Batch field, enter the name of the GL batch to use for the recurring invoice. This batch is used after merging the invoice created by the Recurring Invoice process.
-
In the Attributes field(s), enter the appropriate attribute value(s) for the recurring invoice. In particular, be sure to enter values for required attributes. The attribute values entered here are copied to the invoices created in recurring processing. Attributes provide additional ways to categorize invoices and may include a GL account mask that contributes to determining the GL accounts used during invoice posting.
If default attribute items are defined on the vendor record, they are copied to these fields. You can override or blank out the default attribute items as needed.
- In the Terms field, select the payment terms that apply to the recurring invoice. This field can be left blank if there are no applicable terms. ActivityHD supplies the default payment terms associated with the vendor for the invoice and calculates the basis based on the payment terms and invoice date. When the invoice is processed, ActivityHD uses the specified terms to calculate the due date and any discount dates based on the invoice date.
- In the Basis field, enter the discount basis amount for the recurring invoice if it is different than the calculated amount.
- Select the Distribution tab.

-
In the GL Detail table, enter the GL detail lines for the recurring invoice.
Note
If your cursor is in an editable line of the GL Detail table, you can press Ctrl+B or select
 > Tools > Distribute Balance to automatically enter the debit amount needed to balance the distribution.
 - You only know part of the account number when the invoice is entered.
- You know the correct account number, but it hasn't been created in the General Ledger yet.
-
If your system is set up to handle intercompany postings and the recurring invoice requires that you create intercompany postings, select
> Tools > Create Intercompany Detail or press Ctrl+I. (This command is visible only if your system is set up for intercompany postings.) ActivityHD automatically generates the intercompany receivables and payables detail lines and adds them to the Distribution table below the existing GL detail. Each system-generated intercompany detail line has a source of "Intercompany".Notes
- Intercompany detail lines cannot be edited in the table; however, you can delete them individually.
- You can generate intercompany postings multiple times if you make changes to the distribution. ActivityHD always deletes the existing intercompany detail lines and replaces them with new detail lines based on the current distribution information.
- If the vendor on the recurring invoice has default APCodes, they load in the APCodes table where you can make any changes necessary. If not, you can leave the table blank or add APCodes as needed.
- When you finish, save the recurring invoice.
Note
You can enter partial or invalid accounts in the Account field. By the time an invoice created from the recurring invoice is merged, a valid account must be entered.
Reasons you might want to enter a partial or invalid account include:
Partial or invalid accounts are highlighted in yellow in the Recurring Invoice window.
There are no restrictions on deleting recurring invoices.
To delete a recurring invoice, highlight the recurring invoice record in the HD view and click ![]() , or open the recurring invoice and select
, or open the recurring invoice and select ![]() > Edit > Delete. In either case, ActivityHD prompts you to confirm your action. Click Delete to delete the recurring invoice.
> Edit > Delete. In either case, ActivityHD prompts you to confirm your action. Click Delete to delete the recurring invoice.
Processing a recurring invoice results in an actual invoice being generated from the recurring invoice. When invoices are created from recurring invoices, they are added to the Invoices folder where they can be proofed, merged, paid, or voided just like any other AP invoice.
Note
Process Recurring Invoices now allows partial or invalid accounts on the invoices it creates; however, all accounts must be valid before an invoice can be merged.
Process a recurring AP invoice
- In the Navigation pane, highlight the Accounts Payable > Invoices > Recurring folder.
- Start the Process Recurring Invoices wizard.
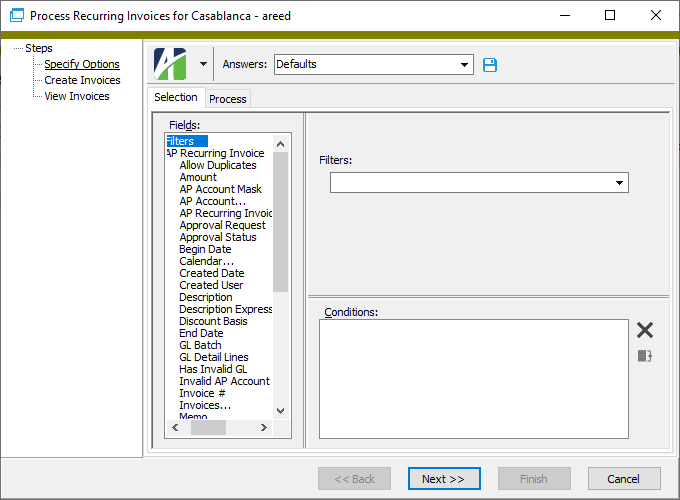
- To process all or a filtered subset of recurring invoices:
- Right-click the Recurring folder and select Select and Process from the shortcut menu.
- On the Selection tab, define any filters to apply to the data.
- To process specifically selected recurring invoices:
- In the HD view, select the recurring invoices to process. You can use Ctrl and/or Shift selection to select multiple records.
- Click
 .
.
- To process all or a filtered subset of recurring invoices:
- On the Process tab in the Batch field, enter the name for the batch of journal entries that will be created in the process.
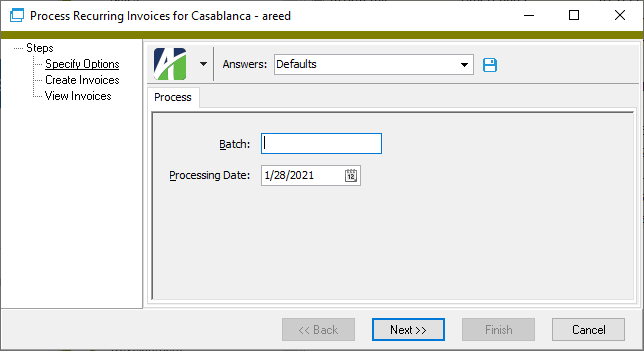
-
In the Processing Date field, enter the posting date for the journal entries in the batch.
Note
You cannot enter a date that does not fall within the date range defined for the calendar specified on the recurring invoice and you cannot enter a date outside the account's date range if the posting control is set to "Error".
- Click Next >>. ActivityHD prompts you to confirm that you want to process the recurring invoice(s).
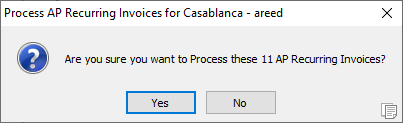
- Click Yes. ActivityHD processes the recurring invoices.
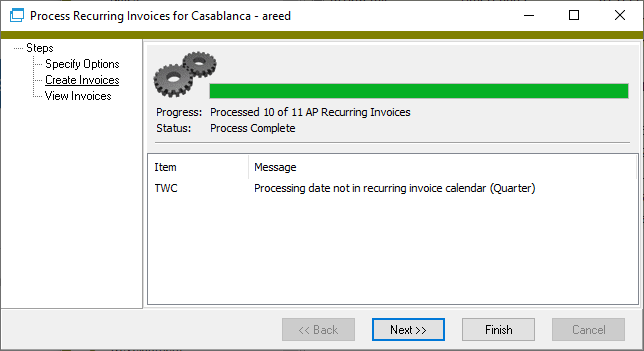
If problems are encountered during processing, ActivityHD lists the reasons.
- Click Next >>.
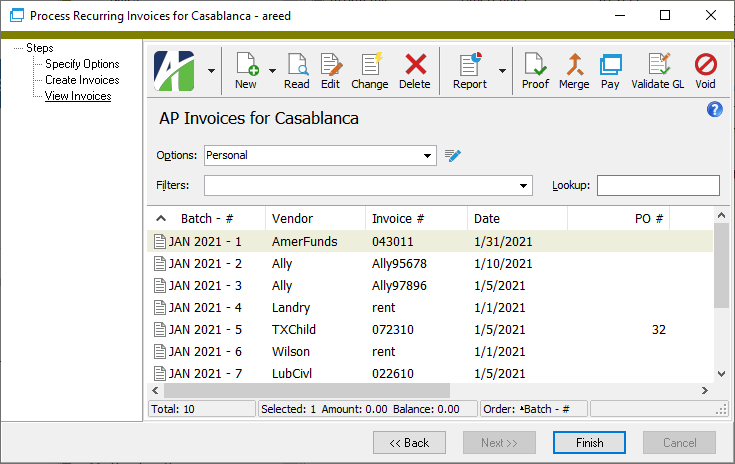
At this point, you can double-click an invoice in the right pane to drill down to the AP Invoice window, print the Invoices Listing, proof the invoices for merging, merge the invoices, pay the invoices, or void invoices.
Note
Don't forget to edit any 0.00 invoices to enter the actual amount and complete the distribution.
- When you finish viewing or working with the invoices, click Finish.
Note
Recurring invoices can only be processed once during a calendar period unless the recurring invoice is flagged to allow duplicates.
Recurring AP Invoices Listing
Purpose
The Recurring Invoices Listing provides details for the recurring invoices defined in Accounts Payable.
Content
For each recurring invoice represented, the listing shows:
- vendor name
- vendor description
- beginning date for using the recurring invoice
- the day of the month to post the invoice
- purchase order number
- whether the recurring invoice is on payment hold
- GL batch name
- recurring invoice number
- recurring invoice description
- the date to stop using the recurring invoice
- invoice amount
- whether duplicates are allowed
- whether the recurring invoice is on merge hold
- AP account number.
In addition, you can include one or more of the following:
- departments and approval statuses (if Purchasing is installed, AP invoice approval is enabled, and a recurring invoice has a department and/or approval status specified)
- payment locations and terms (payment address; terms code, description, basis)
- attributes (both invoice usage attributes and invoice detail usage attributes)
- APCodes (code, description, type, basis)
- GL detail (for each detail line: line number, GL account and description, unit, debit or credit amount)
- GL Summary section (account, account description, attributes, total debits, total credits)
- timestamps
- memos
- custom fields.
The following totals appear on the report:
- total count of recurring invoices
- total amount of recurring invoices.
Print the report
- In the Navigation pane, highlight the Accounts Payable > Invoices > Recurring folder.
- Start the report set-up wizard.
- To report on all or a filtered subset of recurring invoices:
- Right-click the Recurring folder and select Select and Report > Recurring Invoices Listing from the shortcut menu.
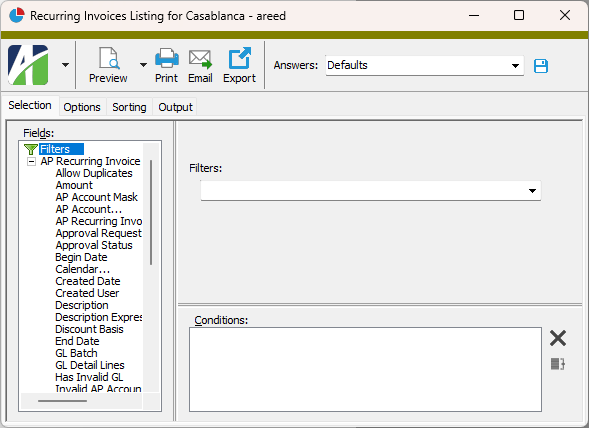
- On the Selection tab, define any filters to apply to the data.
- To report on specifically selected recurring invoices:
- In the HD view, select the recurring invoices to include on the report. You can use Ctrl and/or Shift selection to select multiple records.
- Click
 .
.
- To report on a particular recurring invoice from the Recurring AP Invoice window:
- In the HD view, locate and double-click the recurring invoice to report on. The Recurring AP Invoice window opens with the recurring invoice loaded.
- Click .
- To report on all or a filtered subset of recurring invoices:
- Select the Options tab.
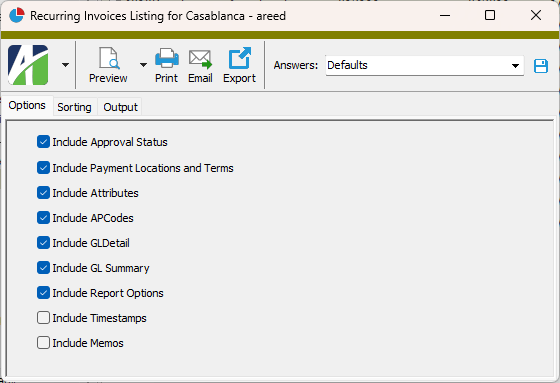
- Mark the checkbox(es) for the additional information to include:
- Approval Status (only visible when Purchasing is installed and AP invoice approval is enabled)
- Payment Locations and Terms
- Attributes
- APCodes
- GL Detail
- GL Summary
- Report Options. To include a section at the end of the report with the report settings used to produce the report, leave the checkbox marked. To produce the report without this information, clear the checkbox.
- Timestamps
- Memos
- Custom Fields (only visible if custom fields are set up)
- Select the Sorting tab.
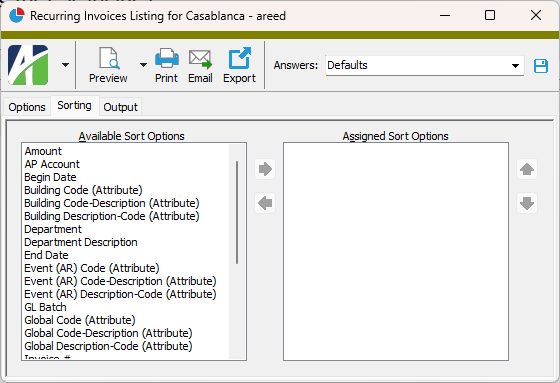
- In the Available Sort Options list box, highlight the field(s) to sort the report by, then click
 to move your selection(s) to the Assigned Sort Options list box.
 - If you selected multiple sort fields, use
 and
and  to arrange the sort fields in the order you want them applied.
 - Select the Output tab.
- In the Design field, look up and select the report design to use.
- In the toolbar, click the icon for the type of output you want:
 - Provides access to two preview options.
- Preview - Click the icon or click the drop-down arrow and select Preview from the drop-down menu to view the report in the Crystal Reports viewer.
- Preview to PDF - Click the drop-down arrow next to the icon and select Preview to PDF to view the report in the PDF reader.
 - Opens the Print dialog so that you can select and configure a printer and then print a paper copy of the report.
 - Opens the Report Email dialog so that you can address and compose an email that the report will be attached to. For best results, ensure your email client is running before you attempt to send a report via email.
 - Opens the Export Report dialog so that you can save the report to a file. File types include Crystal Reports (.rpt), PDF (.pdf), Microsoft Excel (.xls), Microsoft Word (.doc), rich text (.rtf), and XML (.xml).
Data extensions
The following data extensions are available for the report:
- Recurring invoices
- Recurring APCodes
Recurring Invoice Record ID
The vendor assigned to the recurring invoice.
Press F3 to look up the value.
If a value is already selected, you can press F4 to open the record in its native editor.
Recurring Invoices tab
The calendar with the appropriate accounting period structure for the recurring invoice. The selected calendar controls the posting frequency and the entry date.
Press F3 to look up the value.
If a value is already selected, you can press F4 to open the record in its native editor.
The day of the accounting period the recurring invoice will be posted. To force the invoice to post on the last day of the period, enter a number greater than the number of days in the period. To use the date specified in the Post Recurring Invoices process, enter zero.
Example
If you use a monthly calendar and specify a post day of 10, the recurring invoice will post on the 10th of each month.
Press F3 to look up the value.
If a value is already selected, you can press F4 to open the record in its native editor.
The vendor payment location for the recurring invoice. The default payment location is the vendor's default payment location.
Press F3 to look up the value.
If a value is already selected, you can press F4 to open the record in its native editor.
- <blank>
- Hold
- Ready
The liability account that is credited for invoices generated from this recurring invoice. The default account is the vendor's default AP account. Partial or invalid accounts are allowed in this field. Partial or invalid accounts are highlighted in yellow.
Press F2 to open the Account Expand dialog box where you can look up an account number, find an account number by its alias, build the account number by segment, or view setup and setup sources.
Press F3 to look up the account.
If an account is already selected, you can press F4 to open the record in the Account window.
The attribute item that applies for the recurring invoice. If the attribute is a required attribute, you must select an attribute item. The attribute values entered here are copied to the invoices created in recurring processing.
Attribute items provide additional ways to categorize invoices for reporting and they can contribute to the GL account masks used to derive the GL accounts used during invoice posting.
If default attribute items are defined on the vendor record, they are copied to these fields. You can override or blank out the default attribute items as needed.
Press F3 to look up the value.
If a value is already selected, you can press F4 to open the record in its native editor.
The payment terms to be applied to invoices generated from this recurring invoice. If terms do not apply, leave this field blank. The default payment terms are the vendor's default payment terms. When the invoice is processed, ActivityHD uses the payment terms to calculate the due date and any discount dates.
Press F3 to look up the value.
If a value is already selected, you can press F4 to open the record in its native editor.
Distribution tab
This table contains the distribution lines for the invoice.
When you create a recurring invoice, ActivityHD automatically creates a detail line with a source of "Invoice" that credits the AP liability account for the invoice. This line cannot be edited directly.
You can enter the remaining distribution lines manually.
GL detail amounts must equal the invoice amount.
Tip
Line numbers in the GL Detail table, except the first line, are editable. You can change the line numbers in order to reorder the rows in the table.
The account the detail line will be posted to. The default account on each new invoice GL detail line (excluding liability, use tax, and intercompany lines) is the default distribution account from the vendor record.
Note
You can enter partial or invalid accounts in the Account field. By the time an invoice created from the recurring invoice is merged, a valid account must be entered.
Reasons you might want to enter a partial or invalid account include:
- You only know part of the account number when the invoice is entered.
- You know the correct account number, but it hasn't been created in the General Ledger yet.
Partial or invalid accounts are highlighted in yellow in the Recurring Invoice window.
Press F2 to open the Account Expand dialog box where you can look up an account number, find an account number by its alias, build the account number by segment, or view setup and setup sources.
Press F3 to look up the account.
If an account is already selected, you can press F4 to open the record in the Account window.
Press F3 to look up the value.
If a value is already selected, you can press F4 to open the record in its native editor.
APCodes provide for non-GL categorizing of invoice amounts for future analysis and reporting. You can use APCodes to handle use tax, multiple 1099 types, and backup withholding. If the vendor has default APCodes assigned, those APCodes will load as defaults on the invoice. APCodes can be added, removed, or changed on an invoice-by-invoice basis.
Tip
Line numbers in the APCodes table are editable. You can change the line numbers in order to reorder the rows in the table.
An APCode used to generate detail for the recurring invoice.
Press F3 to look up the value.
If a value is already selected, you can press F4 to open the record in its native editor.
- Use Tax
- Payment Reporting
- Payment Withholding
Custom tab
This tab is visible if custom fields exist for the entity. At a minimum, if there are custom fields, a Fields subtab will be present. One or more additional categories of subtabs may also be visible.
Fields subtab
This tab prompts for values for any custom fields set up for entity records of this entity type. Respond to the prompts as appropriate.
References subtab
This tab is visible if other records reference the current record.
Example
Suppose a custom field exists on PRCodes that references an ARCode. On the ARCode record, on the Custom > References subtab, you can view all the PRCodes which reference that ARCode.
Exchange Folder subtab
This tab is visible only if you set up a custom field with a data type of "Exchange Folder". The label on this tab is the name assigned to the custom field.
This tab shows the contents of the specified Exchange folder.
File subtab
This tab is visible only if you set up a custom field with a data type of "File". The label on the tab is the name assigned to the custom field.
This tab renders the contents of the specified file according to its file type.
Internet Address subtab
This tab is visible only if you set up a custom field with a data type of "Internet Address". The label on this tab is the name assigned to the custom field.
This tab shows the contents of the specified web page.
Network Folder subtab
This tab is visible only if you set up a custom field with a data type of "Network Folder". The label on this tab is the name assigned to the custom field.
This tab shows the contents of the specified network folder.
Invoices tab
The Invoices pane shows the Invoices HD view filtered to show all invoices created from the selected recurring invoice.
Double-click a row in the pane to drill down to its record in the AP Invoice window.
Notes tab
The Notes pane shows the Notes HD view filtered to show all notes for the selected recurring invoice.
Double-click a row in the pane to drill down to its record in the Note window.
Attachments tab
The Attachments tab is visible if any record for a given entity has an attachment. If the Attachments tab is not visible, this implies that no record of the entity type has an attachment on it; however, once an attachment is added to any record of the entity type, the Attachments tab will become available.
Change Logs tab
This tab is visible if the user has "Change Logs" access to the associated data folder resource.
The Change Logs pane shows the Change Logs HD view filtered to show all change logs for the selected entity record.
Double-click a row in the pane to drill down to its record in the Change Log window.
Other tab
Developer tab
This tab is visible only when developer features are enabled.
Automation subtab
This subtab shows field names and values for the current data record. Use the information in the subtab to assist when creating automation objects such as bots and import files. The field names and field values can be copied from the text box and pasted directly into your code or application. To copy content from the text box, highlight the content to copy and press Ctrl+C or right-click your selection and select Copy from the context menu.
Export (XML) subtab
This subtab shows the XML syntax for exporting the selected data record. The syntax can be copied from the text box as an exemplar for creating your own automation objects for bots, import files, ActivWebAPI, etc. To copy content from the text box, highlight the content to copy and press Ctrl+C or right-click your selection and select Copy from the context menu.
Import (XML) subtab
This subtab allows you to select a file for import and shows the XML syntax for importing data records. Use the subtab to explore the XML syntax for importing data records. In particular, you can investigate the syntax which results when using Data.Import and ActivWebAPI data POST and DELETE routes.
Change Log (XML) subtab
This subtab is visible only when the Enable Change Logs option is marked in System Options or Company Options (depending on whether the feature applies at the system or the company level). This is the default setting when developer features are enabled.
This subtab allows you to investigate changes to the current data record. The syntax can be copied for use in bots, dashboards, ActivWebAPI, and other automation. To copy content from the text box, highlight the content to copy and press Ctrl+C or right-click your selection and select Copy from the context menu.
Select Statement (SQL) subtab
This subtab allows you to investigate the SQL select statement used to retrieve the current data record. The syntax can be copied as an exemplar for data sources and other automation. To copy content from the text box, highlight the content to copy and press Ctrl+C or right-click your selection and select Copy from the context menu.

|
|
Recurring invoices security
Common accesses available on recurring invoices
| Access | A user with this access can... |
|---|---|
| Change | Use the mass change action on recurring invoices. |
| Change Logs | |
| Custom Fields | Create and edit custom fields for recurring invoices. |
| Data | Have read-only access to recurring invoices from anywhere in the software (e.g., field validations, filters, date expressions). |
| Delete | Delete recurring invoices. |
| Edit | Edit recurring invoice records. |
| Export | Export recurring invoice records from ActivityHD. |
| Import | Import recurring invoice records into ActivityHD. |
| New | Create new recurring invoice records. |
| Read | Have read-only access to recurring invoice records. |
| Report | Run reports with recurring invoice information. |
| Report Designs | Create and edit report designs with recurring invoice information. This access enables the Report Designs button on the Output tab of report dialogs. |
| Shared Answers | Create and edit saved answers related to recurring invoices. |
| Shared Filters | Create and edit shared filters on recurring invoices. |
| Visible | View the Recurring folder in the Navigation pane. |
Special accesses available on recurring invoices
| Access | A user with this access can... |
|---|---|
| Process | Process recurring invoices to create regular invoices. |
Recurring invoice filters
The following built-in filters are available for recurring invoices:
| Filter Name | Effect |
|---|---|
| ? Description | Prompts for a description and lists recurring invoices with a description that contains the specified search string. |
| ? Ready to Process |
Prompts for a processing date and returns recurring invoices which meet the following criteria:
|
| ? Vendor | Prompts for a vendor name and lists recurring invoices with a vendor name that contains the specified search string. |
| ? Vendor Description | Prompts for a vendor description and lists recurring invoices with a description that contains the specified search string. |
Entry Totals
Balancing for Recurring Invoice
Report Email dialog
- Windows user default account. Sends email using the user's Windows default email account. For most users, this is the account configured in Outlook or another email client application.
- Server personal. Sends email using the email configuration for the system or company server and the email address on the current user's authorized user record. The authorized user record must have a confirmed email address.
- Server generic. Sends email using the email configuration and "from" address for the system or company server. This option requires "Send generic" access to the Server Email resource.
Validation messages for the Process Recurring Invoices wizard
The following messages may be returned in the recurring invoices process for any invoices which were not generated:
- Duplicate recurring invoice not allowed in period (xxxxx).
- Processing date not in recurring invoice calendar (xxxxx).
- Processing date outside effective date range (xxxxx).
- Use tax APCode has no effective rate for invoice date or is obsolete.
- GL Detail line n Account (xxxx-xx-x-xxx) is an incomplete account.
- GL Detail line n Account (xxxx-xx-x-xxx) is an invalid account.
AP recurring invoice expression keywords
The following keywords are available in expressions for AP recurring invoice numbers and AP recurring invoice descriptions:
- <Customer>
- <Period Number>
- <Period Description>
- <Period Year Code>
- <Period Year Description>
- <Period Begin Month>
- <Period Begin Month Name>
- <Period Begin Day>
- <Period Begin Year>
- <Period End Month>
- <Period End Month Name>
- <Period End Day>
- <Period End Year>
|
5225 S Loop 289, #207 Lubbock, TX 79424 806.687.8500 | 800.354.7152 |
© 2025 AccountingWare, LLC All rights reserved. |