Follow the link for the report you want to view help for.
1099 Detail Report
Purpose
For each vendor in your selection, the 1099 Detail Report shows 1099 amounts by return type during a specified date range.
Content
For each vendor on the report, the report shows:
- vendor name
- vendor federal ID number
- 1099 income type
- 1099 total for transactions in the date range.
In addition, you can include one or more of the following:
- payment detail (payment date, reference, merge number; invoice date, invoice number, merge number; invoice payment APCode, gross payment, amount)
- reporting location.
The following total appears on the report:
- record count.
Preinstalled saved answers
For your convenience, ActivityHD includes four preinstalled saved answers for common reporting scenarios.

Print the report
- In the Navigation pane, highlight the Accounts Payable > Vendors folder.
- Start the report set-up wizard.
- To report on all or a filtered subset of vendors:
- Right-click the Vendors folder and select Select and Report > 1099 Detail Report from the shortcut menu.
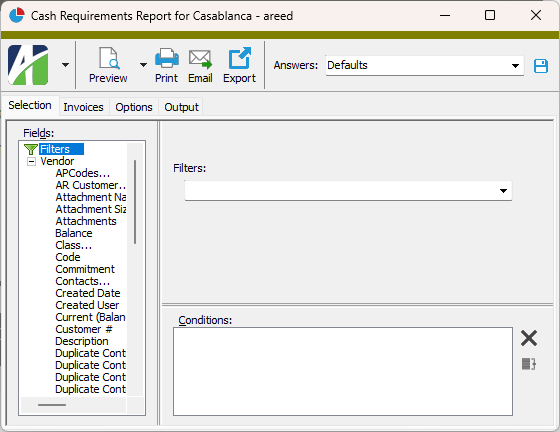
- On the Selection tab, define any filters to apply to the data.

- To report on specifically selected vendors:
- In the HD view, select the vendors to include on the report. You can use Ctrl and/or Shift selection to select multiple records.
- Click
 and select 1099 Detail Report from the drop-down menu.
- To report on a particular vendor from the Vendor window:
- In the HD view, locate and double-click the vendor to report on. The Vendor window opens with the vendor loaded.
- Click and select 1099 Detail Report from the drop-down menu.
- To report on all or a filtered subset of vendors:
- Select the Detail tab.

- In the Payment Begin Date and Payment End Date fields, enter the range of vendor payment dates for which to include transaction information on the report.
- In the Return Types section, ensure that the checkbox is marked for each 1099 return type you want to include on the report. Your options are:
- 1099-DIV Dividends and Distributions
- 1099-INT Interest Income
- 1099-MISC Miscellaneous Income
- 1099-NEC Nonemployee Compensation
- 1099-R Distributions from Pensions, ...
- Select the Options tab.

- If you only want to show vendors on the report that would be included in the 1099 creation process, mark the Apply Minimum Amount Limits checkbox.
- If you want to suppress transaction detail and show only 1099 totals for each vendor, mark the Totals Only checkbox. If you mark this checkbox, the remaining checkboxes on the tab are disabled; skip to step 11.
- If you want to limit the report to vendors who are missing required 1099 information or whose combined address fields exceed 40 characters, mark the Only Show Vendors with Validation Errors checkbox.
- Mark the checkbox(es) for the additional information to include:
- Payment Detail
- Reporting Location
- To include a section at the end of the report with the report settings used to produce the report, leave the Include Report Options checkbox marked. To produce the report without this information, clear the checkbox.
- Select the Output tab.
- In the Design field, look up and select the report design to use.
- In the toolbar, click the icon for the type of output you want:
 - Provides access to two preview options.
- Preview - Click the icon or click the drop-down arrow and select Preview from the drop-down menu to view the report in the Crystal Reports viewer.
- Preview to PDF - Click the drop-down arrow next to the icon and select Preview to PDF to view the report in the PDF reader.
 - Opens the Print dialog so that you can select and configure a printer and then print a paper copy of the report.
 - Opens the dialog so that you can address and compose an email that the report will be attached to. For best results, ensure your email client is running before you attempt to send a report via email.
 - Opens the Export Report dialog so that you can save the report to a file. File types include Crystal Reports (.rpt), PDF (.pdf), Microsoft Excel (.xls), Microsoft Word (.doc), rich text (.rtf), and XML (.xml).
Data extensions
The following data extension is available for the report:
- Vendors
- Invoices
- Payments
1099 Transmissions Listing
Purpose
The 1099 Transmissions Listing provides a list of the 1099 transmissions prepared for submission to the IRS along with the FIRE System results for each transmission.
Content
For each 1099 transmission included on the report, the listing shows:
- transmission number
- transmission description
- tax year
- file type
- summary of FIRE System results for the transmission including filename, your filename, date received, payee count, and file status.
In addition, you can include one or more of the following:
- timestamps
- memos
- custom fields.
The following total appears on the report:
- record count.
Print the report
- In the Navigation pane, highlight the Accounts Payable > Government > 1099 Transmissions folder.
- Start the report set-up wizard.
- To report on all or a filtered subset of 1099 transmissions:
- Right-click the 1099 Transmissions folder and select Select and Report > 1099 Transmissions Listing from the shortcut menu.
- On the Selection tab, define any filters to apply to the data.
- To report on specifically selected 1099 transmissions:
- In the HD view, select the 1099 transmissions to include on the report. You can use Ctrl and/or Shift selection to select multiple records.
- Click and select 1099 Transmissions Listing from the drop-down menu.
- To report on a particular 1099 transmission from the 1099 Transmission window:
- In the HD view, locate and double-click the 1099 transmission to report on. The 1099 Transmissions window opens with the 1099 transmission loaded.
- Click .
- To report on all or a filtered subset of 1099 transmissions:
- Select the Options tab.
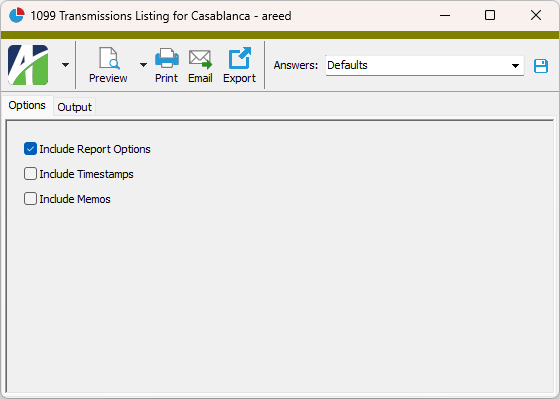
- To include a section at the end of the report with the report settings used to produce the report, leave the Include Report Options checkbox marked. To produce the report without this information, clear the checkbox.
- Mark the checkbox(es) for the additional information to include:
- Timestamps
- Memos
- Custom Fields (only visible if custom fields are set up)
- Select the Output tab.
- In the Design field, look up and select the report design to use.
- In the toolbar, click the icon for the type of output you want:
- - Provides access to two preview options.
- Preview - Click the icon or click the drop-down arrow and select Preview from the drop-down menu to view the report in the Crystal Reports viewer.
- Preview to PDF - Click the drop-down arrow next to the icon and select Preview to PDF to view the report in the PDF reader.
- - Opens the Print dialog so that you can select and configure a printer and then print a paper copy of the report.
- - Opens the dialog so that you can address and compose an email that the report will be attached to. For best results, ensure your email client is running before you attempt to send a report via email.
- - Opens the Export Report dialog so that you can save the report to a file. File types include Crystal Reports (.rpt), PDF (.pdf), Microsoft Excel (.xls), Microsoft Word (.doc), rich text (.rtf), and XML (.xml).
Data extensions
The following data extension is available for the report:
- 1099 transmissions
Aged Invoice Analysis
Purpose
Invoice aging categorizes outstanding invoices by how long they have gone unpaid. The Aged Invoice Analysis report shows amounts owed to vendors by aging category. This report is useful for determining cash outflow.
Content
For each vendor included on the report, the report shows:
- vendor name
- vendor balance
- vendor totals by aging category.
In addition, you can include:
- invoice information.
If you include invoice information, for each invoice represented on the report, the report shows:
- invoice number
- due date
- invoice balance
- invoice amount by aging category.
The following totals appear on the report:
- grand totals for balance and aging categories.
Preinstalled saved answers
For your convenience, ActivityHD includes two preinstalled saved answers for common reporting scenarios:
- "Current Aging"
- "Reconcile to General Ledger"
Print the report
- In the Navigation pane, highlight the Accounts Payable > Vendors folder.
- Start the report set-up wizard.
- To report on all or a filtered subset of vendors:
- Right-click the Vendors folder and select Select and Report > Aged Invoice Analysis from the shortcut menu.
- On the Selection tab, define any filters to apply to the data.
- To report on specifically selected vendors:
- In the HD view, select the vendors to include on the report. You can use Ctrl and/or Shift selection to select multiple records.
- Click and select Aged Invoice Analysis from the drop-down menu.
- To report on a particular vendor from the Vendor window:
- In the HD view, locate and double-click the vendor to report on. The Vendor window opens with the vendor loaded.
- Click and select Aged Invoice Analysis from the drop-down menu.
- To report on all or a filtered subset of vendors:
- Select the Invoices tab.
- Define any filters you want to apply to invoices represented in the data.
- Select the Options tab.
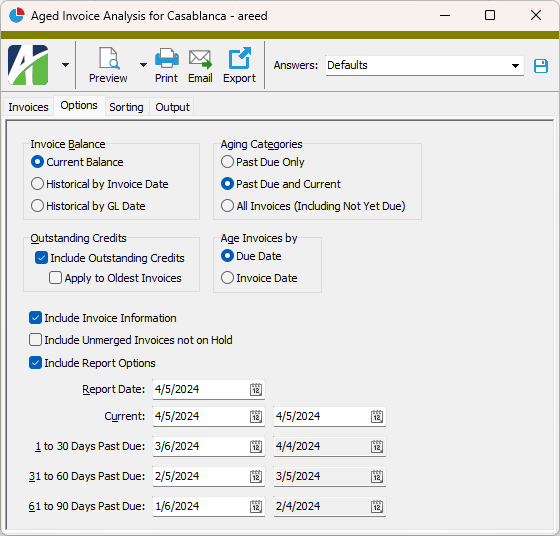
- In the Invoice Balance field, select how to present the invoice balance. Your options are:
- Current Balance
- Historical by Invoice Date
- Historical by GL Date
- In the Aging Categories field, select which aging information you want to show on the report. Your options are:
- Past Due Only
- Past Due and Current
- All Invoices (Including Not Yet Due)
- In the Outstanding Credits section, indicate how to handle outstanding credits.
- To include outstanding credits on the report and age them in the appropriate aging column based on their due date, mark the Include Outstanding Credits checkbox. To exclude outstanding credits, clear the checkbox.
- If you marked the Include Outstanding Credits checkbox, the Apply to Oldest Invoices checkbox is enabled. Mark the checkbox if you want to include all credit-balance invoices, even those not yet due, and apply them to the oldest aging columns with outstanding balances. If you do not mark the checkbox, and if you are not including "Not Yet Due" invoices, then credit-balance invoices that are not yet due are excluded.
- In the Age Invoices By field, select the date to base aging on. Your options are:
- Due Date
- Invoice Date
- In the Report Vendors By field, select the primary sort for the report. Your options are:
- Code. Sorts by vendor code.
- Description. Sorts by vendor description.
Note
Because the vendor description is not required on vendors, the report adds "Code" as an additional sort even when "Description" is selected.
- To show invoice detail, mark the Include Invoice Information checkbox.
- To include unmerged invoices if they are not on merge hold, mark the Include Unmerged Invoices not on Hold checkbox.
- To include a section at the end of the report with the report settings used to produce the report, leave the Include Report Options checkbox marked. To produce the report without this information, clear the checkbox.
- In the Report Date field, enter the date from which to calculate historical balances. The remaining date fields default to values based on this date and on the aging categories.
- If you need to override the aging category date ranges, enter the correct range of dates for the "Current" category and any beginning date ranges which need to change. ActivityHD automatically calculates the ending dates for you. The date ranges must be contiguous and continuous.
-
Select the Sorting tab.
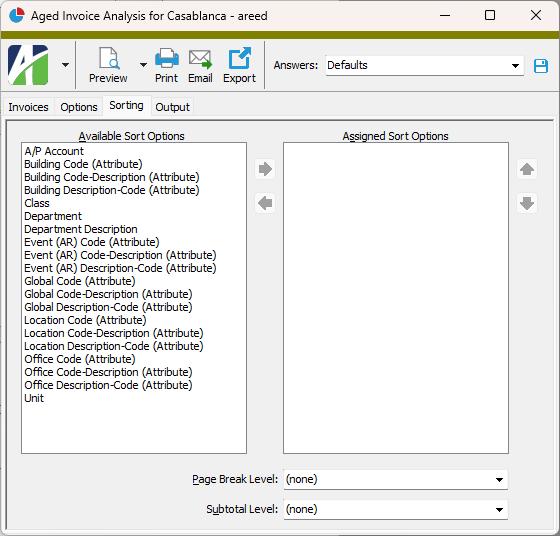
- In the Available Sort Options list box, highlight the field(s) to sort the report by, then click
 to move your selection(s) to the Assigned Sort Options list box.
 - If you selected multiple sort fields, use
 and
and  to arrange the sort fields in the order you want them applied.
 - If you want the report to start a new page for each change in one of the sorting options you specified, select the sorting option to break on from the Page Break Level drop-down list. If you do not want to insert page breaks, accept "(none)".
- If you want the report to subtotal based on one of the sorting options you specified, select the sorting option to subtotal on from the Subtotal Level drop-down list. If you do not want to show subtotals, accept "(none)".
- Select the Output tab.
- In the Design field, look up and select the report design to use.
- In the toolbar, click the icon for the type of output you want:
- - Provides access to two preview options.
- Preview - Click the icon or click the drop-down arrow and select Preview from the drop-down menu to view the report in the Crystal Reports viewer.
- Preview to PDF - Click the drop-down arrow next to the icon and select Preview to PDF to view the report in the PDF reader.
- - Opens the Print dialog so that you can select and configure a printer and then print a paper copy of the report.
- - Opens the dialog so that you can address and compose an email that the report will be attached to. For best results, ensure your email client is running before you attempt to send a report via email.
- - Opens the Export Report dialog so that you can save the report to a file. File types include Crystal Reports (.rpt), PDF (.pdf), Microsoft Excel (.xls), Microsoft Word (.doc), rich text (.rtf), and XML (.xml).
Data extensions
The following data extensions are available for the report:
- Vendors
- Invoices
APCodes Listing
Purpose
The APCodes Listing provides a list of the APCodes defined in Accounts Payable.
Content
For each APCode included on the report, the listing shows:
- description
- code type
- 1099 type
- credit and/or debit accounts
- rate detail.
For each rate detail line, the listing shows:
- line number
- effective date
- percentage.
In addition, you can include one or more of the following:
- timestamps
- memos
- custom fields.
The following total appears on the report:
- record count.
Print the report
- In the Navigation pane, highlight the Accounts Payable > Setup > APCodes folder.
- Start the report set-up wizard.
- To report on all or a filtered subset of APCodes:
- Right-click the APCodes folder and select Select and Report > APCodes Listing from the shortcut menu.
- On the Selection tab, define any filters to apply to the data.
- To report on specifically selected APCodes:
- In the HD view, select the APCodes to include on the report. You can use Ctrl and/or Shift selection to select multiple records.
- Click .
- To run the report for a particular APCode from the APCode window:
- In the HD view, locate and double-click the APCode to report on. The APCode window opens with the APCode loaded.
- Click .
- To report on all or a filtered subset of APCodes:
- Select the Options tab.
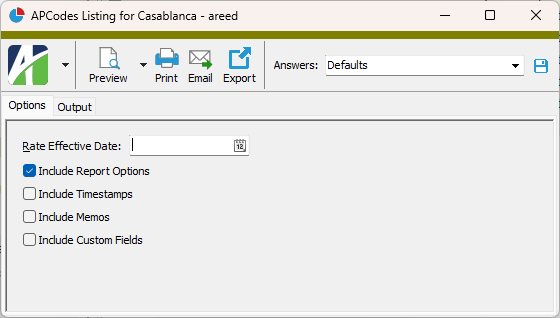
- In the Rate Effective Date field, enter the date to test to determine which rates appear on the report.
- To include a section at the end of the report with the report settings used to produce the report, leave the Include Report Options checkbox marked. To produce the report without this information, clear the checkbox.
- Mark the checkbox(es) for the additional information to include:
- Timestamps
- Memos
- Custom Fields (only visible if custom fields are set up)
- Select the Output tab.
- In the Design field, look up and select the report design to use.
- In the toolbar, click the icon for the type of output you want:
- - Provides access to two preview options.
- Preview - Click the icon or click the drop-down arrow and select Preview from the drop-down menu to view the report in the Crystal Reports viewer.
- Preview to PDF - Click the drop-down arrow next to the icon and select Preview to PDF to view the report in the PDF reader.
- - Opens the Print dialog so that you can select and configure a printer and then print a paper copy of the report.
- - Opens the dialog so that you can address and compose an email that the report will be attached to. For best results, ensure your email client is running before you attempt to send a report via email.
- - Opens the Export Report dialog so that you can save the report to a file. File types include Crystal Reports (.rpt), PDF (.pdf), Microsoft Excel (.xls), Microsoft Word (.doc), rich text (.rtf), and XML (.xml).
Data extensions
The following data extensions are available for the report:
- APCodes
- APCode detail
Cash Requirements Report
Purpose
The Cash Requirements Report lists outstanding invoices by vendor and amounts due by date range. You can use this report to project cash needs and to manage cash flow.
Content
For each vendor included on the report, the report shows:
- vendor description
- vendor class
- outstanding invoices for the vendor
- balance due to the vendor.
For each invoice included on the report, the report shows:
- invoice number
- due date
- balance
- amounts due by date range.
In addition, you can include one or more of the following:
- invoices due before the earliest date in your date ranges
- invoices due after the latest date in your date ranges
- vendors with a balance of zero.
The following totals appear on the report:
- grand totals.
Print the report
- In the Navigation pane, highlight the Accounts Payable > Vendors folder.
- Start the report set-up wizard.
- To report on all or a filtered subset of vendors:
- Right-click the Vendors folder and select Select and Report > Cash Requirements Report from the shortcut menu.
- On the Selection tab, define any filters to apply to the data.
- To report on specifically selected vendors:
- In the HD view, select the vendors to include on the report. You can use Ctrl and/or Shift selection to select multiple records.
- Click and select Cash Requirements Report from the drop-down menu.
- To report on a particular vendor from the Vendor window:
- In the HD view, locate and double-click the vendor to report on. The Vendor window opens with the vendor loaded.
- Click and select Cash Requirements Report from the drop-down menu.
- To report on all or a filtered subset of vendors:
- Select the Invoices tab.
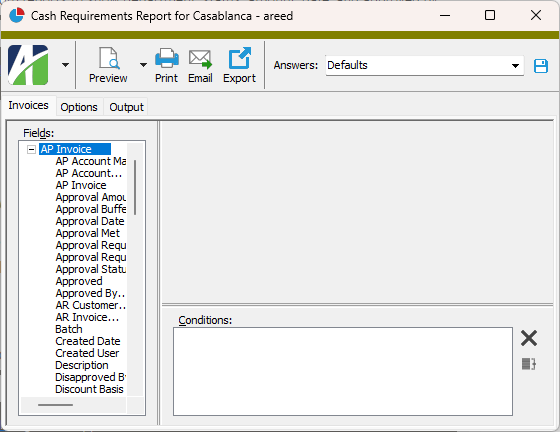
- Define any filters you want to apply to invoices represented in the data.
- Select the Options tab.
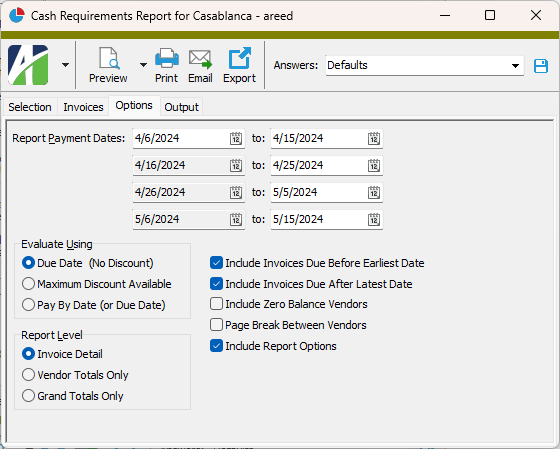
- Use the Report Payment Dates fields to define four contiguous payment date ranges to use for your cash requirements analysis. In the first row, enter the beginning and ending dates for the first payment date range. The remaining beginning dates are calculated from the ending date of the prior date range. Enter the ending dates for the remaining ranges.
- In the Evaluate Using field, select the date to base your analysis on. Your options are:
- Due Date (No Discount)
- Maximum Discount Available
- Pay By Date (or Due Date)
- In the Report Level field, select the level of detail you want to see on the report. Your options are:
- Invoice Detail
- Vendor Totals Only
- Grand Totals Only
- Mark the checkbox(es) for the additional information to include:
- Invoices Due Before Earliest Date
- Invoices Due After Latest Date
- Zero Balance Vendors
- If you selected "Invoice Detail" in the Report Level field, the Page Break Between Vendors checkbox is enabled. Mark the checkbox if you want information for each vendor to start on a new page.
- To include a section at the end of the report with the report settings used to produce the report, leave the Include Report Options checkbox marked. To produce the report without this information, clear the checkbox.
- Select the Output tab.
- In the Design field, look up and select the report design to use.
- In the toolbar, click the icon for the type of output you want:
- - Provides access to two preview options.
- Preview - Click the icon or click the drop-down arrow and select Preview from the drop-down menu to view the report in the Crystal Reports viewer.
- Preview to PDF - Click the drop-down arrow next to the icon and select Preview to PDF to view the report in the PDF reader.
- - Opens the Print dialog so that you can select and configure a printer and then print a paper copy of the report.
- - Opens the dialog so that you can address and compose an email that the report will be attached to. For best results, ensure your email client is running before you attempt to send a report via email.
- - Opens the Export Report dialog so that you can save the report to a file. File types include Crystal Reports (.rpt), PDF (.pdf), Microsoft Excel (.xls), Microsoft Word (.doc), rich text (.rtf), and XML (.xml).
Data extensions
The following data extension is available for the report:
- Vendors
Check Register Report
Purpose
The Check Register Report provides a list of AP check payments.
Content
For each check, the report shows:
- reference
- check date
- vendor ID
- vendor description
- net pay amount
- merge number
- voided check indication, if applicable.
If the GL summary is included, the following additional information is included in the GL Summary section for each account affected:
- account number and name
- unit
- total credits
- total debits.
The following totals appear on the report:
- total number of payments
- total amount of payments.
Print the report
- In the Navigation pane, highlight the Accounts Payable > Payments folder.
- Start the report set-up wizard.
- To report on all or a filtered subset of payments:
- Right-click the Payments folder and select Select and Report > Check Register Report from the shortcut menu.
- On the Selection tab, define any filters to apply to the data.

- To report on specifically selected check payments:
- In the HD view, select the payments to include on the report. You can use Ctrl and/or Shift selection to select multiple records.
- Click .
- To report on a particular payment from the Payment window:
- In the HD view, locate and double-click the check payment to report on. The Payment window opens with the payment loaded.
- Click .
- To report on all or a filtered subset of payments:
- Select the Options tab.
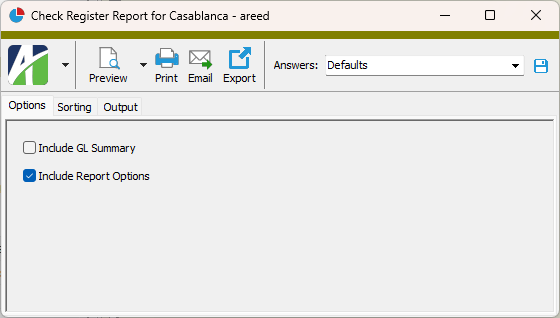
- If you want to include a summary of check payments by GL account, mark the Include GL Summary checkbox.
- To include a section at the end of the report with the report settings used to produce the report, leave the Include Report Options checkbox marked. To produce the report without this information, clear the checkbox.
- Select the Sorting tab.
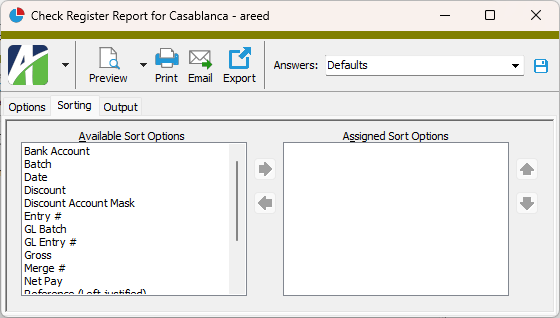
- In the Available Sort Options list box, highlight the field(s) to sort the report by, then click to move your selection(s) to the Assigned Sort Options list box.
- If you selected multiple sort fields, use and to arrange the sort fields in the order you want them applied.
- Select the Output tab.
- In the Design field, look up and select the report design to use.
- In the toolbar, click the icon for the type of output you want:
- - Provides access to two preview options.
- Preview - Click the icon or click the drop-down arrow and select Preview from the drop-down menu to view the report in the Crystal Reports viewer.
- Preview to PDF - Click the drop-down arrow next to the icon and select Preview to PDF to view the report in the PDF reader.
- - Opens the Print dialog so that you can select and configure a printer and then print a paper copy of the report.
- - Opens the dialog so that you can address and compose an email that the report will be attached to. For best results, ensure your email client is running before you attempt to send a report via email.
- - Opens the Export Report dialog so that you can save the report to a file. File types include Crystal Reports (.rpt), PDF (.pdf), Microsoft Excel (.xls), Microsoft Word (.doc), rich text (.rtf), and XML (.xml).
Data extensions
The following data extensions are available for the report:
- Payments
- Payment invoices
Classes Listing
Purpose
The Classes Listing provides a list of the vendor classes defined in Accounts Payable.
Content
For each vendor class included on the report, the listing shows:
- description.
In addition, you can include one or more of the following:
- timestamps
- memos
- custom fields.
- record count.
Print the report
- In the Navigation pane, highlight the Accounts Payable > Setup > Classes folder.
- Start the report set-up wizard.
- To report on all or a filtered subset of vendor classes:
- Right-click the Classes folder and select Select and Report > Classes Listing from the shortcut menu.
- On the Selection tab, define any filters to apply to the data.
- To report on specifically selected vendor classes:
- In the HD view, select the vendor classes to include on the report. You can use Ctrl and/or Shift selection to select multiple records.
- Click .
- To report on a particular vendor class from the Class window:
- In the HD view, locate and double-click the vendor class to report on. The Class window opens with the vendor class loaded.
- Click .
- To report on all or a filtered subset of vendor classes:
- Select the Options tab.
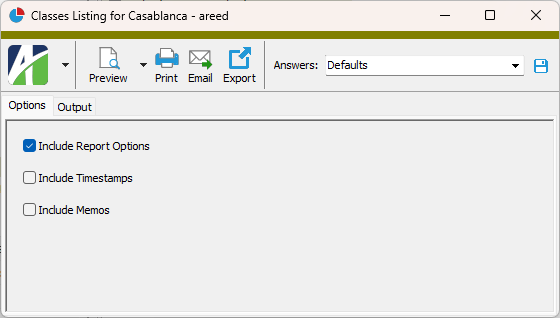
- To include a section at the end of the report with the report settings used to produce the report, leave the Include Report Options checkbox marked. To produce the report without this information, clear the checkbox.
- Mark the checkbox(es) for the additional information to include:
- Timestamps
- Memos
- Custom Fields (only visible if custom fields are set up)
- Select the Output tab.
- In the Design field, look up and select the report design to use.
- In the toolbar, click the icon for the type of output you want:
- - Provides access to two preview options.
- Preview - Click the icon or click the drop-down arrow and select Preview from the drop-down menu to view the report in the Crystal Reports viewer.
- Preview to PDF - Click the drop-down arrow next to the icon and select Preview to PDF to view the report in the PDF reader.
- - Opens the Print dialog so that you can select and configure a printer and then print a paper copy of the report.
- - Opens the dialog so that you can address and compose an email that the report will be attached to. For best results, ensure your email client is running before you attempt to send a report via email.
- - Opens the Export Report dialog so that you can save the report to a file. File types include Crystal Reports (.rpt), PDF (.pdf), Microsoft Excel (.xls), Microsoft Word (.doc), rich text (.rtf), and XML (.xml).
Data extensions
The following data extension is available for the report:
- Classes
Contact Labels
Purpose
Contact Labels produces a list of vendor contact name and addresses formatted for label printing.
Content
For each vendor contact included, the labels show:
- vendor name
- vendor contact name
- contact address.
Print the report
- In the Navigation pane, highlight the Accounts Payable > Vendors > Contacts folder.
- Start the report set-up wizard.
- To create labels for all or a filtered subset of vendor contacts:
- Right-click the Contacts folder and select Select and Report > Contact Labels from the shortcut menu.
- On the Selection tab, define any filters to apply to the data.
- To create labels for specifically selected vendor contacts:
- In the HD view, select the vendor contacts to include on the report. You can use Ctrl and/or Shift selection to select multiple records.
- Click and select Contact Labels from the drop-down menu.
- To create a label for a particular vendor contact from the Contact window:
- In the HD view, locate and double-click the vendor contact you want to create a label for. The Contact window opens with the vendor contact loaded.
- Click and select Contact Labels from the drop-down menu.
- To create labels for all or a filtered subset of vendor contacts:
- Select the Options tab.
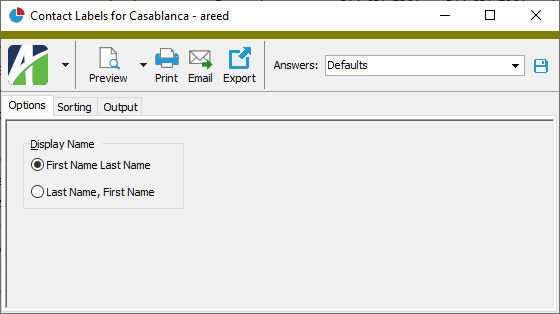
- In the Display Name field, select the order in which to present contact names on the labels. Your options are:
- First Name Last Name
- Last Name, First Name
- Select the Sorting tab.
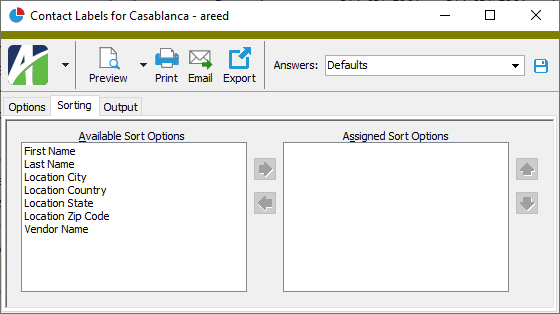
- In the Available Sort Options list box, highlight the field(s) to sort the labels by, then click to move your selection(s) to the Assigned Sort Options list box.
- If you selected multiple sort fields, use and to arrange the sort fields in the order you want them applied.
- Select the Output tab.
- In the Design field, look up and select the report design to use.
- In the toolbar, click the icon for the type of output you want:
- - Provides access to two preview options.
- Preview - Click the icon or click the drop-down arrow and select Preview from the drop-down menu to view the report in the Crystal Reports viewer.
- Preview to PDF - Click the drop-down arrow next to the icon and select Preview to PDF to view the report in the PDF reader.
- - Opens the Print dialog so that you can select and configure a printer and then print a paper copy of the report.
- - Opens the dialog so that you can address and compose an email that the report will be attached to. For best results, ensure your email client is running before you attempt to send a report via email.
- - Opens the Export Report dialog so that you can save the report to a file. File types include Crystal Reports (.rpt), PDF (.pdf), Microsoft Excel (.xls), Microsoft Word (.doc), rich text (.rtf), and XML (.xml).
Data extensions
The following data extension is available for the report:
- Contacts
Contacts Listing
Purpose
The Contacts Listing provides a list of contacts recorded for the vendors in Accounts Payable.
Content
For each vendor contact included on the report, the listing shows:
- vendor contact's full name
- vendor
- job title
- phone number
- mail stop
- email address
- whether the contact is the vendor's primary contact
- whether the contact has been flagged as obsolete.
In addition, you can include one or more of the following:
- all phone numbers and name details
- vendor locations
- timestamps
- memos
- custom fields.
The following total appears on the report:
- record count.
Print the report
- In the Navigation pane, highlight the Accounts Payable > Vendors > Contacts folder.
- Start the report set-up wizard.
- To report on all or a filtered subset of vendor contacts:
- Right-click the Contacts folder and select Select and Report > Contacts Listing from the shortcut menu.
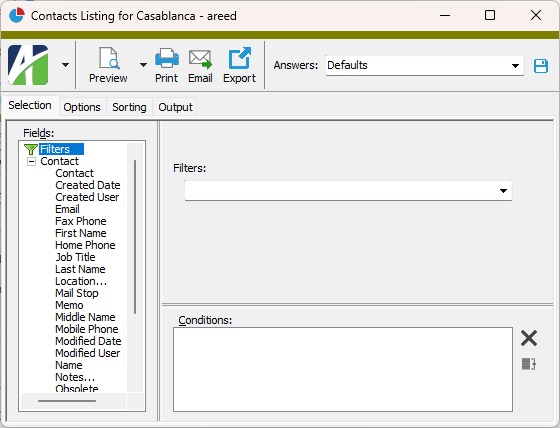
- On the Selection tab, define any filters to apply to the data.
- To report on specifically selected vendor contacts:
- In the HD view, select the vendor contacts to include on the report. You can use Ctrl and/or Shift selection to select multiple records.
- Click and select Contacts Listing from the drop-down menu.
- To report on a particular vendor contact from the Contact window:
- In the HD view, locate and double-click the vendor contact to report on. The Contact window opens with the vendor contact loaded.
- Click and select Contacts Listing from the drop-down menu.
- To report on all or a filtered subset of vendor contacts:
- Select the Options tab.
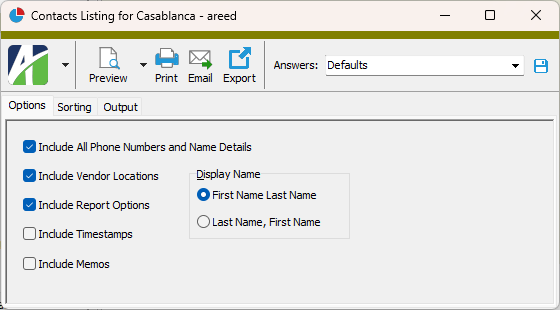
- Mark the checkbox(es) for the additional information to include:
- All Phone Numbers and Name Details
- Vendor Locations
- Report Options. To include a section at the end of the report with the report settings used to produce the report, leave the checkbox marked. To produce the report without this information, clear the checkbox.
- Timestamps
- Memos
- Custom Fields (only visible if custom fields are set up)
- To include a section at the end of the report with the report settings used to produce the report, leave the Include Report Options checkbox marked. To produce the report without this information, clear the checkbox.
- In the Display Name field, select the order in which to present contact names on the listing. Your options are:
- First Name Last Name
- Last Name, First Name
- Select the Sorting tab.
- In the Available Sort Options list box, highlight the field(s) to sort the report by, then click to move your selection(s) to the Assigned Sort Options list box.
- If you selected multiple sort fields, use or to arrange the sort fields in the order you want them applied.
- Select the Output tab.
- In the Design field, look up and select the report design to use.
- In the toolbar, click the icon for the type of output you want:
- - Provides access to two preview options.
- Preview - Click the icon or click the drop-down arrow and select Preview from the drop-down menu to view the report in the Crystal Reports viewer.
- Preview to PDF - Click the drop-down arrow next to the icon and select Preview to PDF to view the report in the PDF reader.
- - Opens the Print dialog so that you can select and configure a printer and then print a paper copy of the report.
- - Opens the dialog so that you can address and compose an email that the report will be attached to. For best results, ensure your email client is running before you attempt to send a report via email.
- - Opens the Export Report dialog so that you can save the report to a file. File types include Crystal Reports (.rpt), PDF (.pdf), Microsoft Excel (.xls), Microsoft Word (.doc), rich text (.rtf), and XML (.xml).
Data extensions
The following data extension is available for the report:
- Contacts
Distribution Templates Listing
Purpose
The Distribution Templates Listing provides a list of the distribution templates defined in Accounts Payable.
Content
For each distribution template included on the report, the listing shows:
- description.
In addition, you can include one or more of the following:
- effective date detail (effective date, obsolete flag, distribution lines, total share)
- detail attributes
- timestamps
- memos
- custom fields.
If you include effective date detail, the report shows the following information for each distribution line:
- line number
- account number
- account description
- share
- percentage.
The following total appears on the report:
- record count.
Print the report
- In the Navigation pane, highlight the Accounts Payable > Setup > Distribution Templates folder.
- Start the report set-up wizard.
- To report on all or a filtered subset of distribution templates:
- Right-click the Distribution Templates folder and select Select and Report > Distribution Templates Listing from the shortcut menu.
- On the Selection tab, define any filters to apply to the data.
- To report on specifically selected distribution templates:
- In the HD view, select the distribution templates to include on the report. You can use Ctrl and/or Shift selection to select multiple records.
- Click .
- To report on a particular distribution template from the Distribution Template window:
- In the HD view, locate and double-click the distribution template to report on. The Distribution Template window opens with the distribution template loaded.
- Click .
- To report on all or a filtered subset of distribution templates:
- Select the Options tab.

- Mark the checkbox(es) for the additional information to include:
- Effective Date Detail - If you mark this checkbox, the Effective Date field and the Include Detail Attributes checkbox are enabled. In the Effective Date field, enter the date to test to determine which detail is included on the report.
- Detail Attributes
- Report Options. To include a section at the end of the report with the report settings used to produce the report, leave the checkbox marked. To produce the report without this information, clear the checkbox.
- Timestamps
- Memos
- Custom Fields (only visible if custom fields are set up)
- Effective Date Detail - If you mark this checkbox, the Effective Date field and the Include Detail Attributes checkbox are enabled. In the Effective Date field, enter the date to test to determine which detail is included on the report.
- Select the Output tab.
- In the Design field, look up and select the report design to use.
- In the toolbar, click the icon for the type of output you want:
- - Provides access to two preview options.
- Preview - Click the icon or click the drop-down arrow and select Preview from the drop-down menu to view the report in the Crystal Reports viewer.
- Preview to PDF - Click the drop-down arrow next to the icon and select Preview to PDF to view the report in the PDF reader.
- - Opens the Print dialog so that you can select and configure a printer and then print a paper copy of the report.
- - Opens the dialog so that you can address and compose an email that the report will be attached to. For best results, ensure your email client is running before you attempt to send a report via email.
- - Opens the Export Report dialog so that you can save the report to a file. File types include Crystal Reports (.rpt), PDF (.pdf), Microsoft Excel (.xls), Microsoft Word (.doc), rich text (.rtf), and XML (.xml).
Data extensions
The following data extensions are available for the report:
- Distribution templates
- Distribution template date
- Distribution template detail
Invoice APCodes Listing
Purpose
The Invoice APCodes Listing shows APCode detail for selected invoice APCodes.
Content
When printed to include details, for each invoice APCode detail line, the report shows:
- APCode
- vendor
- invoice date
- invoice number
- basis amount
- percent (if applicable)
- APCode amount.
The following totals appear on the report:
- grand totals.
Print the report
- In the Navigation pane, highlight the Accounts Payable > Invoices > Invoice APCodes folder.
- Start the report set-up wizard.
- To report on all or a filtered subset of invoice APCodes:
- Right-click the Invoice APCodes folder and select Select and Report > Invoice APCodes Listing from the shortcut menu.
- On the Selection tab, define any filters to apply to the data.
- To report on specifically selected invoice APCodes:
- In the HD view, select the invoice APCodes to include on the report. You can use Ctrl and/or Shift selection to select multiple records.
- Click .
- To report on all or a filtered subset of invoice APCodes:
- Select the Options tab.
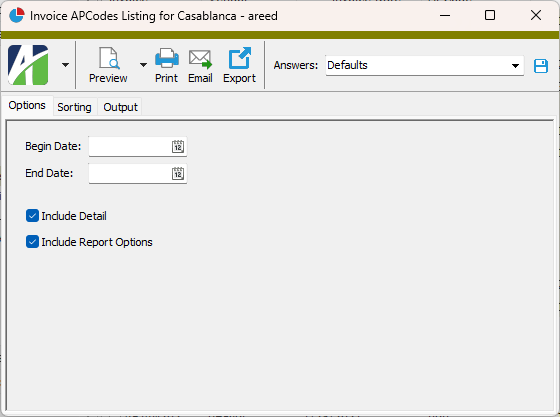
- In the Begin Date and End Date fields, enter the range of dates for which to include invoice APCode detail on the report.
- Ensure the Include Detail checkbox is marked if you want to include APCode detail on the report. If you clear the checkbox, the report shows grand totals only.
- To include a section at the end of the report with the report settings used to produce the report, leave the Include Report Options checkbox marked. To produce the report without this information, clear the checkbox.
- Select the Sorting tab.

- In the Available Sort Options list box, highlight the field(s) to sort the report by, then click to move your selection(s) to the Assigned Sort Options list box.
- If you selected multiple sort fields, use and to arrange the sort fields in the order you want them applied.
- If you want the report to start a new page for each change in one of the sorting options you specified, select the sorting option to break on from the Page Break Level drop-down list. If you do not want to insert page breaks, accept "(none)".
- If you want the report to subtotal based on one of the sorting options you specified, select the sorting option to subtotal on from the Subtotal Level drop-down list. If you do not want to show subtotals, accept "(none)".
- Select the Output tab.
- In the Design field, look up and select the report design to use.
- In the toolbar, click the icon for the type of output you want:
- - Provides access to two preview options.
- Preview - Click the icon or click the drop-down arrow and select Preview from the drop-down menu to view the report in the Crystal Reports viewer.
- Preview to PDF - Click the drop-down arrow next to the icon and select Preview to PDF to view the report in the PDF reader.
- - Opens the Print dialog so that you can select and configure a printer and then print a paper copy of the report.
- - Opens the dialog so that you can address and compose an email that the report will be attached to. For best results, ensure your email client is running before you attempt to send a report via email.
- - Opens the Export Report dialog so that you can save the report to a file. File types include Crystal Reports (.rpt), PDF (.pdf), Microsoft Excel (.xls), Microsoft Word (.doc), rich text (.rtf), and XML (.xml).
Data extensions
The following data extension is available for the report:
- Invoice APCodes
Invoice Extra GL Listing
Purpose
The Invoice Extra GL Listing shows the selected extra GL lines.
Content
For each extra GL line included on the report, the listing shows:
- account number
- GL date
- vendor
- invoice date
- invoice number
- batch-entry-line
- debit amount
- credit amount.
The following totals appear on the report:
- grand totals.
Print the report
- In the Navigation pane, highlight the Accounts Payable > Invoices > Invoice Extra GL folder.
- Start the report set-up wizard.
- To report on all or a filtered subset of extra GL lines:
- Right-click the Invoice Extra GL folder and select Select and Report > Invoice Extra GL Listing from the shortcut menu.
- On the Selection tab, define any filters to apply to the data.
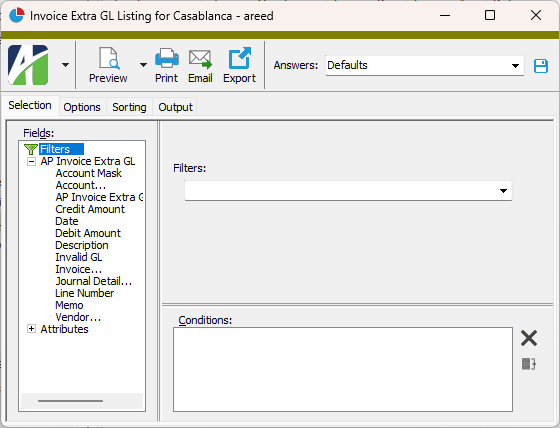
- To report on specifically selected extra GL lines:
- In the HD view, select the extra GL lines to include on the report. You can use Ctrl and/or Shift selection to select multiple records.
- Click .
- To report on all or a filtered subset of extra GL lines:
- Select the Options tab.
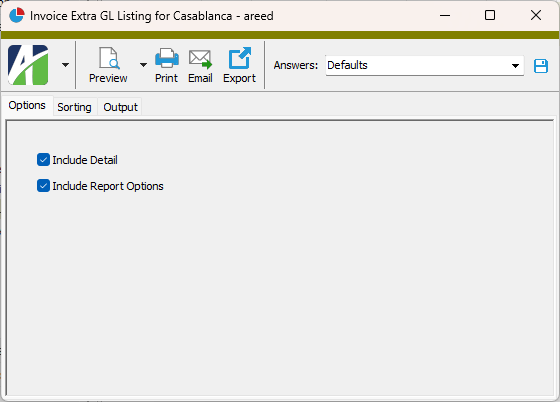
- Ensure the Include Detail checkbox is marked if you want to include extra GL lines on the report. If you clear the checkbox, the report shows grand totals only.
- To include a section at the end of the report with the report settings used to produce the report, leave the Include Report Options checkbox marked. To produce the report without this information, clear the checkbox.
- Select the Sorting tab.
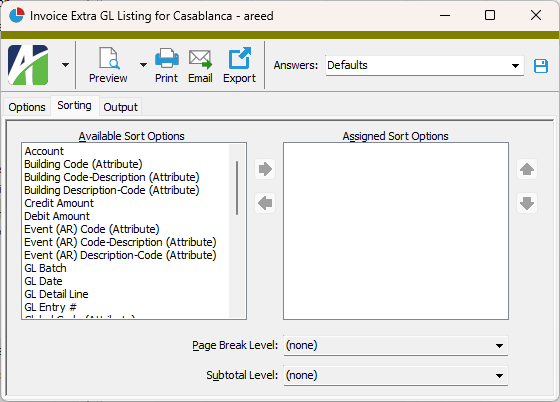
- In the Available Sort Options list box, highlight the field(s) to sort the report by, then click to move your selection(s) to the Assigned Sort Options list box.
- If you selected multiple sort fields, use and to arrange the sort fields in the order you want them applied.
- If you want the report to start a new page for each change in one of the sorting options you specified, select the sorting option to break on from the Page Break Level drop-down list. If you do not want to insert page breaks, accept "(none)".
- If you want the report to subtotal based on one of the sorting options you specified, select the sorting option to subtotal on from the Subtotal Level drop-down list. If you do not want to show subtotals, accept "(none)".
- Select the Output tab.
- In the Design field, look up and select the report design to use.
- In the toolbar, click the icon for the type of output you want:
- - Provides access to two preview options.
- Preview - Click the icon or click the drop-down arrow and select Preview from the drop-down menu to view the report in the Crystal Reports viewer.
- Preview to PDF - Click the drop-down arrow next to the icon and select Preview to PDF to view the report in the PDF reader.
- - Opens the Print dialog so that you can select and configure a printer and then print a paper copy of the report.
- - Opens the dialog so that you can address and compose an email that the report will be attached to. For best results, ensure your email client is running before you attempt to send a report via email.
- - Opens the Export Report dialog so that you can save the report to a file. File types include Crystal Reports (.rpt), PDF (.pdf), Microsoft Excel (.xls), Microsoft Word (.doc), rich text (.rtf), and XML (.xml).
Data extensions
The following data extension is available for the report:
- Invoice extra GL
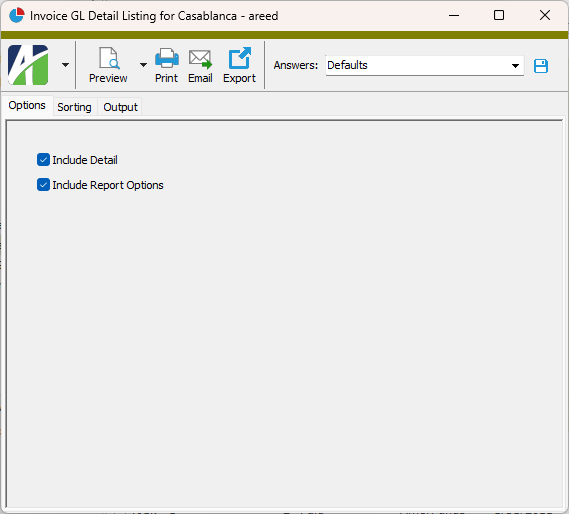
Invoice GL Detail Listing
Purpose
The Invoice GL Detail Listing shows how invoices are distributed to GL accounts.
Content
For each invoice GL detail line included on the report, the listing shows:
- GL account number
- GL date
- vendor name
- invoice date
- invoice number
- batch - entry - line number
- debit amount
- credit amount.
The following totals appear on the report:
- grand totals.
Print the report
- In the Navigation pane, highlight the Accounts Payable > Invoices > Invoice GL Detail folder.
- Start the report set-up wizard.
- To report on all or a filtered subset of GL detail items:
- Right-click the Invoice GL Detail folder and select Select and Report > Invoice GL Detail Listing from the shortcut menu.
- On the Selection tab, define any filters to apply to the data.
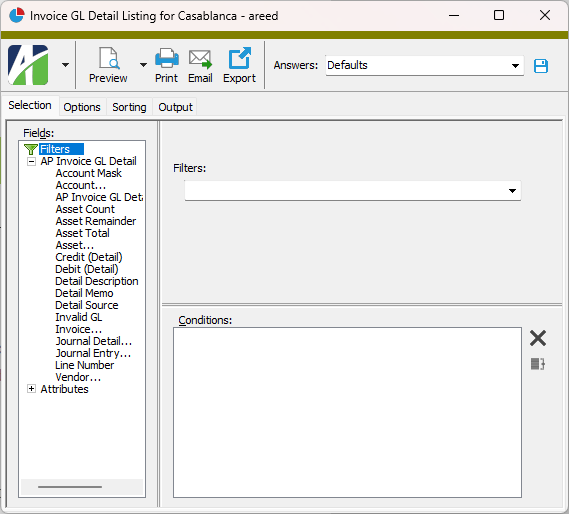
- To report on specifically selected GL detail items:
- In the HD view, select the GL detail items to include on the report. You can use Ctrl and/or Shift selection to select multiple records.
- Click .
- To report on a particular GL detail item from the Invoice GL Detail window:
- In the HD view, locate and double-click the GL detail item to report on. The Invoice GL Detail window opens with the detail item loaded.
- Click .
- To report on all or a filtered subset of GL detail items:
- Select the Options tab.
- Ensure the Include Detail checkbox is marked if you want to include GL detail on the report. If you clear the checkbox, the report shows grand totals only.
- To include a section at the end of the report with the report settings used to produce the report, leave the Include Report Options checkbox marked. To produce the report without this information, clear the checkbox.
- Select the Sorting tab.
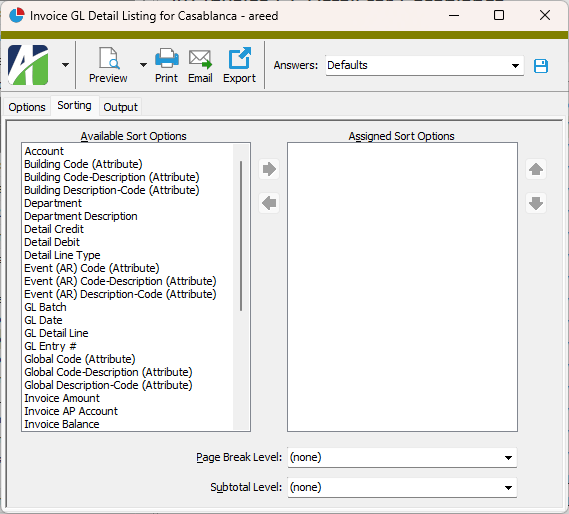
- In the Available Sort Options list box, highlight the field(s) to sort the report by, then click to move your selection(s) to the Assigned Sort Options list box.
- If you selected multiple sort fields, use and to arrange the sort fields in the order you want them applied.
- If you want the report to start a new page for each change in one of the sorting options you specified, select the sorting option to break on from the Page Break Level drop-down list. If you do not want to insert page breaks, accept "(none)".
- If you want the report to subtotal based on one of the sorting options you specified, select the sorting option to subtotal on from the Subtotal Level drop-down list. If you do not want to show subtotals, accept "(none)".
- Select the Output tab.
- In the Design field, look up and select the report design to use.
- In the toolbar, click the icon for the type of output you want:
- - Provides access to two preview options.
- Preview - Click the icon or click the drop-down arrow and select Preview from the drop-down menu to view the report in the Crystal Reports viewer.
- Preview to PDF - Click the drop-down arrow next to the icon and select Preview to PDF to view the report in the PDF reader.
- - Opens the Print dialog so that you can select and configure a printer and then print a paper copy of the report.
- - Opens the dialog so that you can address and compose an email that the report will be attached to. For best results, ensure your email client is running before you attempt to send a report via email.
- - Opens the Export Report dialog so that you can save the report to a file. File types include Crystal Reports (.rpt), PDF (.pdf), Microsoft Excel (.xls), Microsoft Word (.doc), rich text (.rtf), and XML (.xml).
Data extensions
The following data extension is available for the report:
- Invoice GL detail
Invoice Payment Analysis
Purpose
The Invoice Payment Analysis report shows invoice and payment transactions by vendor.
Content
For each vendor included on the report, the report shows:
- vendor name
- information about invoice and payment transactions
- vendor totals.
For each transaction included on the report, the report shows:
- transaction date
- transaction type
- reference
- merge number
- payment number
- invoice or payment amount
- balance.
In addition, you can include one or more of the following:
- voided payments
- voided invoices
- invoices on payment hold
- PO commitments
- zero balance/no activity vendors.
The following totals appear on the report:
- grand totals.
Print the report
- In the Navigation pane, highlight the Accounts Payable > Vendors folder.
- Start the report set-up wizard.
- To report on all or a filtered subset of vendors:
- Right-click the Vendors folder and select Select and Report > Invoice Payment Analysis from the shortcut menu.
- On the Selection tab, define any filters to apply to the data.

- To report on specifically selected vendors:
- In the HD view, select the vendors to include on the report. You can use Ctrl and/or Shift selection to select multiple records.
- Click and select Invoice Payment Analysis from the drop-down menu.
- To report on a particular vendor from the Vendor window:
- In the HD view, locate and double-click the vendor to report on. The Vendor window opens with the vendor loaded.
- Click and select Invoice Payment Analysis from the drop-down menu.
- To report on all or a filtered subset of vendors:
- Select the Detail tab.
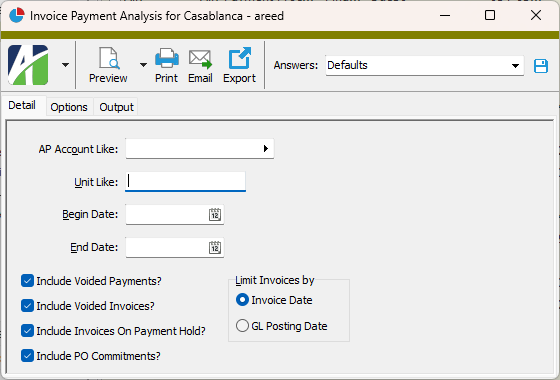
- In the AP Account Like field, enter an account mask or a specific AP account number if you want to restrict the report to transactions with certain AP accounts.
- In the Unit Like field, enter a unit mask or a specific unit to restrict the report to transactions that reference items with certain units.
- In the Begin Date and End Date fields, enter the range of dates for which to include transactions on the report.
- Mark the checkbox(es) for the additional information to include:
- Voided Payments
- Voided Invoices
- Invoices on Payment Hold
- PO Commitments
- In the Limit Options by field, select the type of date to use to determine if an invoice meets your date range criteria. Your options are:
- Invoice Date
- GL Posting Date
- Select the Options tab.
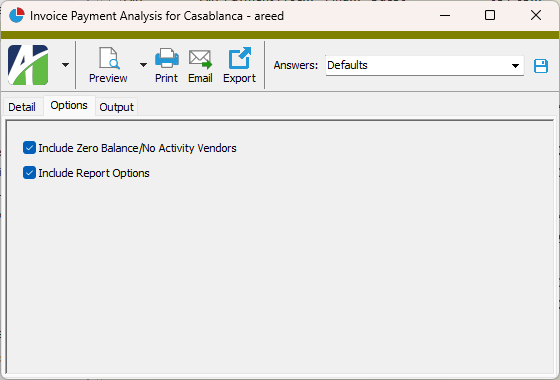
- If you want the report to show transactions for vendors with a zero balance or with no activity in the date range you specified, mark the Include Zero Balances/No Actvity Vendors checkbox.
- To include a section at the end of the report with the report settings used to produce the report, leave the Include Report Options checkbox marked. To produce the report without this information, clear the checkbox.
- Select the Output tab.
- In the Design field, look up and select the report design to use.
- In the toolbar, click the icon for the type of output you want:
- - Provides access to two preview options.
- Preview - Click the icon or click the drop-down arrow and select Preview from the drop-down menu to view the report in the Crystal Reports viewer.
- Preview to PDF - Click the drop-down arrow next to the icon and select Preview to PDF to view the report in the PDF reader.
- - Opens the Print dialog so that you can select and configure a printer and then print a paper copy of the report.
- - Opens the dialog so that you can address and compose an email that the report will be attached to. For best results, ensure your email client is running before you attempt to send a report via email.
- - Opens the Export Report dialog so that you can save the report to a file. File types include Crystal Reports (.rpt), PDF (.pdf), Microsoft Excel (.xls), Microsoft Word (.doc), rich text (.rtf), and XML (.xml).
Data extensions
The following data extension is available for the report:
- Vendors
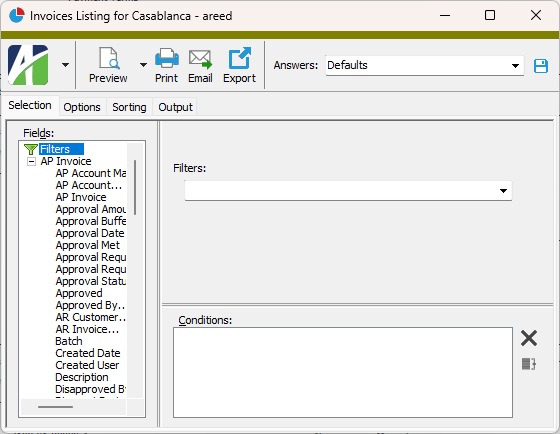
Invoices Listing
Purpose
The Invoices Listing provides a list, by batch number, of the invoices recorded in Accounts Payable.
Content
For each batch number, the listing shows:
- vendor
- vendor description
- merge number
- invoice detail.
For each invoice represented, the listing shows:
- invoice date
- invoice number
- invoice description
- GL batch - entry number
- invoice amount
- GL date
- PO number
- AP account
- source
- balance
- whether invoice is on merge hold
- whether payment is on hold
- invoice status.
In addition, you can include one or more of the following:
- approval status (department, status, amount, date, approved by) [only available when Purchasing is installed and AP invoice approval is enabled]
- approval history (approval date, removed date, approval level, approval status, approved by, approval amount, approval note) [only available when Purchasing is installed and AP invoice approval is enabled]
- payment location, terms, and payment detail (payment address; terms code, due date, basis, pay by date; payment date, reference, merge number, net payment)
Note
Payment detail includes unmerged payments so that you can see how the balance is calculated.
- attributes (both invoice usage attributes and invoice detail usage attributes)
- APCodes (code, description, type, basis, percent, amount)
- GL detail (for each detail line: line number, GL account, account description, unit, debit or credit amount; GL summary)
- extra GL (for each detail line: line number, extra GL account, account description, date, unit, debit or credit amount; extra GL summary)
- GL Summary section (unit; for each account: account, account description, total debits, total credits)
- timestamps
- memos
- custom fields.
The following totals appear on the report:
- invoice totals (count, amount, balance)
- commitment totals (count, amount, balance)
- grand totals (amount, balance).
Print the report
- In the Navigation pane, highlight the Accounts Payable > Invoices folder.
- Start the report set-up wizard.
- To report on all or a filtered subset of invoices:
- Right-click the Invoices folder and select Select and Report > Invoices Listing from the shortcut menu.
- On the Selection tab, define any filters to apply to the data.
- To report on specifically selected invoices:
- In the HD view, select the invoices to include on the report. You can use Ctrl and/or Shift selection to select multiple records.
- Click .
- To report on a particular invoice from the AP Invoice window:
- In the HD view, locate and double-click the invoice to report on. The AP Invoice window opens with the invoice loaded.
- Click .
- To report on all or a filtered subset of invoices:
- Select the Options tab.
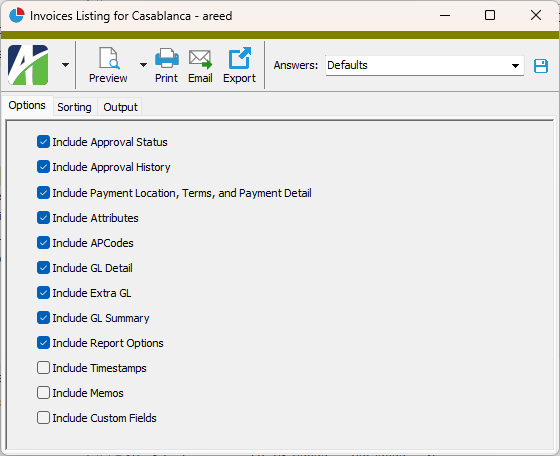
- Mark the checkbox(es) for the additional information to include:
- Approval Status (only visible when Purchasing is installed and AP invoice approval is enabled)
- Approval History (only visible when Purchasing is installed and AP invoice approval is enabled)
- Payment Location, Terms, and Payment Detail
- Attributes
- APCodes
- GL Detail
- Extra GL
- GL Summary
- Report Options. To include a section at the end of the report with the report settings used to produce the report, leave the checkbox marked. To produce the report without this information, clear the checkbox.
- Timestamps
- Memos
- Custom Fields (only visible if custom fields are set up)
- Select the Sorting tab.

- In the Available Sort Options list box, highlight the field(s)/attribute(s) to sort the report by, then click to move your selection(s) to the Assigned Sort Options list box.
- If you selected multiple sort fields, use and to arrange the sort fields in the order you want them applied.
- Select the Output tab.
- In the Design field, look up and select the report design to use.
There are two built-in report designs for the Invoices Listing:
- AP Invoices - This design lists invoices by batch and entry number.
- AP Invoices by Vendor - This design groups invoices by vendor.
- In the toolbar, click the icon for the type of output you want:
- - Provides access to two preview options.
- Preview - Click the icon or click the drop-down arrow and select Preview from the drop-down menu to view the report in the Crystal Reports viewer.
- Preview to PDF - Click the drop-down arrow next to the icon and select Preview to PDF to view the report in the PDF reader.
- - Opens the Print dialog so that you can select and configure a printer and then print a paper copy of the report.
- - Opens the dialog so that you can address and compose an email that the report will be attached to. For best results, ensure your email client is running before you attempt to send a report via email.
- - Opens the Export Report dialog so that you can save the report to a file. File types include Crystal Reports (.rpt), PDF (.pdf), Microsoft Excel (.xls), Microsoft Word (.doc), rich text (.rtf), and XML (.xml).
Data extensions
The following data extensions are available for the report:
- Invoices
- Journal entries
- Invoice APCodes
- Invoice AP extra GL
- Payment invoices
- Invoice approval history (only available when Purchasing is installed and AP invoice approval is enabled)
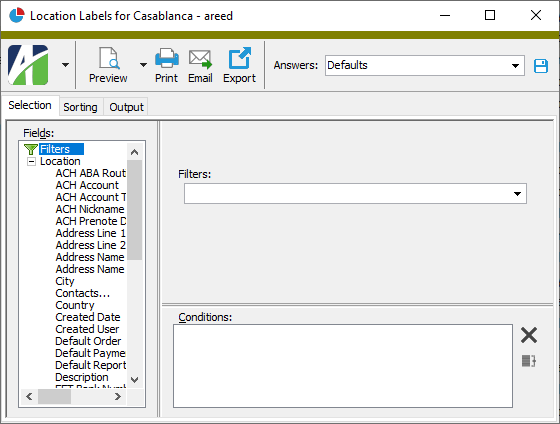
Location Labels
Purpose
Location Labels produces a list of vendor location addresses formatted for label printing.
Content
For each vendor location included, the labels show:
- vendor name
- vendor location address.
Print the report
- In the Navigation pane, highlight the Accounts Payable > Vendors > Locations folder.
- Start the report set-up wizard.
- To create labels for all or a filtered subset of vendor locations:
- Right-click the Locations folder and select Select and Report > Location Labels from the shortcut menu.
- On the Selection tab, define any filters to apply to the data.
- To create labels for specifically selected vendor locations:
- In the HD view, select the vendor locations to include on the report. You can use Ctrl and/or Shift selection to select multiple records.
- Click and select Location Labels from the drop-down menu.
- To create a label for a particular vendor location from the Location window:
- In the HD view, locate and double-click the vendor location you want to create a label for. The Location window opens with the vendor location loaded.
- Click and select Location Labels from the drop-down menu.
- To create labels for all or a filtered subset of vendor locations:
- Select the Sorting tab.
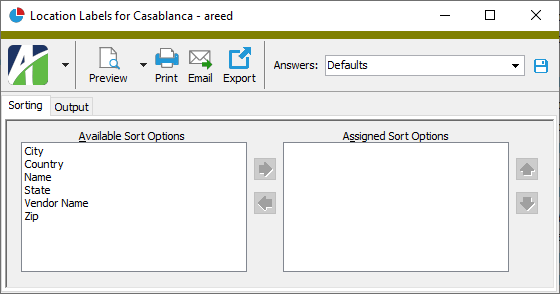
- In the Available Sort Options list box, highlight the field(s) to sort the labels by, then click to move your selection(s) to the Assigned Sort Options list box.
- If you selected multiple sort fields, use and to arrange the sort fields in the order you want them applied.
- Select the Output tab.
- In the Design field, look up and select the report design to use.
- In the toolbar, click the icon for the type of output you want:
- - Provides access to two preview options.
- Preview - Click the icon or click the drop-down arrow and select Preview from the drop-down menu to view the report in the Crystal Reports viewer.
- Preview to PDF - Click the drop-down arrow next to the icon and select Preview to PDF to view the report in the PDF reader.
- - Opens the Print dialog so that you can select and configure a printer and then print a paper copy of the report.
- - Opens the dialog so that you can address and compose an email that the report will be attached to. For best results, ensure your email client is running before you attempt to send a report via email.
- - Opens the Export Report dialog so that you can save the report to a file. File types include Crystal Reports (.rpt), PDF (.pdf), Microsoft Excel (.xls), Microsoft Word (.doc), rich text (.rtf), and XML (.xml).
Data extensions
The following data extension is available for the report:
- Locations
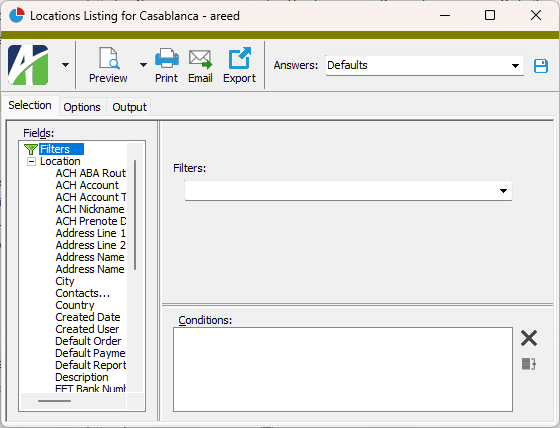
Locations Listing
Purpose
The Locations Listing provides a list of locations for the vendors tracked in Accounts Payable.
Content
For each vendor location included on the report, the listing shows:
- vendor code
- location code
- location description
- whether the location is flagged as obsolete
- whether the location is the default order location
- whether the location is the default payment location
- whether the location is the default report location.
In addition, you can include one or more of the following:
- addresses
- EFT information (ACH account type, ABA routing number, account number, account nickname)
- timestamps
- memos
- custom fields.
The following total appears on the report:
- record count.
Print the report
- In the Navigation pane, highlight the Accounts Payable > Vendors > Locations folder.
- Start the report set-up wizard.
- To report on all or a filtered subset of vendor locations:
- Right-click the Locations folder and select Select and Report > Locations Listing from the shortcut menu.
- On the Selection tab, define any filters to apply to the data.
- To report on specifically selected vendor locations:
- In the HD view, select the vendor locations to include on the report. You can use Ctrl and/or Shift selection to select multiple records.
- Click and select Locations Listing from the drop-down menu.
- To report on a particular vendor location from the Location window:
- In the HD view, locate and double-click the vendor location to report on. The Location window opens with the selected vendor location loaded.
- Click and select Locations Listing from the drop-down menu.
- To report on all or a filtered subset of vendor locations:
- Select the Options tab.
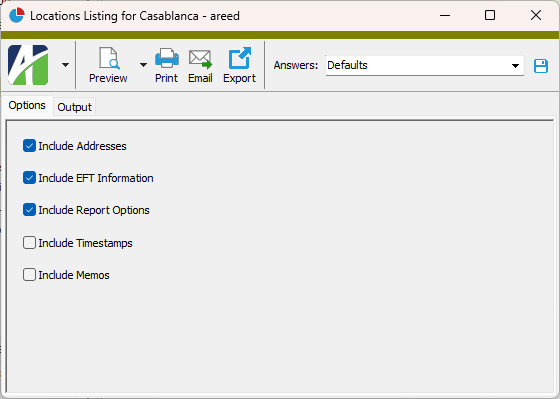
- Mark the checkbox(es) for the additional information to include:
- Addresses
- EFT Information
- Report Options. To include a section at the end of the report with the report settings used to produce the report, leave the checkbox marked. To produce the report without this information, clear the checkbox.
- Timestamps
- Memos
- Custom Fields (only visible if custom fields are set up)
- Select the Output tab.
- In the Design field, look up and select the report design to use.
- In the toolbar, click the icon for the type of output you want:
- - Provides access to two preview options.
- Preview - Click the icon or click the drop-down arrow and select Preview from the drop-down menu to view the report in the Crystal Reports viewer.
- Preview to PDF - Click the drop-down arrow next to the icon and select Preview to PDF to view the report in the PDF reader.
- - Opens the Print dialog so that you can select and configure a printer and then print a paper copy of the report.
- - Opens the dialog so that you can address and compose an email that the report will be attached to. For best results, ensure your email client is running before you attempt to send a report via email.
- - Opens the Export Report dialog so that you can save the report to a file. File types include Crystal Reports (.rpt), PDF (.pdf), Microsoft Excel (.xls), Microsoft Word (.doc), rich text (.rtf), and XML (.xml).
Data extensions
The following data extension is available for the report:
- Locations
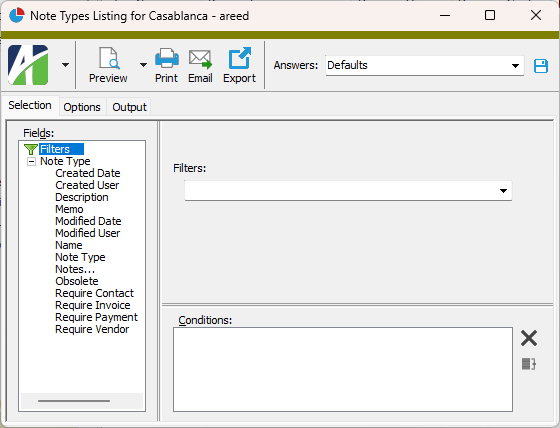
Note Types Listing
Purpose
The Note Types Listing provides a list of the note types defined in Accounts Payable.
Content
For each note type included on the report, the listing shows:
- description
- whether the note type has been flagged as obsolete
- whether the note type requires a vendor reference
- whether the note type requires a contact reference
- whether the note type requires an invoice reference
- whether the note type requires a payment reference.
In addition, you can include one or more of the following:
- timestamps
- memos
- custom fields.
The following total appears on the report.
- record count.
Print the report
- In the Navigation pane, highlight the Accounts Payable > Setup > Note Types folder.
- Start the report set-up wizard.
- To report on all or a filtered subset of note types:
- Right-click the Note Types folder and select Select and Report > Note Types Listing from the shortcut menu.
- On the Selection tab, define any filters to apply to the data.
- To report on specifically selected note types:
- In the HD view, select the note types to include on the report. You can use Ctrl and/or Shift selection to select multiple records.
- Click .
- To report on a particular note type from the Note Type window:
- In the HD view, locate and double-click the note type to report on. The Note Type window opens with the note type loaded.
- Click .
- To report on all or a filtered subset of note types:
- Select the Options tab.
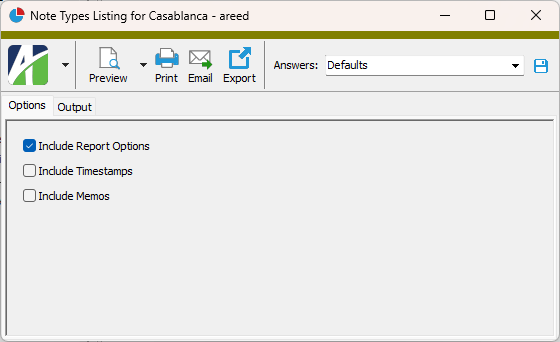
- To include a section at the end of the report with the report settings used to produce the report, leave the Include Report Options checkbox marked. To produce the report without this information, clear the checkbox.
- Mark the checkbox(es) for the additional information to include:
- Timestamps
- Memos
- Custom Fields (only visible if custom fields are set up)
- Select the Output tab.
- In the Design field, look up and select the report design to use.
- In the toolbar, click the icon for the type of output you want:
- - Provides access to two preview options.
- Preview - Click the icon or click the drop-down arrow and select Preview from the drop-down menu to view the report in the Crystal Reports viewer.
- Preview to PDF - Click the drop-down arrow next to the icon and select Preview to PDF to view the report in the PDF reader.
- - Opens the Print dialog so that you can select and configure a printer and then print a paper copy of the report.
- - Opens the dialog so that you can address and compose an email that the report will be attached to. For best results, ensure your email client is running before you attempt to send a report via email.
- - Opens the Export Report dialog so that you can save the report to a file. File types include Crystal Reports (.rpt), PDF (.pdf), Microsoft Excel (.xls), Microsoft Word (.doc), rich text (.rtf), and XML (.xml).
Data extensions
The following data extension is available for the report:
- Note types
Notes Listing
Purpose
The Notes Listing provides a list of the notes recorded in Accounts Payable.
Content
For each note included on the report, the listing shows:
- number
- date and time
- description
- user
- note type
- note text.
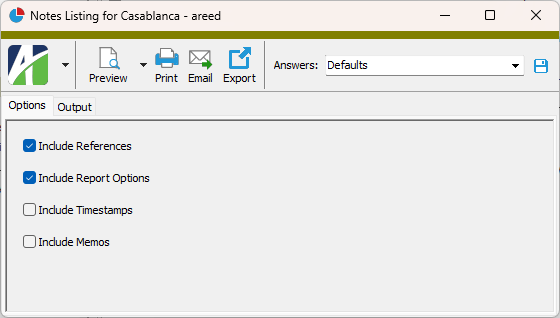
In addition, you can include one or more of the following:
- references
- timestamps
- memos
- custom fields.
The following total appears on the report:
- record count.
Print the report
- In the Navigation pane, highlight the Accounts Payable > Notes folder.
- Start the report set-up wizard.
- To report on all or a filtered subset of notes:
- Right-click the Notes folder and select Select and Report > Notes Listing from the shortcut menu.
- On the Selection tab, define any filters to apply to the data.
- To report on specifically selected notes:
- In the HD view, select the notes to include on the report. You can use Ctrl and/or Shift selection to select multiple records.
- Click .
- To report on a particular note from the Note window:
- In the HD view, locate and double-click the note to report on. The Note window opens with the note loaded.
- Click .
- To report on all or a filtered subset of notes:
- Select the Options tab.
- Mark the checkbox(es) for the additional information to include:
- References
- Report Options. To include a section at the end of the report with the report settings used to produce the report, leave the checkbox marked. To produce the report without this information, clear the checkbox.
- Timestamps
- Memos
- Custom Fields (only visible if custom fields are set up)
- Select the Output tab.
- In the Design field, look up and select the report design to use.
- In the toolbar, click the icon for the type of output you want:
- - Provides access to two preview options.
- Preview - Click the icon or click the drop-down arrow and select Preview from the drop-down menu to view the report in the Crystal Reports viewer.
- Preview to PDF - Click the drop-down arrow next to the icon and select Preview to PDF to view the report in the PDF reader.
- - Opens the Print dialog so that you can select and configure a printer and then print a paper copy of the report.
- - Opens the dialog so that you can address and compose an email that the report will be attached to. For best results, ensure your email client is running before you attempt to send a report via email.
- - Opens the Export Report dialog so that you can save the report to a file. File types include Crystal Reports (.rpt), PDF (.pdf), Microsoft Excel (.xls), Microsoft Word (.doc), rich text (.rtf), and XML (.xml).
Data extensions
The following data extensions are available for the report:
- Notes
- Note types
Payment APCodes Listing
Purpose
The Payment APCodes Listing shows APCode detail for selected payment APCodes.
Content
When printed to include details, for each payment APCode detail line, the report shows:
- APCode
- vendor
- payment date
- batch-entry-line number
- invoice number
- basis amount
- percent (if applicable)
- APCode amount.
The following totals appear on the report:
- grand totals.
Print the report
- In the Navigation pane, highlight the Accounts Payable > Payments > Payment APCodes folder.
- Start the report set-up wizard.
- To report on all or a filtered subset of payment APCodes:
- Right-click the Payment APCodes folder and select Select and Report > Payment APCodes Listing from the shortcut menu.
- On the Selection tab, define any filters to apply to the data.

- To report on specifically selected payment APCodes:
- In the HD view, select the payment APCodes to include on the report. You can use Ctrl and/or Shift selection to select multiple records.
- Click .
- To report on all or a filtered subset of payment APCodes:
- Select the Options tab.

- In the Begin Date and End Date fields, enter the range of dates for which to include payment APCode detail on the report.
- Ensure the Include Detail checkbox is marked if you want to include APCode detail on the report. If you clear the checkbox, the report shows grand totals only.
- To include a section at the end of the report with the report settings used to produce the report, leave the Include Report Options checkbox marked. To produce the report without this information, clear the checkbox.
- Select the Sorting tab.

- In the Available Sort Options list box, highlight the field(s) to sort the report by, then click to move your selection(s) to the Assigned Sort Options list box.
- If you selected multiple sort fields, use and to arrange the sort fields in the order you want them applied.
- If you want the report to start a new page for each change in one of the sorting options you specified, select the sorting option to break on from the Page Break Level drop-down list. If you do not want to insert page breaks, accept "(none)".
- If you want the report to subtotal based on one of the sorting options you specified, select the sorting option to subtotal on from the Subtotal Level drop-down list. If you do not want to show subtotals, accept "(none)".
- Select the Output tab.
- In the Design field, look up and select the report design to use.
- In the toolbar, click the icon for the type of output you want:
- - Provides access to two preview options.
- Preview - Click the icon or click the drop-down arrow and select Preview from the drop-down menu to view the report in the Crystal Reports viewer.
- Preview to PDF - Click the drop-down arrow next to the icon and select Preview to PDF to view the report in the PDF reader.
- - Opens the Print dialog so that you can select and configure a printer and then print a paper copy of the report.
- - Opens the dialog so that you can address and compose an email that the report will be attached to. For best results, ensure your email client is running before you attempt to send a report via email.
- - Opens the Export Report dialog so that you can save the report to a file. File types include Crystal Reports (.rpt), PDF (.pdf), Microsoft Excel (.xls), Microsoft Word (.doc), rich text (.rtf), and XML (.xml).
Data extensions
The following data extension is available for the report:
- Payment APCodes
Payments Listing
Purpose
The Payments Listing provides a list, by batch number, of payments recorded in Accounts Payable.
Content
For each batch number, the listing shows:
- payment information.
For each payment represented, the listing shows:
- merge number
- payment description
- bank account number
- payment date
- GL batch - entry number
- payment type
- reference
- vendor name
- vendor description
- discount account
- gross amount
- discount amount
- net payment amount
- amount withheld
- amount reported.
In addition, you can include one or more of the following:
- payment detail (invoice number, invoice date, invoice description, balance, gross amount, discount, net payment, amount withheld, amount reported)
- APCodes (invoice number, APCode, description, type, basis, percent, amount)
- payment distributions (for each distribution line: invoice number, date, distribution account and description, unit, invoice distribution amount, payment distribution amount)
- GL detail (for each detail line: line number, invoice number, GL detail account, unit, debit or credit amount)
- addresses
- timestamps
- memos
- custom fields.
The following totals appear on the report:
- grand totals.
Print the report
- In the Navigation pane, highlight the Accounts Payable > Payments folder.
- Start the report set-up wizard.
- To report on all or a filtered subset of payments:
- Right-click the Payments folder and select Select and Report > Payments Listing from the shortcut menu.
- On the Selection tab, define any filters to apply to the data.
- To report on specifically selected payments:
- In the HD view, select the payments to include on the report. You can use Ctrl and/or Shift selection to select multiple records.
- Click .
- To report on a particular payment from the Payment window:
- In the HD view, locate and double-click the payment to report on. The Payment window opens with the payment loaded.
- Click .
- To report on all or a filtered subset of payments:
- Select the Options tab.
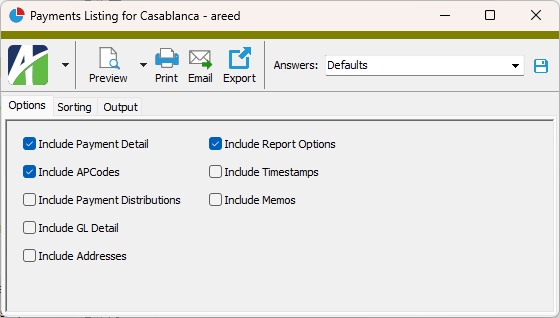
- Mark the checkbox(es) for the additional information to include:
- Payment Detail
- APCodes
- Payment Distributions
- GL Detail
- Addresses
- Report Options. To include a section at the end of the report with the report settings used to produce the report, leave the checkbox marked. To produce the report without this information, clear the checkbox.
- Timestamps
- Memos
- Custom Fields (only visible if custom fields are set up)
- Select the Sorting tab.
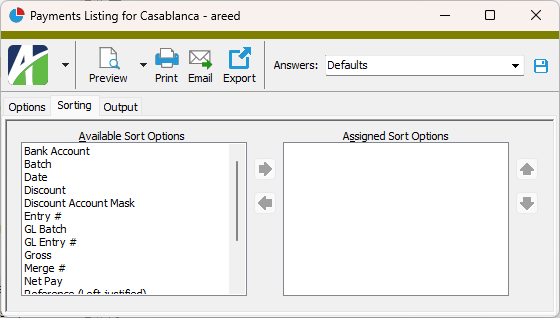
- In the Available Sort Options list box, highlight the field(s) to sort the report by, then click to move your selection(s) to the Assigned Sort Options list box.
- If you selected multiple sort fields, use and to arrange the sort fields in the order you want them applied.
- Select the Output tab.
- In the Design field, look up and select the report design to use.
- In the toolbar, click the icon for the type of output you want:
- - Provides access to two preview options.
- Preview - Click the icon or click the drop-down arrow and select Preview from the drop-down menu to view the report in the Crystal Reports viewer.
- Preview to PDF - Click the drop-down arrow next to the icon and select Preview to PDF to view the report in the PDF reader.
- - Opens the Print dialog so that you can select and configure a printer and then print a paper copy of the report.
- - Opens the dialog so that you can address and compose an email that the report will be attached to. For best results, ensure your email client is running before you attempt to send a report via email.
- - Opens the Export Report dialog so that you can save the report to a file. File types include Crystal Reports (.rpt), PDF (.pdf), Microsoft Excel (.xls), Microsoft Word (.doc), rich text (.rtf), and XML (.xml).
Data extensions
The following data extensions are available for the report:
- Payments
- Payment invoices
- Payment APCodes
- Payment GL detail
Recurring Invoices Listing
Purpose
The Recurring Invoices Listing provides details for the recurring invoices defined in Accounts Payable.
Content
For each recurring invoice represented, the listing shows:
- vendor name
- vendor description
- beginning date for using the recurring invoice
- the day of the month to post the invoice
- purchase order number
- whether the recurring invoice is on payment hold
- GL batch name
- recurring invoice number
- recurring invoice description
- the date to stop using the recurring invoice
- invoice amount
- whether duplicates are allowed
- whether the recurring invoice is on merge hold
- AP account number.
In addition, you can include one or more of the following:
- departments and approval statuses (if Purchasing is installed, AP invoice approval is enabled, and a recurring invoice has a department and/or approval status specified)
- payment locations and terms (payment address; terms code, description, basis)
- attributes (both invoice usage attributes and invoice detail usage attributes)
- APCodes (code, description, type, basis)
- GL detail (for each detail line: line number, GL account and description, unit, debit or credit amount)
- GL Summary section (account, account description, attributes, total debits, total credits)
- timestamps
- memos
- custom fields.
The following totals appear on the report:
- total count of recurring invoices
- total amount of recurring invoices.
Print the report
- In the Navigation pane, highlight the Accounts Payable > Invoices > Recurring folder.
- Start the report set-up wizard.
- To report on all or a filtered subset of recurring invoices:
- Right-click the Recurring folder and select Select and Report > Recurring Invoices Listing from the shortcut menu.
- On the Selection tab, define any filters to apply to the data.
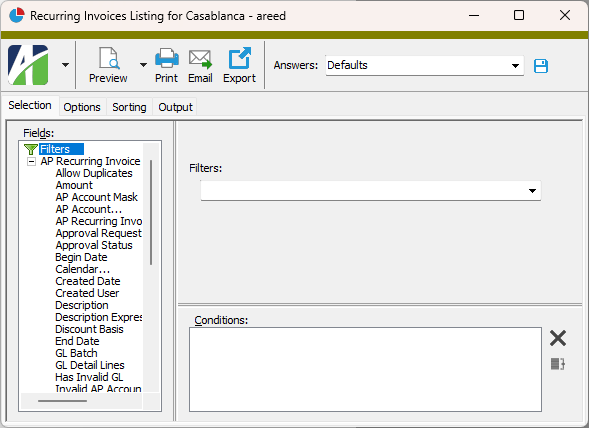
- To report on specifically selected recurring invoices:
- In the HD view, select the recurring invoices to include on the report. You can use Ctrl and/or Shift selection to select multiple records.
- Click .
- To report on a particular recurring invoice from the Recurring AP Invoice window:
- In the HD view, locate and double-click the recurring invoice to report on. The Recurring AP Invoice window opens with the recurring invoice loaded.
- Click .
- To report on all or a filtered subset of recurring invoices:
- Select the Options tab.
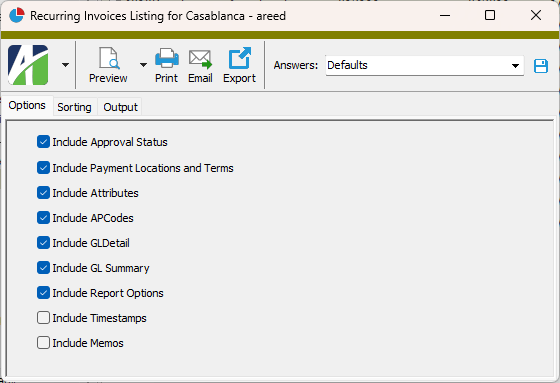
- Mark the checkbox(es) for the additional information to include:
- Approval Status (only visible when Purchasing is installed and AP invoice approval is enabled)
- Payment Locations and Terms
- Attributes
- APCodes
- GL Detail
- GL Summary
- Report Options. To include a section at the end of the report with the report settings used to produce the report, leave the checkbox marked. To produce the report without this information, clear the checkbox.
- Timestamps
- Memos
- Custom Fields (only visible if custom fields are set up)
- Select the Sorting tab.
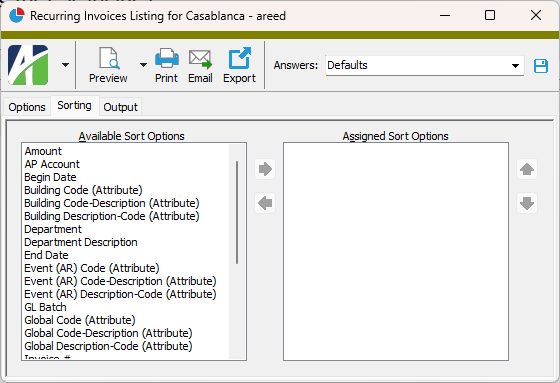
- In the Available Sort Options list box, highlight the field(s) to sort the report by, then click to move your selection(s) to the Assigned Sort Options list box.
- If you selected multiple sort fields, use and to arrange the sort fields in the order you want them applied.
- Select the Output tab.
- In the Design field, look up and select the report design to use.
- In the toolbar, click the icon for the type of output you want:
- - Provides access to two preview options.
- Preview - Click the icon or click the drop-down arrow and select Preview from the drop-down menu to view the report in the Crystal Reports viewer.
- Preview to PDF - Click the drop-down arrow next to the icon and select Preview to PDF to view the report in the PDF reader.
- - Opens the Print dialog so that you can select and configure a printer and then print a paper copy of the report.
- - Opens the dialog so that you can address and compose an email that the report will be attached to. For best results, ensure your email client is running before you attempt to send a report via email.
- - Opens the Export Report dialog so that you can save the report to a file. File types include Crystal Reports (.rpt), PDF (.pdf), Microsoft Excel (.xls), Microsoft Word (.doc), rich text (.rtf), and XML (.xml).
Data extensions
The following data extensions are available for the report:
- Recurring invoices
- Recurring APCodes
Terms Listing
Purpose
The Terms Listing provides a list of the payment terms defined in Accounts Payable.
Content
For each payment terms included on the report, the listing shows:
- description
- number of days from the reference date that payment is due
- payment reference date
- day of the month the vendor uses as basis for end-of-month.
In addition, you can include one or more of the following:
-
- timestamps
- memos
- custom fields.
The following total appears on the report:
- record count.
Print the report
- In the Navigation pane, highlight the Accounts Payable > Setup > Terms folder.
- Start the report set-up wizard.
- To report on all or a filtered subset of payment terms:
- Right-click the Terms folder and select Select and Report > Terms Listing from the shortcut menu.
- On the Selection tab, define any filters to apply to the data.
- To report on specifically selected payment terms:
- In the HD view, select the payment terms to include on the report. You can use Ctrl and/or Shift selection to select multiple records.
- Click .
- To report on a particular payment terms from the Terms window:
- In the HD view, locate and double-click the terms to report on. The Terms window opens with the payment terms loaded.
- Click .
- To report on all or a filtered subset of payment terms:
- Select the Options tab.
- Mark the checkbox(es) for the additional information to include:
- Detail
- Report Options. To include a section at the end of the report with the report settings used to produce the report, leave the checkbox marked. To produce the report without this information, clear the checkbox.
- Timestamps
- Memos
- Custom Fields (only visible if custom fields are set up)
- Select the Output tab.
- In the Design field, look up and select the report design to use.
- In the toolbar, click the icon for the type of output you want:
- - Provides access to two preview options.
- Preview - Click the icon or click the drop-down arrow and select Preview from the drop-down menu to view the report in the Crystal Reports viewer.
- Preview to PDF - Click the drop-down arrow next to the icon and select Preview to PDF to view the report in the PDF reader.
- - Opens the Print dialog so that you can select and configure a printer and then print a paper copy of the report.
- - Opens the dialog so that you can address and compose an email that the report will be attached to. For best results, ensure your email client is running before you attempt to send a report via email.
- - Opens the Export Report dialog so that you can save the report to a file. File types include Crystal Reports (.rpt), PDF (.pdf), Microsoft Excel (.xls), Microsoft Word (.doc), rich text (.rtf), and XML (.xml).
Data extensions
The following data extensions are available for the report:
- Terms
- Terms discount
Vendor Invoices Report
Purpose
The Vendor Invoices Report summarizes invoice information by vendor.
Content
For each vendor included on the report, the report shows:
- vendor description
- number of invoices
- amount of invoices
- balance.
In addition, you can include one or more of the following:
- invoice detail (invoice date, invoice number, invoice description, GL batch - entry number, source, amount, GL date, batch-entry number, AP account, merge number, purchase order number, due date, balance, whether the invoice is on merge hold, whether the invoice is on payment hold, whether the invoice has been voided, invoice status)
- approval status (department, status, approval amount, approval date, and approved by) [only available when Purchasing is installed and AP invoice approval is enabled]
- approval history (approval date, removed date, approval level, approval status, approved by, approval amount, approval notes) [only available when Purchasing is installed and AP invoice approval is enabled]
- payment location, terms, and payment detail (payment address; terms code, due date, basis, pay by date; payment date, reference, merge number, net payment)
- attributes (both invoice usage and invoice detail usage attributes)
- APCodes (code, description, type, basis, percent, amount)
- GL detail (for each detail line: line number, GL account and description, unit, debit or credit amount; GL summary)
- extra GL (for each detail line: line number, extra GL account, account description, date, unit, debit or credit amount; extra GL summary)
- GL Summary section (unit; for each account: account number, account description, total debits, total credits)
- timestamps
- memos
- custom fields.
The following totals appear on the report:
- vendor totals
- invoice count, amount, balance
- commitment count, amount, balance
- vendor total amount, total balance
- grand totals
- invoice count, amount, balance
- commitment count, amount, balance
- grand total amount, total balance.
Print the report
- In the Navigation pane, highlight the Accounts Payable > Vendors folder.
- Start the report set-up wizard.
- To report on all or a filtered subset of vendors:
- Right-click the Vendors folder and select Select and Report > Vendor Invoices Report from the shortcut menu.
- On the Selection tab, define any filters to apply to the data.
- To report on specifically selected vendors:
- In the HD view, select the vendors to include on the report. You can use Ctrl and/or Shift selection to select multiple records.
- Click and select Vendor Invoices Report from the drop-down menu.
- To report on a particular vendor from the Vendor window:
- In the HD view, locate and double-click the vendor to report on. The Vendor window opens with the vendor loaded.
- Click and select Vendor Invoices Report from the drop-down menu.
- To report on all or a filtered subset of vendors:
- Select the Invoices tab.
- Define any filters you want to apply to invoices represented in the data.
- Select the Options tab.
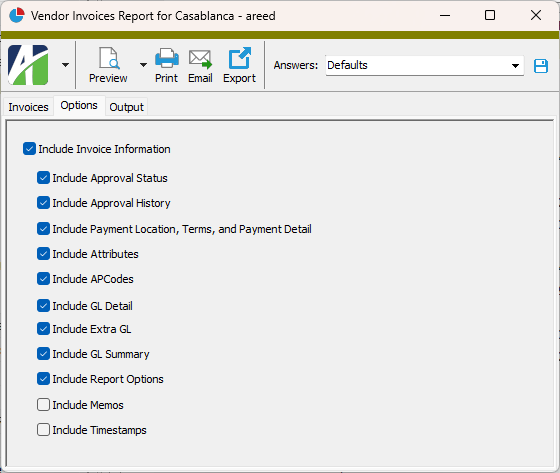
- If you want to include invoice details on the report, mark the Include Invoice Information checkbox. The remaining checkboxes are enabled.
- Mark the checkbox(es) for the additional information to include:
- Approval Status (only visible when Purchasing is installed and AP invoice approval is enabled)
- Approval History (only visible when Purchasing is installed and AP invoice approval is enabled)
- Payment Location, Terms, and Payment Detail
- Attributes
- APCodes
- GL Detail
- Extra GL
- GL Summary
- Report Options. To include a section at the end of the report with the report settings used to produce the report, leave the checkbox marked. To produce the report without this information, clear the checkbox.
- Memos
- Timestamps
- Custom Fields (only visible if custom fields are set up)
- Select the Output tab.
- In the Design field, look up and select the report design to use.
- In the toolbar, click the icon for the type of output you want:
- - Provides access to two preview options.
- Preview - Click the icon or click the drop-down arrow and select Preview from the drop-down menu to view the report in the Crystal Reports viewer.
- Preview to PDF - Click the drop-down arrow next to the icon and select Preview to PDF to view the report in the PDF reader.
- - Opens the Print dialog so that you can select and configure a printer and then print a paper copy of the report.
- - Opens the dialog so that you can address and compose an email that the report will be attached to. For best results, ensure your email client is running before you attempt to send a report via email.
- - Opens the Export Report dialog so that you can save the report to a file. File types include Crystal Reports (.rpt), PDF (.pdf), Microsoft Excel (.xls), Microsoft Word (.doc), rich text (.rtf), and XML (.xml).
Data extensions
The following data extensions are available for the report:
- Vendors
- Invoices
- Invoice APCodes
- Payment invoices
- Invoice AP extra GL
- Invoice approval history (only available when Purchasing is installed and AP invoice approval is enabled)
Vendor Payments Report
Purpose
The Vendor Payments Report summarizes payment information by vendor.
Content
For each vendor included on the report, the report shows:
- vendor description
- number of payments
- gross payment amount
- discount amount
- amount withheld
- amount reported
- net payment amount.
In addition, you can include one or more of the following:
- payment detail (payment date, reference, description, whether payment is on merge hold, bank account, net payment, amount withheld, gross payment, merge number, batch - entry number, source, type, whether the payment has been voided, discount account, discount amount, amount reported, GL batch name - entry number)
- invoice detail (invoice number, invoice date, description, amount, balance, discount amount, net payment, amount withheld, gross amount)
- APCodes (invoice number, code, code description, type, basis, percent, amount)
- payment distributions (invoice number, distribution date, distribution account, unit, invoice distribution amount, payment distribution amount)
- GL detail (for each detail line: line number, GL detail account, unit, debit or credit amount; GL summary)
- addresses and timestamps
- memos
- custom fields.
The following totals appear on the report:
- grand totals.
Print the report
- In the Navigation pane, highlight the Accounts Payable > Vendors folder.
- Start the report set-up wizard.
- To report on all or a filtered subset of vendors:
- Right-click the Vendors folder and select Select and Report > Vendor Payments Report from the shortcut menu.
- On the Selection tab, define any filters to apply to the data.
- To report on specifically selected vendors:
- In the HD view, select the vendors to include on the report. You can use Ctrl and/or Shift selection to select multiple records.
- Click and select Vendor Payments Report from the drop-down menu.
- To report on a particular vendor from the Vendor window:
- In the HD view, locate and double-click the vendor to report on. The Vendor window opens with the vendor loaded.
- Click and select Vendor Payments Report from the drop-down menu.
- To report on all or a filtered subset of vendors:
- Select the Payments tab.
- Define any filters you want to apply to payments represented in the data.
- Select the Options tab.
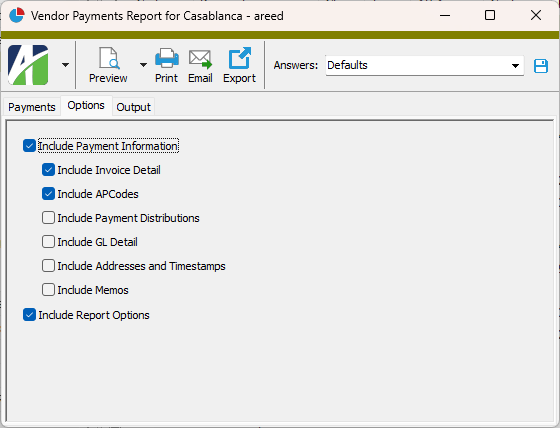
- If you want to include payment details on the report, mark the Include Payment Information checkbox. The remaining checkboxes are enabled.
- Mark the checkbox(es) for the additional information to include:
- Invoice Detail
- APCodes
- Payment Distributions
- GL Detail
- Addresses and Timestamps
- Memos
- Custom Fields (only visible if custom fields are set up)
- To include a section at the end of the report with the report settings used to produce the report, leave the Include Report Options checkbox marked. To produce the report without this information, clear the checkbox.
- Select the Output tab.
- In the Design field, look up and select the report design to use.
- In the toolbar, click the icon for the type of output you want:
- - Provides access to two preview options.
- Preview - Click the icon or click the drop-down arrow and select Preview from the drop-down menu to view the report in the Crystal Reports viewer.
- Preview to PDF - Click the drop-down arrow next to the icon and select Preview to PDF to view the report in the PDF reader.
- - Opens the Print dialog so that you can select and configure a printer and then print a paper copy of the report.
- - Opens the dialog so that you can address and compose an email that the report will be attached to. For best results, ensure your email client is running before you attempt to send a report via email.
- - Opens the Export Report dialog so that you can save the report to a file. File types include Crystal Reports (.rpt), PDF (.pdf), Microsoft Excel (.xls), Microsoft Word (.doc), rich text (.rtf), and XML (.xml).
Data extensions
The following data extensions are available for the report:
- Payments
- Vendors
- Invoices
- Payment invoices
- Invoice GL detail
- Payment APCodes
- Payment GL detail
Vendor Labels
Purpose
Vendor Labels produces a list of vendor addresses formatted for label printing. You specify which type of vendor location to use as the address source.
Content
For each vendor included, the labels show:
- vendor name and description
- vendor address.
Print the report
- In the Navigation pane, highlight the Accounts Payable > Vendors folder.
- Start the report set-up wizard.
- To create labels for all or a filtered subset of vendors:
- Right-click the Vendors folder and select Select and Report > Vendor Labels from the shortcut menu.
- On the Selection tab, define any filters to apply to the data.
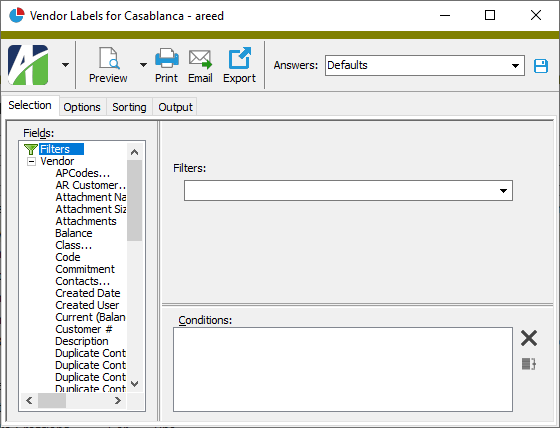
- To create labels for specifically selected vendors:
- In the HD view, select the vendors to include on the report. You can use Ctrl and/or Shift selection to select multiple records.
- Click and select Vendor Labels from the drop-down menu.
- To create a label for a particular vendor from the Vendor window:
- In the HD view, locate and double-click the vendor you want to create a label for. The Vendor window opens with the vendor loaded.
- Click and select Vendor Labels from the drop-down menu.
- To create labels for all or a filtered subset of vendors:
- Select the Options tab.
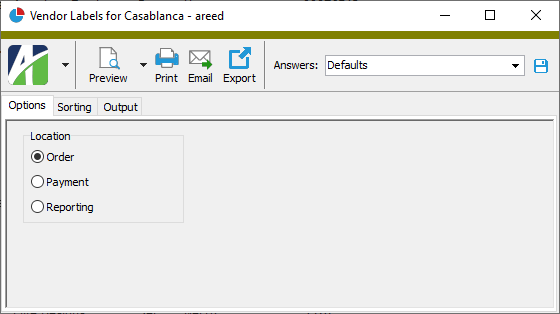
- In the Location field, select the type of location to use as the source of addresses for the labels. Your options are:
- Order
- Payment
- Reporting
- Select the Sorting tab.
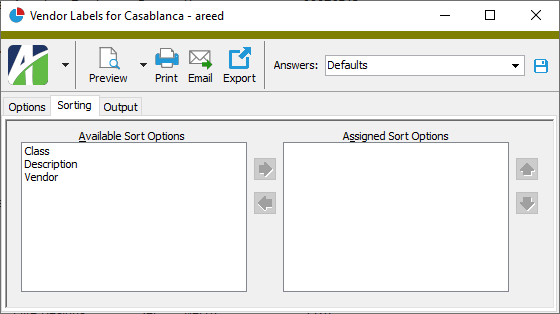
- In the Available Sort Options list box, highlight the field(s) to sort the labels by, then click to move your selection(s) to the Assigned Sort Options list box.
- If you selected multiple sort fields, use and to arrange the sort fields in the order you want them applied.
- Select the Output tab.
- In the Design field, look up and select the report design to use.
There are four built-in vendor label designs:
- Folder 3 Across Labels - This design is set up for 3-across folder labels.
- Vendor 3 Across Labels - This design is set up for 3-across address labels.
- Vendor Labels - This design is set up for 2-across address labels.
- Vendor Mailing Labels - The address block for these labels does not include the vendor code.
- In the toolbar, click the icon for the type of output you want:
- - Provides access to two preview options.
- Preview - Click the icon or click the drop-down arrow and select Preview from the drop-down menu to view the report in the Crystal Reports viewer.
- Preview to PDF - Click the drop-down arrow next to the icon and select Preview to PDF to view the report in the PDF reader.
- - Opens the Print dialog so that you can select and configure a printer and then print a paper copy of the report.
- - Opens the dialog so that you can address and compose an email that the report will be attached to. For best results, ensure your email client is running before you attempt to send a report via email.
- - Opens the Export Report dialog so that you can save the report to a file. File types include Crystal Reports (.rpt), PDF (.pdf), Microsoft Excel (.xls), Microsoft Word (.doc), rich text (.rtf), and XML (.xml).
Data extensions
The following data extension is available for the report:
- Vendors
Vendors Listing
Purpose
The Vendors Listing provides a list of the vendors tracked in Accounts Payable.
Content
For each vendor included on the report, the listing shows:
- vendor description
- vendor class
- default payment terms
- "pay by" days
- preferred payment method
- customer number.
In addition, you can include one or more of the following:
- vendor ID and controls
- PO defaults
- GL defaults
- default APCodes
- vendor locations
- vendor contacts
- federal ID
- timestamps
- memos
- custom fields.
The following total appears on the report:
- record count.
Print the report
- In the Navigation pane, highlight the Accounts Payable > Vendors folder.
- Start the report set-up wizard.
- To report on all or a filtered subset of vendors:
- Right-click the Vendors folder and select Select and Report > Vendors Listing from the shortcut menu.
- On the Selection tab, define any filters to apply to the data.
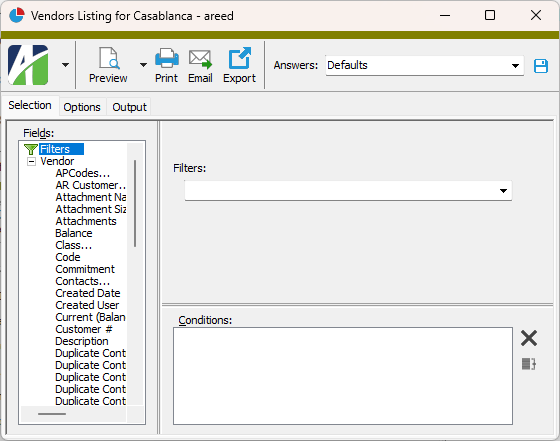
- To report on specifically selected vendors:
- In the HD view, select the vendors to include on the report. You can use Ctrl and/or Shift selection to select multiple records.
- Click and select Vendors Listing from the drop-down menu.
- To report on a particular vendor from the Vendor window:
- In the HD view, locate and double-click the vendor to report on. The Vendor window opens with the vendor loaded.
- Click and select Vendors Listing from the drop-down menu.
- To report on all or a filtered subset of vendors:
- Select the Options tab.
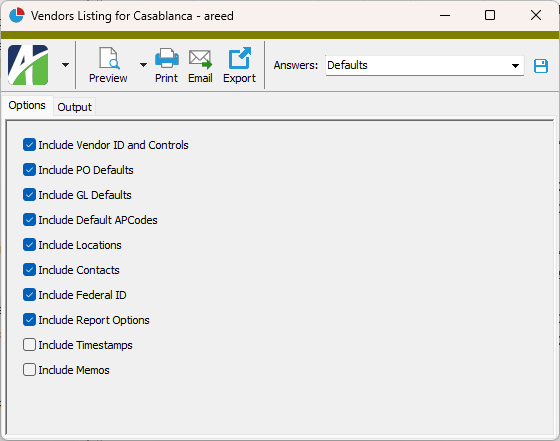
- Mark the checkbox(es) for the additional information to include:
- Vendor ID and Controls
- PO Defaults
- GL Defaults
- Default APCodes
- Locations
- Contacts
- Federal ID
- Report Options. To include a section at the end of the report with the report settings used to produce the report, leave the checkbox marked. To produce the report without this information, clear the checkbox.
- Timestamps
- Memos
- Custom Fields (only visible if custom fields are set up)
- Select the Output tab.
- In the Design field, look up and select the report design to use.
- In the toolbar, click the icon for the type of output you want:
- - Provides access to two preview options.
- Preview - Click the icon or click the drop-down arrow and select Preview from the drop-down menu to view the report in the Crystal Reports viewer.
- Preview to PDF - Click the drop-down arrow next to the icon and select Preview to PDF to view the report in the PDF reader.
- - Opens the Print dialog so that you can select and configure a printer and then print a paper copy of the report.
- - Opens the dialog so that you can address and compose an email that the report will be attached to. For best results, ensure your email client is running before you attempt to send a report via email.
- - Opens the Export Report dialog so that you can save the report to a file. File types include Crystal Reports (.rpt), PDF (.pdf), Microsoft Excel (.xls), Microsoft Word (.doc), rich text (.rtf), and XML (.xml).
Data extensions
The following data extensions are available for the report:
- Vendors
- Locations
- Contacts