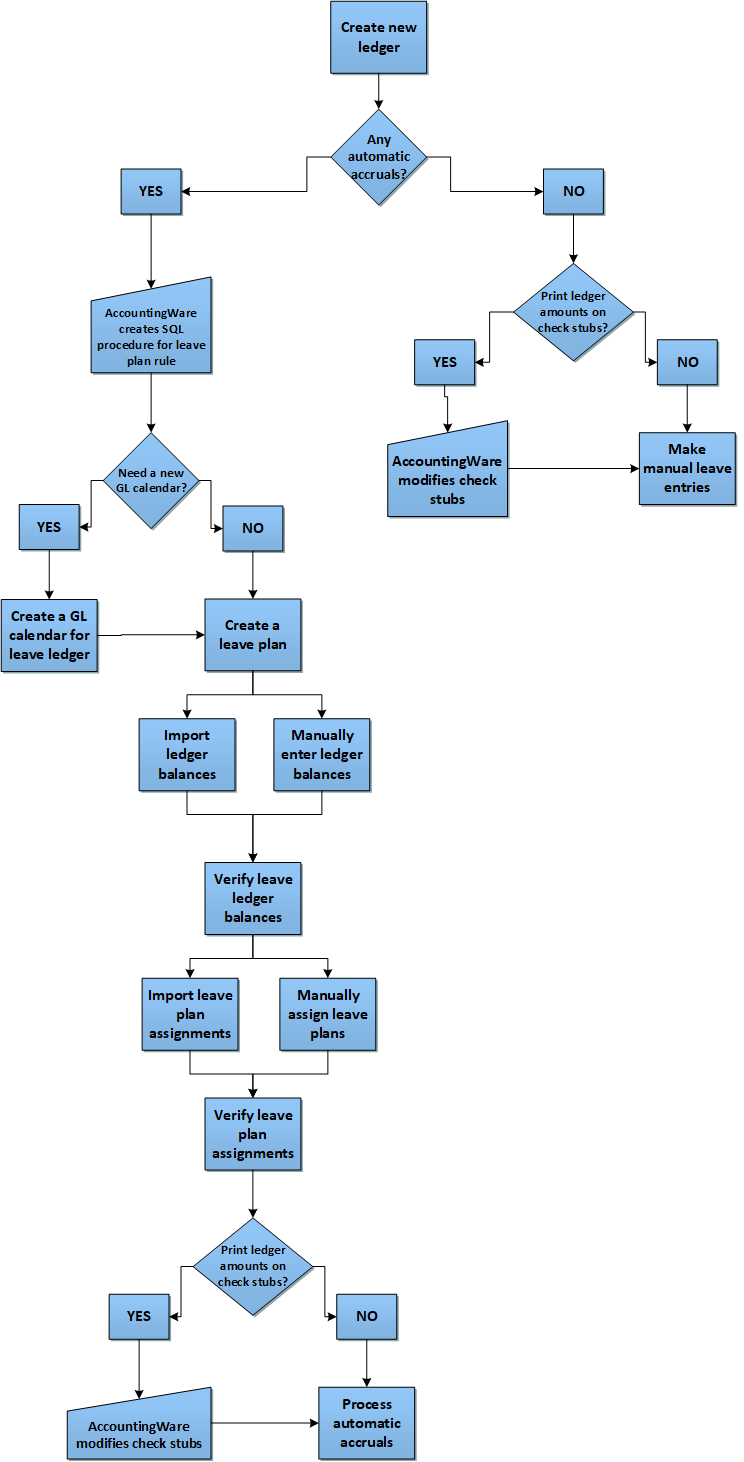
Create new Ledger
Create a leave ledger
- In the Navigation pane, highlight the Payroll/Human Resources > Setup > Leave Ledgers folder.
- Click
 . The New Seniority & Leave Ledger window opens.
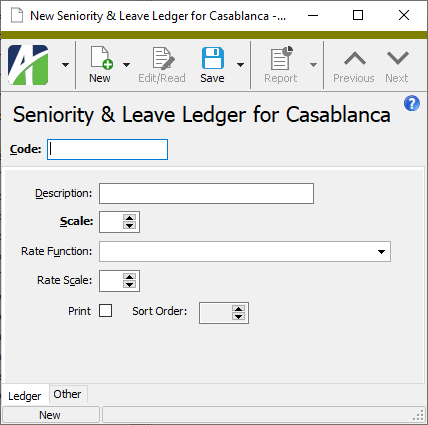
- Enter a unique Code for the leave ledger.
- Enter a Description of the leave ledger.
- In the Scale field, enter the number of digits (0-4) to allow to the right of the decimal in ledger entries.
-
From the Rate Function drop-down list, select the valuation rate function for the ledger. Use this field if you need to convert ledger balances to dollars.
The following functions are available by default:
- PRPLeaveRate_Hourly. This function references the Type:Pay:Rate parameter to determine an employee's pay rate for evaluating leave ledger dollars.
- PRPLeaveRate_HourlyOrSalary. This function references the Type:Pay:Rate or Type:Pay:Salary parameter to determine an employee's pay rate for evaluating leave ledger dollars.
- PRPLeaveRate_HourUnitOfPay. This function returns the value of the "Hour" unit of pay for an employee's primary position to use for evaluating leave ledger dollars.
- In the Rate Scale field, enter the number of digits (0-4) to allow to the right of the decimal in valuation amounts.
- If you want to print ledger amounts on check stubs and pay statements, mark the Print checkbox. If your company has an ActivityHD employee Self-Serve web portal, this checkbox also controls whether balances for this leave ledger are displayed there.
Note
Leave balances are only shown in Self-Serve for leave ledgers with the Print checkbox marked.
- If you mark the Print checkbox, the Sort Order field is enabled. Enter the order in which to print the ledger amount on check stubs and pay statements. If you leave this field blank, ActivityHD assigns the next available order number when you save the ledger.
- Save the new leave ledger.
Make manual leave entries
- In the Navigation pane, highlight the Payroll/Human Resources > Leave Plans > Leave Entries folder.
- Click . The New Seniority & Leave Entry window opens.
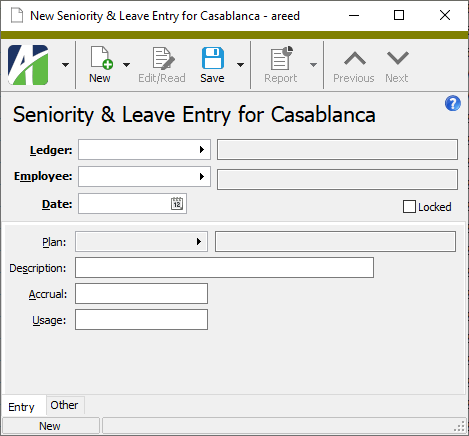
- In the Ledger field, select the leave ledger to associate with the leave entry.
- In the Employee field, select the employee code of the employee for whom you are making the leave entry.
- Enter the Date of the leave entry.
- If you need to protect the leave entry record (except for the Description and Memo fields) from future changes, mark the Locked checkbox.
- Enter a Description of the leave entry.
- If this leave entry adds to the ledger balance, enter the amount to add in the Accrual field.
- If this leave entry subtracts from the ledger balance, enter the amount to subtract in the Usage field.
- Save the new leave entry.
Create a GL calendar for the leave ledger
- In the Navigation pane, highlight the General Ledger > Setup > Calendars folder.
- Click . The New Calendar window opens.
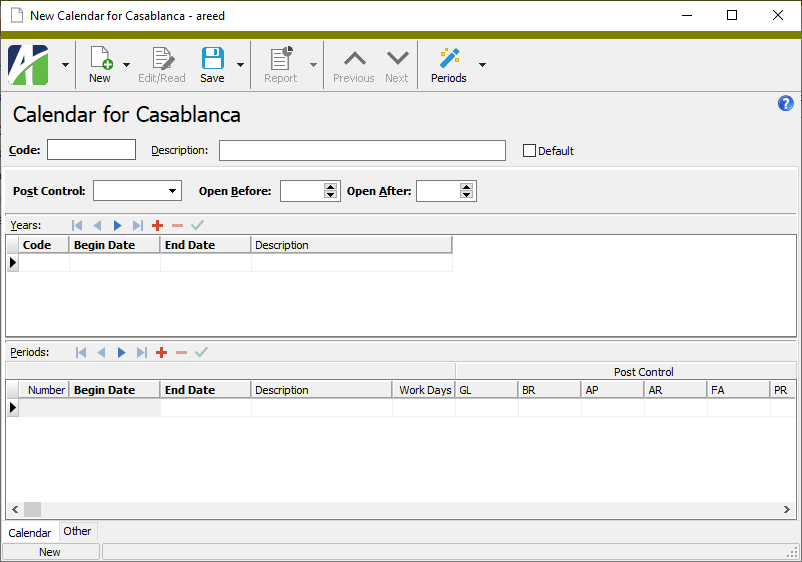
- Enter a unique Code for the calendar.
- Enter a Description of the calendar.
- If you want ActivityHD to default to this calendar whenever a calendar is prompted for, mark the Default checkbox. Only one calendar can be designated as the default calendar. This calendar is also used if no segment in the chart of accounts requires a calendar.
- From the Post Control drop-down list, select how ActivityHD handles postings to a closed period. Your options are:
- Error. ActivityHD returns an error and will only accept entries in open periods.
- Warning. ActivityHD returns a warning but will accept entries that are not in open periods.
Note
If you specify a package-specific post control in the Periods table, it will override this post control setting.
- In the Open Before field, enter the number of periods before the current period (based on today's date) to consider open and available for posting.
- In the Open After field, enter the number of periods after the current period (based on today's date) to consider open and available for posting.
- In the Years table, enter the years that the calendar is valid. To do so, do the following for each valid year:
- In the Code column, enter a year code. Typically, this would be the four-digit year. This code is used in date expressions and financial expressions to refer to a specific year of a calendar.
- In the Begin Date column, enter the date of the first day of the fiscal year. The date must be valid and less than the End Date for the same year.
- In the End Date column, enter the date of the last day of the fiscal year. The date must be valid and greater than the Begin Date for the same year.
- In the Description column, enter a description of the year.
- In the Periods table, enter the periods of the selected years that are valid. You can use the Automatic Periods wizard to create the periods or enter the periods directly in the table. Do one of the following for each year you need to create periods for:
- To use the Automatic Periods wizard:
- Select a fiscal year in the Years table.
- Click
 .
. - From the drop-down menu, select the type of accounting periods to create. Your options are:
- Monthly
- Semimonthly
- Quarterly
- Weekly
- Biweekly
- Daily
- Four Weeks
- Four/Four/Five
- Five/Four/Four
The wizard loads the periods into the Periods table.
- Modify the settings in the Periods table if needed.
- To enter the periods directly in the table:
- Select a fiscal year in the Years table.
- In the End Date column, enter the date of the last day of the period.
- Enter a Description of the period.
- The Work Days column is calculated for you. If you need to override the number, type the actual number of work days in the period.
- In the Post Control columns, select how to handle posting to the accounting period. Your options are:
- <blank>. Use the post control designated for the calendar.
- Open. The period is open for posting.
- Error. The period is closed to posting. Attempts to make entries to the period are rejected and ActivityHD issues an error message.
- Warning. The period is closed to posting. Attempts to make entries to the period are allowed, but ActivityHD issues a warning message.
- Repeat steps b-e for each period in the fiscal year.
Note
The Begin Date, End Date, and Work Days for the first row are loaded for you. On subsequent rows, the Begin Date loads and you are immediately prompted for the End Date.
- To use the Automatic Periods wizard:
- When you finish, save the new calendar.
Create a leave plan
- In the Navigation pane, highlight the Payroll/Human Resources > Leave Plans folder.
- Click . The New Seniority & Leave Plan window opens.
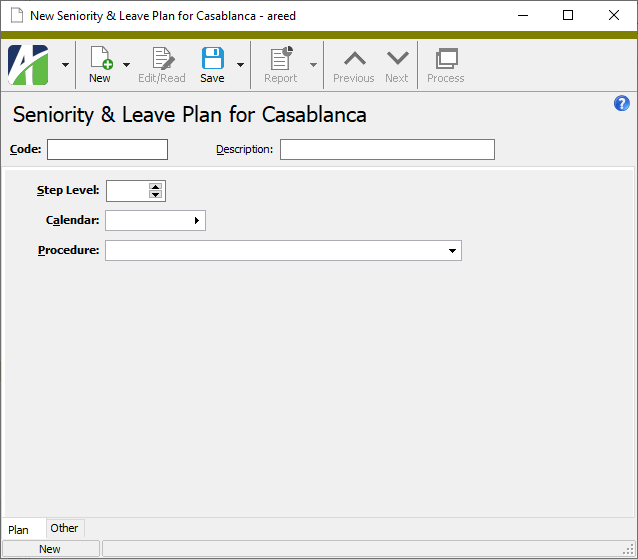
- Enter a unique Code for the leave plan.
- Enter a Description of the leave plan.
- In the Step Level field, enter a number to indicate the order in which to process this leave plan.
- In the Calendar field, select the calendar to use to determine how often automatic leave entries are created.
- In the Procedure field, enter the name of the SQL procedure to use to calculate automatic entries for the plan or select it from the drop-down list.
- Save the leave plan.
Manually enter ledger balances
To manually establish beginning balances for each employee, create leave entries to reflect beginning balances.
- In the Navigation pane, highlight the Payroll/Human Resources > Leave Plans > Leave Entries folder.
- Click . The New Seniority & Leave Entry window opens.
- In the Ledger field, select the leave ledger for which you are entering the beginning balance.
- In the Employee field, select the employee code of the employee for whom you are entering the beginning balance.
- Enter the Date of the beginning balance entry.
- Mark the Locked checkbox.
-
Enter a Description of the beginning balance.
Tip
Make the description something obvious such as "Beginning Balance".
- If the beginning balance amount is positive, enter the amount in the Accrual field.
- If the beginning balance amount is negative, enter the amount in the Usage field.
- Save the leave entry.
Manually assign leave plans
Assign the leave plan for automatic accruals to each employee who will earn accruals for that type of leave.
- Open the employee record to assign a leave plan to and select the Seniority & Leave tab.

- In the Seniority & Leave Plans table in the Leave Plan column, select the leave plan to assign to the employee.
- In the Begin Date and End Date columns, enter the range of effective dates for the leave plan. If the leave plan is already in effect, you can leave the Begin Date blank. If the leave plan is in effect indefinitely, you can leave the End Date blank.
- Repeat steps 2-3 for each leave plan you need to assign to the employee.
- When you finish, save your changes.
Process automatic accruals
If you are reporting the leave ledger's balance on checks, you will need to process accruals before you print the checks for the pay period.
- In the Navigation pane, highlight the Payroll/Human Resources > Leave Plans folder.
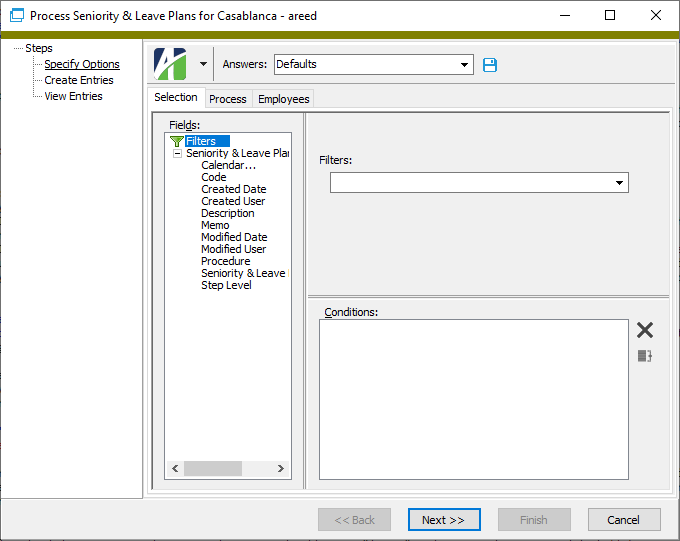
- Start the Process Seniority & Leave Plans wizard.
- To process all or a filtered subset of leave plans:
- Right-click and select Select and Process from the shortcut menu.
- On the Selection tab, define any filters to apply to the data.
- To process specifically selected leave plans:
- In the HD view, select the leave plans to process. You can use Ctrl and/or Shift selection to select multiple leave plans.
- Click
 .
.
- To process a particular leave plan from the Seniority & Leave Plans window:
- In the HD view, locate and double-click the leave plan to process. The Seniority & Leave Plan window opens with the leave plan record loaded.
- Click .
- To process all or a filtered subset of leave plans:
- Select the Process tab.
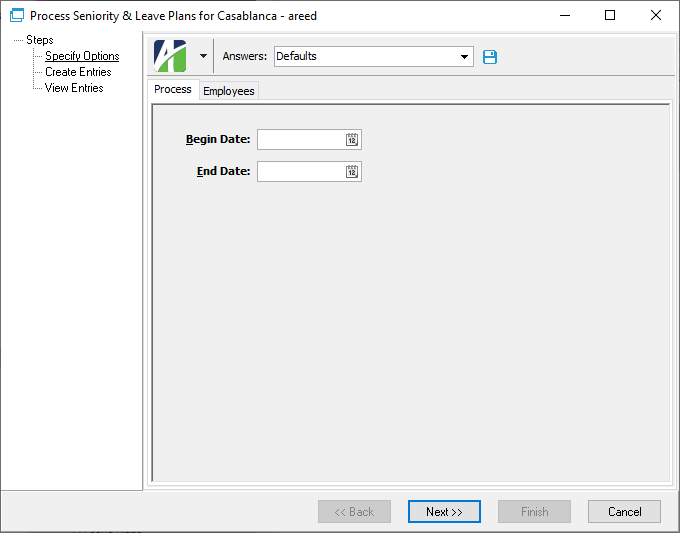
- In the Begin Date and End Date fields, enter the range of dates for which to process the leave plan. The range of dates must completely contain one or more of the periods in the leave plan calendar. Typically, this is the pay period begin and end dates.
- Select the Employees tab.
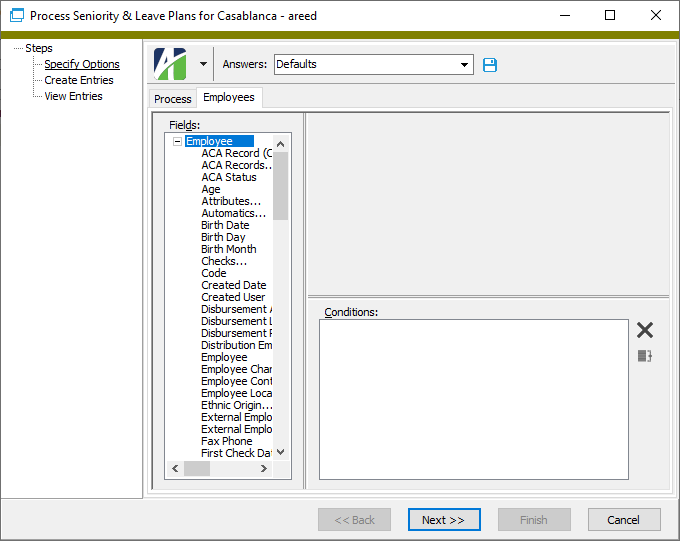
- Define any filters to apply to the employees selected for leave plan processing.
- Click Next >>. ActivityHD prompts you to confirm your action.
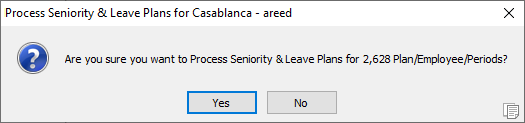
- Click Yes. ActivityHD creates entries for the leave plan(s) and reports its results.
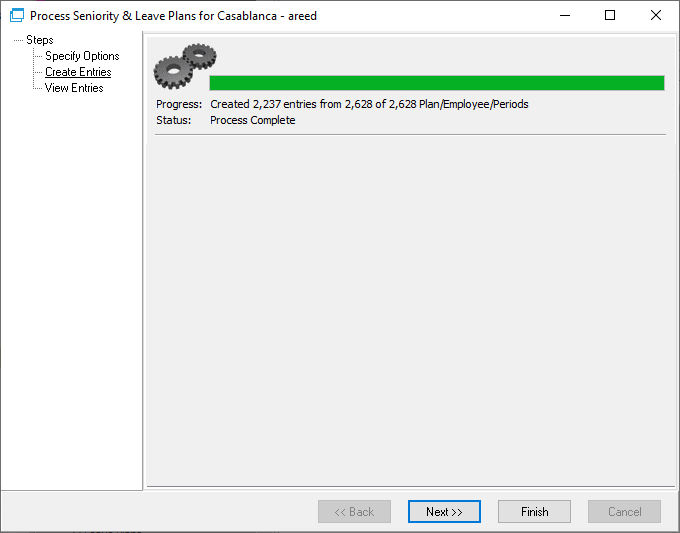
- Click Next >>. ActivityHD shows the leave entries created in the process.
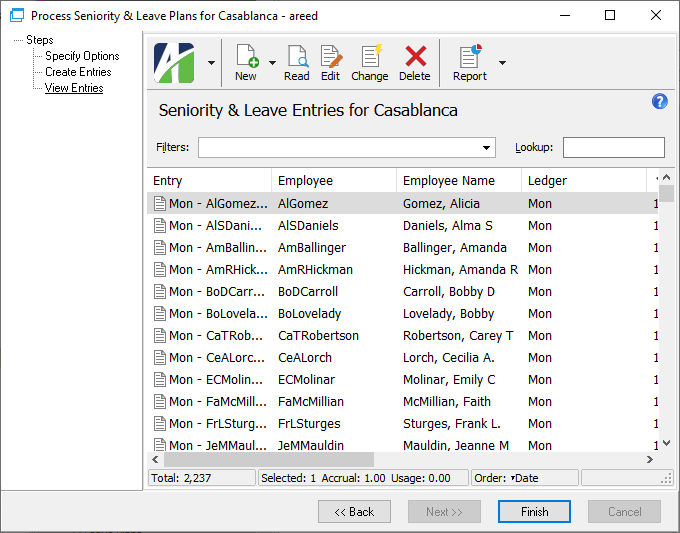
At this point, you can double-click the leave entries in the right pane to drill down to the Seniority & Leave Entry window, or you can print the Entries Listing.
- When you finish viewing or working with the leave entries, click Finish.