System Reports
Click the link for the report you want to view help for.
Authorized Users Listing
Purpose
The Authorized Users Listing provides a list of users who have access to ActivityHD.
Content
For each authorized user included on the report, the listing shows:
- name
- Windows username
- username
- web only indicator
- access control level.
In addition, you can include one or more of the following:
- permissions
- security levels
- timestamps
- memos
- custom fields.
The following total appears on the report:
- record count.
Print the report
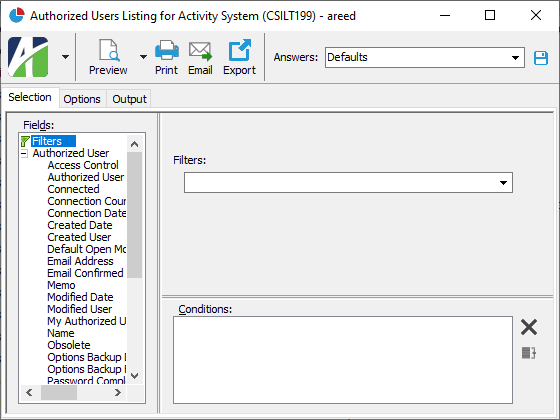
- In the Navigation pane, highlight the ActivityHD System > Administration > Authorized Users folder.
- Start the report set-up wizard.
- To report on all or a filtered subset of authorized users:
- Right-click the Authorized Users folder and select Select and Report > Authorized Users Listing from the shortcut menu.
- On the Selection tab, define any filters to apply to the data.
- To report on specifically selected authorized users:
- In the HD view, select the authorized users to include on the report. You can use Ctrl and/or Shift selection to select multiple records.
- Click
 and select Authorized Users Listing from the drop-down menu.
- To report on a particular authorized user from the Authorized User window:
- In the HD view, locate and double-click the authorized user to report on. The Authorized User window opens with the authorized user loaded.
- Click and select Authorized Users Listing from the drop-down menu.

- To report on all or a filtered subset of authorized users:
- On the Options tab, mark the checkbox(es) for the additional information to include:
- Permissions
- Security Views
- Report Options. To include a section at the end of the report with the report settings used to produce the report, leave the checkbox marked. To produce the report without this information, clear the checkbox.
- Timestamps
- Memos
- Custom Fields (only visible if custom fields are set up)
- Select the Output tab.
- In the Design field, look up and select the report design to use.
There are two built-in report designs for the Authorized Users Listing:
- Authorized Users - Shows name, Windows username, username, email, and web only indicator for each authorized user.
- Advanced Authorized Users - Shows name, Windows username, username, email, web only indicator, and access control level for each authorized user.
- In the toolbar, click the icon for the type of output you want:
 - Provides access to two preview options.
- Preview - Click the icon or click the drop-down arrow and select Preview from the drop-down menu to view the report in the Crystal Reports viewer.
- Preview to PDF - Click the drop-down arrow next to the icon and select Preview to PDF to view the report in the PDF reader.
 - Opens the Print dialog so that you can select and configure a printer and then print a paper copy of the report.
 - Opens the dialog so that you can address and compose an email that the report will be attached to. For best results, ensure your email client is running before you attempt to send a report via email.
 - Opens the Export Report dialog so that you can save the report to a file. File types include Crystal Reports (.rpt), PDF (.pdf), Microsoft Excel (.xls), Microsoft Word (.doc), rich text (.rtf), and XML (.xml).
Data extensions
The following data extensions are available for the report:
- Authorized users
- Companies
- Permissions
- Security views
Change Logs Listing
Purpose
The Change Logs Listing provides a list of the system-level change logs in ActivityHD.
Content
For each change log included on the report, the listing shows:
- change log number
- date and time of the change log
- authorized user who made the change
- package/resource/record item
- command used to make the change (e.g., "New", "Edit", "Delete").
In addition, you can include one or more of the following:
- change log details (XML details of change)
- timestamps
- memos
- custom fields.
The following total appears on the report:
- total change logs.
Print the report
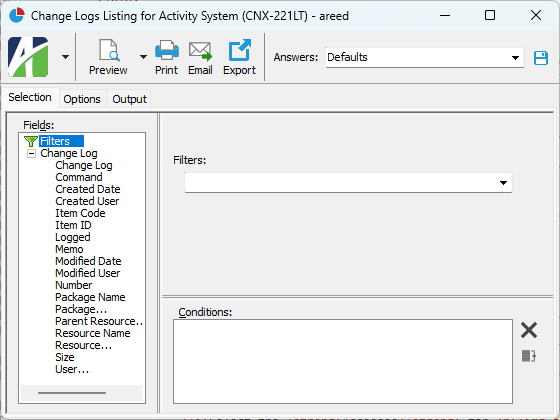
- In the Navigation pane, highlight the Activity System > Administration > Change Logs folder.
- Start the report set-up wizard.
- To report on all or a filtered subset of change logs:
- Right-click the Change Logs folder and select Select and Report > Change Logs Listing from the shortcut menu.
- On the Selection tab, define any filters to apply to the data.
- To report on specifically selected change logs:
- In the HD view, select the change logs to include on the report. You can use Ctrl and/or Shift selection to select multiple records.
- Click and select Change Logs Listing from the drop-down menu.
- To report on a particular change log from the Change Log window:
- In the HD view, locate and double-click the change log to report on. The Change Log window opens with the change log loaded.
- Click and select Change Logs Listing from the drop-down menu.
- To report on all or a filtered subset of change logs:
- Select the Options tab.
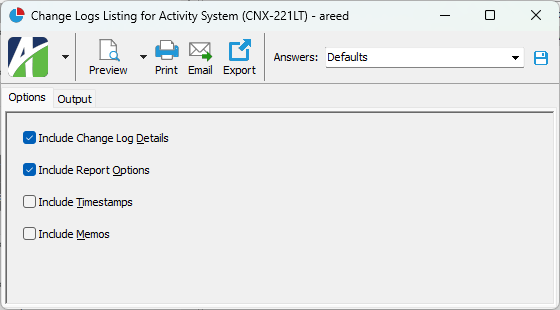
- Mark the checkbox(es) for the additional information to include:
- Change Log Details
- Report Options. To include a section at the end of the report with the report settings used to produce the report, leave the checkbox marked. To produce the report without this information, clear the checkbox.
- Timestamps
- Memos
- Custom Fields (only visible if custom fields are set up)
- Select the Output tab.
- In the Design field, look up and select the report design to use.
- In the toolbar, click the icon for the type of output you want:
- - Provides access to two preview options.
- Preview - Click the icon or click the drop-down arrow and select Preview from the drop-down menu to view the report in the Crystal Reports viewer.
- Preview to PDF - Click the drop-down arrow next to the icon and select Preview to PDF to view the report in the PDF reader.
- - Opens the Print dialog so that you can select and configure a printer and then print a paper copy of the report.
- - Opens the dialog so that you can address and compose an email that the report will be attached to. For best results, ensure your email client is running before you attempt to send a report via email.
- - Opens the Export Report dialog so that you can save the report to a file. File types include Crystal Reports (.rpt), PDF (.pdf), Microsoft Excel (.xls), Microsoft Word (.doc), rich text (.rtf), and XML (.xml).
Data extensions
The following data extensions are available for the report:
- Change Logs
- Authorized Users
- Resources
Companies Listing
Purpose
The Companies Listing provides a list of the companies set up in your system.
Content
For each company included on the report, the listing shows:
- company name
- legal name
- SQL Server name
- database name
- database login name
- startup type
- backup alert status.
In addition, you can include one or more of the following:
- address
- timestamps
- memos
- custom fields.
The following total appears on the report:
- record count.
Print the report
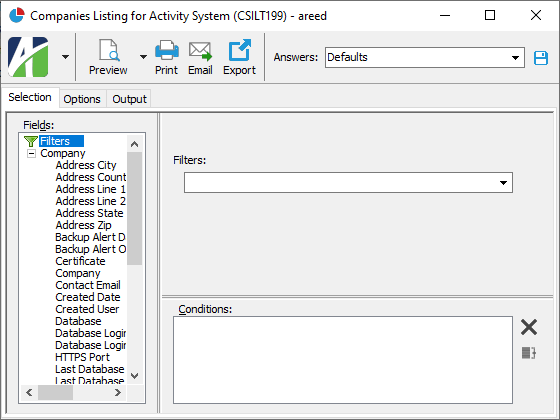
- In the Navigation pane, highlight the ActivityHD System > Companies folder.
- Start the report set-up wizard.
- To report on all or a filtered subset of companies:
- Right-click the Companies folder and select Select and Report > Companies Listing from the shortcut menu.
- On the Selection tab, define any filters to apply to the data.
- To report on specifically selected companies:
- In the HD view, select the companies to include on the report. You can use Ctrl and/or Shift selection to select multiple records.
- Click and select Companies Listing from the drop-down menu.
- To report on a particular company from the Company window:
- In the HD view, locate and double-click the company to report on. The Company window opens with the company loaded.
- Click and select Companies Listing from the drop-down menu.
- To report on all or a filtered subset of companies:
- Select the Options tab.
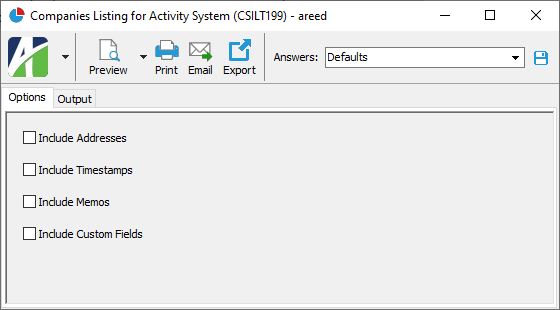
- Mark the checkbox(es) for the additional information to include:
- Addresses
- Report Options. To include a section at the end of the report with the report settings used to produce the report, leave the checkbox marked. To produce the report without this information, clear the checkbox.
- Timestamps
- Memos
- Custom Fields (only visible if custom fields are set up)
- Select the Output tab.
- In the Design field, look up and select the report design to use.
- In the toolbar, click the icon for the type of output you want:
- - Provides access to two preview options.
- Preview - Click the icon or click the drop-down arrow and select Preview from the drop-down menu to view the report in the Crystal Reports viewer.
- Preview to PDF - Click the drop-down arrow next to the icon and select Preview to PDF to view the report in the PDF reader.
- - Opens the Print dialog so that you can select and configure a printer and then print a paper copy of the report.
- - Opens the dialog so that you can address and compose an email that the report will be attached to. For best results, ensure your email client is running before you attempt to send a report via email.
- - Opens the Export Report dialog so that you can save the report to a file. File types include Crystal Reports (.rpt), PDF (.pdf), Microsoft Excel (.xls), Microsoft Word (.doc), rich text (.rtf), and XML (.xml).
Data extensions
The following data extension is available for the report:
- Companies
Permissions Listing
Purpose
The Permissions Listing provides a list of permissions defined for your system.
Content
In addition to the simple list of permissions, you can include one or more of the following:
- resources and access levels
- users
- timestamps
- memos
- custom fields.
The following total appears on the report:
- record count.
Print the report
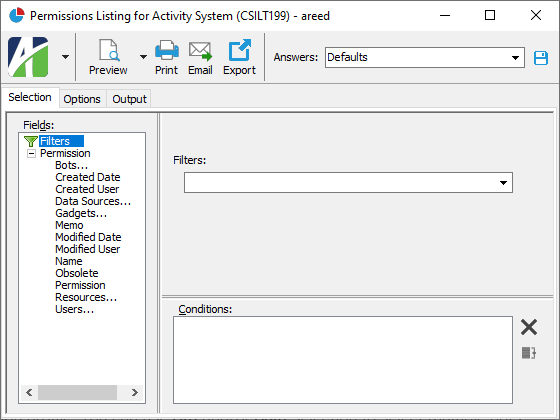
- In the Navigation pane, highlight the ActivityHD System > Administration > Security > Permissions folder.
- Start the report set-up wizard.
- To report on all or a filtered subset of permissions:
- Right-click the Permissions folder and select Select and Report > Permissions Listing from the shortcut menu.
- On the Selection tab, define any filters to apply to the data.
- To report on specifically selected permissions:
- In the HD view, select the permissions to include on the report. You can use Ctrl and/or Shift selection to select multiple records.
- Click .
- To report on a particular permission from the Permission window:
- In the HD view, locate and double-click the permission to report on. The Permission window opens with the permission loaded.
- Click .

- To report on all or a filtered subset of permissions:
- On the Options tab, mark the checkbox(es) for the additional information to include:
- Resources and Accesses
- Users
- Report Options. To include a section at the end of the report with the report settings used to produce the report, leave the checkbox marked. To produce the report without this information, clear the checkbox.
- Timestamps
- Memos
- Custom Fields (only visible if custom fields are set up)
- Select the Output tab.
- In the Design field, look up and select the report design to use.
There are two built-in report designs for the Permissions Listing:
- Permissions - Shows permission profile names plus any additional information you requested.
- Permissions Common Accesses - Shows permission profile names and, if you include resources and accesses on the report, indicates the accesses assigned for each resource that is set up in the permission profile.
- In the toolbar, click the icon for the type of output you want:
- - Provides access to two preview options.
- Preview - Click the icon or click the drop-down arrow and select Preview from the drop-down menu to view the report in the Crystal Reports viewer.
- Preview to PDF - Click the drop-down arrow next to the icon and select Preview to PDF to view the report in the PDF reader.
- - Opens the Print dialog so that you can select and configure a printer and then print a paper copy of the report.
- - Opens the dialog so that you can address and compose an email that the report will be attached to. For best results, ensure your email client is running before you attempt to send a report via email.
- - Opens the Export Report dialog so that you can save the report to a file. File types include Crystal Reports (.rpt), PDF (.pdf), Microsoft Excel (.xls), Microsoft Word (.doc), rich text (.rtf), and XML (.xml).
Data extensions
The following data extensions are available for the report:
- Permissions
- Permission resource access
- User permissions
Resource Users Analysis
Purpose
The Resource Users Analysis provides a list of resources defined for your system along with the users assigned to the resources and the users' access rights. Authorized users who are not assigned a permission or to whom a permission has not been assigned do not appear on the report.
Content
For each resource included on the report, the report shows:
- resource type
- software package
- resource users and their access levels.
In addition, you can include one or more of the following:
- resources with no users
- permissions
- timestamps
- memos
- custom fields.
The following total appears on the report:
- record count.
Print the report
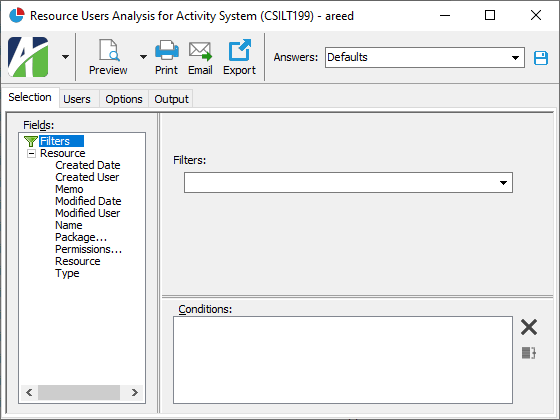
- In the Navigation pane, highlight the ActivityHD System > Administration > Security > Resources folder.
- Start the report set-up wizard.
- To report on all or a filtered subset of resources:
- Right-click the Resources folder and select Select and Report > Resource Users Analysis from the shortcut menu.
- On the Selection tab, define any filters to apply to the data.
- To report on specifically selected resources:
- In the HD view, select the resources to include on the report. You can use Ctrl and/or Shift selection to select multiple records.
- Click and select Resource Users Analysis from the drop-down menu.
- To report on a particular resource from the Resource window:
- In the HD view, locate and double-click the resource to report on. The Resource window opens with the resource loaded.
- Click and select Resource Users Analysis from the drop-down menu.
- To report on all or a filtered subset of resources:
- Select the Users tab.
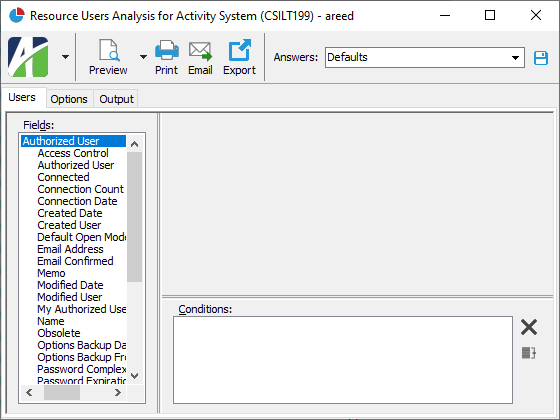
- Define any filters you want to apply on authorized users.
- Select the Options tab.
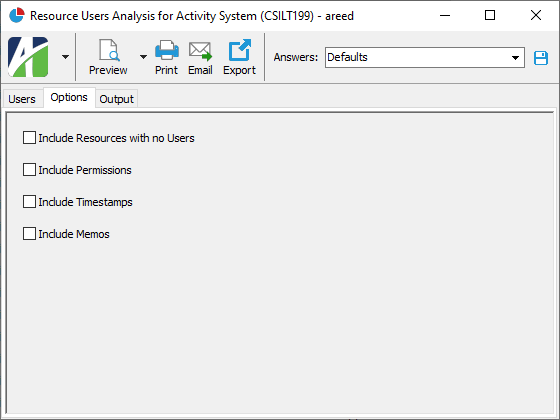
- Mark the checkbox(es) for the additional information to include:
- Resources with No Users
- Permissions
- Report Options. To include a section at the end of the report with the report settings used to produce the report, leave the checkbox marked. To produce the report without this information, clear the checkbox.
- Timestamps
- Memos
- Custom Fields (only visible if custom fields are set up)
- Select the Output tab.
- In the Design field, look up and select the report design to use.
- In the toolbar, click the icon for the type of output you want:
- - Provides access to two preview options.
- Preview - Click the icon or click the drop-down arrow and select Preview from the drop-down menu to view the report in the Crystal Reports viewer.
- Preview to PDF - Click the drop-down arrow next to the icon and select Preview to PDF to view the report in the PDF reader.
- - Opens the Print dialog so that you can select and configure a printer and then print a paper copy of the report.
- - Opens the dialog so that you can address and compose an email that the report will be attached to. For best results, ensure your email client is running before you attempt to send a report via email.
- - Opens the Export Report dialog so that you can save the report to a file. File types include Crystal Reports (.rpt), PDF (.pdf), Microsoft Excel (.xls), Microsoft Word (.doc), rich text (.rtf), and XML (.xml).
Data extensions
The following data extensions are available for the report:
- Resources
- Permissions
- Authorized users
Resources Listing
Purpose
The Resources Listing provides a list of resources defined for your system.
Content
For each resource included on the report, the listing shows:
- resource type
- software package.
In addition, you can include one or more of the following:
- permissions
- security views
- timestamps
- memos
- custom fields.
The following total appears on the report:
- record count.
Print the report
- In the Navigation pane, highlight the ActivityHD System > Administration > Security > Resources folder.
- Start the report set-up wizard.
- To report on all or a filtered subset of resources:
- Right-click the Resources folder and select Select and Report > Resources Listing from the shortcut menu.
- On the Selection tab, define any filters to apply to the data.

- To report on specifically selected resources:
- In the HD view, select the resources to include on the report. You can use Ctrl and/or Shift selection to select multiple records.
- Click and select Resources Listing from the drop-down menu.
- To report on a particular resource from the Resource window:
- In the HD view, locate and double-click the resource to report on. The Resource window opens with the resource loaded.
- Click and select Resources Listing from the drop-down menu.

- To report on all or a filtered subset of resources:
- On the Options tab, mark the checkbox(es) for the additional information to include:
- Permissions
- Security Views
- Report Options. To include a section at the end of the report with the report settings used to produce the report, leave the checkbox marked. To produce the report without this information, clear the checkbox.
- Timestamps
- Memos
- Custom Fields (only visible if custom fields are set up)
- Select the Output tab.
- In the Design field, look up and select the report design to use.
- In the toolbar, click the icon for the type of output you want:
- - Provides access to two preview options.
- Preview - Click the icon or click the drop-down arrow and select Preview from the drop-down menu to view the report in the Crystal Reports viewer.
- Preview to PDF - Click the drop-down arrow next to the icon and select Preview to PDF to view the report in the PDF reader.
- - Opens the Print dialog so that you can select and configure a printer and then print a paper copy of the report.
- - Opens the dialog so that you can address and compose an email that the report will be attached to. For best results, ensure your email client is running before you attempt to send a report via email.
- - Opens the Export Report dialog so that you can save the report to a file. File types include Crystal Reports (.rpt), PDF (.pdf), Microsoft Excel (.xls), Microsoft Word (.doc), rich text (.rtf), and XML (.xml).
Data extensions
The following data extensions are available for the report:
- Resources
- Permissions
- Security views
Security Views Listing
Purpose
The Security Views Listing provides a list of security views defined for your system.
Content
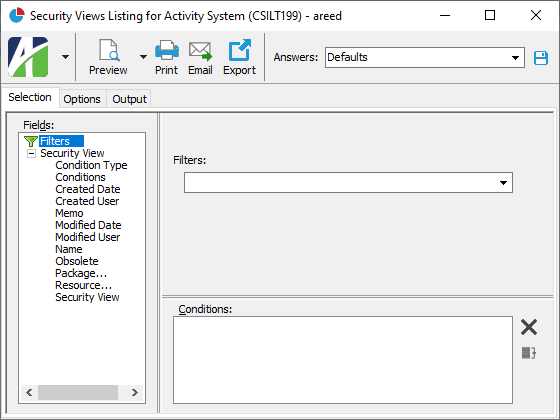
For each security view included on the report, the listing shows:
- package
- resource
- security view name
- conditions type ("Include" or "Exclude").
In addition, you can include one or more of the following:
- conditions defined on the views
- users assigned to the views
- timestamps
- memos
- custom fields
The following total appears on the report:
- record count.
Print the report
- In the Navigation pane, highlight the ActivityHD System > Administration > Security > Security Views folder.
- Start the report set-up wizard.
- To report on all or a filtered subset of security views:
- Right-click the Security Views folder and select Select and Report > Security Views Listing from the shortcut menu.
- On the Selection tab, define any filters to apply to the data.
- To report on specifically selected security views:
- In the HD view, select the security views to include on the report. You can use Ctrl and/or Shift selection to select multiple records.
- Click .
- To report on a particular security view from the Security View window:
- In the HD view, locate and double-click the security view to report on. The Security View window opens with the security view record loaded.
- Click .
- To report on all or a filtered subset of security views:
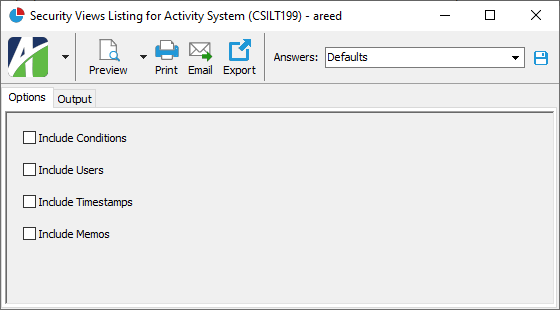
- On the Options tab, mark the checkbox(es) for the additional information to include:
- Conditions
- Users
- Report Options. To include a section at the end of the report with the report settings used to produce the report, leave the checkbox marked. To produce the report without this information, clear the checkbox.
- Timestamps
- Memos
- Custom Fields (only visible if custom fields are set up)
- Select the Output tab.
- In the Design field, look up and select the report design to use.
- In the toolbar, click the icon for the type of output you want:
- - Provides access to two preview options.
- Preview - Click the icon or click the drop-down arrow and select Preview from the drop-down menu to view the report in the Crystal Reports viewer.
- Preview to PDF - Click the drop-down arrow next to the icon and select Preview to PDF to view the report in the PDF reader.
- - Opens the Print dialog so that you can select and configure a printer and then print a paper copy of the report.
- - Opens the dialog so that you can address and compose an email that the report will be attached to. For best results, ensure your email client is running before you attempt to send a report via email.
- - Opens the Export Report dialog so that you can save the report to a file. File types include Crystal Reports (.rpt), PDF (.pdf), Microsoft Excel (.xls), Microsoft Word (.doc), rich text (.rtf), and XML (.xml).
Data extensions
The following data extension is available for the report:
- Security views
User Locations History Report
Purpose
The User Locations History Report provides a history of user location updates by user.
Content
For each authorized user included on the report, the report shows:
- location update records.
For each location update record, the report shows:
- location description
- number of days kept in history
- whether the user was out of the office
- whether the user was on personal time
- the date and time of the update
- the username of the person who performed the update.
Print the report
- In the Navigation pane, highlight the ActivityHD System > User Locations folder.
- Start the report set-up wizard.
- To report on all or a filtered subset of authorized users:
- Right-click the User Locations folder and select Select and Report > User Locations History Report from the shortcut menu.
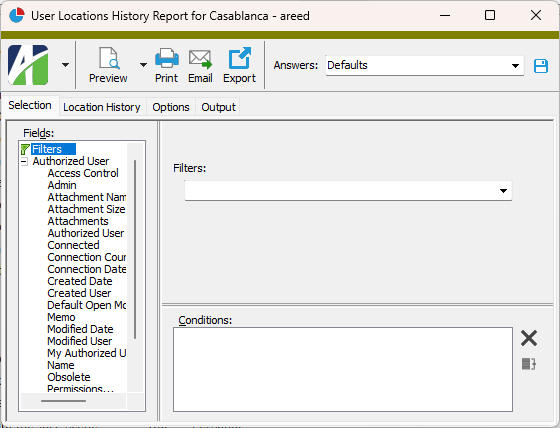
- On the Selection tab, define any filters to apply to the data.
- To report on specifically selected users:
- In the HD view, select the users to include on the report. You can use Ctrl and/or Shift selection to select multiple records.
- Click and select User Locations History Report from the drop-down menu.
- To report on a particular user from the User Location window:
- In the HD view, locate and double-click the user to report on. The User Location window opens with the user location loaded.
- Click and select User Locations History Report from the drop-down menu.
- To report on all or a filtered subset of authorized users:
- Select the Location History tab.

- Define any filters you want to apply on location history.
- Select the Options tab.
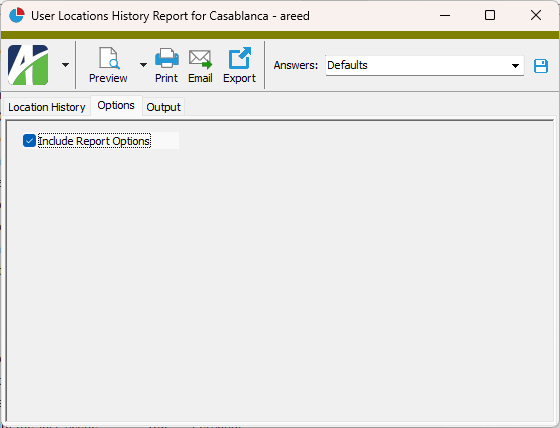
- To include a section at the end of the report with the report settings used to produce the report, leave the Include Report Options checkbox marked. To produce the report without this information, clear the checkbox.
- Select the Output tab.
- In the Design field, look up and select the report design to use.
- In the toolbar, click the icon for the type of output you want:
- - Provides access to two preview options.
- Preview - Click the icon or click the drop-down arrow and select Preview from the drop-down menu to view the report in the Crystal Reports viewer.
- Preview to PDF - Click the drop-down arrow next to the icon and select Preview to PDF to view the report in the PDF reader.
- - Opens the Print dialog so that you can select and configure a printer and then print a paper copy of the report.
- - Opens the dialog so that you can address and compose an email that the report will be attached to. For best results, ensure your email client is running before you attempt to send a report via email.
- - Opens the Export Report dialog so that you can save the report to a file. File types include Crystal Reports (.rpt), PDF (.pdf), Microsoft Excel (.xls), Microsoft Word (.doc), rich text (.rtf), and XML (.xml).
Data extensions
The following data extensions are available for the report:
- Authorized users
- User location history
User Locations Listing
Purpose
The User Locations Listing shows the most current user location update for each user.
Content
For each user location included on the report, the listing shows:
- user name
- user location
- whether the user is out of the office
- whether the user is on personal time
- the date and time of the update
- the username of the person who performed the update.
In addition, you can include one or more of the following:
- days and creation information
- memos
- custom fields.
The following total appears on the report:
- record count.
Print the report
- In the Navigation pane, highlight the ActivityHD System > User Locations folder.
- Start the report set-up wizard.
- To report on all or a filtered subset of user locations:
- Right-click the User Locations folder and select Select and Report > User Locations Listing from the shortcut menu.
- On the Selection tab, define any filters to apply to the data.
- To report on specifically selected user locations:
- In the HD view, select the users to include on the report. You can use Ctrl and/or Shift selection to select multiple records.
- Click and select User Locations Listing from the drop-down menu.
- To report on a particular user location from the User Location window:
- In the HD view, locate and double-click the user location to report on. The User Location window opens with the user location loaded.
- Click and select User Locations Listing from the drop-down menu.
- To report on all or a filtered subset of user locations:
- Select the Options tab.
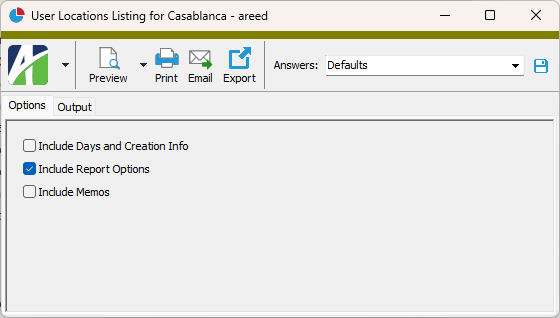
- Mark the checkbox(es) for the additional information to include:
- Days and Creation Info
- Report Options. To include a section at the end of the report with the report settings used to produce the report, leave the checkbox marked. To produce the report without this information, clear the checkbox.
- Memos
- Custom Fields (only visible if custom fields are set up)
- Select the Output tab.
- In the Design field, look up and select the report design to use.
- In the toolbar, click the icon for the type of output you want:
- - Provides access to two preview options.
- Preview - Click the icon or click the drop-down arrow and select Preview from the drop-down menu to view the report in the Crystal Reports viewer.
- Preview to PDF - Click the drop-down arrow next to the icon and select Preview to PDF to view the report in the PDF reader.
- - Opens the Print dialog so that you can select and configure a printer and then print a paper copy of the report.
- - Opens the dialog so that you can address and compose an email that the report will be attached to. For best results, ensure your email client is running before you attempt to send a report via email.
- - Opens the Export Report dialog so that you can save the report to a file. File types include Crystal Reports (.rpt), PDF (.pdf), Microsoft Excel (.xls), Microsoft Word (.doc), rich text (.rtf), and XML (.xml).
Data extensions
The following data extensions are available for the report:
- Authorized users
User Resources Analysis
Purpose
The User Resources Analysis provides a list of authorized users, the resources assigned to each user, and the types of access assigned for each resource.
Content
For each authorized user included on the report, the report shows:
- username
- access control level (All/Permitted/Unpermitted/None)
- resources and the type(s) of access the user has to each resource.
In addition, you can include one or more of the following:
- authorized users with no resources
- permissions
- timestamps
- memos
- custom fields.
The following total appears on the report:
- record count.
Print the report
- In the Navigation pane, highlight the ActivityHD System > Administration > Authorized Users folder.
- Start the report set-up wizard.
- To report on all or a filtered subset of authorized users:
- Right-click the Authorized Users folder and select Select and Report > User Resources Analysis from the shortcut menu.
- On the Selection tab, define any filters to apply to the data.
- To report on specifically selected authorized users:
- In the HD view, select the authorized users to include on the report. You can use Ctrl and/or Shift selection to select multiple records.
- Click and select User Resources Analysis from the drop-down menu.
- To report on a particular authorized user from the Authorized User window:
- In the HD view, locate and double-click the authorized user to report on. The Authorized User window opens with the authorized user loaded.
- Click and select User Resources Analysis from the drop-down menu.
- To report on all or a filtered subset of authorized users:
- Select the Resources tab.

- Define any filters you want to apply on resources.
- Select the Options tab.
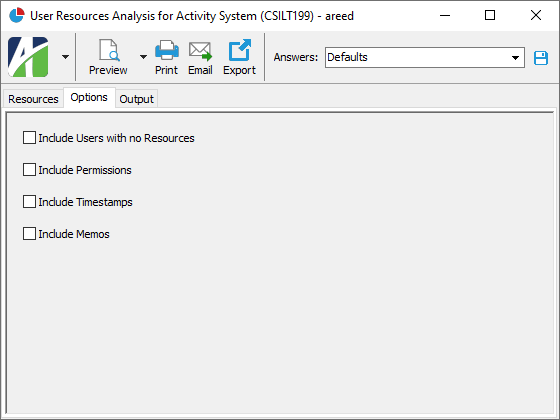
- Mark the checkbox(es) for the additional information to include:
- Users with No Resources
- Permissions
- Report Options. To include a section at the end of the report with the report settings used to produce the report, leave the checkbox marked. To produce the report without this information, clear the checkbox.
- Timestamps
- Memos
- Custom Fields (only visible if custom fields are set up)
- Select the Output tab.
- In the Design field, look up and select the report design to use.
- In the toolbar, click the icon for the type of output you want:
- - Provides access to two preview options.
- Preview - Click the icon or click the drop-down arrow and select Preview from the drop-down menu to view the report in the Crystal Reports viewer.
- Preview to PDF - Click the drop-down arrow next to the icon and select Preview to PDF to view the report in the PDF reader.
- - Opens the Print dialog so that you can select and configure a printer and then print a paper copy of the report.
- - Opens the dialog so that you can address and compose an email that the report will be attached to. For best results, ensure your email client is running before you attempt to send a report via email.
- - Opens the Export Report dialog so that you can save the report to a file. File types include Crystal Reports (.rpt), PDF (.pdf), Microsoft Excel (.xls), Microsoft Word (.doc), rich text (.rtf), and XML (.xml).
Data extensions
The following data extensions are available for the report:
- Authorized users
- Permissions
- Resources