Maintain journal entry options
Maintain journal entry options
You can set defaults to improve efficiency when making journal entries.
- In the Navigation pane, highlight the General Ledger > Journal Entries folder.
- In the HD view, double-click a record to open it. The Journal Entry window opens.
- Click
 (next to the Options dropdown) or select
  > Tools > Options > Maintain Options. The Form Options for Journal Entries dialog box opens.
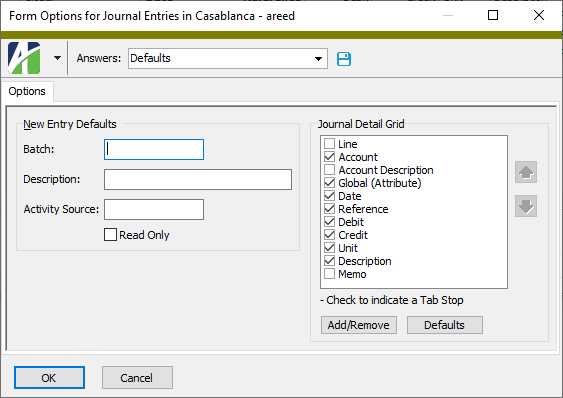
- In the New Entry Defaults section, enter the name of the default GL Batch to assign to new journal entries that use this options profile.
- Enter the default Description to use for new journal entries that use this options profile.
- In the Activity Source field, enter a short description that describes the type of activity which results in the journal entries associated with this options profile. This description is used as the default activity source on manual journal entries that use this options profile.
- If you want to protect the Activity Source field from edits and skip over it in the tab order, mark the Read Only checkbox.
- In the Journal Detail Grid section, configure the Journal Detail table to your needs. You can do one or more of the following:
- Add columns. To do so:
Click Add/Remove. The Column Selection dialog box opens.
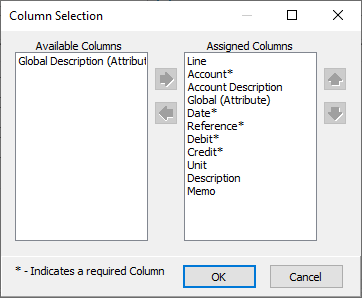
In the Available Columns list box, highlight the columns to add to the table, then click
 to move your selections to the Assigned Columns list box.
- Click OK.
- Remove columns. To do so:
Click Add/Remove. The Column Selection dialog box opens.
- In the Assigned Columns list box, highlight the columns to remove from the table, then click
 to move your selections to the Available Columns list box.
 - Click OK.
- Reorder columns. To do so:
- Highlight a column name in the Journal Detail Grid list box.
- Use
 and
and  to move the column to the desired position.
 - Repeat the last step for other columns you need to move.
- Set tab stops. To do so:
- In the Journal Detail Grid list box, ensure the checkboxes for the columns that need a tab stop are marked.
- Clear the checkbox for the columns that do not need a tab stop.
- Add columns. To do so:
- Click OK. You are prompted to save the settings with a profile name.
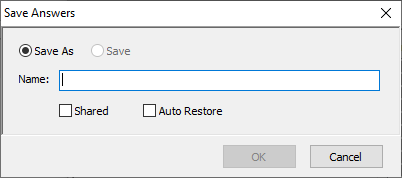
- Enter a Name for the profile.
- If you want to give other users access to this profile, mark the Shared checkbox.
- If you want this profile to load automatically the next time you make journal entries, mark the Auto Restore checkbox.
- Click OK.