
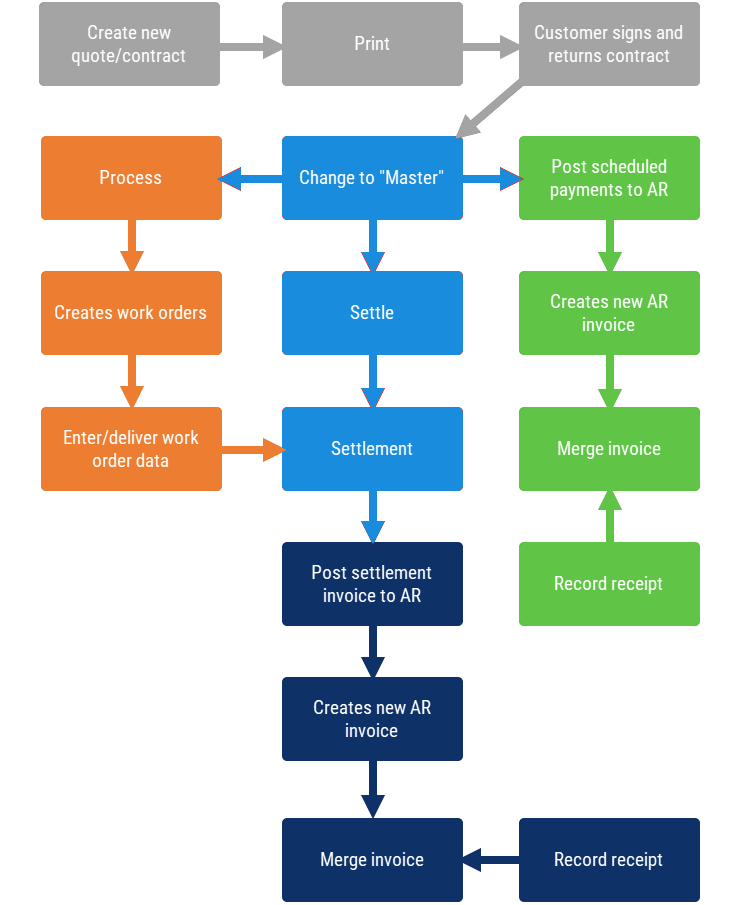
ActivityHD Contract Processing lets you define products and contracts based upon those products. Contracts optionally can be processed into work orders which are used to record performance of each contract line. Contracts can also be settled. The numbers from the resulting settlements can be analyzed, verified, and modified as needed. Finally, settlements can be posted to AR invoices.

Create a contract
There are four methods for building a contract:
- Click
 and fill out the New Contract window.
 - Select a similar existing contract, or a contract template, and perform a New Copy.
- Go to the Contract Lines folder, select the lines from an existing or template contract, and copy all the lines to Excel. In Excel, modify the lines as needed. When you finish, import the data into ActivityHD as a new contract.
- Start with a customized Excel spreadsheet which has built-in formulas and field references. When you finish, import the data into ActivityHD as a new contract.
Here we will focus on the first method.
- In the Navigation pane, highlight the Contracts Processing > Contracts folder.
-
Click
. The New Contract window opens.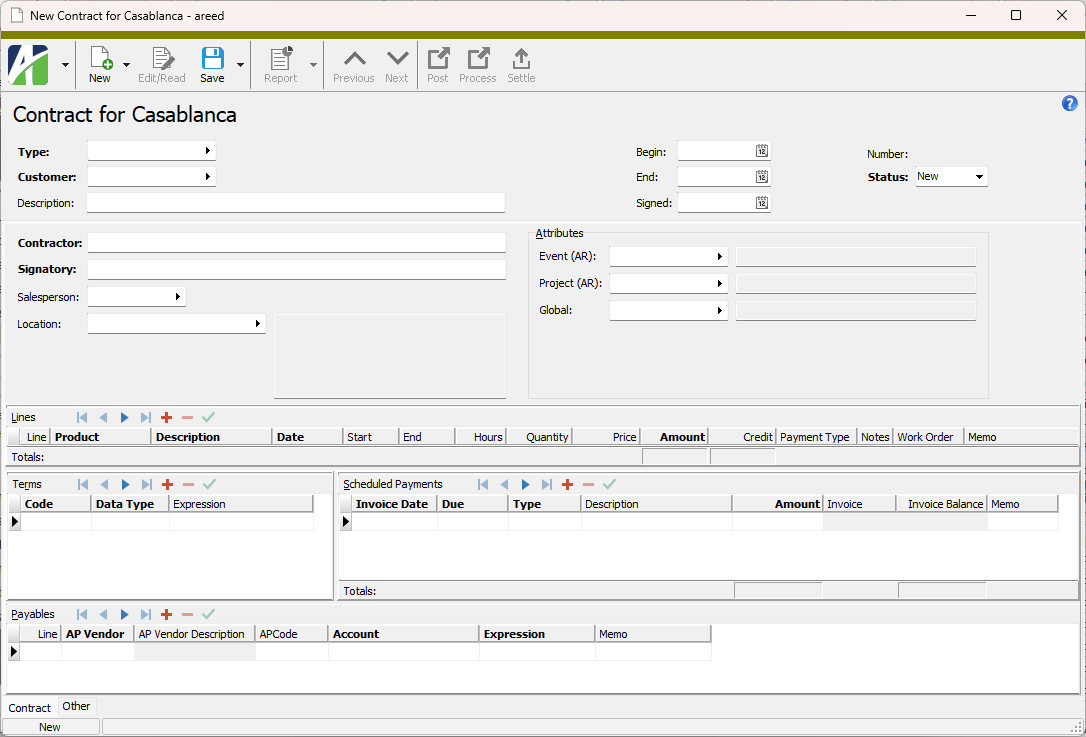
- Select the contract Type. The contract type determines the type of AR invoice that will be used on settlement invoices. To learn more, click here.
- Select the Customer with which you are entering into a contract.
- Enter a Description of the contract.
- Enter the Begin and End dates for the contract.
- Enter the name of the Contractor. This field defaults to the name of the selected customer.
- Enter the name of the Signatory on the contract. This field defaults to the name of the selected customer.
- Select the Salesperson responsible for the contract. This field defaults to the primary salesperson for the customer, if applicable.
- Select the Location where invoices should be sent. You can select any location for the contract customer. If you do not specify a location, the customer's default invoice location is printed on the contract.
- In the Attributes field(s), provide the attribute value(s) which apply to the contract.
- Use the Lines table to enter contract lines. Contract lines represent items to be billed or work to be completed. For each contract line, provide the following information:
- Select the Product being provided. To learn how to add a product for use in Contracts Processing, click here.
- The Description is defaulted from the product, but can be overridden here as needed.
Select the Date the product on the contract line will be delivered or the work on the contract line will be performed.
Note
A separate contract line is required for each date a product is delivered or work performed.
- Enter the Start and End times for the item on the contract line. The duration for the item on this line is calculated for you and entered into the Hours field. These fields are only enabled if the product's expression uses hours to determine how the product is billed or performed.
In the Quantity field, enter the number of units of the item on this contract line that will be used on the specified date. This field is disabled if quantity is not part of the product's calculation expression.
Note
Do not enter a quantity for any date/time period other than the date/time period specified on the contract line. Create a new contract line for each date/time period the item was used. The contract line Amount is calculated for you.
Enter the Price per unit of the item on the contract line. If a default price is loaded, you can override it if the product's setup allows override. If a range is specified for override, your new price must fall within that range.
Some lines can be zero-priced lines, meaning they represent activities/items which are required to satisfy the contract but for which no money is billed.
- If you want to apply a scheduled payment to this contract line, select the Payment Type associated with that scheduled payment.
- Enter any Notes you need to record about the contract line. Text entered in this field will appear on the work order associated with this line.
- In the Memo field, enter additional information about the contract line. This field is for internal use only and does not appear on work orders or the contract document.
The remaining fields will be variously enabled/disabled depending on the type of product you selected and the information needed by the calculation expression for the product to calculate the contract line amount. Respond as appropriate.
-
Use the Terms table to enter values for any user-defined terms in a product's calculated expression and/or calculated credit expression.
The Code and Data Type fields are automatically filled in when you enter a product with user-defined terms (you may need to click in the terms grid to make them appear).
The Data Type field determines what value you can enter in the Expression field.
In the Expression field, enter the value to substitute for the Code when it appears in a product expression.
- Use the Scheduled Payments table to record payments to be collected before the contract start date. For each scheduled payment:
- Select the Invoice Date associated with the scheduled payment. This date is used for the AR invoice date and the GL date when the contract is posted. This date is also used to build the invoice number when an invoice scheme is not used.
- Select the date the payment is Due. The default date is the date entered in the Invoice Date column.
- Select the Type of payment. Only payment types from scheduled payments can be used on settlement lines.
- Select the Amount of the payment.
- In the Memo field, enter any additional information about the scheduled payment.
- In the Payables table, enter Accounts Payable information for the contract. If the contract does not require you to make any payments, leave this table blank. For each payable:
- Select the AP Vendor.
- Select the AP Code to determine how the payable is processed.
- Select the Account to post to.
- Enter the Expression to use to calculate the payables amount.
- In the Memo field, enter any additional information about the payable.
- When you finish, save your changes.
Change contract to "Master" status
Once a contract has been signed and returned, you should update its electronic record. These updates allow the contract to be processed into work orders.
- In the Navigation pane, highlight the Contracts Processing > Contracts folder.
- In the HD view, locate and open the contract record.
- Enter the date the contract was Signed.
Note
A signed date is not required to change the contract status to "Master".
-
From the Status dropdown, select "Master".
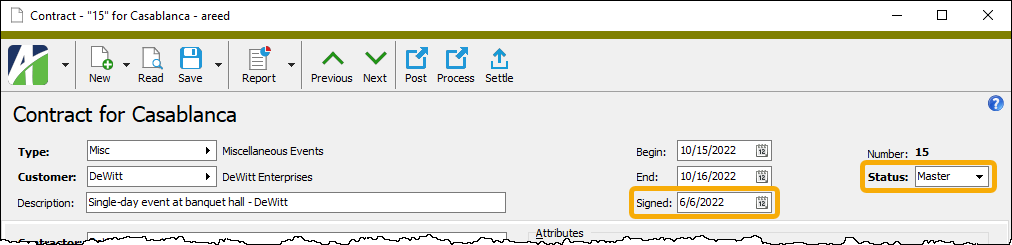
- Save your changes.
Post contracts
If a contract requires a prepayment or a deposit, it is likely that you received a check along with the signed contract. Typically, you would want to update the deferred revenue account with the credit (along with the bank deposit).
Contracts Processing automatically creates the AR invoice using the deferred revenue ARCode assigned to the payment type. If you want ActivityHD to create the AR invoice for deferred revenue, do the following:
- In the Navigation pane, highlight the Contracts Processing > Contracts folder.
- In the HD view, locate and open the contract record.
-
Verify that there is a scheduled payment line in the table for a deposit or prepayment.

-
Click
 (Post). The Post Contracts wizard starts.
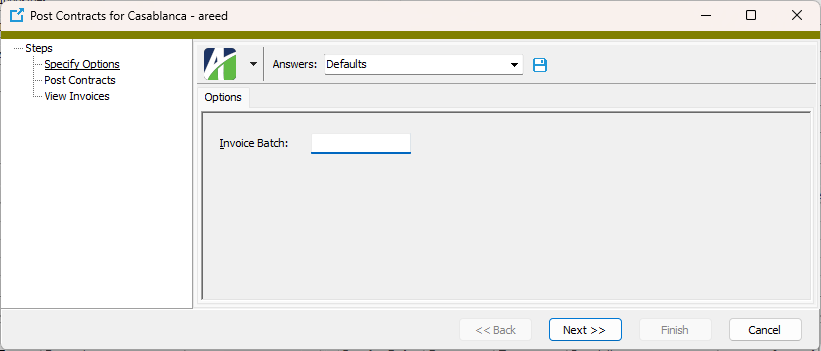
- Enter an Invoice Batch name.
-
Click Next >>. You are prompted to verify that you want to post the contract.
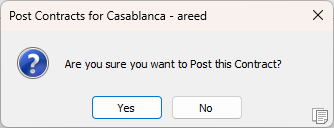
- Click Yes. ActivityHD posts the contract, creating the AR invoice. The invoice date is the invoice date from the scheduled payment and, likewise, the due date is the due date from the scheduled payment.
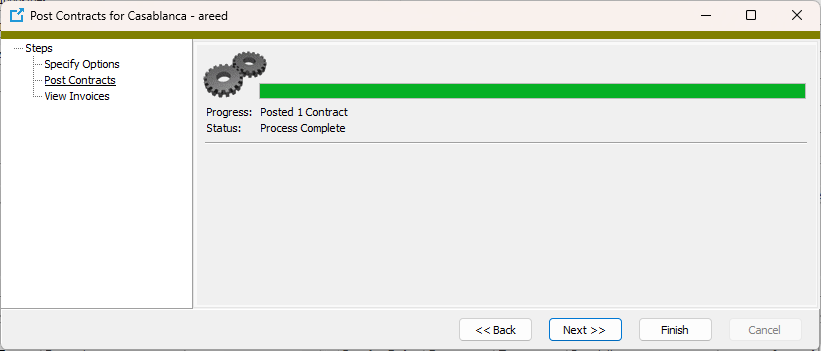
-
Click Next >>.
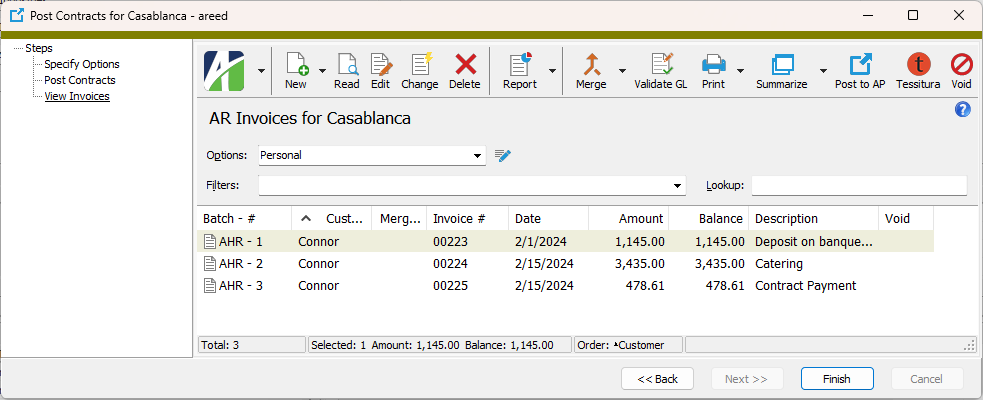
At this point, you can perform several actions on the invoice including viewing it, entering a receipt, merging it as a charge/open invoice, printing it, etc.
Note
If there are multiple prepayments on a contract (a "schedule"), all prepayments are posted at once to AR; however, each prepayment is posted with a different due date as specified on the lines of the Scheduled Payment table.
The Scheduled Payment table is locked once the contract status is set to "Master". If you need to change the payment schedule, first change the contract status back to "New" or "Ready", save the contract, make the needed changes, then set the status back to "Master" and save the contract again.
- Click Finish.
Process contracts
- In the Navigation pane, highlight the Contracts Processing > Contracts folder.
- In the HD view, locate and open the contract record.
-
Click
(Process). The Process Contracts wizard starts, prompting you to confirm that you want to process the contract.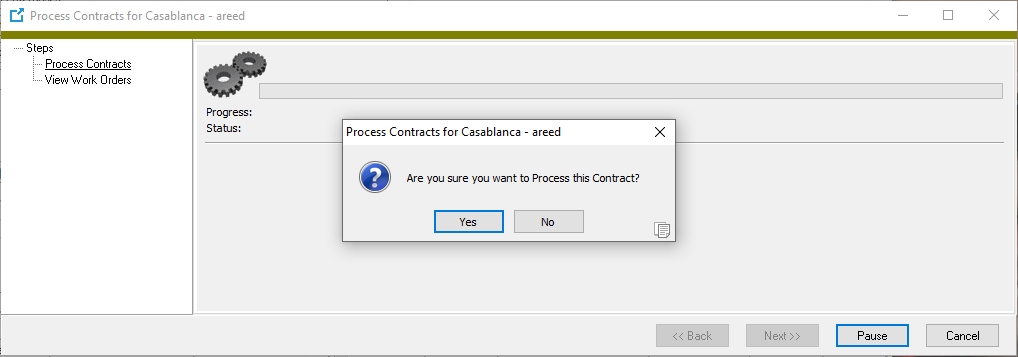
-
Click Yes.

-
Click Next >>. A work order is created for each unsettled line in the Lines table.
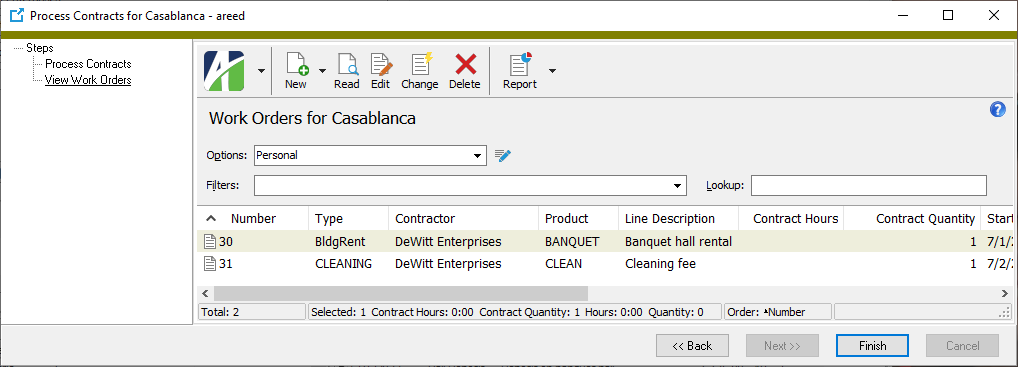
At this point, you can view and print the work order(s).
- Click Finish.
Enter manual work orders
- In the Navigation pane, highlight the Contracts Processing > Work Orders folder.
-
Click
. The New Work Order window opens.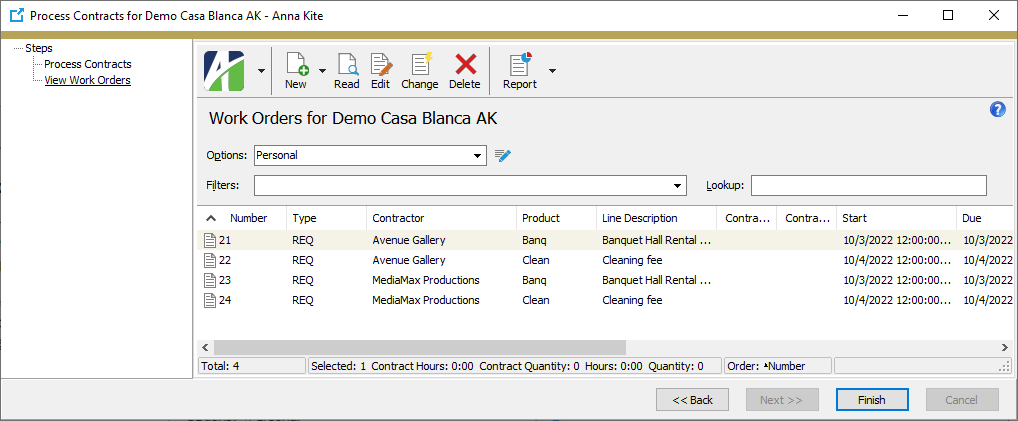
- Select the Contract associated with the work order.
- Select the Product associated with the work order. Additional fields are enabled depending on the product type.
- Select the Date that the work order is due.
- Enter the Start and End times for the work order. The duration of the work is calculated for you and entered in the Hours field.
- In the Quantity field, enter the number of units of the product/service that were used on the specified date.
- In the Price field, enter the price per unit of the product/service. If a default price is loaded, you can override it.
- If the work order has been completed, mark the Delivered checkbox.
- When you finish, save your changes.
Respond to the following fields as appropriate:
Settle contracts
- In the Navigation pane, highlight the Contracts Processing > Contracts folder.
- Start the Settle Contracts wizard.
- To settle all or a filtered subset of contracts:
- Right-click the Contracts folder and select Select and Settle Contracts from the shortcut menu.
On the Selection tab, define any filters to apply to the contracts.
- Click Next >>.
- Right-click the Contracts folder and select Select and Settle Contracts from the shortcut menu.
- To settle specifically selected contracts:
- In the HD view, select the contracts to settle. You can use Ctrl and/or Shift selection to select multiple contracts.
- Click
 .
.
- To settle a particular contract from the Contracts window:
- In the HD view, locate and double-click the contract you want to settle. The Contract window opens with the contract loaded.
- Click .
- To settle all or a filtered subset of contracts:
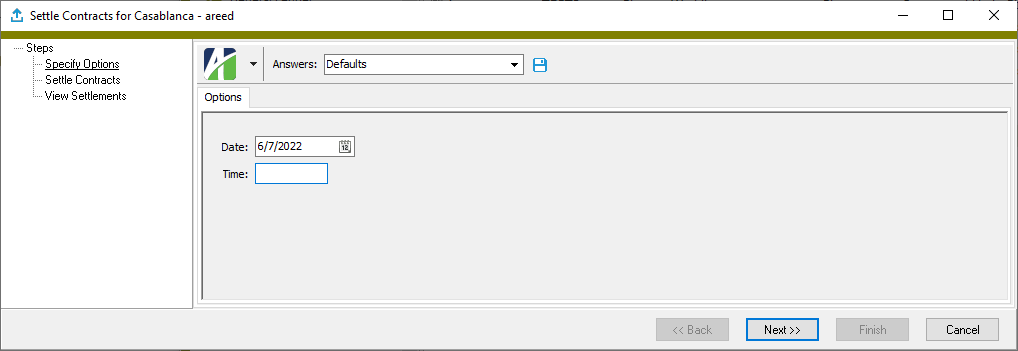
- On the Options tab, enter the cut-off Date through which to include delivered contract items (contract lines, contract lines with work orders, and manual work orders) in settlement processing.

- If you need to limit the items included in settlement processing to those delivered by a certain time on the cut-off day specified, enter the cut-off Time.
-
Click Next >>. The wizard prompts you to confirm that you want to settle the selected contract(s).
-
Click Yes.
-
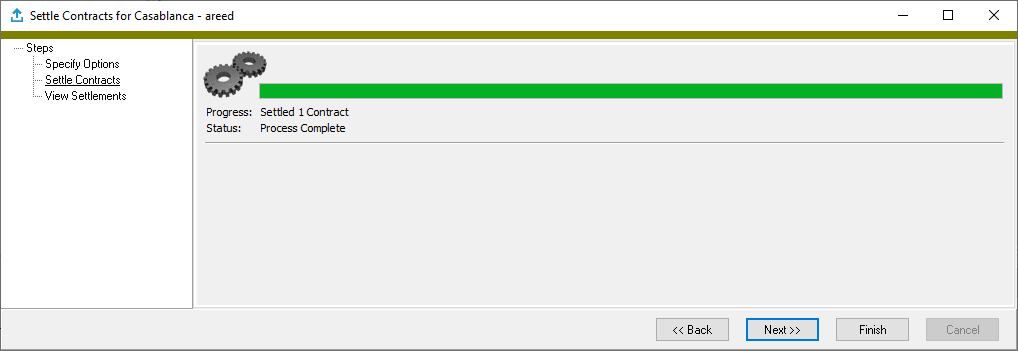
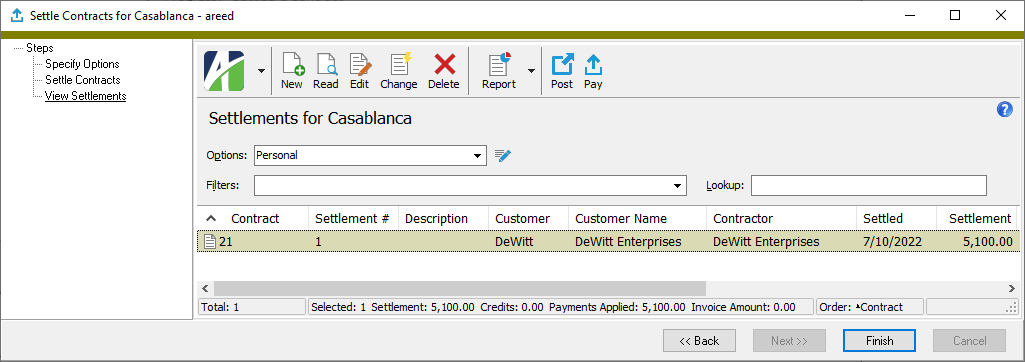
Click Next >>.

At this point, you can double-click the settlement(s) in the right pane to drill down to the Settlement window, delete a settlement, print the Settlements Listing, post settlements to AR, or process settlement payments through AP.
- When you finish viewing or working with the settlement(s), click Finish.
Post settlements to AR
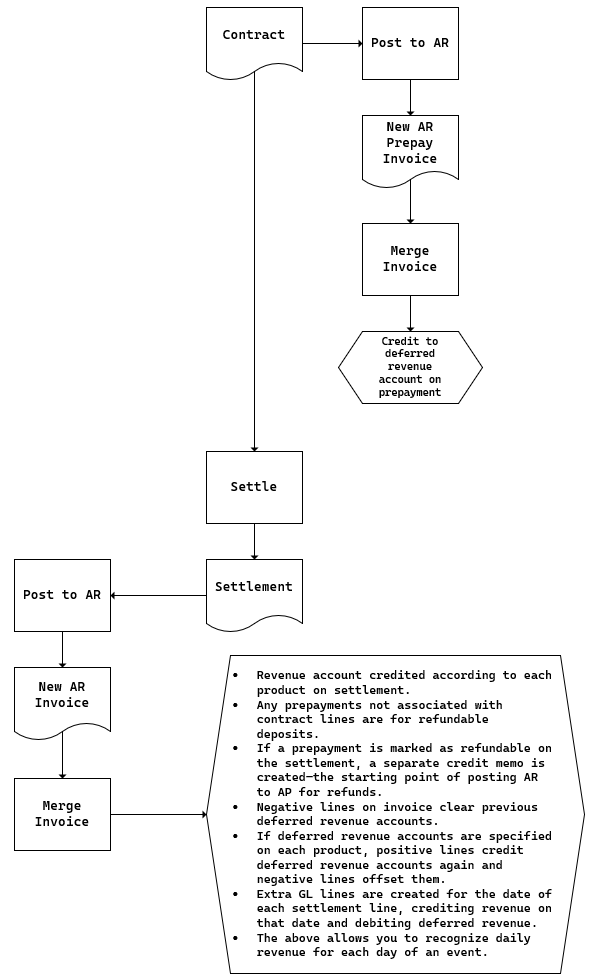
When you post settlements for a contract to Accounts Receivable, the settlement lines are moved into an AR invoice, each product is replaced with its corresponding ARCode, and attributes are updated from the contract.
Note
To use Post Settlements to AR to create invoices with extra GL entries, the corresponding settlements must contain valid extra GL accounts.
If you have a credit expression set up on a product to determine exactly how much revenue to recognize and how much to adjust deferred revenue, extra GL lines are created on the AR invoice. The extra GL lines default to a debit/credit entry to the same account which is indicated on the Invoice tab.
- In the Navigation pane, highlight the Contracts Processing > Settlements folder.
- Start the Post Settlements wizard.
- To post all or a filtered subset of settlements:
- Right-click the Settlements folder and select Select and Post Settlements from the shortcut menu.
On the Selection tab, define any filters to apply to the settlements.
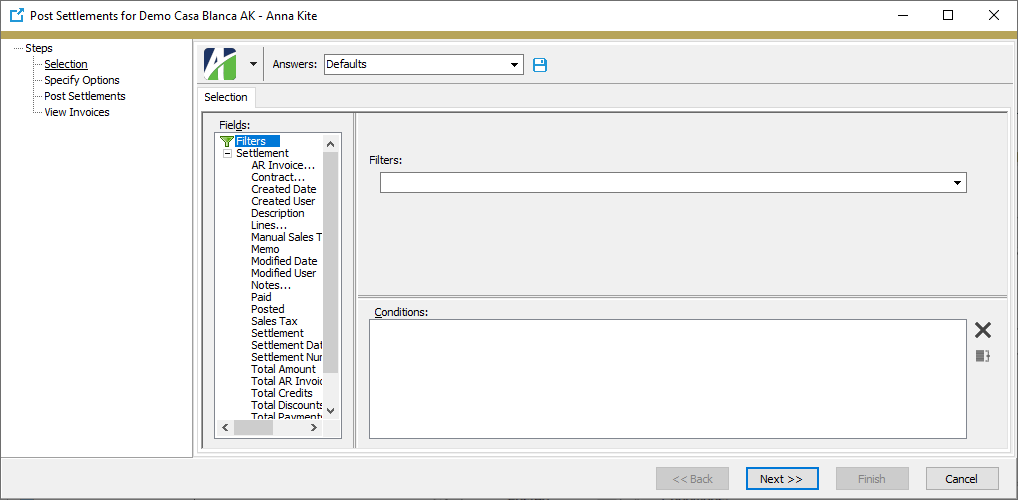
- Click Next >>.
- To post specifically selected settlements:
- In the HD view, select the settlements to post. You can use Ctrl and/or Shift selection to select multiple settlements.
- Click
 .
.
- To post a particular settlement from the Settlement window:
- In the HD view, locate and double-click the settlement you want to post. The Settlement window opens with the settlement loaded.
- Click .
- To post all or a filtered subset of settlements:
-
On the Options tab of the wizard, enter a name for the Invoice Batch.

-
Click Next >>. The wizard prompts you to confirm that you want to post the settlement batch.
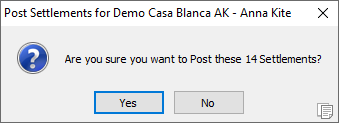
-
Click Yes.
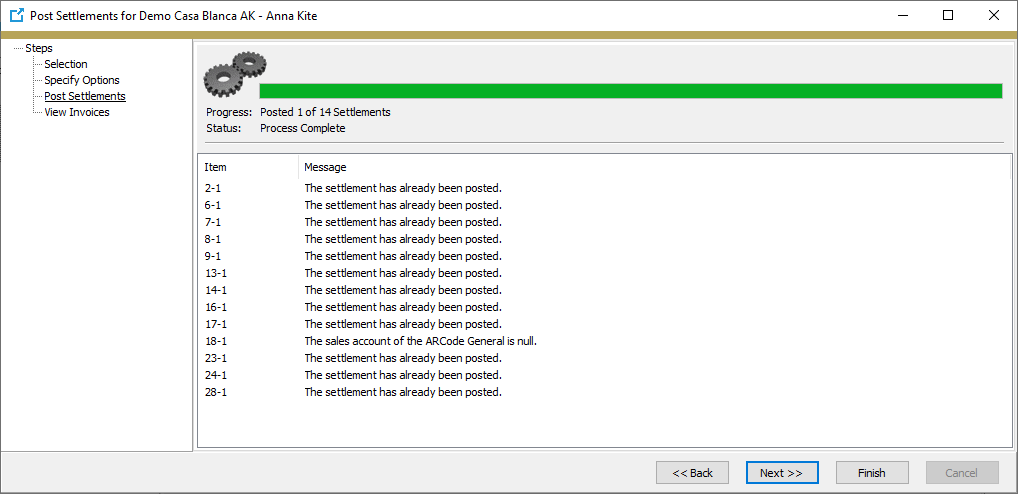
-
Click Next >>.
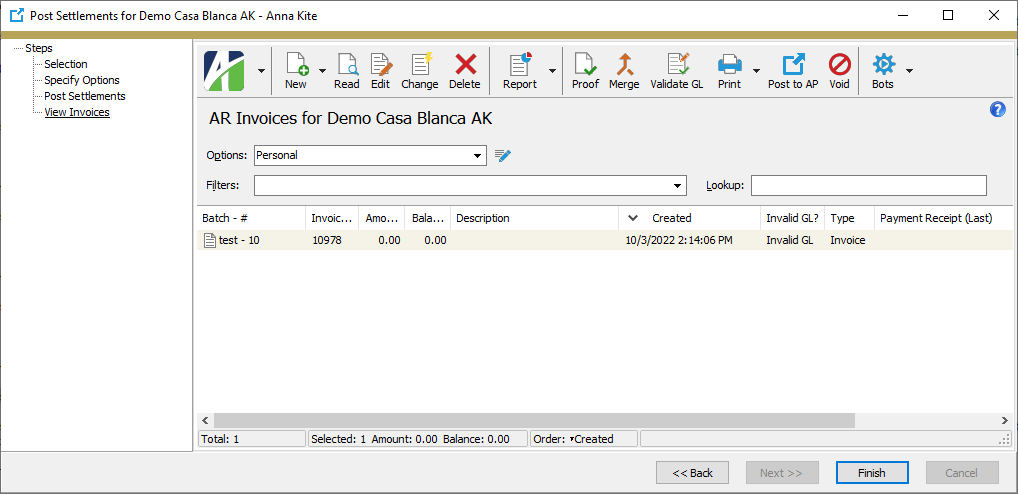
At this point, you can double-click the invoice(s) in the right pane to drill down to the AR Invoice window; delete an invoice; print the AR Invoices Listing and/or Tax Liability Report; and proof, merge, validate, print, summarize, or void AR invoices.
- When you finish viewing or working with the invoice(s), click Finish.
To correct problems with an AR invoice created in the Post Settlements to AR process, you can delete the invoice to reopen the settlement for changes. Otherwise, if there are no problems, you can merge the invoice and apply it towards the customer's unapplied receipts.
Post payments to AP
- In the Navigation pane, highlight the Contracts Processing > Settlements folder.
- Start the wizard.
- To pay all or a filtered subset of settlements:
- Right-click the Settlements folder and select Select and Pay Settlements from the shortcut menu.
On the Selection tab, define any filters to apply to the settlements.
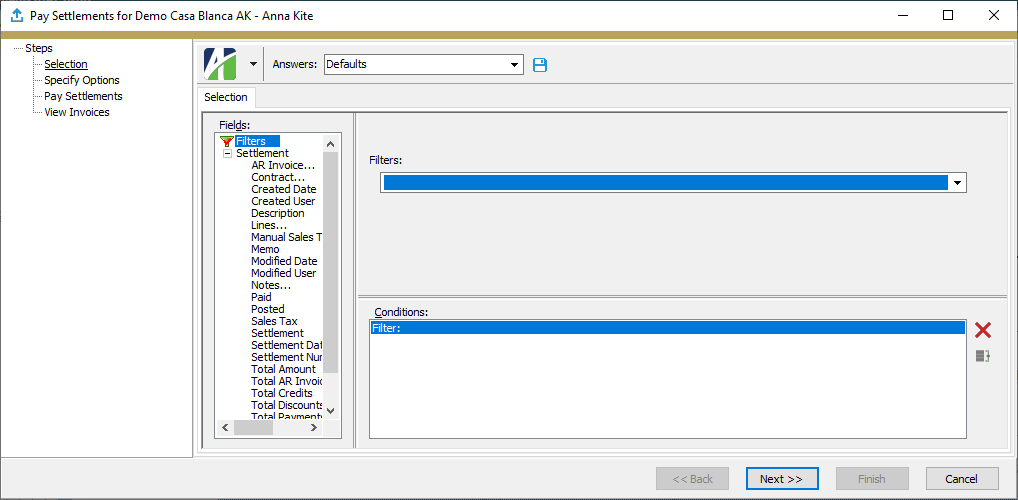
- Click Next >>.
- To pay specifically selected settlements:
- In the HD view, select the settlements to pay. You can use Ctrl and/or Shift selection to select multiple settlements.
- Click
 .
.
- To pay a particular settlement from the Settlement window:
- In the HD view, locate and double-click the settlement you want to pay. The Settlement window opens with the settlement loaded.
- Click .
- To pay all or a filtered subset of settlements:
-
On the Options tab of the wizard, enter a name for the Invoice Batch.
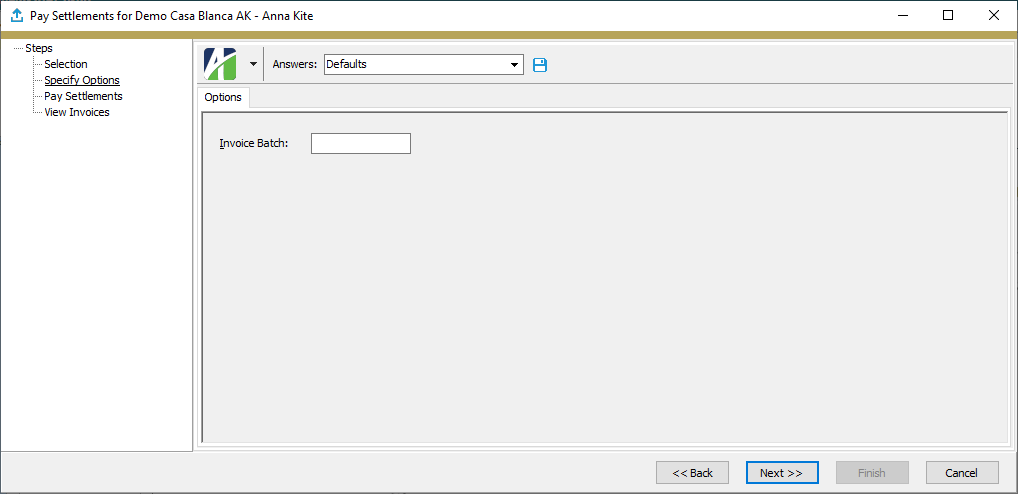
-
Click Next >>. The wizard prompts you to confirm that you want to pay the settlement batch.
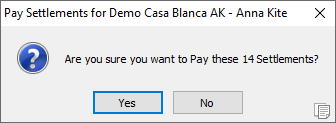
-
Click Yes. ActivityHD creates the AP invoices for payment and reports any errors encountered.
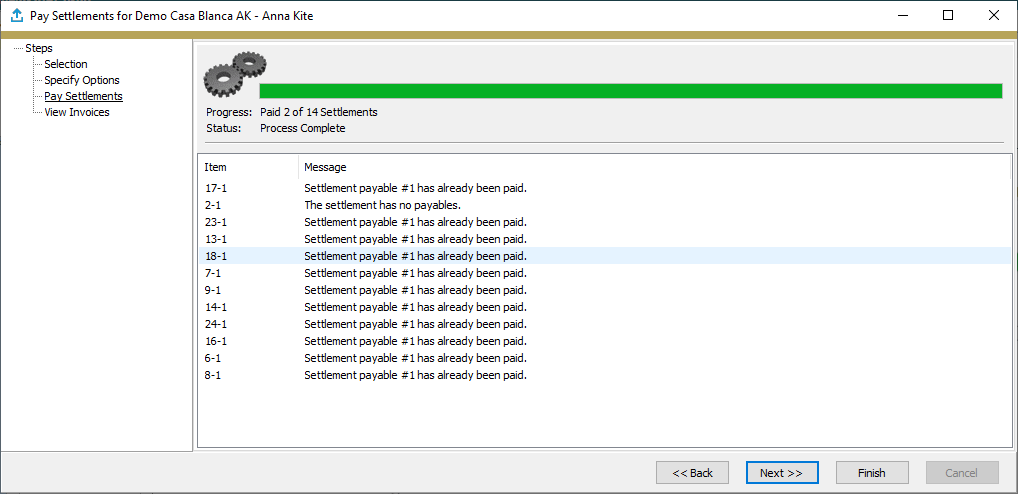
-
Click Next >>.
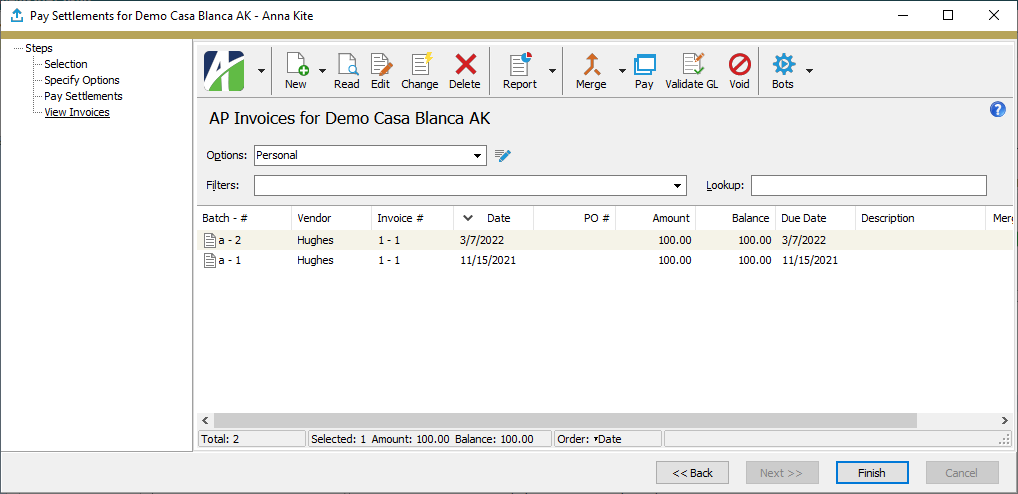
At this point, you can double-click the invoice(s) in the right pane to drill down to the AP Invoice window; delete an invoice; print the Invoices Listing; and proof, merge, pay, validate, or void invoices.
- When you finish viewing or working with the invoice(s), click Finish.
Merge AR invoices
An AR invoice must be merged in order to record the receivable. Moreover, invoices must be merged before you can apply payments to them. When an invoice is merged, a GL entry is created for subsequent posting to General Ledger. Although optional, AccountingWare recommends that you proof invoices before attempting to merge them. The same validation steps that are executed in the proof process are executed in the merge process. Any invoices that fail the validation process are not eligible for merging.
- In the Navigation pane, highlight the Accounts Receivable > Invoices folder.
- Start the Merge AR Invoices wizard.
- To merge all or a filtered subset of invoices:
- Right-click the Invoices folder and select Select and Merge from the shortcut menu.
- On the Selection tab, define any filters to apply to the invoices.
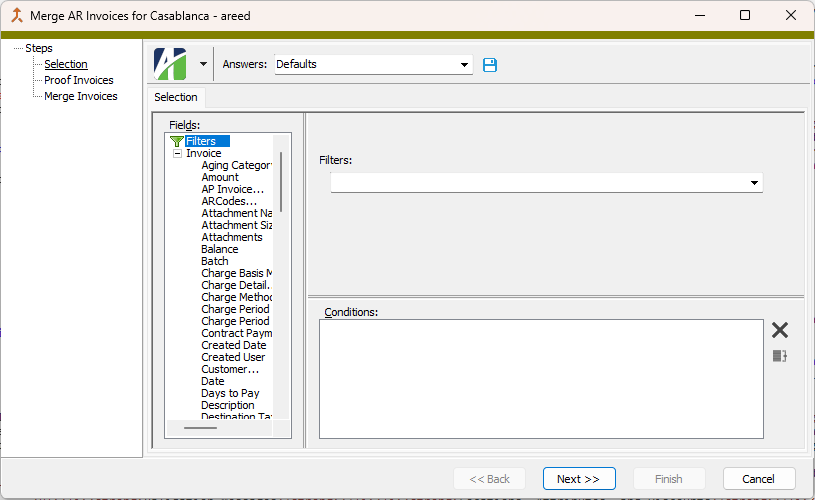
Tip
Apply the "New Invoices" filter to select unmerged invoices.
- Click Next >>.
- To merge specifically selected invoices:
In the HD view, select the invoices to include in the merge. You can use Ctrl and/or Shift selection to select multiple invoices.
Tip
Apply the "New Invoices" filter to see all unmerged invoices.
- Click
 .
.
- To merge a particular invoice from the AR Invoice window:
- In the HD view, locate and double-click the invoice you want to merge. The AR Invoice window opens with the invoice loaded.
- Click .
- To merge all or a filtered subset of invoices:
-
The wizard reports the number of invoices that are valid for merging.
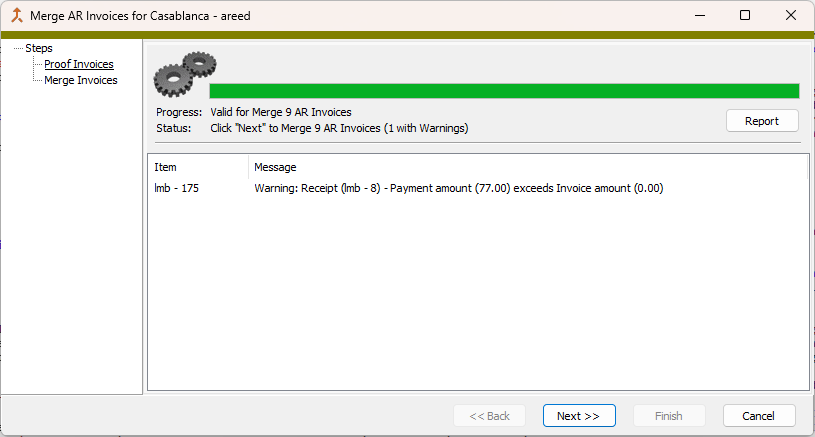
If the validation returns errors or warnings, ActivityHD lists the why.
If you want to view or print the Merge AR Invoices Proof Report, click Report. Otherwise, skip to step 10.
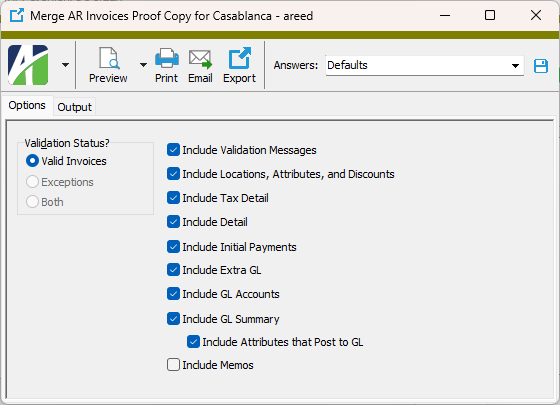
- On the Options tab in the Validation Status? field, select which invoices to include on the merge report. Your options are:
- Valid Invoices. Only shows the invoices that were merged on the report. This option is disabled if there are no valid invoices in your selection. This option is preselected and the other options are disabled if all the invoices are valid.
- Exceptions. Only shows the invoices that were not merged on the report. This option is disabled if there are no invalid invoices in your selection. This option is preselected and the other options are disabled if all the invoices are invalid.
- Both. Shows the invoices in your selection that were merged and those that were not merged on the report. This option is disabled if all the invoices are valid or if all the invoices are invalid.
- Ensure the checkboxes for the additional information you want to include on the report are marked. All checkboxes except Include Memos are marked by default. Your options include:
- Validation Messages
- Locations, Attributes, and Discounts
- Tax Detail
- Detail
- Initial Payments
- Extra GL
- GL Accounts
- GL Summary
- Attributes that Post to GL. This checkbox is enabled if the GL Summary checkbox is marked. Mark this checkbox to include attributes which post to GL in the "GL Summary" section of the report.
- Report Options. To include a section at the end of the report with the report settings used to produce the report, leave the checkbox marked. To produce the report without this information, clear the checkbox.
- Memos
- Select the Output tab.
- In the Design field, look up and select the report design to use.
- In the toolbar, click the icon for the type of output you want:
 - Provides access to two preview options.
- Preview - Click the icon or click the drop-down arrow and select Preview from the drop-down menu to view the report in the Crystal Reports viewer.
- Preview to PDF - Click the drop-down arrow next to the icon and select Preview to PDF to view the report in the PDF reader.
 - Opens the Print dialog so that you can select and configure a printer and then print a paper copy of the report.
 - Opens the dialog so that you can address and compose an email that the report will be attached to. For best results, ensure your email client is running before you attempt to send a report via email.
- - Opens the Export Report dialog so that you can save the report to a file. File types include Crystal Reports (.rpt), PDF (.pdf), Microsoft Excel (.xls), Microsoft Word (.doc), rich text (.rtf), and XML (.xml).
- When you finish with the Merge AR Invoices Proof Report, close the Merge AR Invoices Proof Copy dialog.
- Back in the Merge AR Invoices wizard, click Next >>. ActivityHD merges the invoices and reports its results.
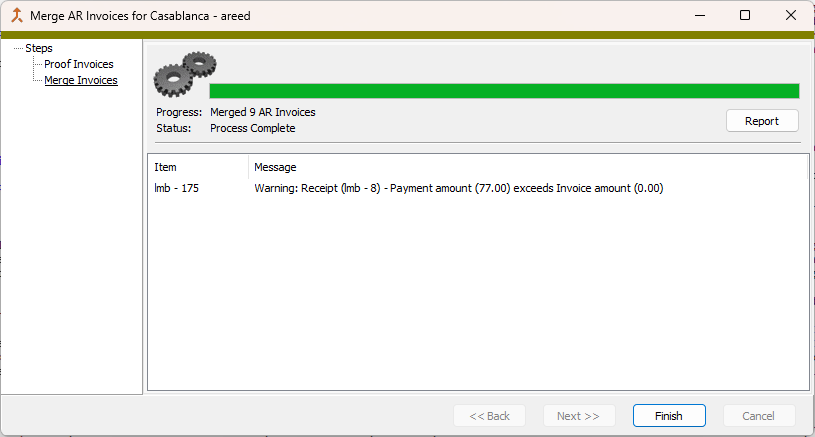
If desired, you can print or preview the proof report again, this time showing only the invoices which were successfully merged. To do so, click Report and repeat steps 4-9.
- Click Finish.
Create AR receipts
- In the Navigation pane, highlight the Accounts Receivable > Receipts folder.
- Click . The New Receipt window opens.
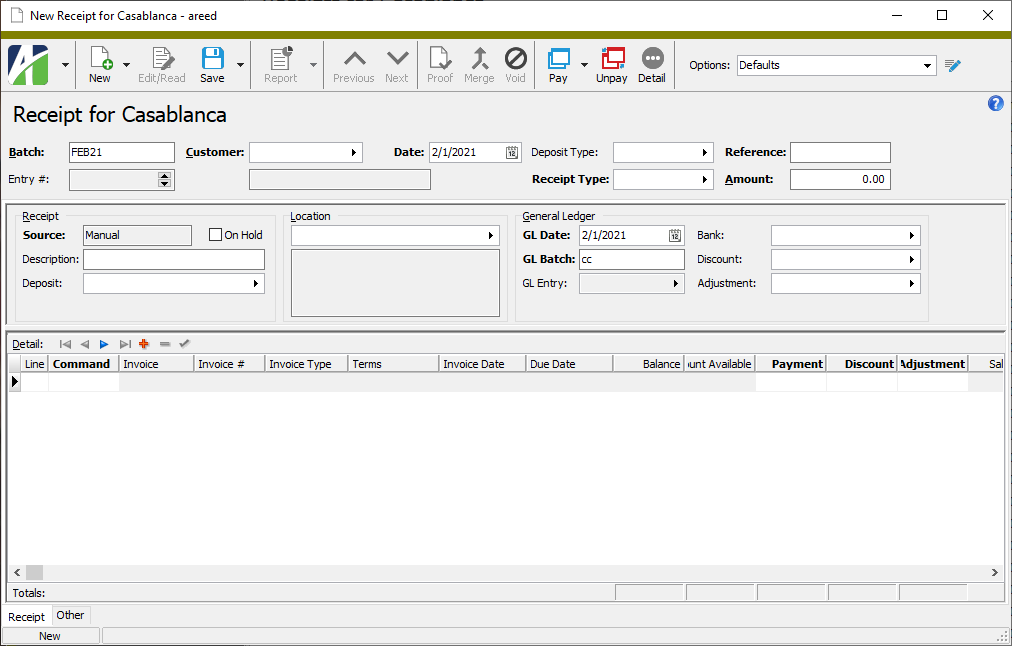
- Enter the name of the Batch to include the receipt in. The default batch name is the batch name from the last receipt you entered. Batches allow you to group multiple receipts for proofing and reporting.
- In the Customer field, select the customer to credit for this receipt. The customer must be a valid "payment customer".
- In the Date field, enter the date to post the receipt to the customer's account. The default date is the deposit date. The receipt date is used to calculate available discounts. This date is also used as the invoice date on invoices created when you enter an unapplied payment or miscellaneous receipt.
-
In the Deposit Type field, select the deposit type to associate with the receipt.
If the receipt is associated with a deposit, the deposit type helps ActivityHD determine the applicable deposit based on the deposit type and GL receipt date. If a deposit with "New" status already exists for the combination of deposit type and GL receipt date, that deposit is used on the receipt. If a deposit does not yet exist, ActivityHD creates it.
If, however, a deposit was created and assigned to the receipt, the deposit type defaults from the deposit record.
Note
If the deposit type is associated with only one receipt type, the Receipt Type field automatically loads that receipt type.
If you leave this field blank and specify a receipt type that has only one deposit type associated with it, this field automatically loads that deposit type.
If you enter a receipt type and subsequently enter a deposit type that is not associated with it, the Receipt Type field is blanked out and you will need to enter a compatible receipt type.
-
In the Receipt Type field, select the receipt type to associate with the receipt.
Note
If you select a "Zero Receipt" receipt type, the receipt must have a zero receipt amount before it can be saved.
-
In the Reference field, enter a note to help you identify the receipt. You can use up to 20 characters. If a default reference was specified on the receipt type you selected, this field defaults to that reference value.
Examples
For a check, you can use the check number as the reference.
For a cash payment, you might simply enter "CASH".
-
The Amount field can be automatically calculated by letting ActivityHD total the payment amounts from the Detail table. If this is what you want to do, accept the 0.00 entry.
Note
If both credit and debit invoices are selected for payment, the Pay and Pay Any commands pay all selected credit invoices first, then pay debit invoices up to the receipt amount entered.
If you enter a manual amount here and click the Pay button to select and pay multiple outstanding invoices, ActivityHD pays the invoices until the amount is exhausted, making a partial payment on the "last" invoice processed if need be, and leaving any remaining invoices unpaid.
If you leave the amount at 0.00 and click the Pay button to select and pay multiple outstanding invoices, ActivityHD pays all the selected invoices in full and updates this amount accordingly.
Note
You can save a receipt where the Amount field does not equal the total payments in the Detail table. ActivityHD issues a warning but allows you to save the receipt. However, you are not allowed to merge the receipt until the conflict is resolved.
- In the Receipt section, enter a Description of the receipt.
- You can assign a Deposit to a receipt in a couple of ways:
- Let ActivityHD assign the deposit based on the combination of deposit type and GL receipt date. If a deposit with a status of "New" exists that satisfies the deposit type-GL receipt date combination, ActivityHD assigns the receipt to that deposit. If such a deposit does not exist, ActivityHD creates one when you save the receipt.
- Create a deposit record first, then assign the receipt to the deposit by selecting it in the Deposit field.
- If you need to prevent the receipt from being merged immediately, mark the On Hold checkbox. If you are entering an unapplied payment or miscellaneous receipt, the resulting invoice is also flagged as "On Hold".
- The Location field defaults to the customer's default statement location. If you need to change the location, select a different location.
-
In the General Ledger section in the GL Date field, enter the date to post the receipt to the general ledger. If you selected a deposit to associate with the receipt, this field defaults to the GL date on the deposit. If you change the GL date here, the Deposit field is blanked out and ActivityHD assigns or creates a different deposit when the receipt is saved.
If the receipt does not have a deposit, this field defaults to the receipt date. The date can be changed until the receipt's GL entry is merged.
Note
"GL Date" access to the Receipts resource is required to access this field.
- If you did not specify a deposit type and did not specify a deposit, the GL Batch field is enabled. Enter the name of the batch to use for the GL entry when the receipt is merged. Receipts are summarized into different GL entries based on the batch name.
- If you did not specify a deposit type and did not specify a deposit, the Bank field is enabled. Enter the bank account to debit for the amount of the receipt.
- In the Discount field, select the account to debit with the total discount given. If none of the lines in the Detail table has a discount, this account is not needed. This field defaults to the discount account (if any) specified in the Options dialog box.
- In the Adjustment field, select the account to debit with the total adjustment amount. If none of the lines in the Detail table has an adjustment, this account is not needed. This field defaults to the adjustment account (if any) specified in the Options dialog box.
- In the Detail table, perform the steps for the type of transaction you need to record.
To enter a payment:
Tip
To quickly record payments in full for one or more invoices, click
 to open the Find dialog box for invoices, select the invoices to pay, and click OK. The detail lines for the selected invoices load in the Detail table.
- From the Command drop-down list, select "Payment".
- In the Invoice column, select the invoice that is being paid on the receipt.
- The Payment column defaults to the full amount of the invoice less any available discounts up to any amount entered in the Amount field. If you need to record a partial payment, enter that amount here.
- The Discount column defaults to the discount available on the invoice. If you need to override this amount, enter the discount amount to credit to the customer's account for the invoice.
If you need to credit the customer's account for an adjustment, enter the amount of the adjustment in the Adjustment column. To adjust the invoice balance down, enter a positive adjustment amount. To adjust the balance up, enter a negative adjustment amount.
Note
You might want to adjust the balance up if the payment amount exceeds the invoice balance by a nominal amount.
To enter an unapplied payment:
- From the Command drop-down list, select "Unapplied".
- The Invoice # defaults to a number of the format U-yyyymmdd unless the invoice scheme for the invoice type you select overrides it. If you need to enter a different invoice number, enter the number in this column.
- In the Invoice Type column, select the invoice type to assign to the unapplied payment.
- The Invoice Date defaults to the receipt date. If you need to override the default invoice date, enter the date in this column.
- The Due Date defaults from the invoice date. If you need to override the default due date, enter the date in this column.
- In the Payment column, enter the amount of the unapplied payment.
- The default Invoice Description is set in the Options dialog box. If it was not or if you need to override the default description, enter the invoice description in this column.
To enter a miscellaneous receipt:
- From the Command drop-down list, select "Miscellaneous".
- The Invoice # defaults to a number of the format M-yyyymmdd unless the invoice scheme for the invoice type you select overrides it. If you need to enter a different invoice number, enter the number in this column.
- In the Invoice Type column, select the invoice type to assign to the miscellaneous payment.
- The Invoice Date defaults to the receipt date. If you need to override the default invoice date, enter the date in this column.
- In the Payment column, enter the amount of the miscellaneous payment including any sales tax amount.
ActivityHD calculates the Sales Tax amount based on the aggregate tax rate in effect for the invoice tax entity on the invoice date. If the amount of tax collected from the customer is different from the calculated amount, enter the actual amount collected in this column.
Note
The sales tax amount is backed off the payment amount. If you enter a payment amount of $500.00 and the aggregate tax rate is 7%, the effective payment amount is $467.29 with a tax of $32.71.
- The default ARCode can be set in the Options dialog box. If it was not or if you need to override the default ARCode, select it in this column. The ARCode categorizes this detail line for reporting purposes and provides information for determining GL accounts and for sales tax calculations.
- The default Invoice Description is set in the Options dialog box. If it was not or if you need to override the default description, enter the invoice description in this column.
- The default Sales Account is derived from masks on the ARCode, attribute items, the invoice customer, the invoice customer class, and from the sales account mask specified in the Options dialog box. The sales account is credited with the invoice amount for this detail line when the receipt is merged to GL. If you need to override the default account number or fill in missing digits, select the account number in this column. Manual entries display in purple.
- Repeat step 19 for each detail line you need to enter.
- When you finish, save the receipt.
In the instructions which follow, steps for controls which may be hidden due to settings in the Options dialog box appear in green.