Follow the link for the report you want to view help for.
Bank Accounts Listing
Purpose
The Bank Accounts Listing provides a list of the bank accounts defined in Bank Reconciliation.
Content
For each bank account included on the report, the listing shows:
- description
- bank name
- bank account number
- account type
- whether the bank account has been flagged as obsolete.
In addition, you can include one or more of the following:
- EFT information
- timestamps
- memos
- custom fields.
The following total appears on the report:
- record count.
Print the report
- In the Navigation pane, highlight the Bank Reconciliation > Setup > Bank Accounts folder.
- Start the report set-up wizard.
- To report on all or a filtered subset of bank accounts:
- Right-click the Bank Accounts folder and select Select and Report > Bank Accounts Listing from the shortcut menu.
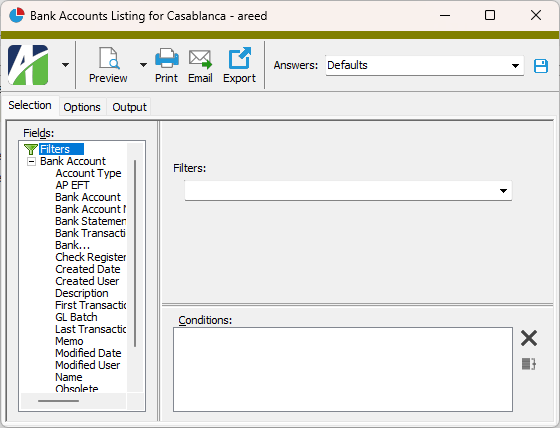
- On the Selection tab, define any filters to apply to the data.
- To report on specifically selected bank accounts:
- In the HD view, select the bank accounts to include on the report. You can use Ctrl and/or Shift selection to select multiple records.
- Click
 .
.
- To report on a particular bank account from the Bank Account window:
- In the HD view, locate and double-click the bank account to report on. The Bank Account window opens with the bank account loaded.
- Click .
- To report on all or a filtered subset of bank accounts:
- Select the Options tab.
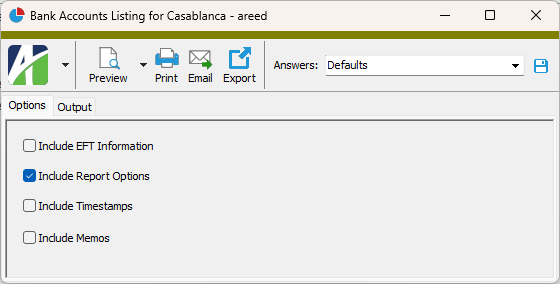
- Mark the checkbox(es) for the additional information to include:
- EFT Information
- Report Options. To include a section at the end of the report with the report settings used to produce the report, leave the checkbox marked. To produce the report without this information, clear the checkbox.
- Timestamps
- Memos
- Custom Fields (only visible if custom fields are set up)
- Select the Output tab.
- In the Design field, look up and select the report design to use.
- In the toolbar, click the icon for the type of output you want:
 - Provides access to two preview options.
- Preview - Click the icon or click the drop-down arrow and select Preview from the drop-down menu to view the report in the Crystal Reports viewer.
- Preview to PDF - Click the drop-down arrow next to the icon and select Preview to PDF to view the report in the PDF reader.
 - Opens the Print dialog so that you can select and configure a printer and then print a paper copy of the report.
 - Opens the dialog so that you can address and compose an email that the report will be attached to. For best results, ensure your email client is running before you attempt to send a report via email.
 - Opens the Export Report dialog so that you can save the report to a file. File types include Crystal Reports (.rpt), PDF (.pdf), Microsoft Excel (.xls), Microsoft Word (.doc), rich text (.rtf), and XML (.xml).
Data extensions
The following data extension is available for the report:
- Bank accounts
Bank Contacts Listing
Purpose
The Bank Contacts Listing provides a list of bank contacts recorded in Bank Reconciliation.
Content
For each bank contact included on the report, the listing shows:
- bank name
- job title
- phone number
- mail stop
- email address.
In addition, you can include one or more of the following:
- name and phone number detail
- timestamps
- memos
- custom fields.
The following total appears on the report:
- record count.
Print the report
- In the Navigation pane, highlight the Bank Reconciliation > Setup > Contacts folder.
- Start the report set-up wizard.
- To report on all or a filtered subset of bank contacts:
- Right-click the Contacts folder and select Select and Report > Bank Contacts Listing from the shortcut menu.
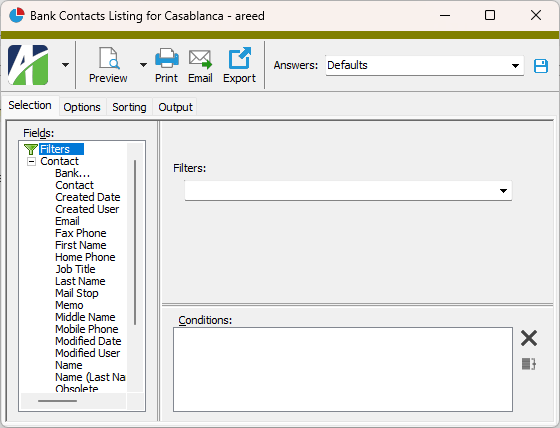
- On the Selection tab, define any filters to apply to the data.
- To report on specifically selected bank contacts:
- In the HD view, select the bank contacts to include on the report. You can use Ctrl and/or Shift selection to select multiple records.
- Click .
- To report on a particular bank contact from the Bank Contact window:
- In the HD view, locate and double-click the bank contact to report on. The Bank Contact window opens with the bank contact loaded.
- Click .
- To report on all or a filtered subset of bank contacts:
- Select the Options tab.

- Mark the checkbox(es) for the additional information to include:
- Name and Phone Number Detail
- Report Options. To include a section at the end of the report with the report settings used to produce the report, leave the checkbox marked. To produce the report without this information, clear the checkbox.
- Timestamps
- Memos
- Custom Fields (only visible if custom fields are set up)
- In the Display Name field, select the order in which to present contact names on the listing. Your options are:
- First Name Last Name
- Last Name, First Name
- Select the Sorting tab.
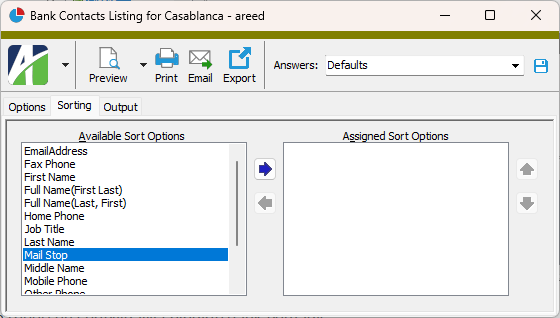
- In the Available Sort Options list box, highlight the field(s) to sort the report by, then click
 to move your selection(s) to the Assigned Sort Options list box.
 - If you selected multiple sort fields, use
 and
and  to arrange the sort fields in the order you want them applied.
 - Select the Output tab.
- In the Design field, look up and select the report design to use.
- In the toolbar, click the icon for the type of output you want:
- - Provides access to two preview options.
- Preview - Click the icon or click the drop-down arrow and select Preview from the drop-down menu to view the report in the Crystal Reports viewer.
- Preview to PDF - Click the drop-down arrow next to the icon and select Preview to PDF to view the report in the PDF reader.
- - Opens the Print dialog so that you can select and configure a printer and then print a paper copy of the report.
- - Opens the dialog so that you can address and compose an email that the report will be attached to. For best results, ensure your email client is running before you attempt to send a report via email.
- - Opens the Export Report dialog so that you can save the report to a file. File types include Crystal Reports (.rpt), PDF (.pdf), Microsoft Excel (.xls), Microsoft Word (.doc), rich text (.rtf), and XML (.xml).
Data extensions
The following data extension is available for the report:
- Bank contacts
Bank Statements Listing
Purpose
The Bank Statements Listing provides a list of bank statements recorded in Bank Reconciliation.
Content
For each bank statement included on the report, the listing shows:
- bank account name and statement date
- description
- GL date
- whether the statement is closed
- a banner noting the difference in the GL balance and the bank balance, if the statement is not reconciled.
In addition, you can include one or more of the following:
- statement and reconciliation totals
- unmerged entries not on hold
- outstanding detail
- reconciled detail
- timestamps
- memos
- custom fields.
The following totals appear on the report:
- record count
- statement totals (optional)
- GL reconcilation totals (optional)
- outstanding transaction count (optional)
- outstanding transaction total (optional)
- reconciled transaction count (optional)
- reconciled debits total (optional)
- reconciled credits total (optional).
Print the report
- In the Navigation pane, highlight the Bank Reconciliation > Statements folder.
- Start the report set-up wizard.
- To report on all or a filtered subset of bank statements:
- Right-click the Statements folder and select Select and Report > Bank Statements Listing from the shortcut menu.
- On the Selection tab, define any filters to apply to the data.
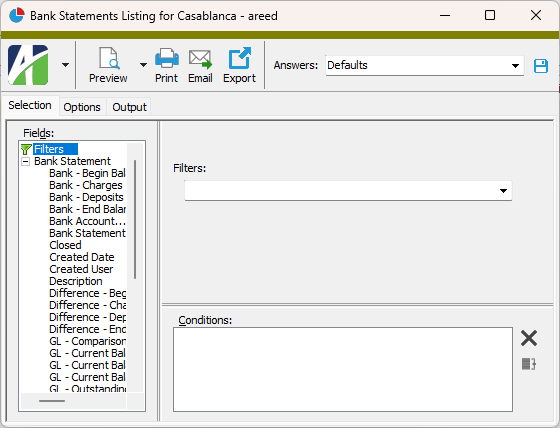
- To report on specifically selected bank statements:
- In the HD view, select the bank statements to include on the report. You can use Ctrl and/or Shift selection to select multiple records.
- Click .
- To report on a particular bank statement from the Bank Statement window:
- In the HD view, locate and double-click the bank statement to report on. The Bank Statement window opens with the bank statement loaded.
- Click .
- To report on all or a filtered subset of bank statements:
- Select the Options tab.
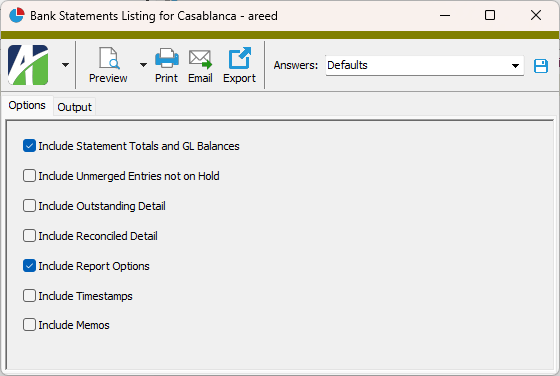
- Mark the checkbox(es) for the additional information to include:
- Statement and Reconciliation Totals
- Unmerged Entries not on Hold
- Outstanding Detail
- Reconciled Detail
- Report Options. To include a section at the end of the report with the report settings used to produce the report, leave the checkbox marked. To produce the report without this information, clear the checkbox.
- Timestamps
- Memos
- Custom Fields (only visible if custom fields are set up)
- Select the Output tab.
- In the Design field, look up and select the report design to use.
- In the toolbar, click the icon for the type of output you want:
- - Provides access to two preview options.
- Preview - Click the icon or click the drop-down arrow and select Preview from the drop-down menu to view the report in the Crystal Reports viewer.
- Preview to PDF - Click the drop-down arrow next to the icon and select Preview to PDF to view the report in the PDF reader.
- - Opens the Print dialog so that you can select and configure a printer and then print a paper copy of the report.
- - Opens the dialog so that you can address and compose an email that the report will be attached to. For best results, ensure your email client is running before you attempt to send a report via email.
- - Opens the Export Report dialog so that you can save the report to a file. File types include Crystal Reports (.rpt), PDF (.pdf), Microsoft Excel (.xls), Microsoft Word (.doc), rich text (.rtf), and XML (.xml).
Data extensions
The following data extensions are available for the report:
- Bank statements
- Transactions
Bank Transactions Listing
Purpose
The Bank Transactions Listing provides a list of the bank transactions recorded in Bank Reconciliation.
Content
For each bank transaction included on the report, the listing shows:
- entry number
- bank account name
- transaction date
- reference
- description
- statement date
- whether the transaction is voided
- if a debit, the debit amount
- if a credit, the credit amount.
In addition, you can include one or more of the following:
- reconciliation detail (date reconciled, date cleared, user who reconciled)
- source and positive pay detail (batch - entry number - line number for GL entry, GL account, source package, source type, and record identifier [format depends on source type])
- timestamps
- memos
- custom fields.
The following totals appear on the report:
- grand totals.
Print the report
- In the Navigation pane, highlight the Bank Reconciliation > Transactions folder.
- Start the report set-up wizard.
- To report on all or a filtered subset of bank transactions:
- Right-click the Transactions folder and select Select and Report > Bank Transactions Listing from the shortcut menu.
- On the Selection tab, define any filters to apply to the data.

- To report on specifically selected bank transactions:
- In the HD view, select the bank transactions to include on the report. You can use Ctrl and/or Shift selection to select multiple records.
- Click .
- To report on a particular bank transaction from the Bank Transaction window:
- In the HD view, locate and double-click the bank transaction to report on. The Bank Transaction window opens with the bank transaction loaded.
- Click .
- To report on all or a filtered subset of bank transactions:
- Select the Options tab.
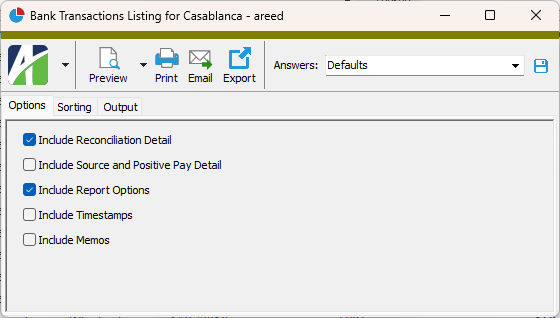
- Mark the checkbox(es) for the additional information to include:
- Reconciliation Detail
- Source and Positive Pay Detail
- Report Options. To include a section at the end of the report with the report settings used to produce the report, leave the checkbox marked. To produce the report without this information, clear the checkbox.
- Timestamps
- Memos
- Custom Fields (only visible if custom fields are set up)
- Select the Sorting tab.
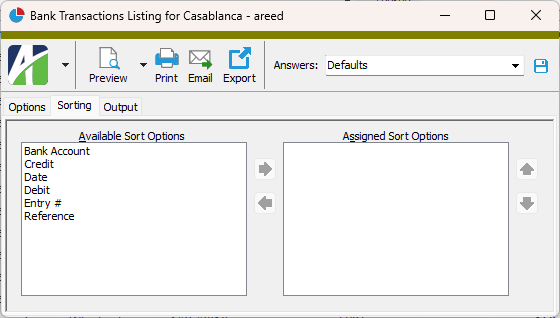
- In the Available Sort Options list box, highlight the field(s) to sort the report by, then click to move your selection(s) to the Assigned Sort Options list box.
- If you selected multiple sort fields, use and to arrange the sort fields in the order you want them applied.
- Select the Output tab.
- In the Design field, look up and select the report design to use.
- In the toolbar, click the icon for the type of output you want:
- - Provides access to two preview options.
- Preview - Click the icon or click the drop-down arrow and select Preview from the drop-down menu to view the report in the Crystal Reports viewer.
- Preview to PDF - Click the drop-down arrow next to the icon and select Preview to PDF to view the report in the PDF reader.
- - Opens the Print dialog so that you can select and configure a printer and then print a paper copy of the report.
- - Opens the dialog so that you can address and compose an email that the report will be attached to. For best results, ensure your email client is running before you attempt to send a report via email.
- - Opens the Export Report dialog so that you can save the report to a file. File types include Crystal Reports (.rpt), PDF (.pdf), Microsoft Excel (.xls), Microsoft Word (.doc), rich text (.rtf), and XML (.xml).
Data extensions
The following data extension is available for the report:
- Transactions
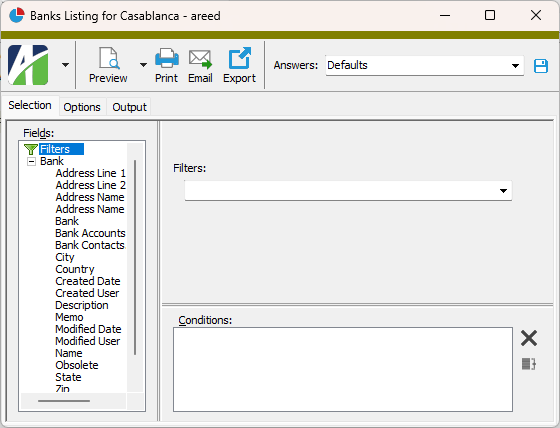
Banks Listing
Purpose
The Banks Listing provides a list of the banks defined in Bank Reconciliation.
Content
For each bank included on the report, the listing shows:
- description
- whether the bank has been flagged as obsolete.
In addition, you can include one or more of the following:
- address information
- contacts
- timestamps
- memos
- custom fields.
The following total appears on the report:
- record count.
Print the report
- In the Navigation pane, highlight the Bank Reconciliation > Setup > Banks folder.
- Start the report set-up wizard.
- To report on all or a filtered subset of banks:
- Right-click the Banks folder and select Select and Report > Banks Listing from the shortcut menu.
- On the Selection tab, define any filters to apply to the data.
- To report on specifically selected banks:
- In the HD view, select the banks to include on the report. You can use Ctrl and/or Shift selection to select multiple records.
- Click .
- To report on a particular bank from the Bank window:
- In the HD view, locate and double-click the bank to report on. The Bank window opens with the bank loaded.
- Click .
- To report on all or a filtered subset of banks:
- Select the Options tab.
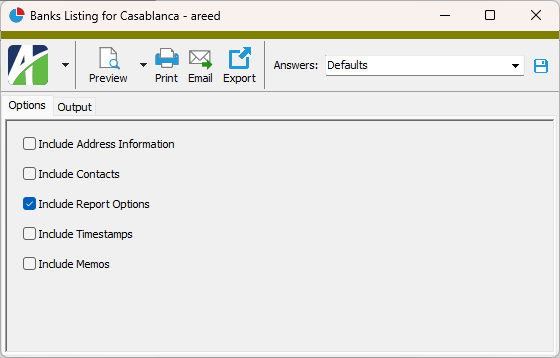
- Mark the checkbox(es) for the additional information to include:
- Address Information
- Contacts
- Report Options. To include a section at the end of the report with the report settings used to produce the report, leave the checkbox marked. To produce the report without this information, clear the checkbox.
- Timestamps
- Memos
- Custom Fields (only visible if custom fields are set up)
- Select the Output tab.
- In the Design field, look up and select the report design to use.
- In the toolbar, click the icon for the type of output you want:
- - Provides access to two preview options.
- Preview - Click the icon or click the drop-down arrow and select Preview from the drop-down menu to view the report in the Crystal Reports viewer.
- Preview to PDF - Click the drop-down arrow next to the icon and select Preview to PDF to view the report in the PDF reader.
- - Opens the Print dialog so that you can select and configure a printer and then print a paper copy of the report.
- - Opens the dialog so that you can address and compose an email that the report will be attached to. For best results, ensure your email client is running before you attempt to send a report via email.
- - Opens the Export Report dialog so that you can save the report to a file. File types include Crystal Reports (.rpt), PDF (.pdf), Microsoft Excel (.xls), Microsoft Word (.doc), rich text (.rtf), and XML (.xml).
Data extensions
The following data extension is available for the report:
- Banks
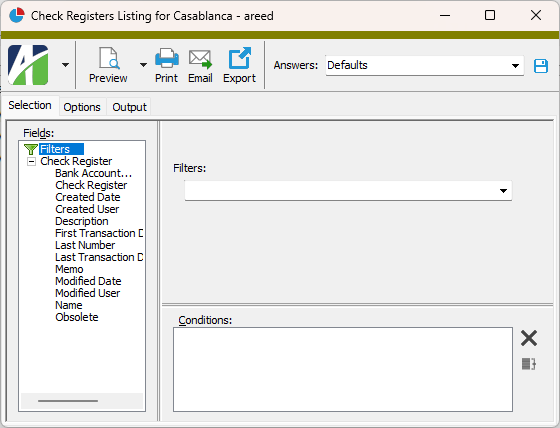
Check Registers Listing
Purpose
The Check Registers Listing provides a list of the check registers defined in Bank Reconciliation.
Content
For each check register included on the report, the listing shows:
- description
- bank account name
- last check number used.
In addition, you can include one or more of the following:
- register control detail (GL account, report source, report design)
- timestamps
- memos
- custom fields.
The following total appears on the report:
- record count.
Print the report
- In the Navigation pane, highlight the Bank Reconciliation > Setup > Bank Registers folder.
- Start the report set-up wizard.
- To report on all or a filtered subset of check registers:
- Right-click the Bank Registers folder and select Select and Report > Check Registers Listing from the shortcut menu.
- On the Selection tab, define any filters to apply to the data.
- To report on specifically selected check registers:
- In the HD view, select the check registers to include on the report. You can use Ctrl and/or Shift selection to select multiple records.
- Click .
- To report on a particular check register from the Check Register window:
- In the HD view, locate and double-click the check register to report on. The Check Register window opens with the check register loaded.
- Click .
- To report on all or a filtered subset of check registers:
- Select the Options tab.
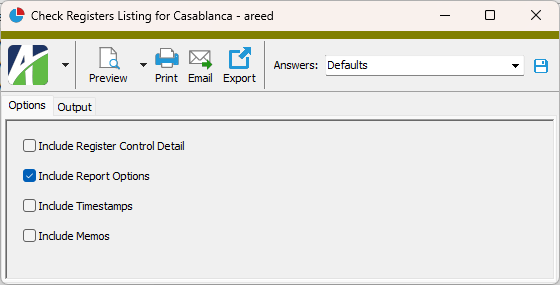
- Mark the checkbox(es) for the additional information to include:
- Register Control Detail
- Report Options. To include a section at the end of the report with the report settings used to produce the report, leave the checkbox marked. To produce the report without this information, clear the checkbox.
- Timestamps
- Memos
- Custom Fields (only visible if custom fields are set up)
- Select the Output tab.
- In the Design field, look up and select the report design to use.
- In the toolbar, click the icon for the type of output you want:
- - Provides access to two preview options.
- Preview - Click the icon or click the drop-down arrow and select Preview from the drop-down menu to view the report in the Crystal Reports viewer.
- Preview to PDF - Click the drop-down arrow next to the icon and select Preview to PDF to view the report in the PDF reader.
- - Opens the Print dialog so that you can select and configure a printer and then print a paper copy of the report.
- - Opens the dialog so that you can address and compose an email that the report will be attached to. For best results, ensure your email client is running before you attempt to send a report via email.
- - Opens the Export Report dialog so that you can save the report to a file. File types include Crystal Reports (.rpt), PDF (.pdf), Microsoft Excel (.xls), Microsoft Word (.doc), rich text (.rtf), and XML (.xml).
Data extensions
The following data extension is available for the report:
- Check registers
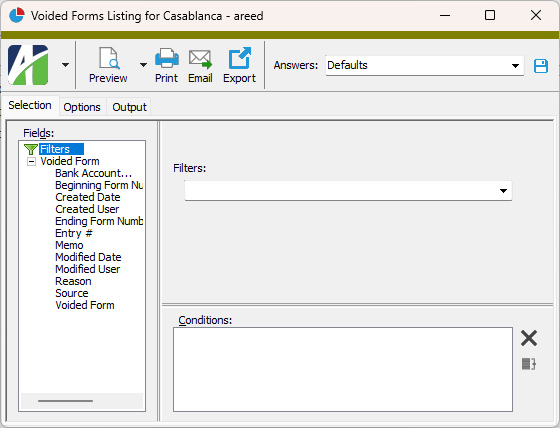
Voided Forms Listing
Purpose
The Voided Forms Listing provides a list of the voided check forms recorded in Bank Reconciliation.
Content
For each range of voided check forms included on the report, the listing shows:
- entry number
- number of the first voided check in the range
- number of the last voided check in the range
- source
- reason the checks were voided.
In addition, you can include one or more of the following:
- timestamps
- memos
- custom fields.
Print the report
- In the Navigation pane, highlight the Bank Reconciliation > Voided Forms folder.
- Start the report set-up wizard.
- To report on all or a filtered subset of voided forms:
- Right-click the Voided Forms folder and select Select and Report > Voided Forms Listing from the shortcut menu.
- On the Selection tab, define any filters to apply to the data.
- To report on specifically selected voided forms:
- In the HD view, select the voided forms to include on the report. You can use Ctrl and/or Shift selection to select multiple records.
- Click .
- To report on a particular voided form record from the Voided Form window:
- In the HD view, locate and double-click the voided form record to report on. The Voided Form window opens with the voided form record loaded.
- Click .
- To report on all or a filtered subset of voided forms:
- Select the Options tab.

- Mark the checkbox(es) for the additional information to include:
- Report Options. To include a section at the end of the report with the report settings used to produce the report, leave the checkbox marked. To produce the report without this information, clear the checkbox.
- Timestamps
- Memos
- Custom Fields (only visible if custom fields are set up)
- Select the Output tab.
- In the Design field, look up and select the report design to use.
- In the toolbar, click the icon for the type of output you want:
- - Provides access to two preview options.
- Preview - Click the icon or click the drop-down arrow and select Preview from the drop-down menu to view the report in the Crystal Reports viewer.
- Preview to PDF - Click the drop-down arrow next to the icon and select Preview to PDF to view the report in the PDF reader.
- - Opens the Print dialog so that you can select and configure a printer and then print a paper copy of the report.
- - Opens the dialog so that you can address and compose an email that the report will be attached to. For best results, ensure your email client is running before you attempt to send a report via email.
- - Opens the Export Report dialog so that you can save the report to a file. File types include Crystal Reports (.rpt), PDF (.pdf), Microsoft Excel (.xls), Microsoft Word (.doc), rich text (.rtf), and XML (.xml).
Data extensions
The following data extension is available for the report:
- Voided forms