About ActivityHD installation
While this topic focuses on ActivityHD Manager, it's instructive to understand all the components of an ActivityHD installation. The installation consists of these components:
-
ActivityHD Server. ActivityHD Server should be installed on the machine where the ActivityHD System service will run. ActivityHD Server consists of the executable programs for the system service. Typically, ActivityHD Server is installed on your server machine along with SQL Server databases.
ActivityHD Server can be installed on multiple machines. However, the ActivityHD System service is licensed to run on a specific machine. Running the ActivityHD System service on another machine requires you to obtain an additional license.
The ActivityHD System database can be on the same machine as the ActivityHD System service, or on a different SQL Server machine.
-
ActivityHD Manager. ActivityHD Manager is the system manager for ActivityHD. SQL 2012 or later must be installed on the machine where you install ActivityHD Manager.
ActivityHD Manager allows you to:
- Configure the ActivityHD System service.
- Create the system and company databases in SQL Server. The system database contains the system's data; a company's database contains company data.
- Delete system and company databases.
- Start and stop the ActivityHD System service for the machine it is installed on.
- Convert system and company databases after installing updates.
- Install packages into a selected ActivityHD database.
- Register an ActivityHD license. A license allows you to run a limited number of companies with a limited number of concurrent users for the packages you are using.
-
ActivityHD Explorer (client). ActivityHD Explorer is the user's interface to the ActivityHD software. ActivityHD allows users to access companies and their data.
Each workstation which needs access to ActivityHD data must either run ActivityHD Explorer or use Terminal Services to access another machine which is running ActivityHD Explorer.
ActivityHD Explorer allows access to two levels of ActivityHD:
- ActivityHD System
- ActivityHD companies
You can install ActivityHD Explorer on as many machines as you need.
- MDAC. Stands for Microsoft Data Access Components. Usually doesn't need to be installed because it is already on the system.
- Documents. ActivityHD-related documents for your review.
![]() Initially install and configure ActivityHD
Initially install and configure ActivityHD
The initial installation and configuration of ActivityHD will likely be performed by a member of AccountingWare's knowledgable implementation team. In the event you are installing and configuring the software yourself, the steps are outlined below.
Whether someone from AccountingWare installs your software, or you do, here are some answers you need to have handy when the time comes:
- Which version of Microsoft Office are you running? The ActivityHD client is available in 32-bit and 64-bit versions. We recommend that you choose the client bitness that matches the bitness of Office you are running. Mismatching bitnesses can result in anomalous behavior in some features.
- What is the name of the SQL Server instance where you want to install the system database?
- Will you use Windows authentication or a SQL Server login and password to gain access to the system database? The login must have sufficient privileges to make changes to the database.
- Will you want the system service to start automatically (typical), or do you want to control it manually?
- Which SQL Server(s) will contain company databases?
- It's useful to have a shared folder location where all users can access distribution files with future software updates. What is the file path to this location?
- What is the path and file name of your license file?
- System configuration can automatically generate a login and password to the system database for you. If you prefer to set the login yourself, what is the login and password you will use?
- Do you want the system to warn you when the database has not been backed up in a few days? If so, how often do you want to be alerted that the database requires backup?
- Which system packages do you want to install?
- What is the name of the first company you need to install a company database for, and what do you want to name the company database?
- Which packages do you want to install for the company?
Install the software
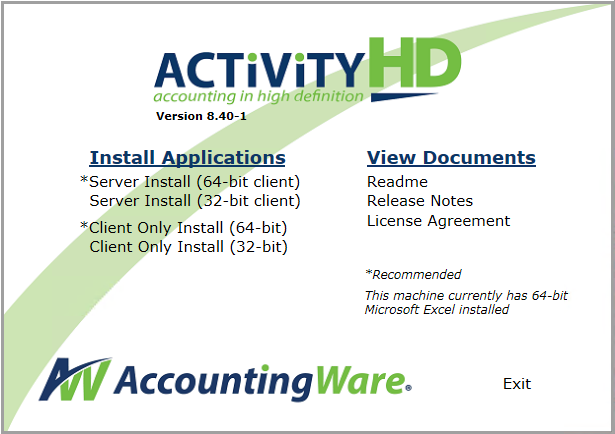
- Locate the ActivityHD installation file and double-click the file name to start the installation process.
-
Depending on your Windows User Account Control settings, you may be prompted to confirm that you want to allow the application to make changes to your device. Click Yes. The installation starts.
-
In the "Install Applications" column, click the "Server Install" package with the bitness that matches your installation of Microsoft Office.
-
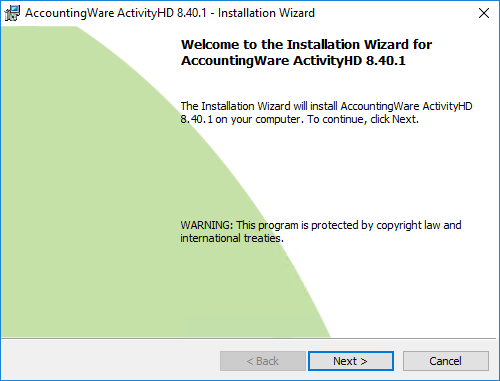
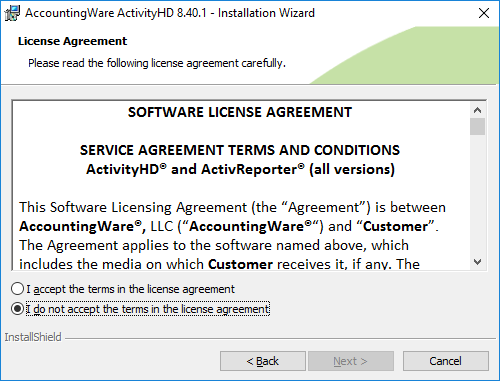
Click Next >. You are prompted to accept the license agreement.
-
Select I accept the terms in the license agreement, then click Next >.
-
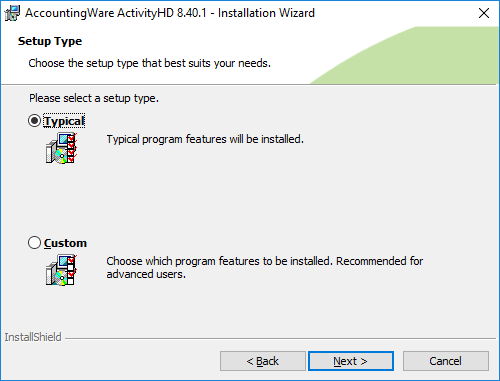
Leave Typical selected and click Next > >.
-
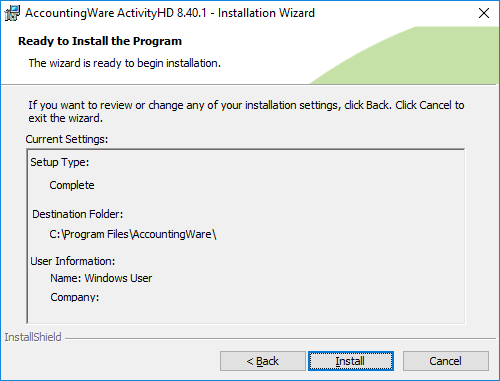
Review the installation settings. When you finish, click Install. The installation ensues and concludes.
-
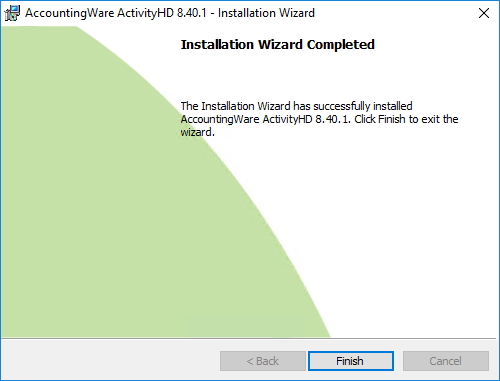
When the installation completes, click Finish.

- Click Exit to leave the installation wizard.
Configure the system
-
Locate the ActivityHD Manager icon
 on your desktop and double-click it.
 -
Depending on your Windows User Account Control settings, you may be prompted to confirm that you want to allow the application to make changes to your device. Click Yes. ActivityHD Manager opens.
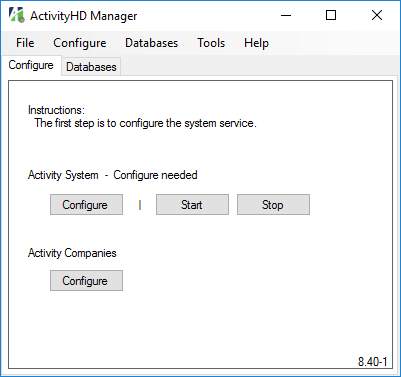
-
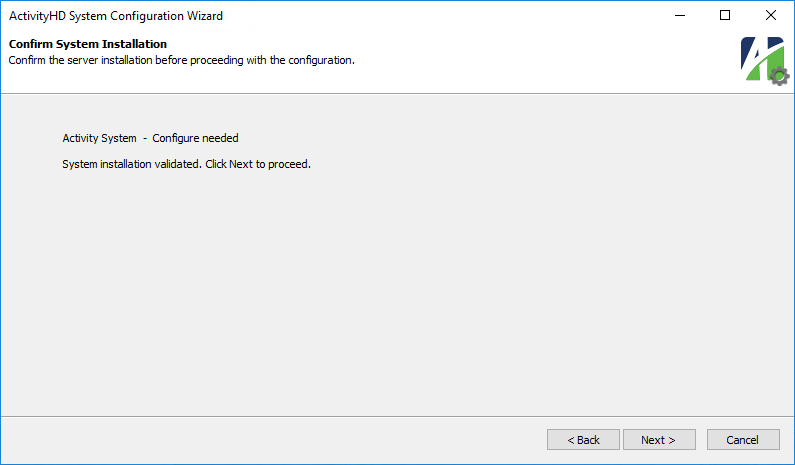
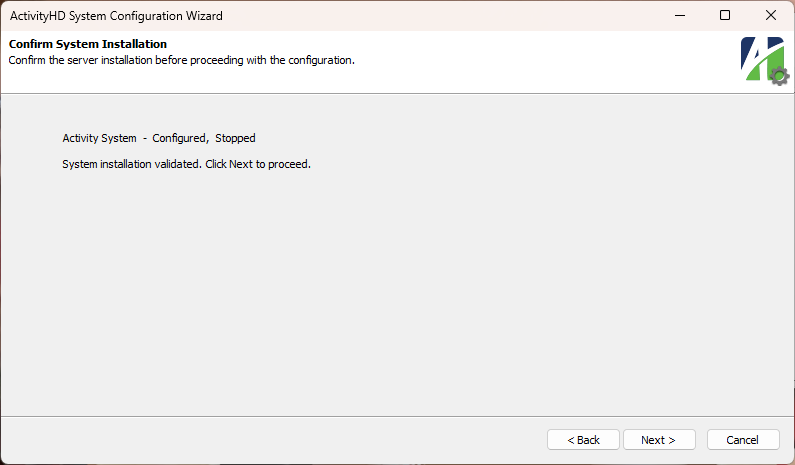
In the ActivityHD System section, click Configure. The ActivityHD System Configuration Wizard starts.
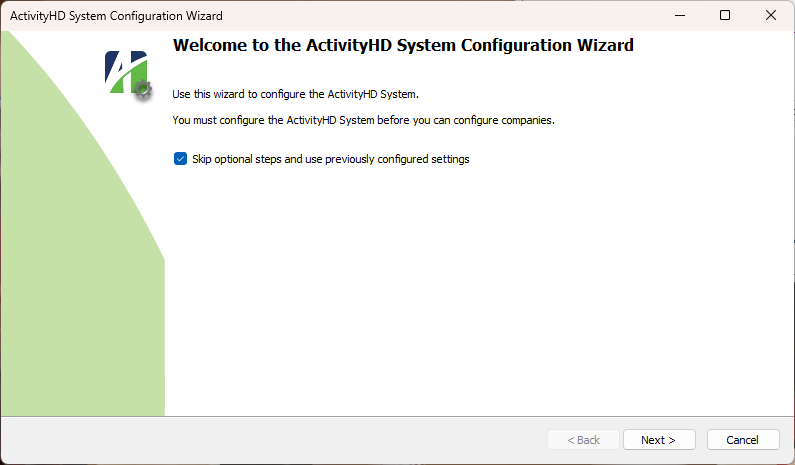
-
Click Next >.
-
Click Next >.

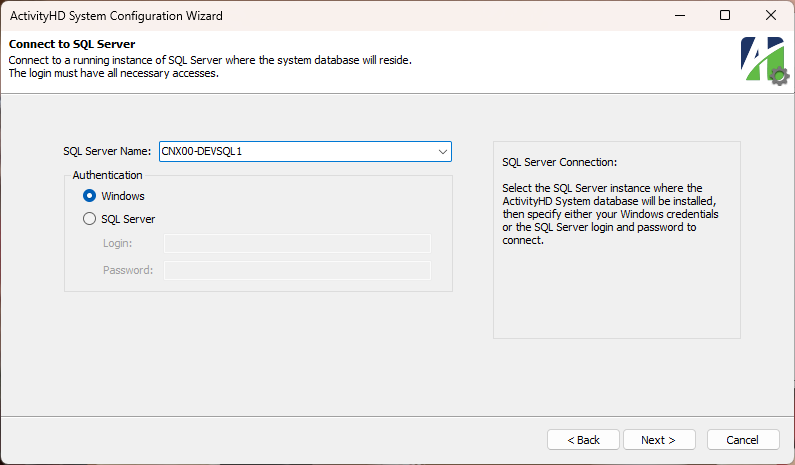
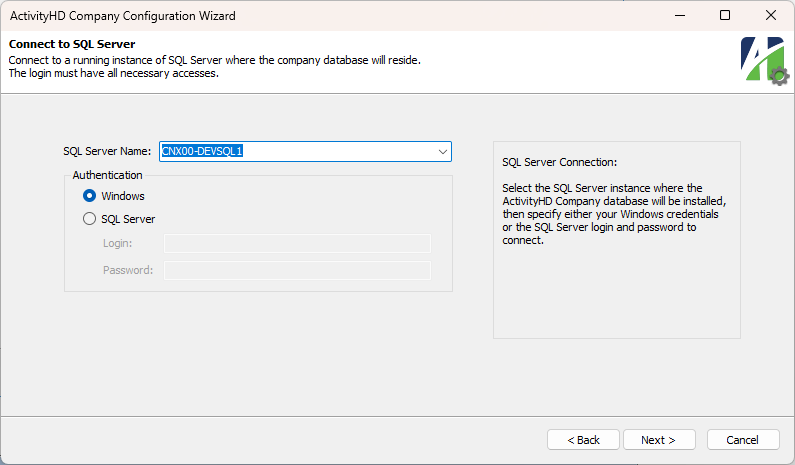
- In the SQL Server Name field, select or enter the name of the SQL Server instance where the system database will reside.
- In the Authentication section, select the credentials to use to log into the database. Your options are:
- Windows. If you select this option, ActivityHD will use your Windows credentials to log into the database.
- SQL Server. If you select this option, provide your Login and Password for the database. The login should represent a user with sufficient privileges to install database components. AccountingWare recommends using the system administrator (sa) login.
-
Click Next >.
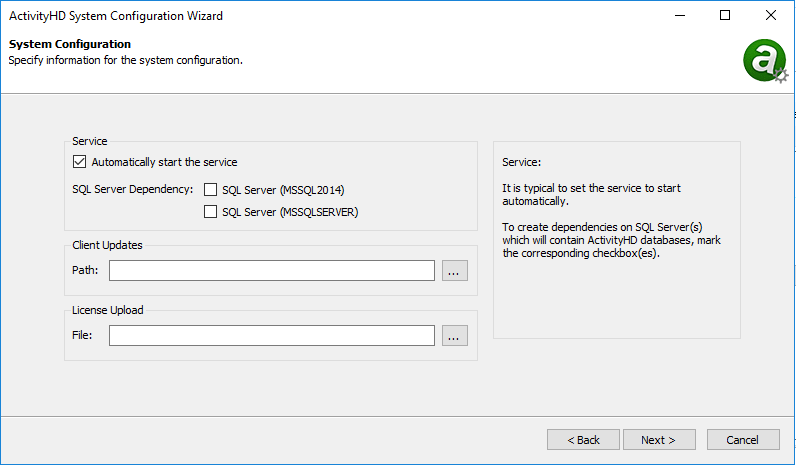
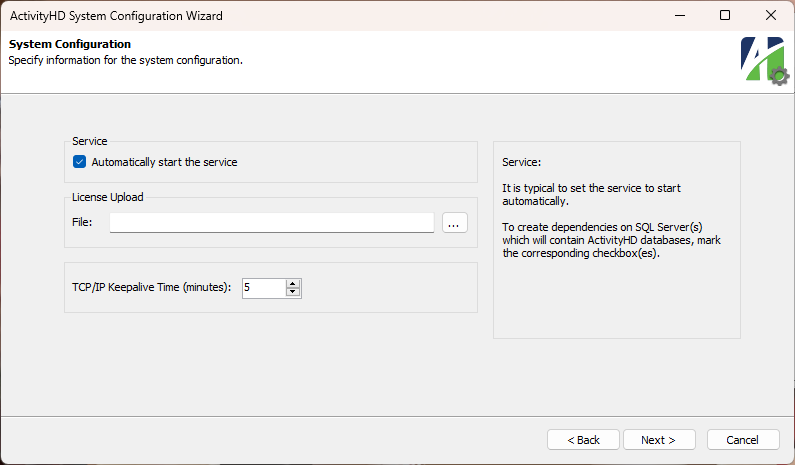
- By default the system service starts automatically when the system is started. If you want to manually start the service every time, clear the Automatically start the service checkbox.
- To create dependencies on any SQL Server(s) that will contain ActivityHD databases, mark the applicable checkboxes in the SQL Server Dependency area, if visible.
- In the License Upload File field, if you need to install a new license, click
 and browse to and select the license file.
 - In the TCP/IP Keepalive Time field, select the number of minutes to maintain the client connection when there is no response. Records which are open when a connection is lost remain locked the number of minutes you specify here. AccountingWare recommends a keepalive time of five minutes.
-
Click Next >.
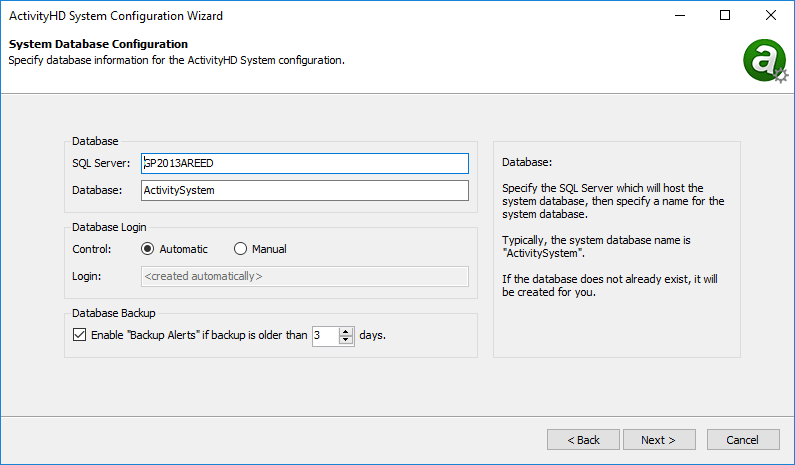
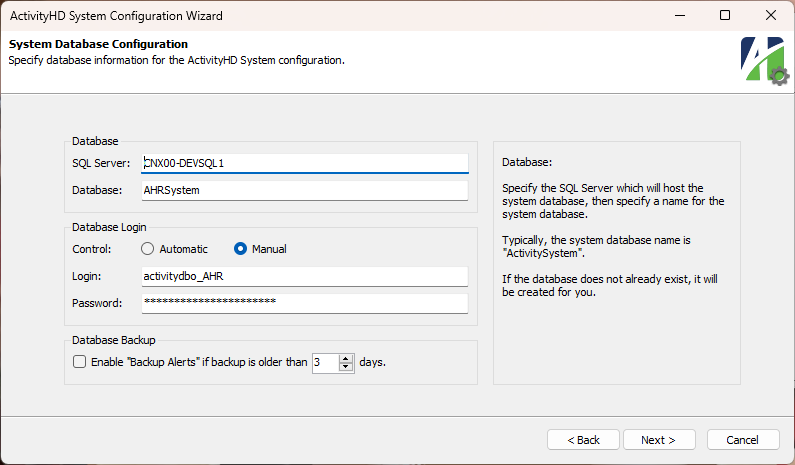
- Ensure that the correct SQL Server instance, database, login, and password are prepopulated in the corresponding fields.
- The default back-up behavior for the database is to alert the user if the latest backup is more than three days old. If you do not want to be reminded to perform backups, clear the Enable "Backup Alerts" checkbox. If you want to be alerted, but at a different frequency than three days, select how many days old a backup can be before issuing an alert.
-
Click Next >.
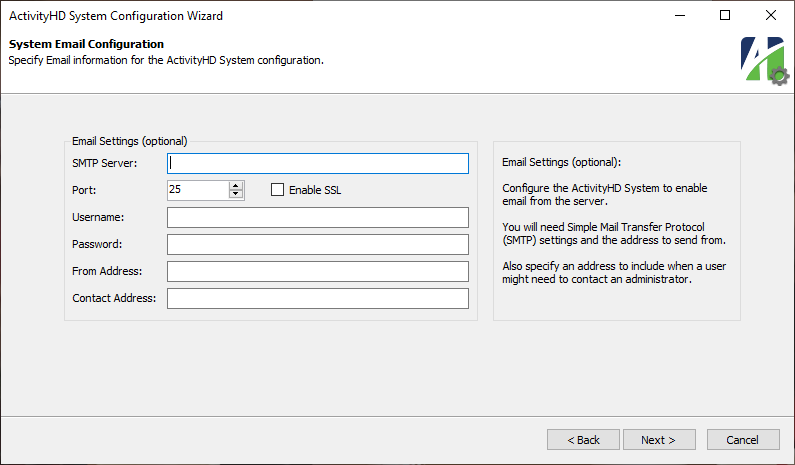
- If you want users to be able to send email from the server, provide your SMTP settings in steps 17-23; otherwise, skip to step 24.
- In the SMTP Server field, enter the name of the outgoing mail server.
- In the Port field, select the port number assigned to the outgoing mail server.
- To enable the Secure Sockets Layer (SSL) protocol to provide a more secure connection, mark the Enable SSL checkbox.
- In the Username field, enter the email account name.
- In the Password field, enter the password for the email account.
- In the From Address field, enter the address to use as the sender's address on outgoing email.
- In the Contact Email field, enter the email address of the person to contact about SMTP information.
-
Click Next >.
-
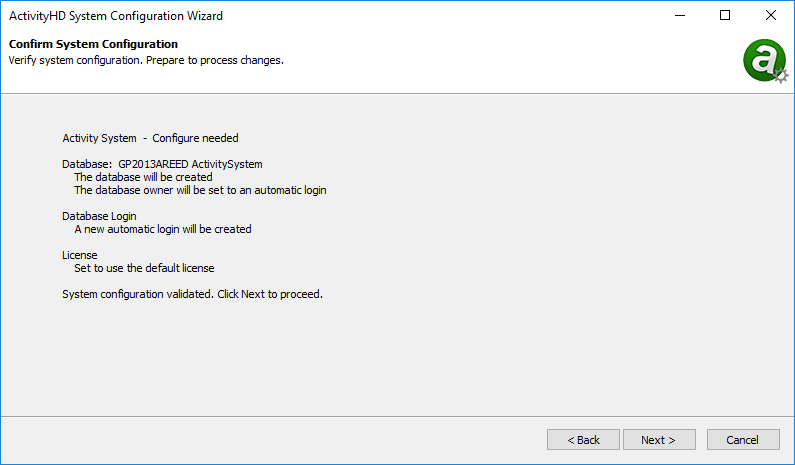
Click Next >.
-
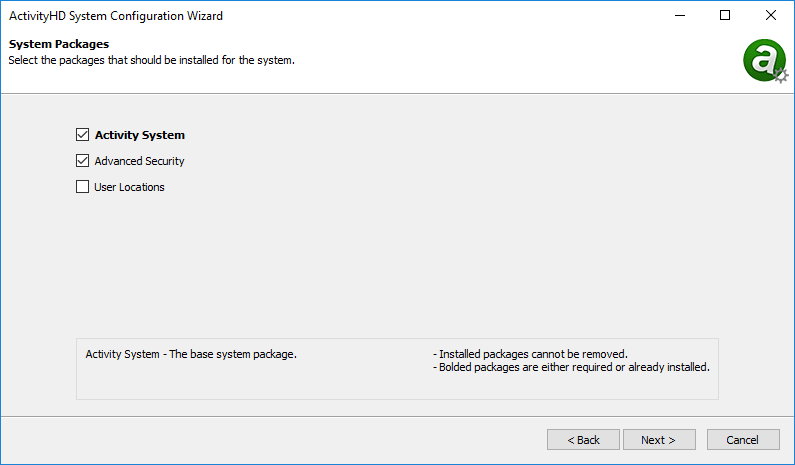
The ActivityHD System package is a required package. Its checkbox is marked and cannot be cleared. Mark the checkbox for any additional packages to include in the configuration.
Note
Packages denoted in bold are either required or already installed.
-
Click Next >. Configuration ensues and concludes.
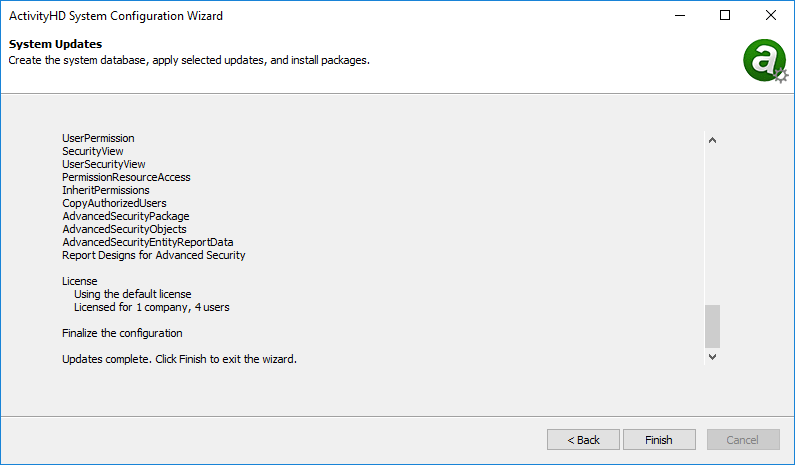
-
Click Finish to return to ActivityHD Manager.
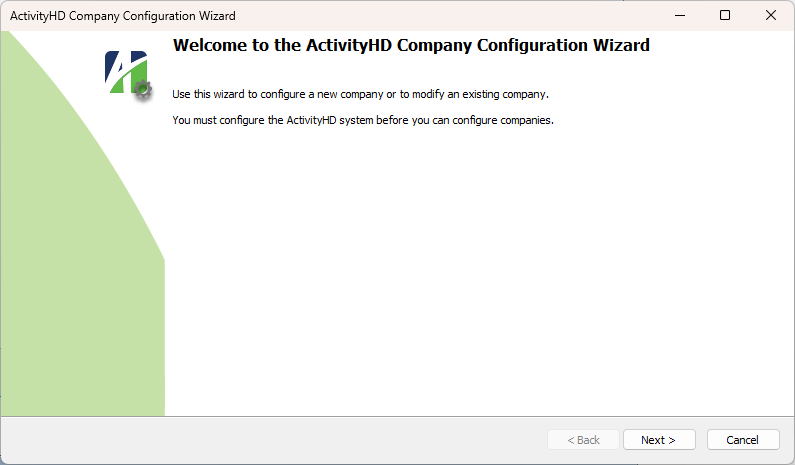
Configure a company
-
In the ActivityHD Companies section, click Configure. The ActivityHD Company Configuration Wizard starts.
-
Click Next >.
-
Click Next >.
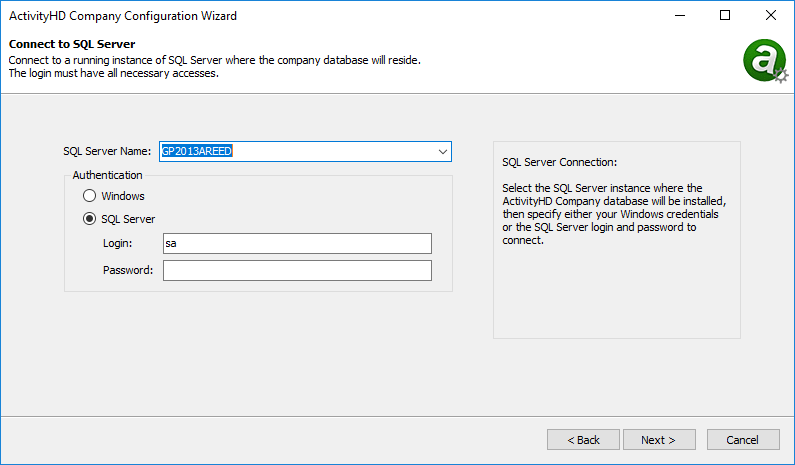
- Verify that the correct instance of SQL Server is selected, and that the correct authentication mode is selected.
- If you selected "SQL Server" authentication, enter the Password for the SQL Server database.
-
Click Next >.
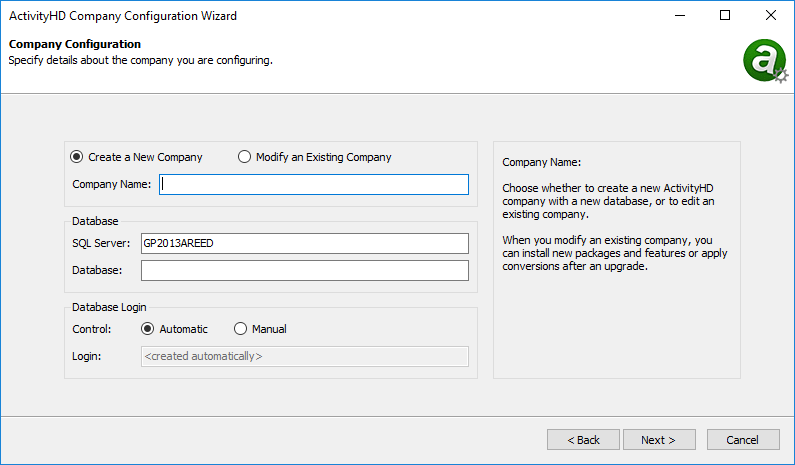
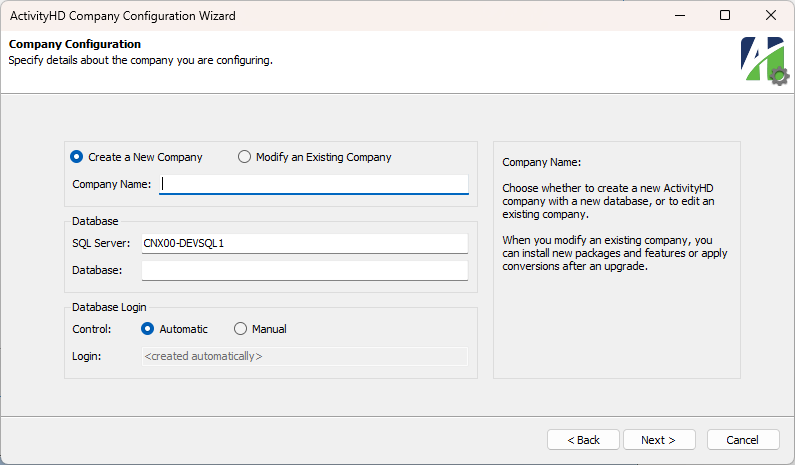
- For an initial installation of ActivityHD, ensure the Create a New Company option is selected.
- Enter the Company Name to associate with the company database.
- Enter the Database name for the company.
- In the Control field, select how to create the database login and password for the company database. The login you set here becomes the database owner and is used by all ActivityHD users to connect to the company database. Your options are:
- Automatic. Select this option to allow the wizard to create a unique SQL Server login and password for accessing the company database.
Manual. Select this option to specify the SQL Server login and password yourself.
If you select "Manual", enter the Login and Password to use to access the company database.
-
Click Next >.
-
Click Next >.
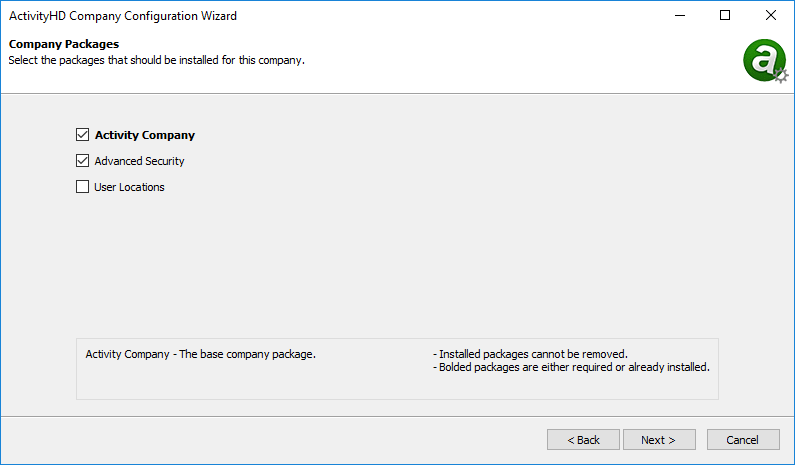
- The ActivityHD Company package is a required package. Mark the checkbox for each package you need to install.
-
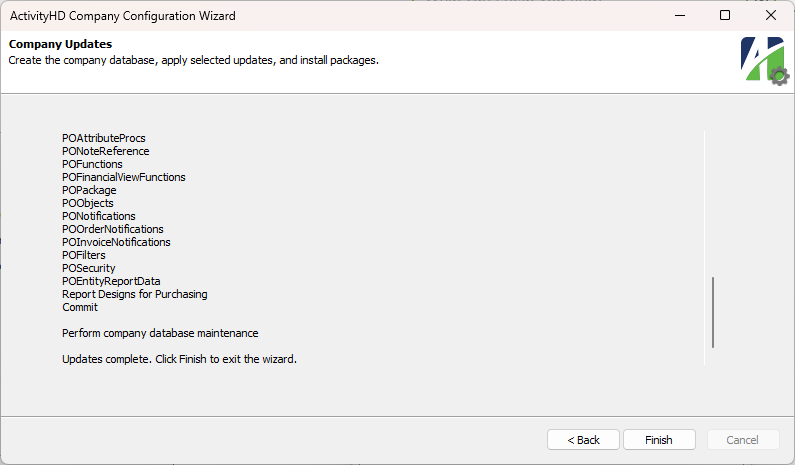
Click Next >. Company updates begin.
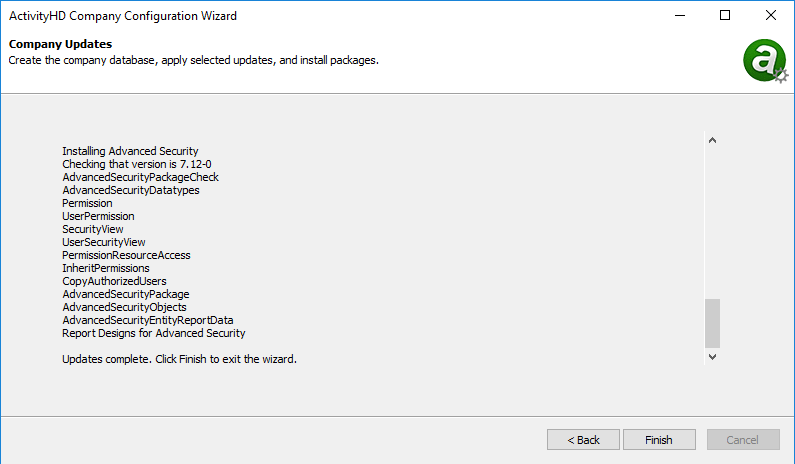
-
Click Finish to return to ActivityHD Manager.

-
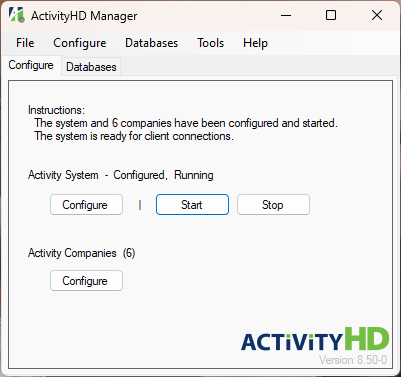
Click Start to start the ActivityHD System.
Get started with ActivityHD
-
Double-click the ActivityHD icon
 . You are confronted with the ActivityHD splash screen and software license agreement.
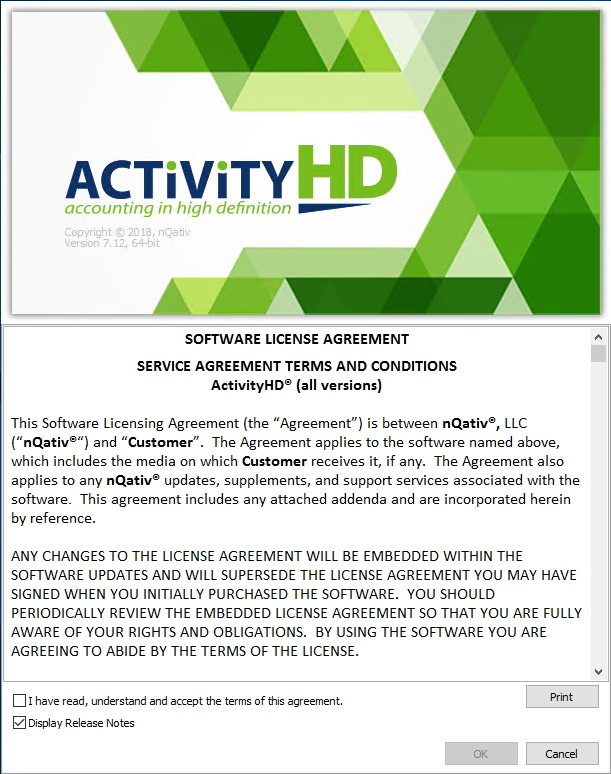
- Before you can exit this screen, you should read the license agreement and must mark the I have read, understand and accept the terms of this agreement checkbox.
-
Click OK. If your system is configured to automatically start the service, ActivityHD Explorer opens. Skip to step 7. Otherwise, you are prompted to establish a system connection.
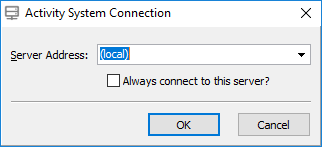
- Select the appropriate Server Address and Login type, and provide your user name and password if you select the "Username and Password" login type.
- AccountingWare recommends you mark the Connect automatically checkbox.
-
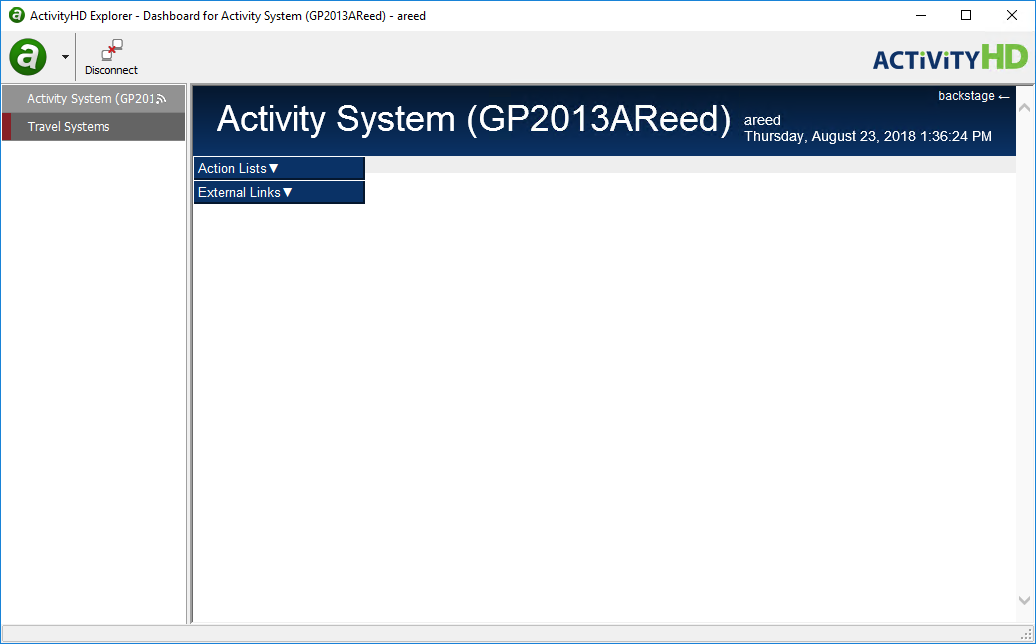
Click OK. ActivityHD Explorer opens.
-
In the navigation pane, click on the company name you created.
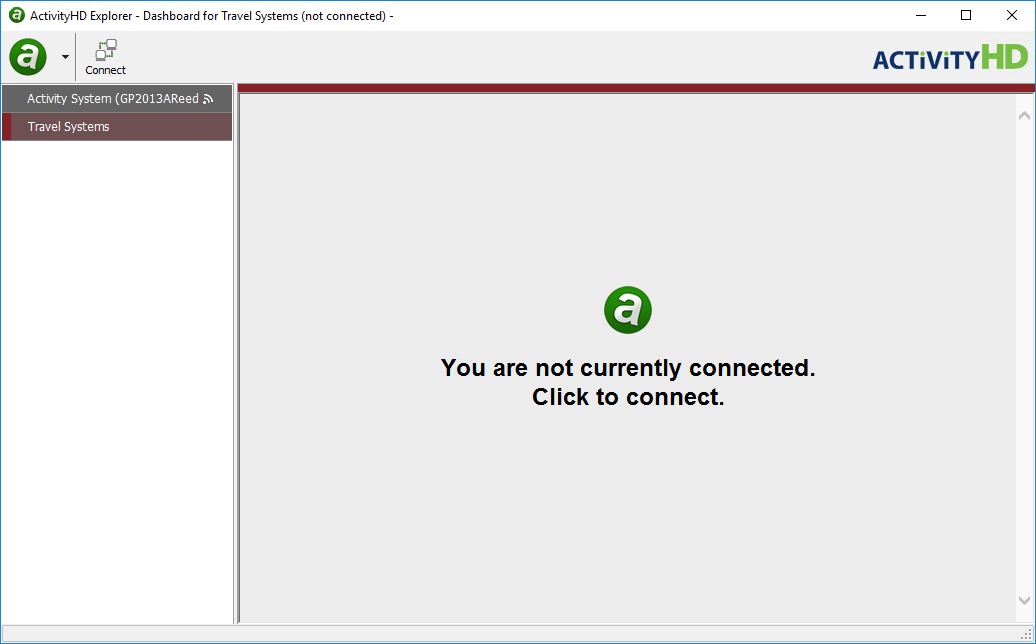
- In the toolbar, click
 to connect to the company database.
 -
Click on the company accordion menu options to expand the navigation and begin your exploration of ActivityHD.
![]() Modify the system configuration
Modify the system configuration
- Run ActivityHD Manager.
-
Stop the ActivityHD System service. You are prompted to confirm that you want to stop the service.

-
Click OK.
-
In the ActivityHD System section, click Configure. The system configuration wizard starts.
- Clear the Skip optional steps and use previously configured settings checkbox.
-
Click Next >.
-
Click Next >. In the remaining pages of the wizard, perform only the steps you need to update the configuration.
- In the SQL Server Name field, select or enter the name of the SQL Server instance where the system database will reside.
- In the Authentication section, select the credentials to use to log into the database. Your options are:
- Windows. If you select this option, ActivityHD will use your Windows credentials to log into the database.
- SQL Server. If you select this option, provide your Login and Password for the database. The login should represent a user with sufficient privileges to install database components. AccountingWare recommends using the system administrator (sa) login.
-
Click Next >.
- If you want to manually start the system service every time, ensure the Automatically start the service checkbox is cleared.
- In the License Upload File field, if you need to install a new license, click and browse to and select the license file.
- In the TCP/IP Keepalive Time field, select the number of minutes to maintain the client connection when there is no response. Records which are open when a connection is lost remain locked the number of minutes you specify here. AccountingWare recommends a keepalive time of five minutes.
-
Click Next >.
- Ensure that the correct SQL Server instance, database, login, and password are prepopulated in the corresponding fields.
- The default back-up behavior for the database is to alert the user if the latest backup is more than three days old. If you do not want to be reminded to perform backups, clear the Enable "Backup Alerts" checkbox. If you want to be alerted, but at a different frequency than three days, select how many days old a backup can be before issuing an alert.
- Click Next >.
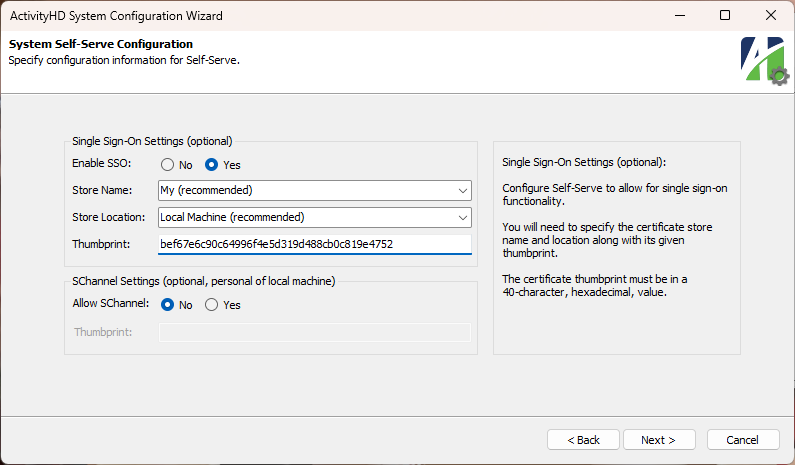
- Self-Serve supports single sign-on access. In the Enable SSO field, select "Yes" to enable single sign-on for Self-Serve; otherwise, select "No". If you select "No", skip to step 21.
- From the Store Name drop-down list, select the appropriate certificate store name. "My" is recommended. Your options are:
- Address Book. The X.509 certificate store for other users.
- Auth Root. The X.509 certificate store for third-party certificate authorities (CAs).
- Certificate Authority. The X.509 certificate store for intermediate certificate authorities (CAs).
- Disallowed. The X.509 certificate store for revoked certificates.
- My (recommended). The X.509 certificate store for personal certificates.
- Root. The X.509 certificate store for trusted root certificate authorities (CAs).
- Trusted People. The X.509 certificate store for directly trusted people and resources.
- Trusted Publisher. The X.509 certificate store for directly trusted publishers.
- From the Store Location drop-down list, select the location of the certificate store. "Local Machine" is recommended. Your options are:
- Current User. The X.509 certificate store used by the current user.
- Local Machine (recommended). The X.509 certificate store assigned to the local machine.
- In the Thumbprint field, enter the 40-character certificate thumbprint in hexadecimal format. This is the value the identity provider signs its messages with.
- SChannel configuration is primarily needed if using ActivWebAPI when the machine that hosts ActivWebAPI is not a member of the domain. To configure SChannel, select "Yes" in the Allow SChannel field; otherwise, select "No". If you select "No", skip to step 23.
- In the Thumbprint field, enter the 40-character certificate thumbprint in hexadecimal format. The certificate specified in this field must exist in the Personal, Local Machine certificate store.
-
Click Next >.
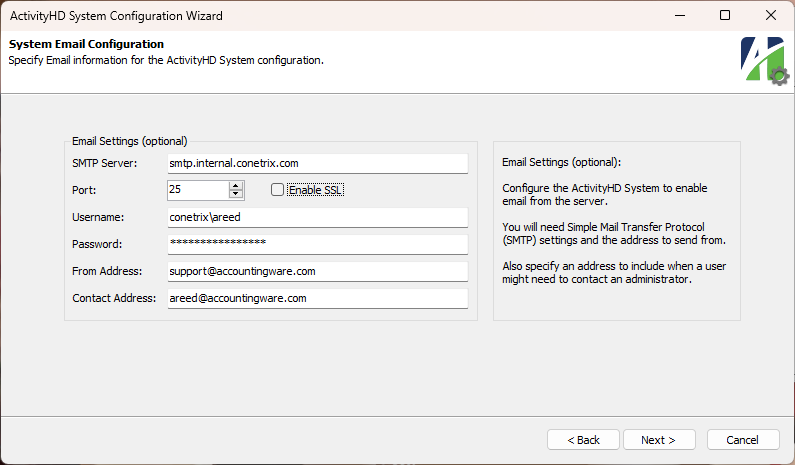
- If you want users to be able to send email from the server, provide your SMTP settings in steps 18-24; otherwise, skip to step 25.
- In the SMTP Server field, enter the name of the outgoing mail server.
- In the Port field, select the port number assigned to the outgoing mail server.
- To enable the Secure Sockets Layer (SSL) protocol to provide a more secure connection, mark the Enable SSL checkbox.
- In the Username field, enter the email account name.
- In the Password field, enter the password for the email account.
- In the From Address field, enter the address to use as the sender's address on outgoing email.
- In the Contact Address field, enter the email address of the person to contact about SMTP information.
-
Click Next >.
-
Click Next >.
-
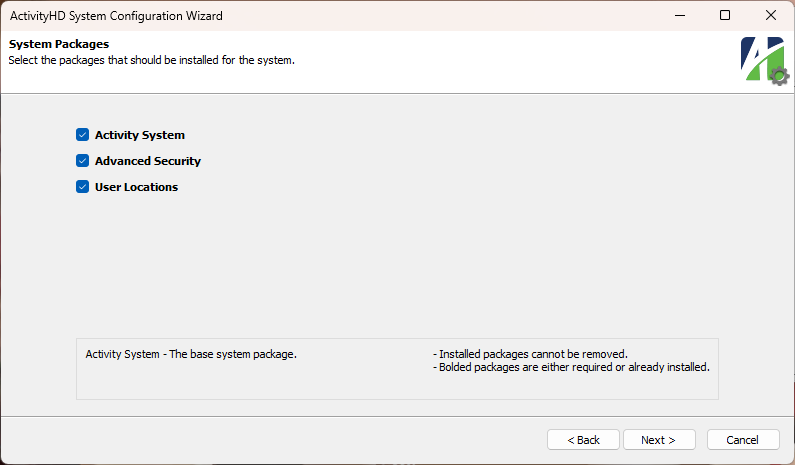
The ActivityHD System package is a required package. Its checkbox is marked and cannot be cleared. Mark the checkbox for any additional packages to include in the configuration.
Packages denoted in bold are either required or already installed.
- Click Next >.
-
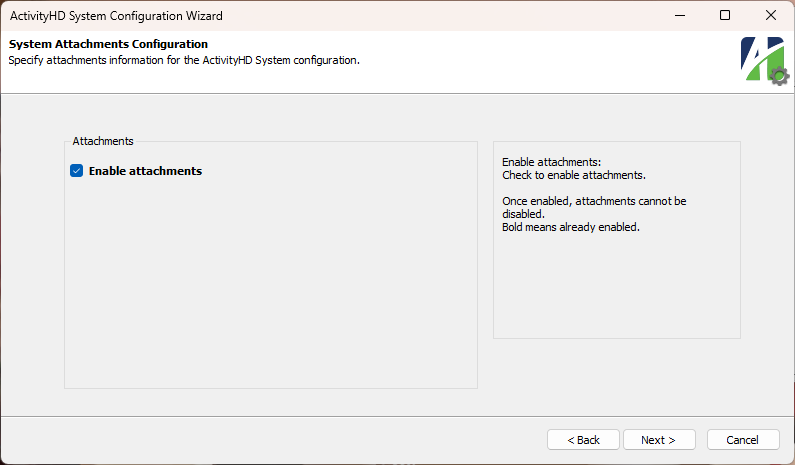
If the Enable attachments checkbox is cleared and you need to enable attachments for ActivityHD System, mark it.
If the checkbox is marked and its label is bold, attachments are already enabled and cannot be disabled.
-
Click Next >. Configuration ensues and concludes.
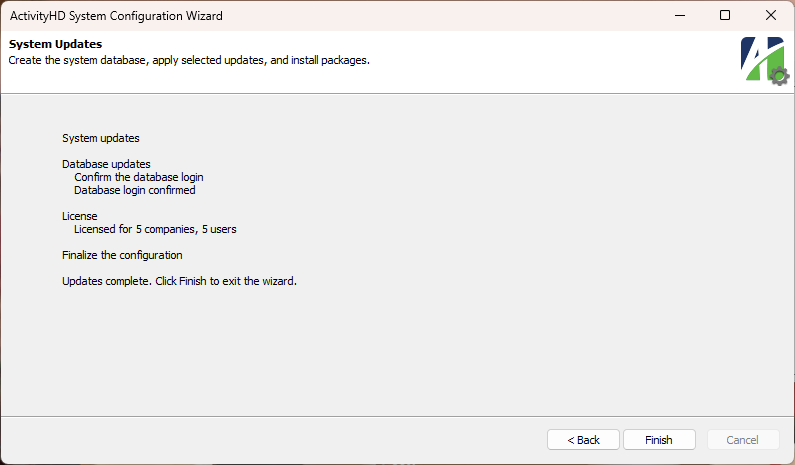
- Click Finish to return to ActivityHD Manager.
![]() Start the ActivityHD System service
Start the ActivityHD System service
- Run ActivityHD Manager.
-
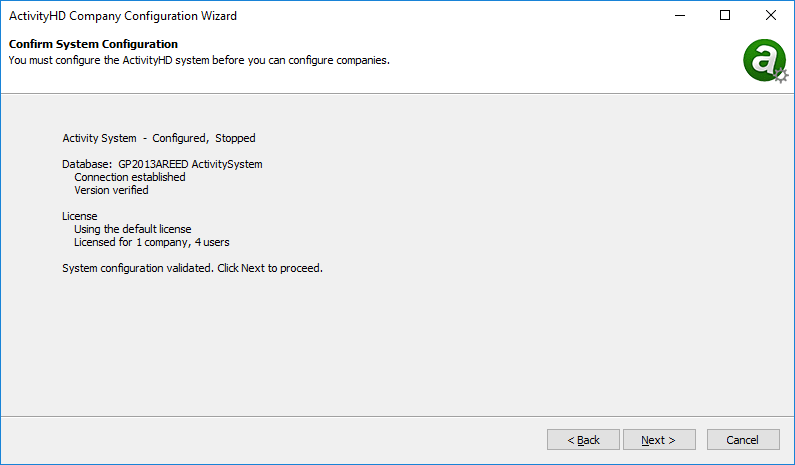
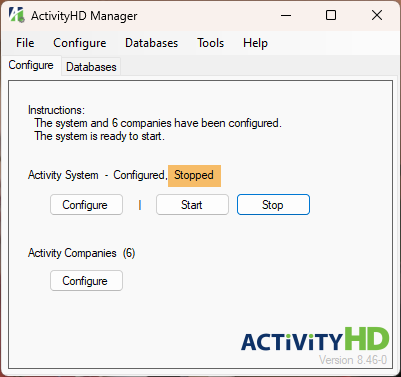
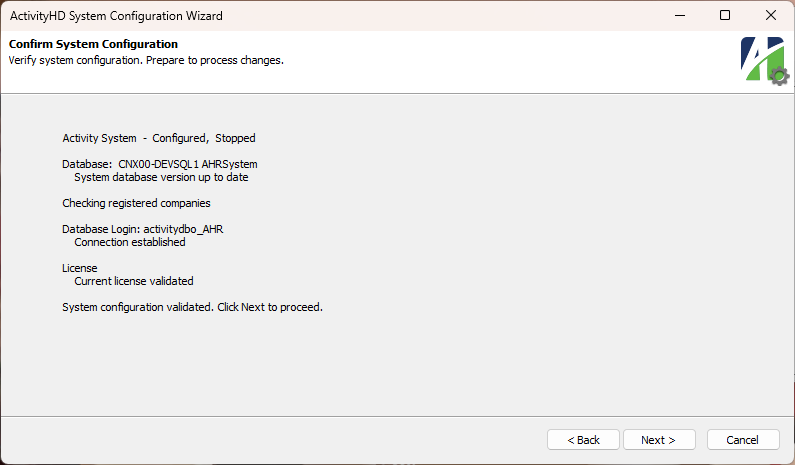
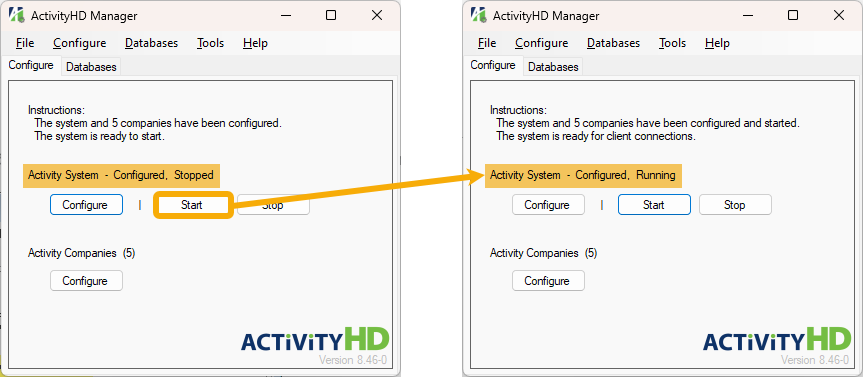
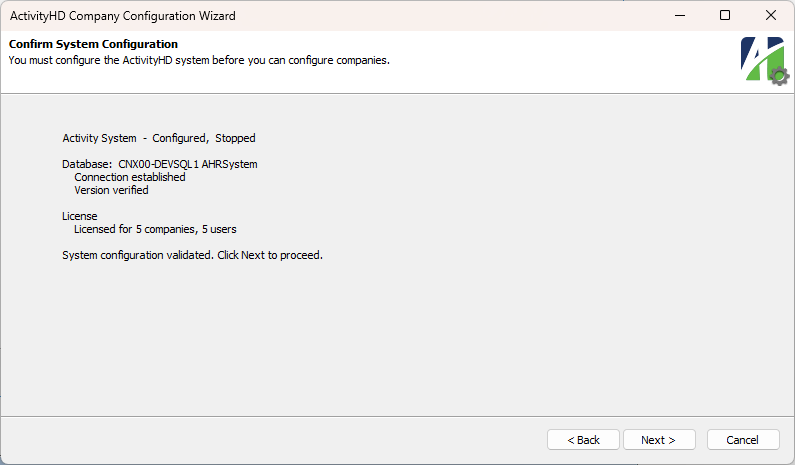
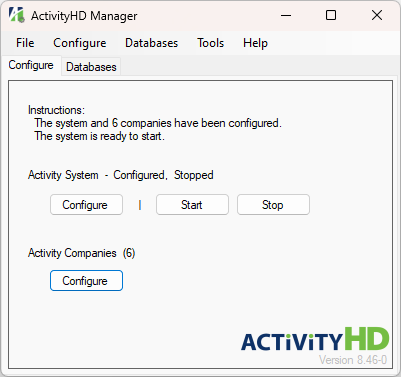
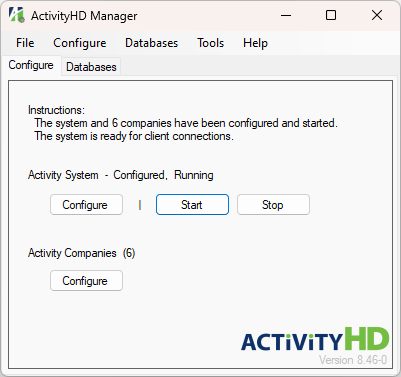
On the Configure tab, click Start. Typically, the label above the buttons will change from "ActivityHD System - Configured, Stopped" to "ActivityHD System - Configured, Running".
![]() Stop the ActivityHD System service
Stop the ActivityHD System service
Important!
Stopping the ActivityHD System service stops the system, stops all companies, and disconnects all users. Proceed with caution.
- Run ActivityHD Manager.
-
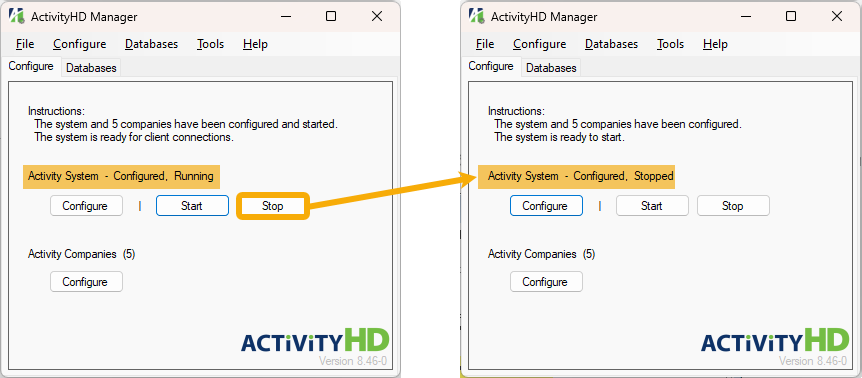
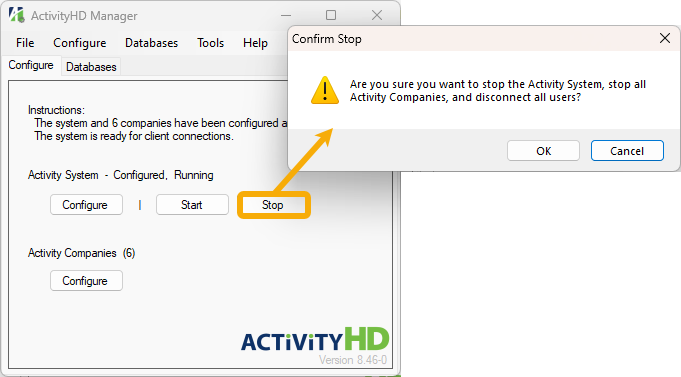
On the Configure tab, click Stop. You are prompted to confirm that you want to stop the service.
-
Click OK. Typically, the label above the buttons will change from "ActivityHD System - Configured, Running" to "ActivityHD System - Configured, Stopped".
![]() Modify a company's configuration
Modify a company's configuration
- Run ActivityHD Manager.
-
Stop the ActivityHD System service. You are prompted to confirm that you want to stop the service.
-
Click OK.
-
In the ActivityHD Companies section, click Configure. The company configuration wizard starts.
-
Click Next >.
-
Click Next >. In the remaining pages of the wizard, perform only the steps you need to update the company configuration.
- Verify that the correct instance of SQL Server is selected, and that the correct authentication mode is selected.
- If you selected "SQL Server" authentication, enter the Password for the SQL Server database.
-
Click Next >.
-
Select the Modify an Existing Company option.
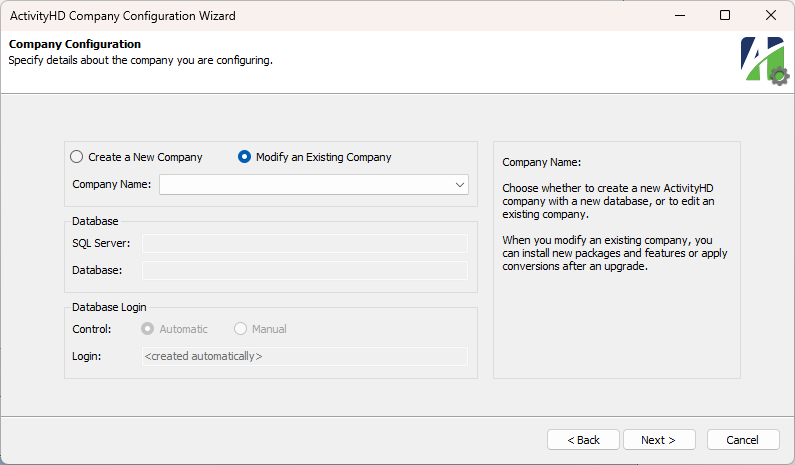
-
From the Company Name drop-down list, select the company you need to modify.
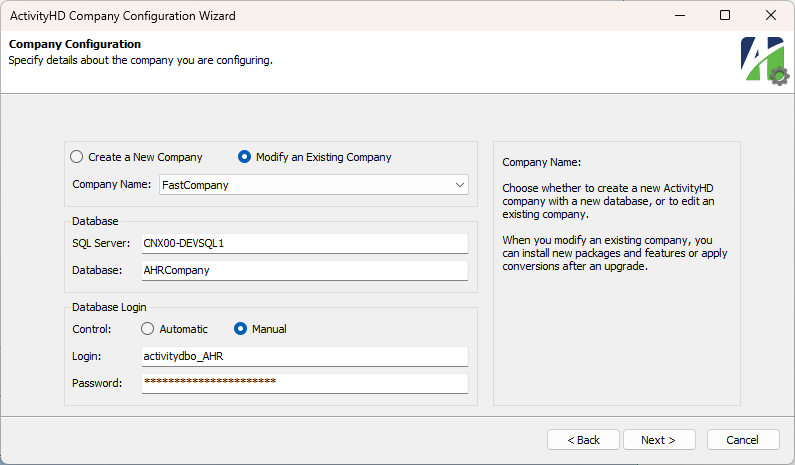
- Confirm that the database and login information are correct.
-
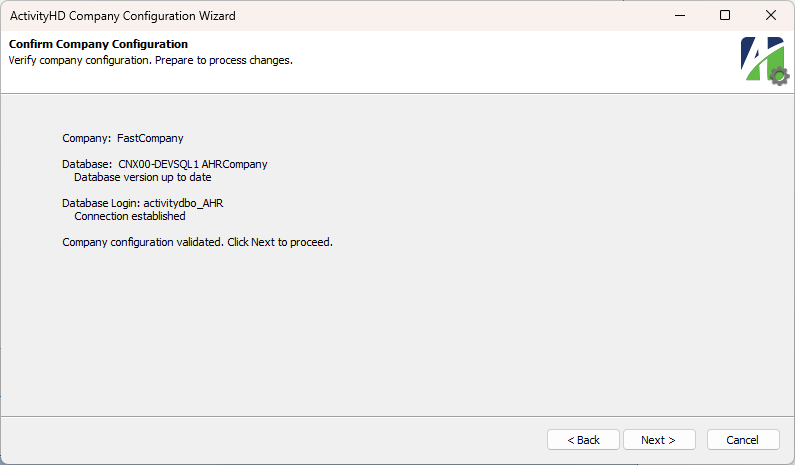
Click Next >.
-
Click Next >.
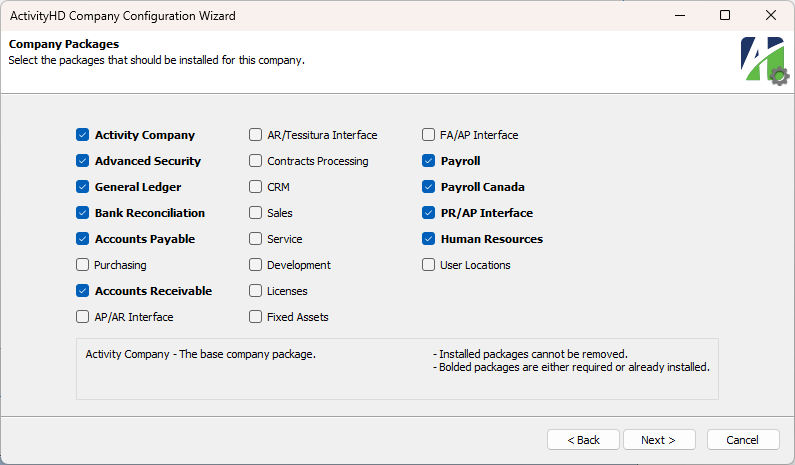
- All packages in bold font are either required or already installed. Mark the checkbox(es) for any additional packages you are licensed for and want to install.
-
Click Next >.
-
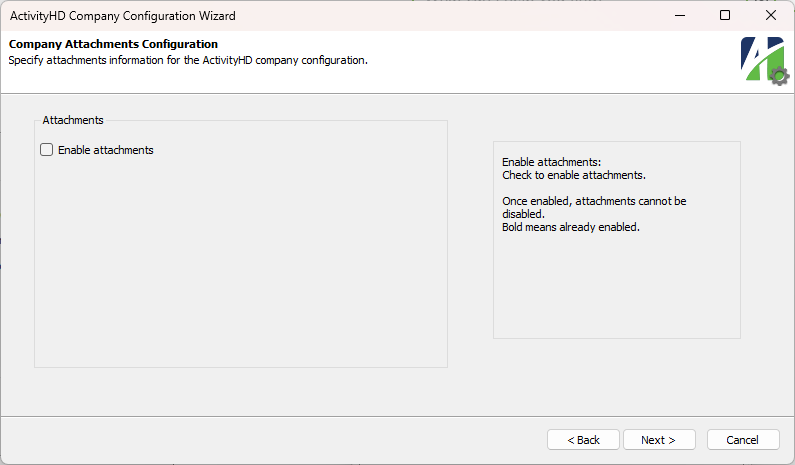
If the Enable attachments checkbox is cleared and you need to enable attachments for the company, mark it.
If the checkbox is marked and its label is bold, attachments are already enabled and cannot be disabled.
-
Click Next >. Company updates begin.
-
Click Finish to return to ActivityHD Manager.
Note
When you finish with configuration, don't forget to restart the system service!
A new license is required any time you add a new company, more users, or new packages, or when you change server machines. When you obtain a new license from AccountingWare, you need to load the information on the ActivityHD Server machine.
Notes
License information is stored only on your server, not on individual clients which run ActivityHD Explorer.
License keys and hardware IDs consist only of digits 0-9 and letters A-F.
There are two methods for loading a new license file. One method is described in the "Modify the system configuration" procedure above. The other method follows:
- Ensure that everyone is logged out of ActivityHD. This is necessary because you will be stopping the ActivityHD System service.
- In ActivityHD Manager on the Configure tab, click Stop. You are prompted to confirm you want to stop the system service.
- Click OK.
- Select the Databases tab.
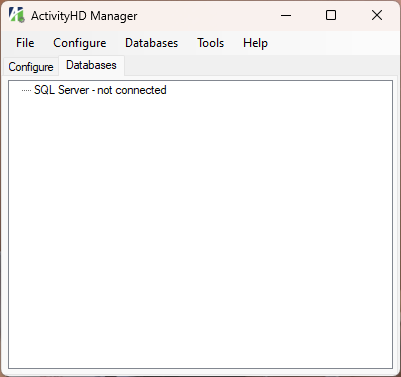
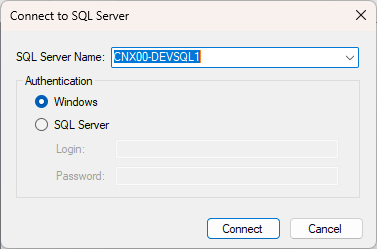
- Right-click in the tab and select Connect from the shortcut menu. The Connect to SQL Server dialog box opens.
- Click Connect. The available databases load in the tab.
-
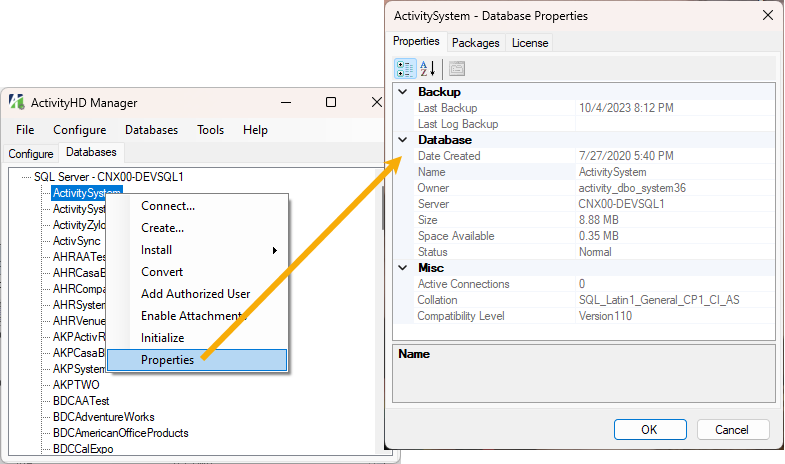
Locate and right-click the system database to install the license for, then select Properties from the shortcut menu. The Database Properties dialog box opens.
-
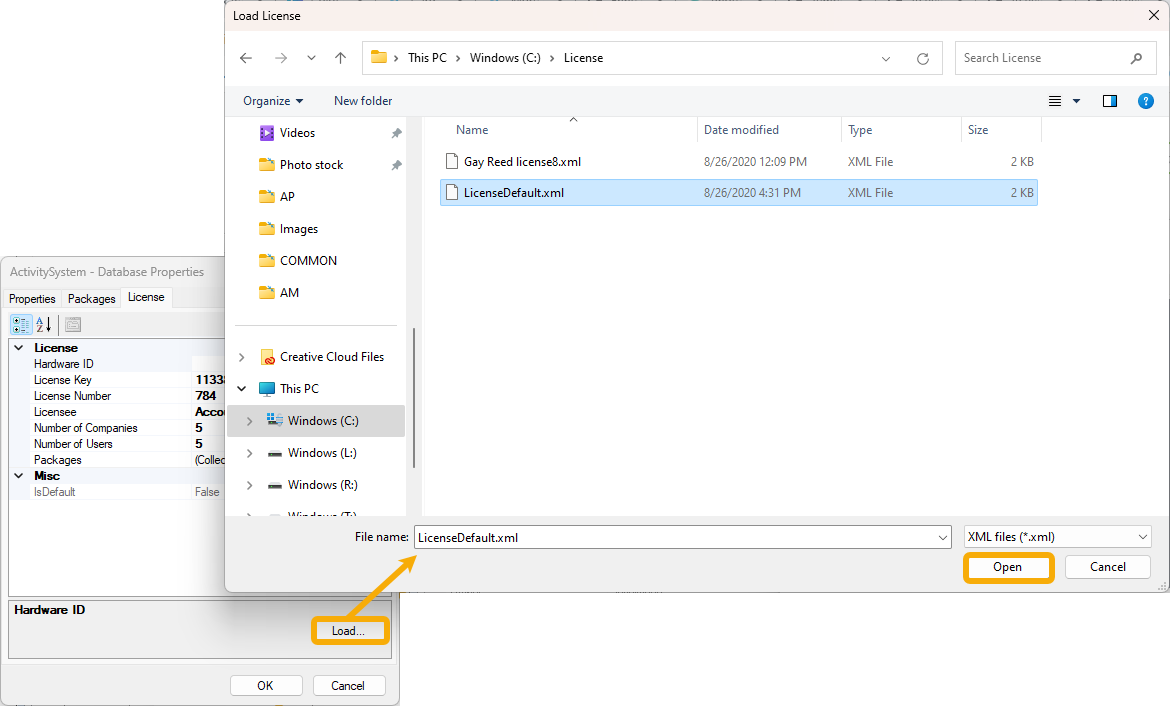
Select the License tab, click Load, browse to the license file, highlight it, and click Open.
-
After the license loads, click OK to close the Database Properties dialog box.
- In ActivityHD Manager on the Configure tab, click Start to restart the service.
You can view existing databases in ActivityHD Manager when you connect to the SQL Server where the databases reside.
To connect to SQL Server:
- Run ActivityHD Manager.
- Select the Databases tab.
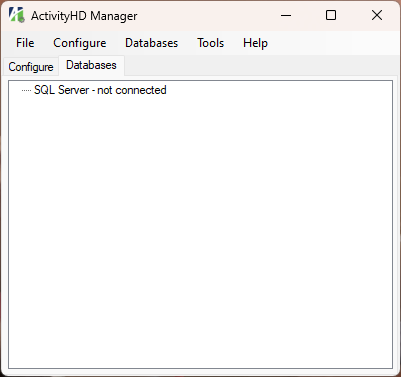
- Right-click in the Databases tab and select Connect from the shortcut menu. The Connect to SQL Server dialog box opens.

-
In the Server Name field, select or enter the name of the SQL Server machine where the ActivityHD database resides.
Note
If the database resides on a named instance of SQL Server, enter the SQL Server machine name followed by "\" followed by the named instance name; e.g., NTServer3\SQLServer2010.
- In the Authentication section, select the type of authentication to use to connect to the database. Authentication is the security mode used to verify client and server connections. Your options are:
- Windows. Your Windows credentials will be used for authentication.
- SQL Server. If you select this option, provide the SQL Server Login name and Password.
- Click Connect. The list of existing databases on the server shows in the Databases tab.

Software packages are installed in the ActivityHD system database and company databases using ActivityHD Manager. Some packages are available only for the system database; others only for company databases. The User Locations and Advanced Security packages can be installed in either or both.
Typically, packages are installed using the configuration wizards; however, the procedure below describes a more straightforward method you can use when you do not need to make other configuration changes.
To install individual packages:
- Run ActivityHD Manager.
- If Activity system is running, click Stop.
- Connect to the SQL Server machine where you want to install packages.
-
Select the Databases tab, right-click the database to install packages to, and then from the drop-down menu, select Install and then the package to install.
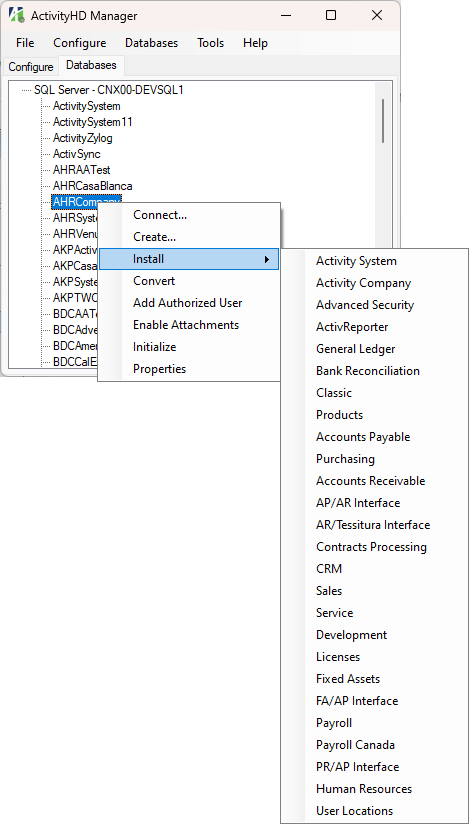
You are prompted to confirm that you want to install the package.
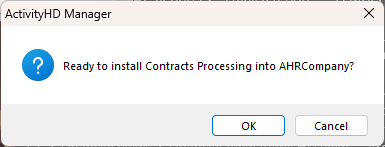
- Click OK. Installation begins.
-
When the installation completes, click OK to dismiss the message box.
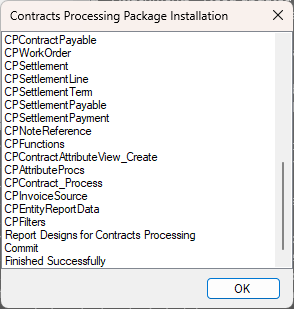
- Repeat steps 4-6 for each package you need to install to the database.
- If you haven't already done so, load license information for the newly installed packages.
License errors
If the company server is not running, ActivityHD returns this error when a user attempts to connect: "The server is not active for the company." When this occurs, the server logs an event and fails to start. This error can indicate that the ActivityHD license information is not loaded or not properly updated. To view the event log, from the ActivityHD Manager menu, select Tools > Event Viewer. Look for a message in the following format:
Company Name No license for package Package Name interface was found. The software must be properly licensed to operate.
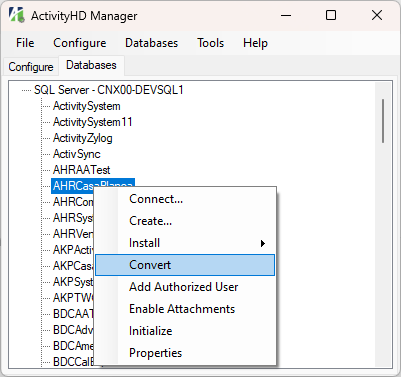
![]() Convert a database after an update
Convert a database after an update
When you receive a new version of ActivityHD, your system and company databases will need to be converted. Conversion is performed when you run the configuration wizards after an update. If needed, you can convert databases individually.
To convert a database:
- Run ActivityHD Manager.
- If ActivityHD System is running, Stop it.
- Select the Databases tab.
- Connect to the SQL Server machine with the database you need to convert.
-
Locate and right-click the database you need to convert, then select Convert from the shortcut menu. You are prompted to confirm that you are ready to convert.
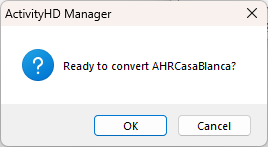
-
Click OK. The conversion should take a few minutes or less.
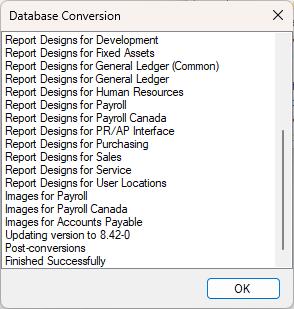
- When the conversion concludes, click OK to dismiss the Database Conversion window.
- Return to the System tab and Start the ActivityHD System service.
![]() Add yourself as an authorized user of a database
Add yourself as an authorized user of a database
- Run ActivityHD Manager.
- Connect to the SQL Server machine with the database you need to add yourself to.
- Select the Databases tab.
- Locate the database to add yourself to, right-click its name, and select Add Authorized User from the shortcut menu. ActivityHD prompts you to confirm your action.
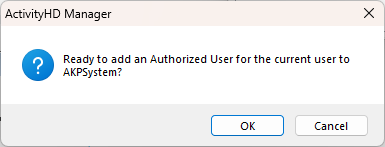
- Click OK. ActivityHD confirms that your authorized user record was added to the selected database.
- Click OK.
ActivityHD supports attaching files to most types of entity records. Attachments are useful for tracking invoices, receipts, contracts, notes, and employee paperwork. Attachments help you stay organized and support your green agenda by reducing the need for storing and sorting through paper documents.
Before you enable attachments, you must first ensure you are running SQL Server 2012 or newer, set the compatibility level for the SQL server database, and enable FILESTREAM.
To enable attachments:
- Run ActivityHD Manager.
- Connect to the SQL Server machine with the database you want to enable attachments for.
- Select the Databases tab.
- Locate the database to enable attachments for, right-click its name, and select Enable Attachments from the shortcut menu. ActivityHD prompts you to confirm that you want to enable attachments.
- Click OK. SQL prompts you to specify the folder where you want to store attachments.
-
Browse to the folder you want to use and then click OK.
Tip
AccountingWare recommends you create the attachments folder in the same directory as your company database.
Important!
Never use this procedure on a database with an active server process. Use the Initialize feature only when a database has been disconnected abnormally from the server process.
To initialize a database:
- Run ActivityHD Manager.
- If the server process is running, click Stop to end it.
- Select the Databases tab.
- Locate the database to initialize, right-click, and select Initialize from the shortcut menu.
ActivityHD warns that a database with an active server process should not be initialized.
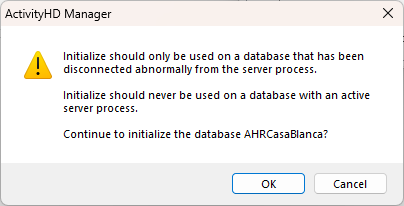
- Click OK. ActivityHD reports when the database has been initialized.
- Click OK.
To view database properties:
- Run ActivityHD Manager.
- Connect to the SQL Server machine where the database you want to view properties for is located.
- Select the Databases tab.
- Locate the database in the list, right-click the database name, and select Properties from the drop-down menu. The Database Properties dialog box opens.
-
Select the tab for the information you want to view.
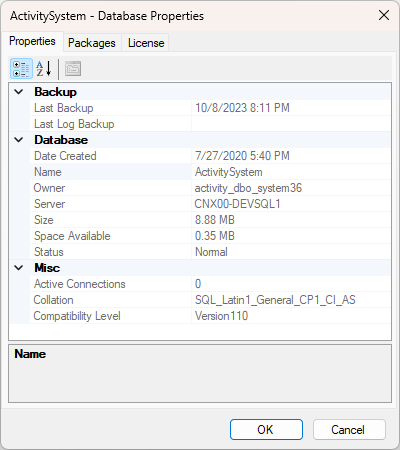
The Database Properties dialog box contains three tabs:
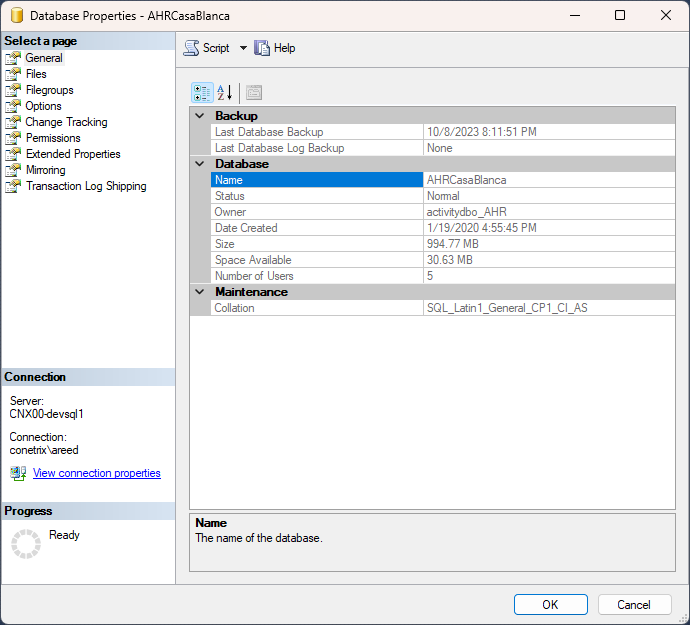
- Properties. This tab shows the date and time of the last database backup and the last log backup; the date and time the database was created; the database name, owner, server name, size, space available, and status; and the number of active connections.
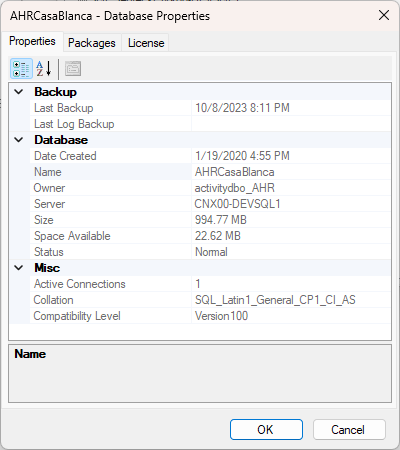
- Packages. This tab shows the packages installed in the database along with the version number for each package.

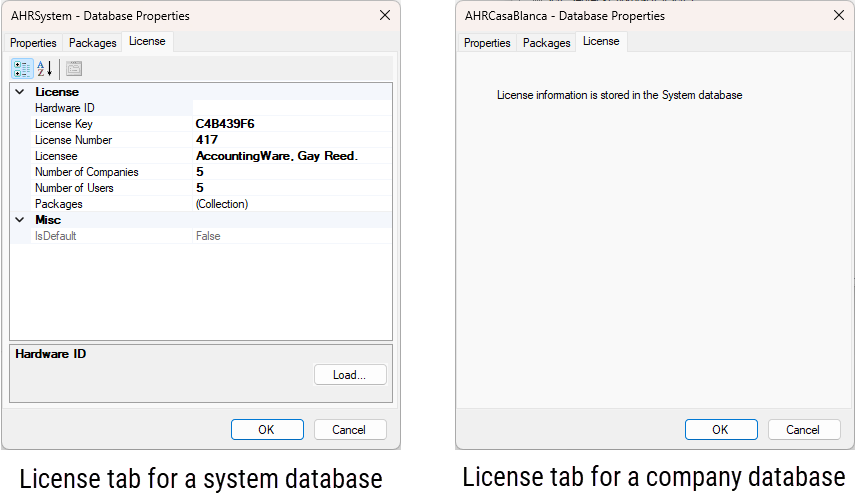
- License. If you selected a system database, this tab shows license information for the system database. If you selected a company database, this tab contains the following statement: "License information is stored in the System database."
- Properties. This tab shows the date and time of the last database backup and the last log backup; the date and time the database was created; the database name, owner, server name, size, space available, and status; and the number of active connections.
![]() Move ActivityHD databases to a new machine
Move ActivityHD databases to a new machine
If you upgrade or change servers or workstations which run ActivityHD components, some reinstallation of ActivityHD will be required.
Remember there are at least two ActivityHD databases: the ActivityHD System database and one or more ActivityHD company databases. The instructions below explain how to move both these databases to a new machine.
- Disconnect all clients from the ActivityHD company databases. For each company database:
- Under the company folder, select the Authorized Users folder. The HD view shows a list of company authorized users.
- In the HD view, locate the Connected column and scan it for active connections.
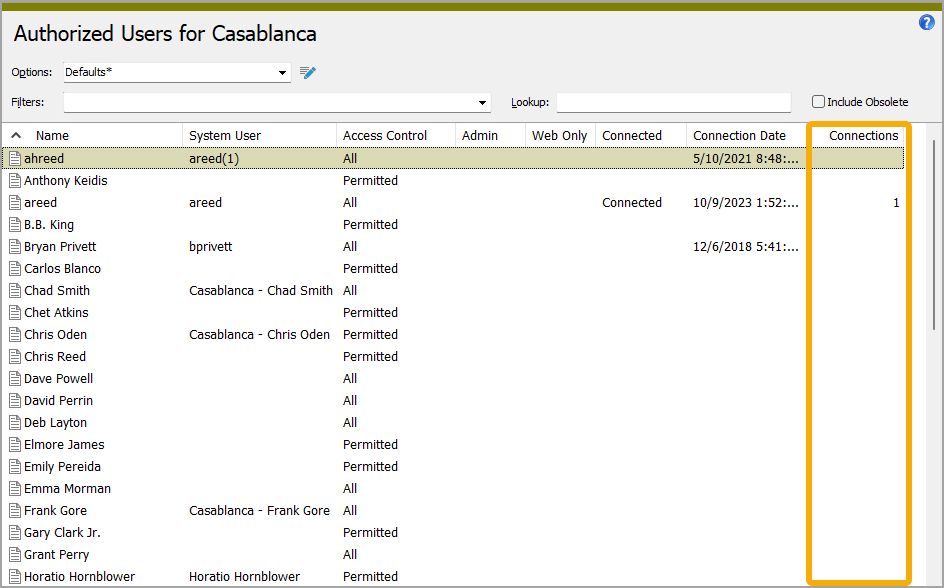
- If you find connected users, notify them to save their work and log out of ActivityHD or they will automatically be disconnected when you stop ActivityHD services.
- Disconnect all clients from the ActivityHD System database.
- Under the system folder, select the Administration > Authorized Users folder. The HD view shows a list of system authorized users.
- In the HD view, locate the Connections column and scan it for active connections.
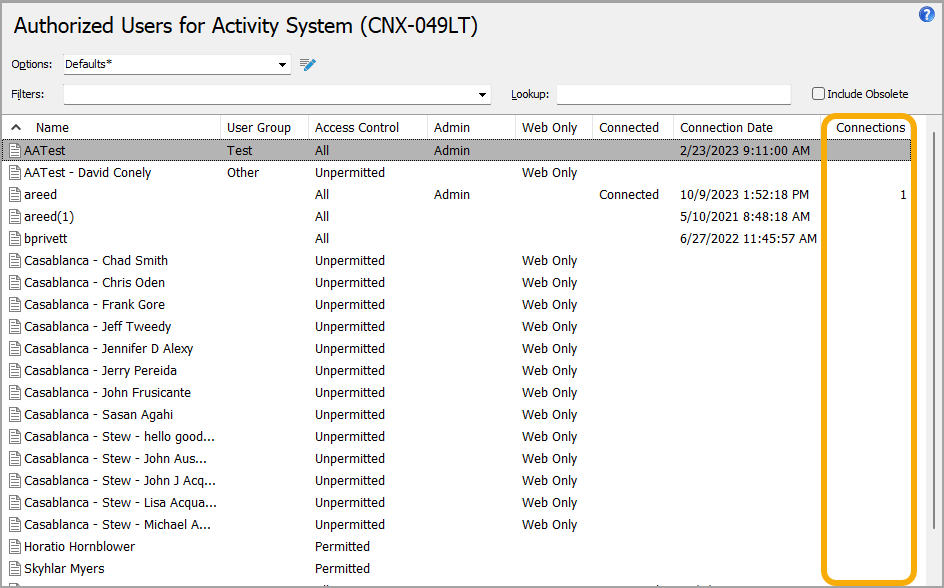
-
If you find connected users, notify them to save their work and log out of the ActivityHD services or they will automatically be disconnected when you stop the ActivityHD services.
Note
A connection is made for the NT username that is running the ActivityHD service for each company service that is running. (The username could be ActivitySystem, Administrator, or NT AUTHORITY\SYSTEM. This username disconnects automatically when the ActivityHD company service is stopped.
- Create a list of SQL Server logins. In a later step, you will create SQL Server logins for the ActivityHD databases which will run on the new machine. (This is often the same login for all company databases and the system databases.) To print a list of the SQL Server logins that you need to create:
- From the system folder, right-click the Companies folder, and select Select and Report > Companies Listing from the drop-down list.
- Print the Companies Listing. The listing shows the database name and login for each company database.
- Stop the ActivityHD System service.
- Run ActivityHD Manager.
- On the Configure tab, click Stop.
- Ensure the SQL Server on the new machine is in "mixed" authentication mode.
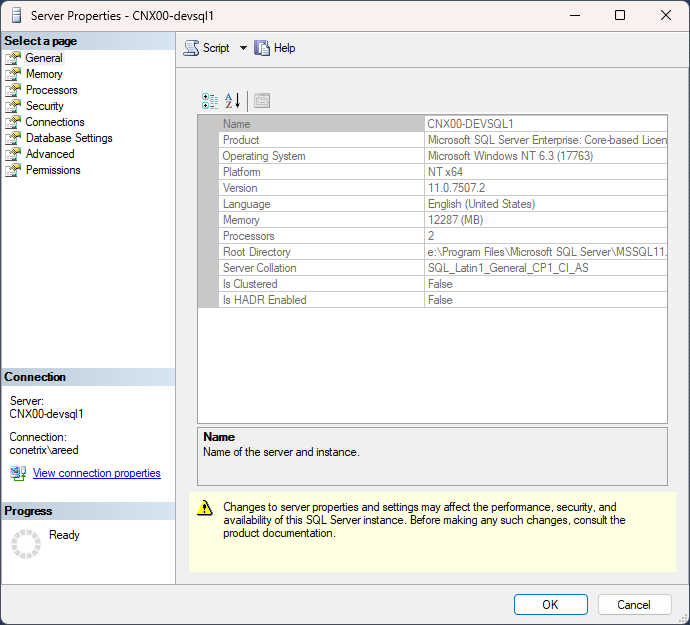
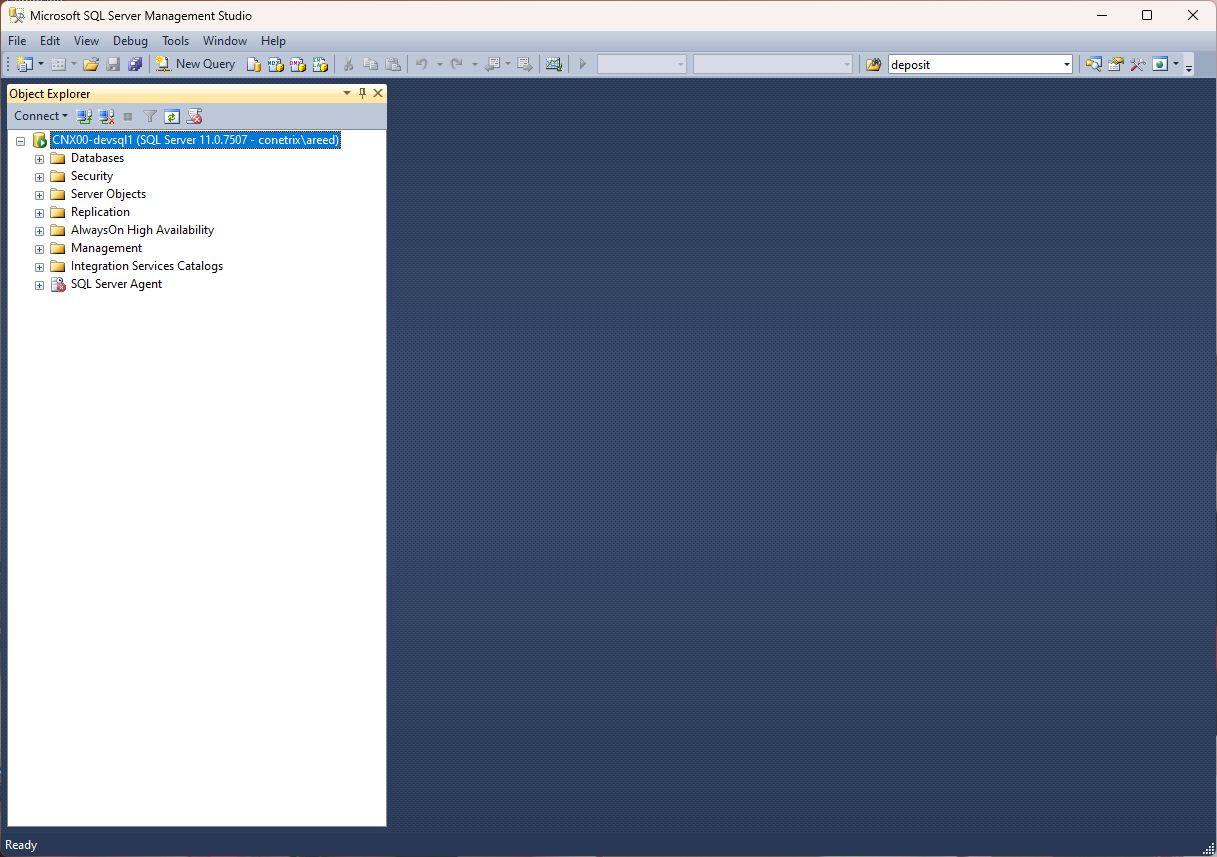
- Start SQL Server Management Studio on the new machine and connect to the server.
- In the Object Explorer, locate and right-click the server node, then select Properties from the drop-down list. The Server Properties dialog box opens.
- Select the Security page.
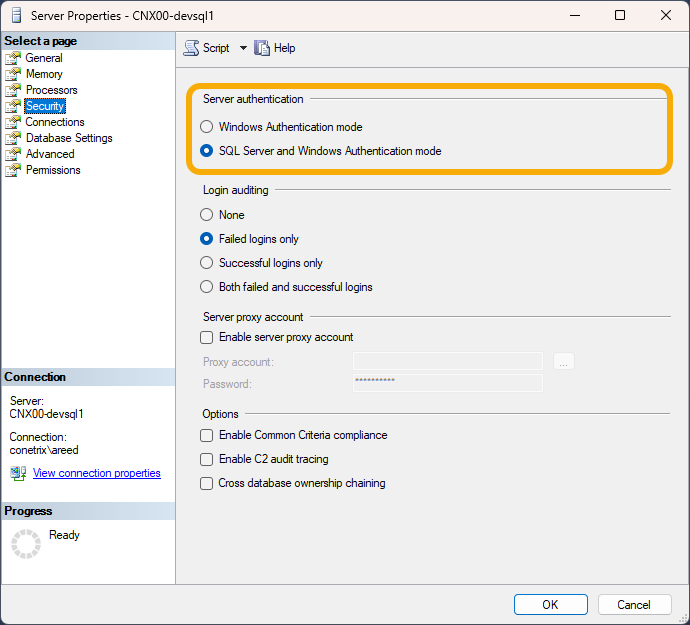
- In the Server authentication section, ensure that "SQL Server and Windows Authentication mode" is selected.
- Click OK.
- Locate the path for the database files. For each company, do the following:
- Start SQL Server Management Studio.
- In the Object Explorer, expand the Databases folder, then locate and right-click the database, and select Properties from the drop-down list. The Database Properties dialog box opens.
Select the Files page.
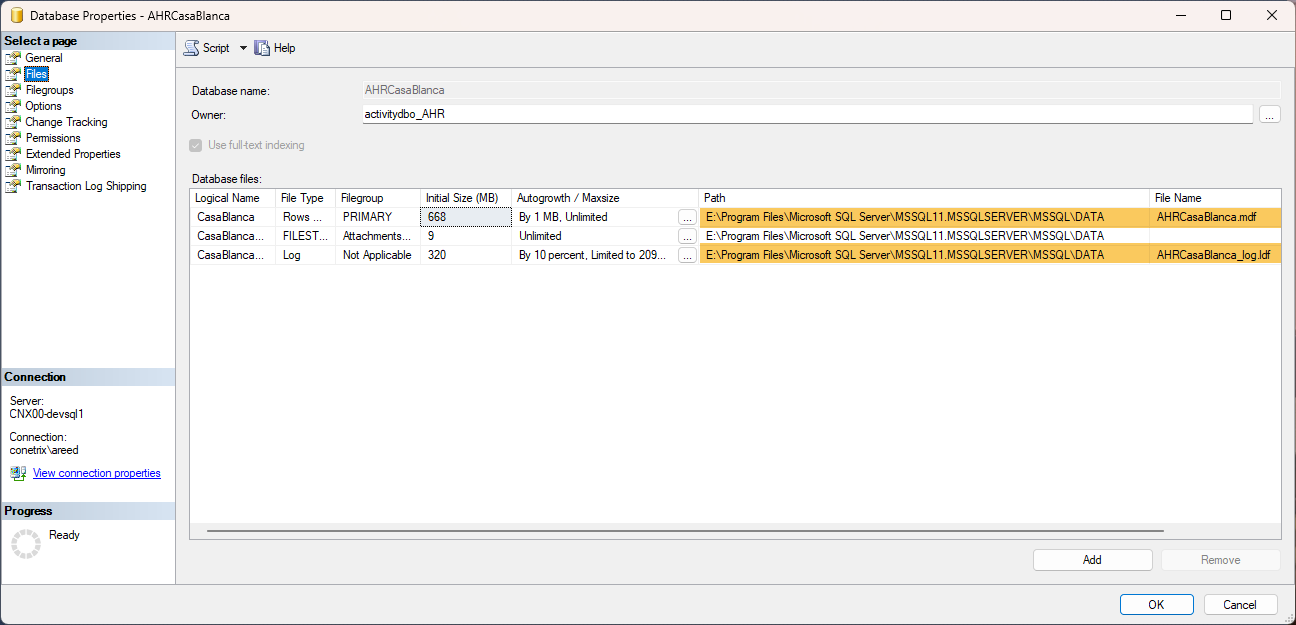
- Note the path and file name of the .MDF and .LDF files.
- Detach the database.
- In SQL Server Management Studio in the Object Explorer, expand the Databases folder, then locate and right-click the database, and select Tasks > Detach from the shortcut menu. The Detach Database dialog box opens.
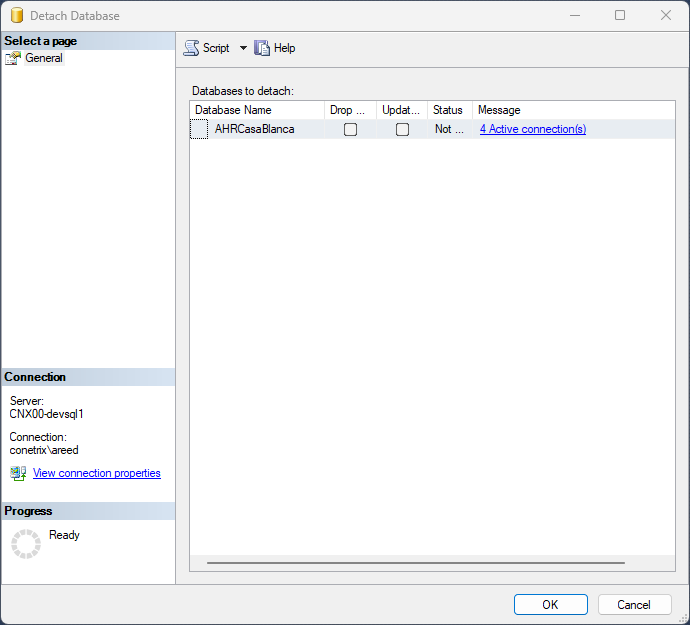
- Click OK.
- In SQL Server Management Studio in the Object Explorer, expand the Databases folder, then locate and right-click the database, and select Tasks > Detach from the shortcut menu. The Detach Database dialog box opens.
- Copy the database files to the new machine.
- Copy the .MDF and .LDF files from the old machine (the files you located in step 6).
- Navigate to the folder on the new machine where the database files will be stored and paste the files there.
- Attach to the copied database on the new machine.
- In SQL Server Management Studio in the Object Explorer, right-click the Databases folder and select Attach from the drop-down menu. The Attach Databases dialog box opens.
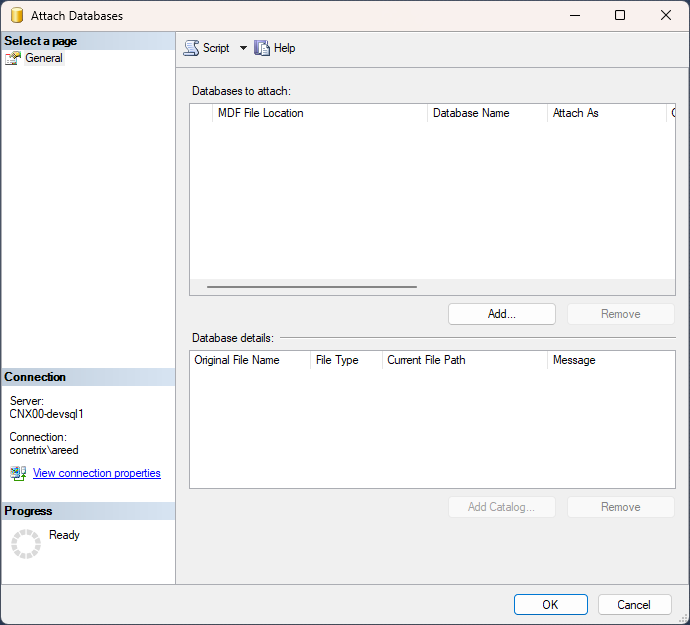
- Below the Databases to attach list box, click Add. The Locate Database Files dialog box opens.
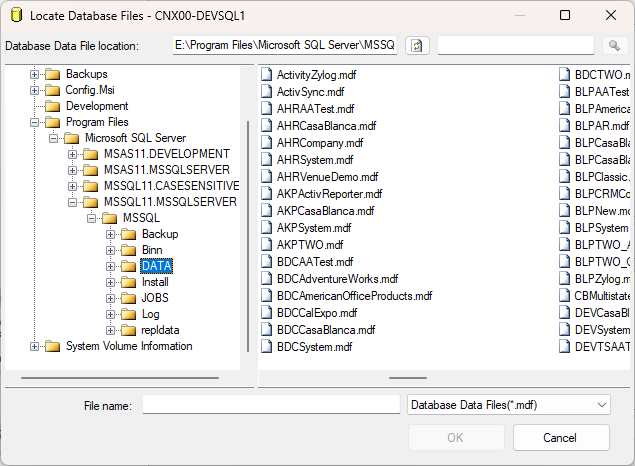
- Browse to and select the .MDF file you copied to the new machine.
- Click OK.
- In the Database details list box, edit the Current File Path for the .MDF and .LDF files to match the path on the new machine.
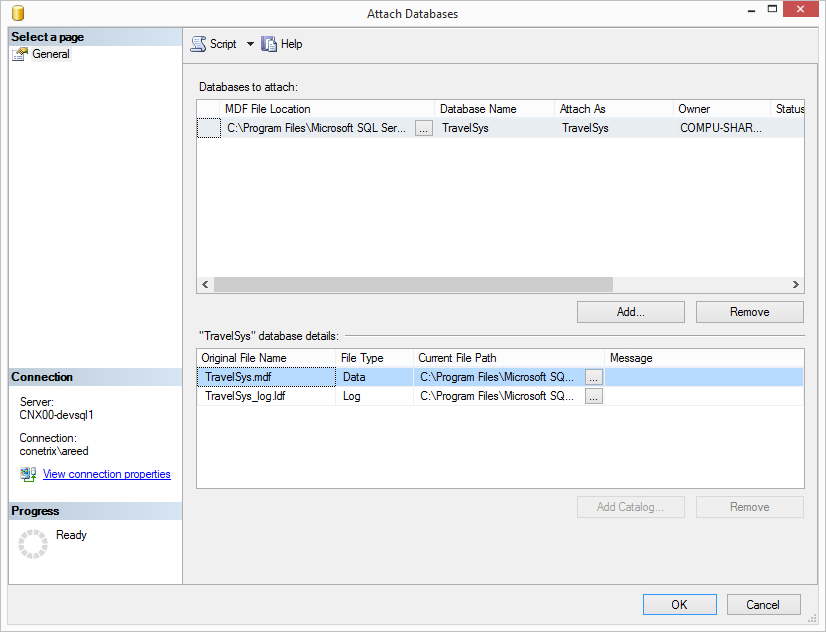
- When you finish, click OK.
- In SQL Server Management Studio in the Object Explorer, right-click the Databases folder and select Attach from the drop-down menu. The Attach Databases dialog box opens.
- Create SQL logins. Use SQL Server Management Studio for the SQL Server on the new machine to create SQL logins.
- Start SQL Server Management Studio.
- Right-click the Security folder and select New > Login from the drop-down menu. The Login - New dialog box opens.
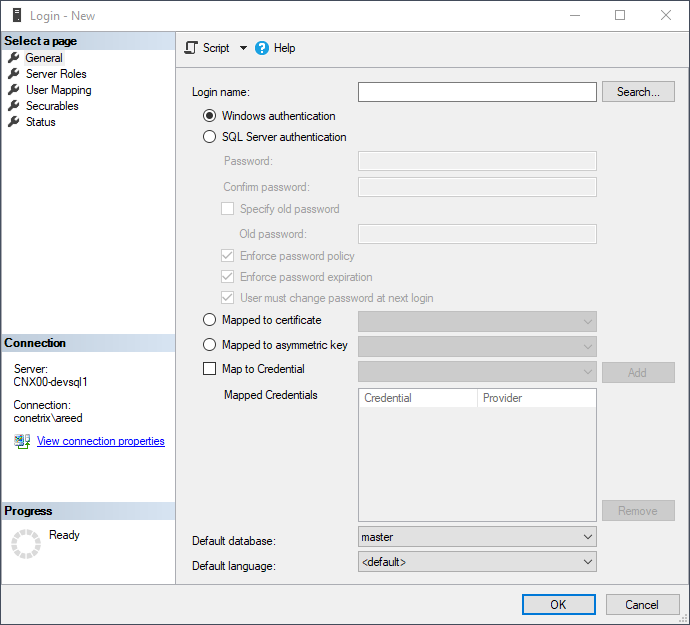
Enter the Login name if you know it.
Note
If you do not know the SQL login that is currently being used for the system, you can invent a new login name and password. This is the login name and password you will use when you configure the ActivityHD System.
If you know the login name but not the password, you can enter and confirm a new password.
- Select "SQL Server authentication".
If you entered a new login name or need to change the password for an existing login name, enter a Password and then re-enter it in the Confirm Password field.
Note
Any changed password used for a company database will need to be changed in ActivityHD once the new ActivityHD System server is running.
- From the Default database drop-down list, select the database for which you are creating a SQL login.
- Click OK.
- Change the owner for each new database. After you set up the databases and create the SQL logins, you need to ensure that the SQL login has "database owner (dbo)" access to the appropriate database.
- In SQL Server Management Studio in the Databases folder, locate and right-click on the new database, then select Properties. The Database Properties dialog box opens.
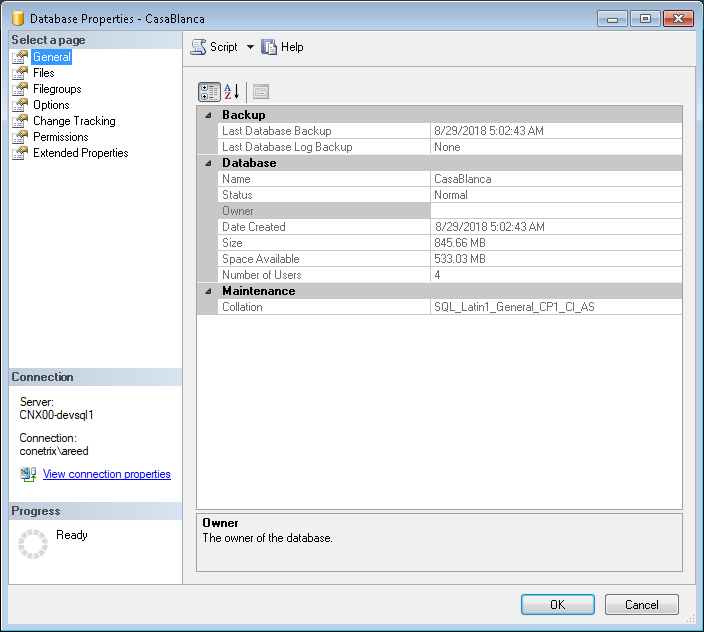
- Select the Files page.
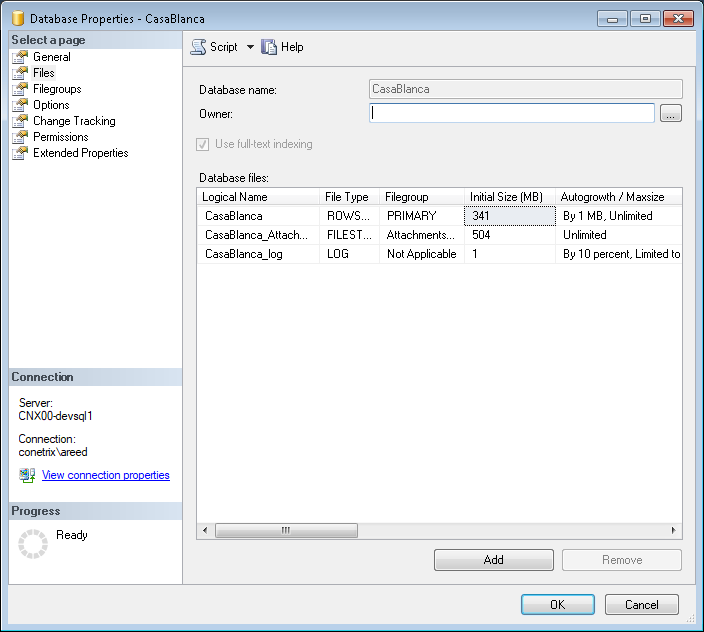
- In the Owner field, enter or look up the database owner's login name.
- Click OK.
- In SQL Server Management Studio in the Databases folder, locate and right-click on the new database, then select Properties. The Database Properties dialog box opens.
- Update ActivityHD license information.
- Run ActivityHD Manager.
- Connect to the new SQL Server machine.
- On the Databases tab, locate and right-click the new ActivityHD System database, then select Properties from the drop-down menu. The Database Properties dialog box opens.
- Select the License tab.
-
Click Load. The Load License dialog box opens.
- Browse to the license file AccountingWare supplied to you, select it, and click Open. The license loads.
- Click OK.
- Configure ActivityHD and start the ActivityHD System service.
- Configure ActivityHD.
- Start the system server.
- Change each company's database server in ActivityHD Explorer.
- Run ActivityHD Explorer.
- From the system folder, highlight the Companies folder.
-
In the HD view, double-click a company name to open the company for editing.
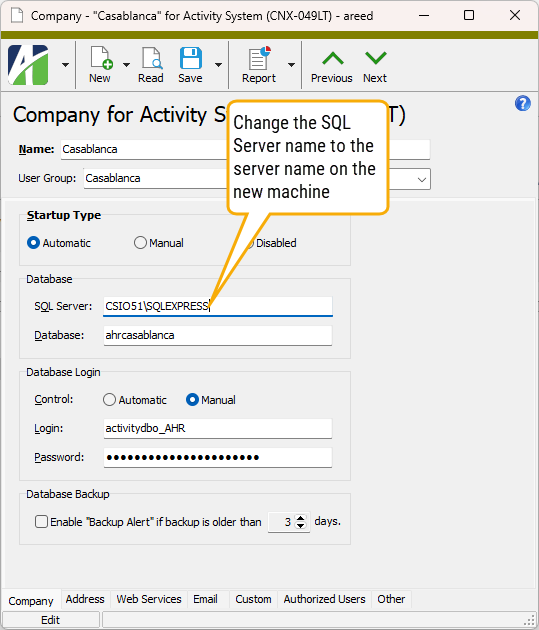
-
In the SQL Server field, change the server name to the name of the new SQL Server host machine.
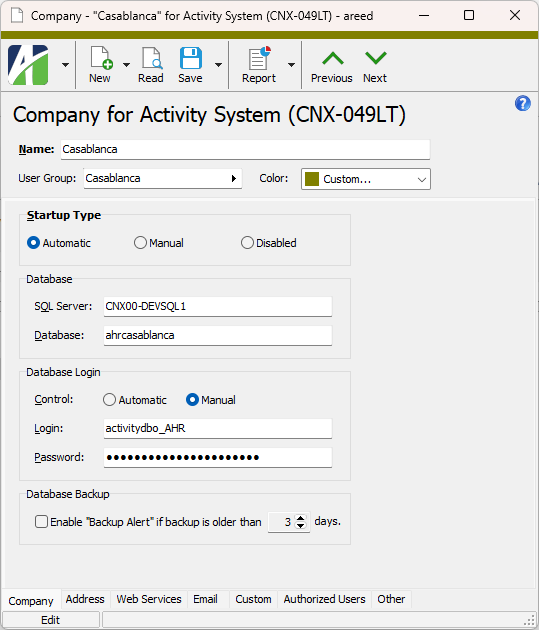
- Change the Login and Password if necessary.
- Save your changes.
- Start the ActivityHD companies.
- Run ActivityHD Explorer.
- From the system folder, highlight the Companies folder.
- In the HD view, right-click a company you want to start and select Start from the shortcut menu.
The Activity System service performs database maintenance on the system database and on each of the company databases for any running company. During database maintenance indexes are reorganized or rebuilt if necessary based on levels of fragmentation. Database maintenance actions are logged to the Windows Event log.
Limited database maintenance is performed once per hour. Full maintenance is performed once per day between 12:00 AM and 5:00 AM. However, you can configure the maintenance interval with the following registry value:
HKEY_LOCAL_MACHINE\SOFTWARE\AccountingWare\Activity System\MaintenanceInterval (DWORD)
Default: 3600000 (ms)
Set to 0 to disable this feature
Database maintenance can be performed manually by executing the ActivityDatabaseMaintenance stored procedure on each database.
Starting in a 8.26-0, the database maintenance procedure is also run automatically in "unlimited mode" during configuration if either of the following occur:
- Database conversions are performed on the system or company databases.
- Packages are installed into the system or company databases.
In addition to rebuilding and reorganizing the indexes, when ActivityDatabaseMaintenance is run in "unlimited mode", the statistics on all database objects are updated. Fresh indexes and statistics promote optimal query performance.
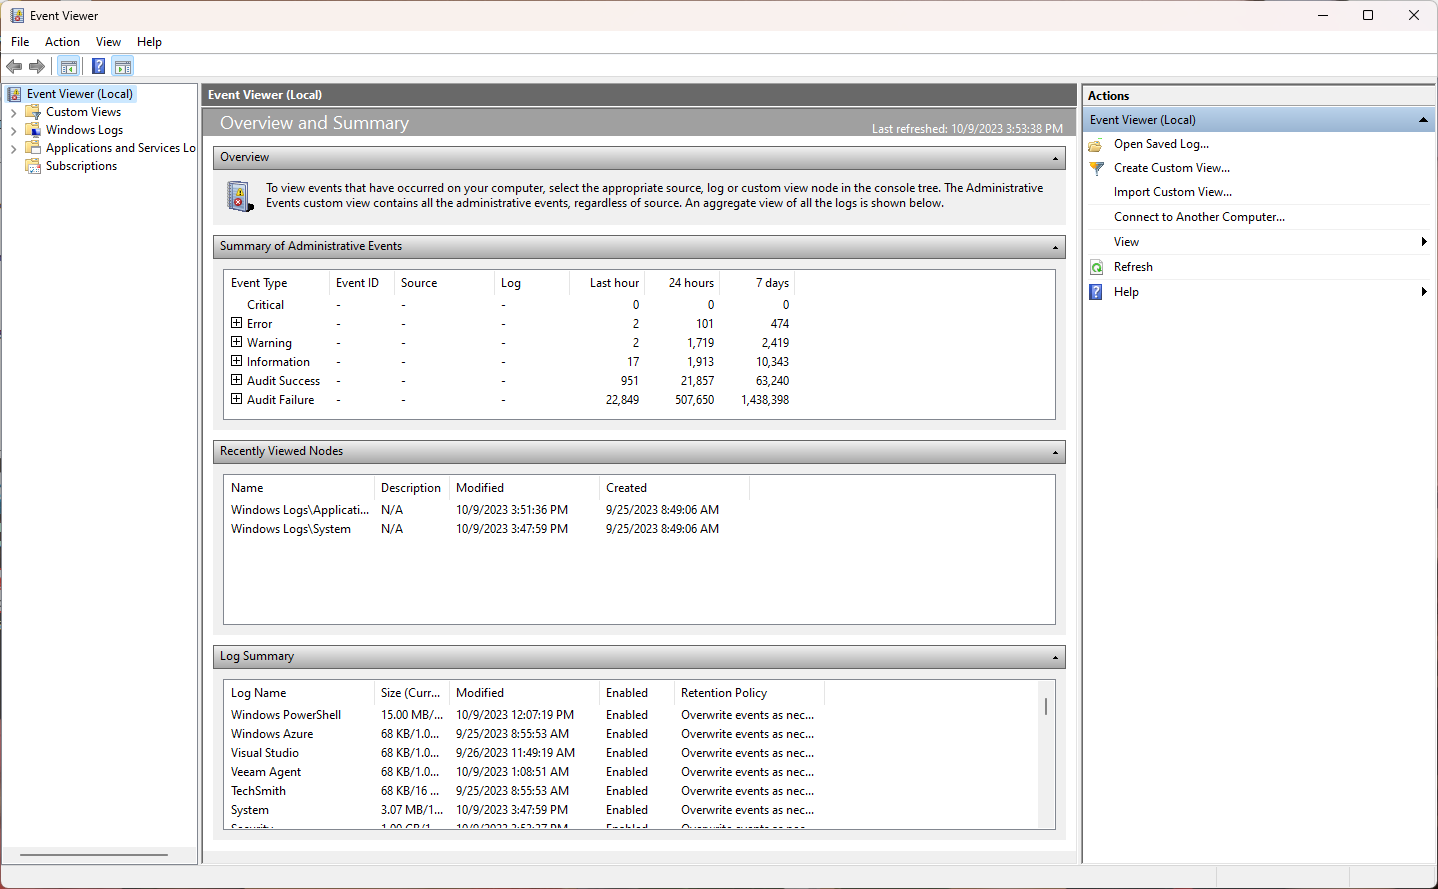
The Event Viewer is part of the Microsoft Management Console toolkit. It lets you view the event logs for the system, applications, and security. Application and system log entries can be informational entries, warnings, or errors.
To open the Event Viewer from ActivityHD Manager:
- Run ActivityHD Manager.
-
From the menu, select Tools > Event Viewer.
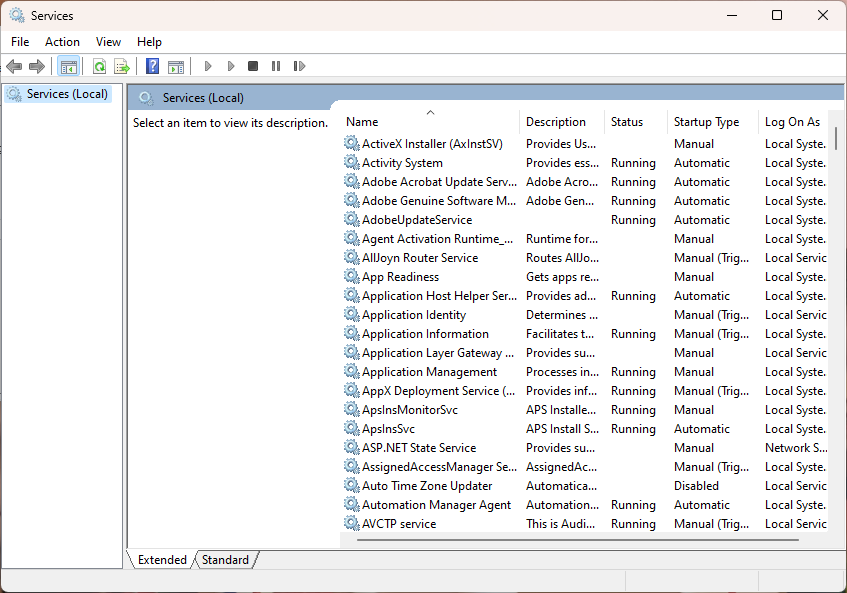
The Services console is part of the Microsoft Management Console toolkit. It lets you stop and start services on local and remote computers and perform other service management functions.
To open the Services console from ActivityHD Manager:
- Run ActivityHD Manager.
-
From the menu, select Tools > Services.
![]() Access SQL Server Management Studio
Access SQL Server Management Studio
SQL Server Management Studio (SSMS) provides access to your system and company databases.
To open SSMS from ActivityHD Manager:
- Run ActivityHD Manager.
-
From the menu, select Tools > SQL Server Management Studio. You are presented with the Connect to Server dialog.
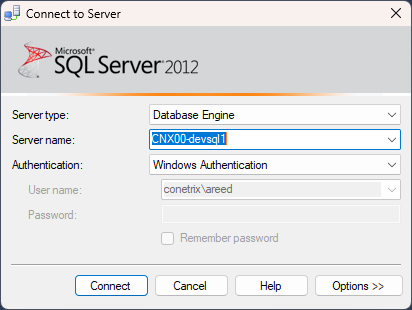
-
Provide your credentials, then click Connect. SSMS loads in the window.
|
5225 S Loop 289, #207 Lubbock, TX 79424 806.687.8500 | 800.354.7152 |
© 2025 AccountingWare, LLC All rights reserved. |