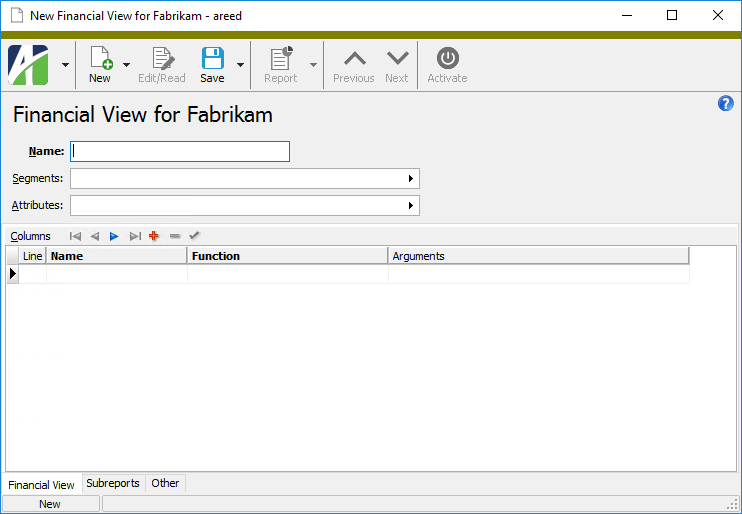
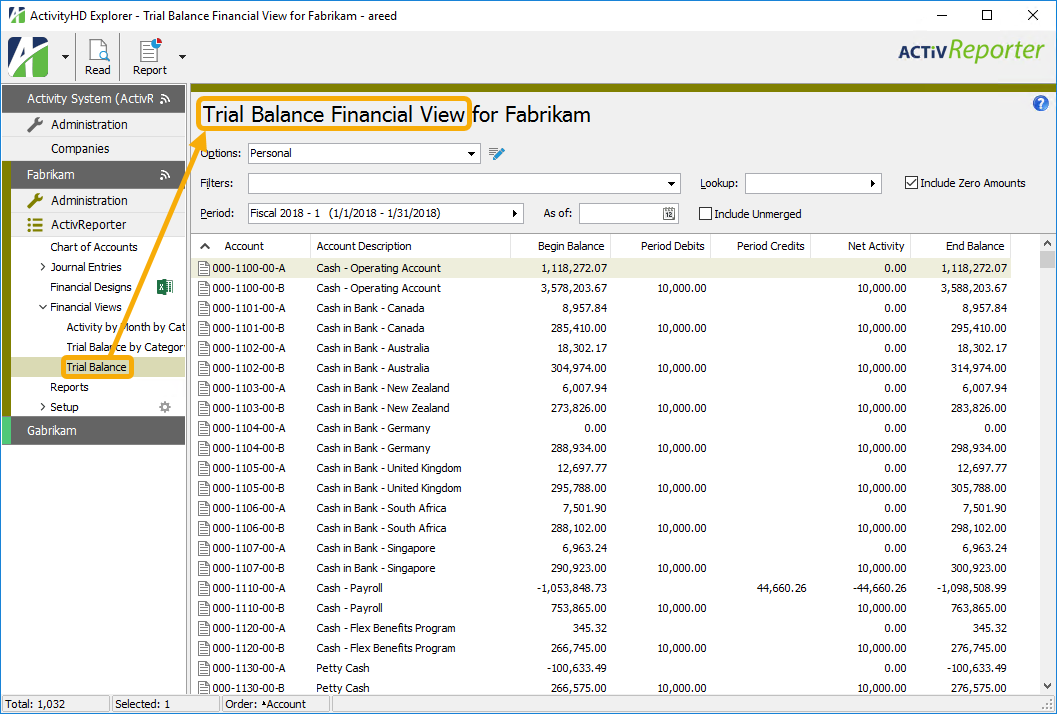
Financial views
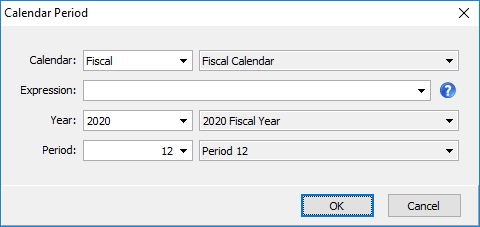
Financial views help you create dynamic financial statements that you can view in the HD view or generate in report form for deeper analysis of your financial data. Each financial view can be filtered by calendar, by year, and by period and you can include or exclude unmerged entries which are not on hold. Views which explicitly include account numbers can also be filtered by account number.
Planning is vital to a great financial view. AccountingWare suggests that you design the financial view on paper before undertaking the design in ActivReporter. You may be able to use existing rollups to group information for financial reports, or you may need to create new rollups.
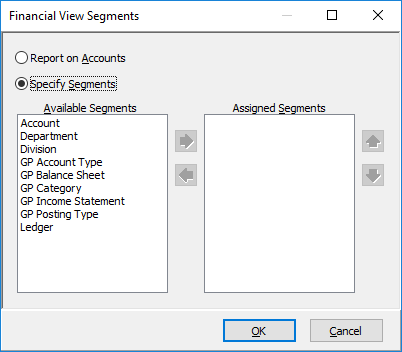
The rows in a financial view can report over all accounts in the chart of accounts or over specified segments and/or rollups. The columns in a financial view are defined by choosing a column name, financial view function, and depending on the function selected, by specifying an items expression.
How the financial view is defined determines what information is available for financial reports based on the financial view.

Financial views security
Common accesses available on financial views
| Access | A user with this access can... |
|---|---|
| Change | Use the mass change action on financial views. |
| Change Logs | Access change logs for financial views. |
| Custom Fields | Create and edit custom fields for financial views. |
| Data | Have read-only access to financial views from anywhere in the software (e.g., field validations, filters, date expressions). |
| Delete | Delete financial views. |
| Edit | Edit financial views records. |
| Export | Export financial views records from ActivReporter. |
| Import | Import financial views records into ActivReporter. |
| New | Create new financial views records. |
| Read | Have read-only access to financial views records. |
| Report | Run reports with financial views information. |
| Report Designs | Create and edit report designs with financial views information. This access enables the Report Designs button on the Output tab of report dialogs. |
| Shared Answers | Create and edit saved answers related to financial views. |
| Shared Filters | Create and edit shared filters on financial views. |
| Visible | View the Financial Views folder in the Navigation pane. |
Special accesses available on financial views
| Access | A user with this access can... |
|---|---|
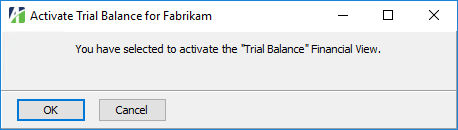
| Activate | Activate a financial view. Its folder becomes visible in the Navigation pane. |
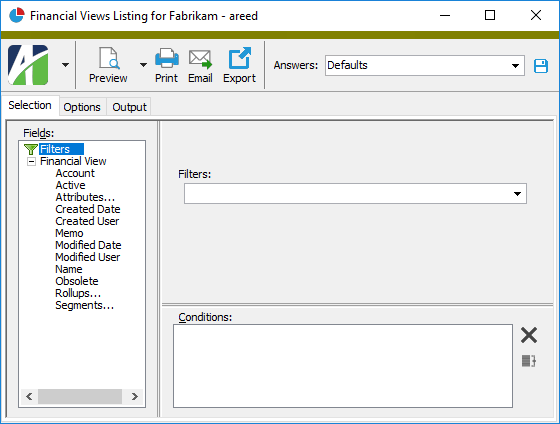
Financial views filters
The following built-in filters are available for financial views:
| Filter Name | Effect |
|---|---|
| Active Financial Views | Lists active financial views only. |
| Inactive Financial Views | Lists inactive financial views only. |
Fully qualified naming convention
When specifying arguments in conditional expressions, it is important to eliminate any ambiguity so that ActivReporter can correctly evaluate the expressions. To do this, we refer to the element we are specifying a condition on by its fully qualified name. In general, the fully qualified name has the following form:
<Two-character package ID>.<entity name>.<item name>
Ambiguity can arise in a couple of ways:
- If you have a GL segment named "Account", it can conflict with the GL account entity. In order to eliminate the ambiguity, refer to the account entity as GL.Account and to the segment as GL.Segment.Account.
-
If you are using financial functions which are not GL-specific, you may need to distinguish segment/rollup names from attribute names (or entity names) from other packages. If a segment/rollup name is the same as the attribute or entity name, an ambiguity can occur.
Fully-qualified names are not necessary for GL-specific functions such as Activity, Balance, YearToDate, etc.; however, there's no harm in using them.
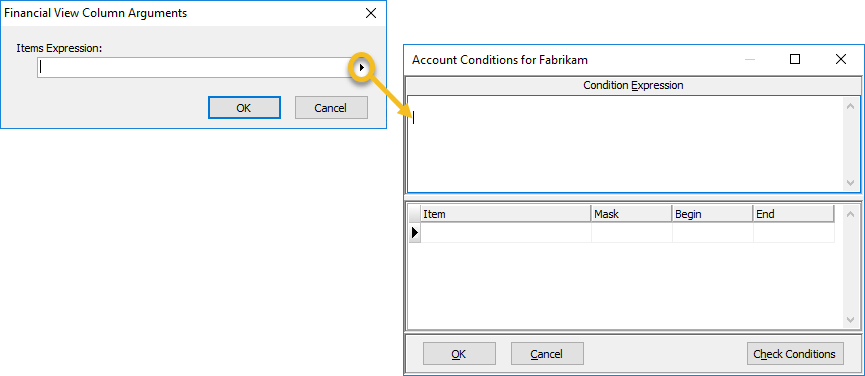
Account Conditions
Enter a SQL condition statement here to exclude or include information from the financial view. Alternatively, you can use the table below to describe the conditions you need and ActivReporter will build and add the conditions to this text box.
Enter a mask for the selected item values when the values you need to select have common characters but are not in a particular order.
Press F3 to look up the value.
If a value is already selected, you can press F4 to open the record in its native editor.
Enter the first value in the range of item values you need to select. Use a range when the values are in a defined order.
Press F3 to look up the value.
If a value is already selected, you can press F4 to open the record in its native editor.
Enter the last value in the range of item values you need to select. Use a range when the values are in a defined order.
Press F3 to look up the value.
If a value is already selected, you can press F4 to open the record in its native editor.
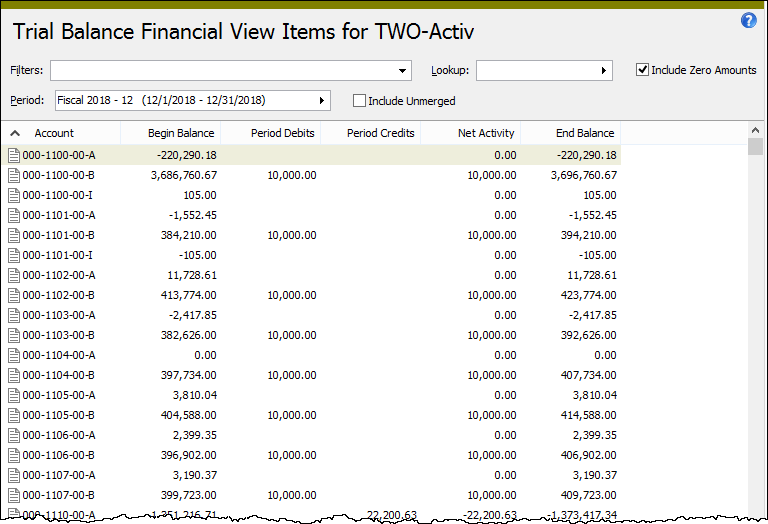
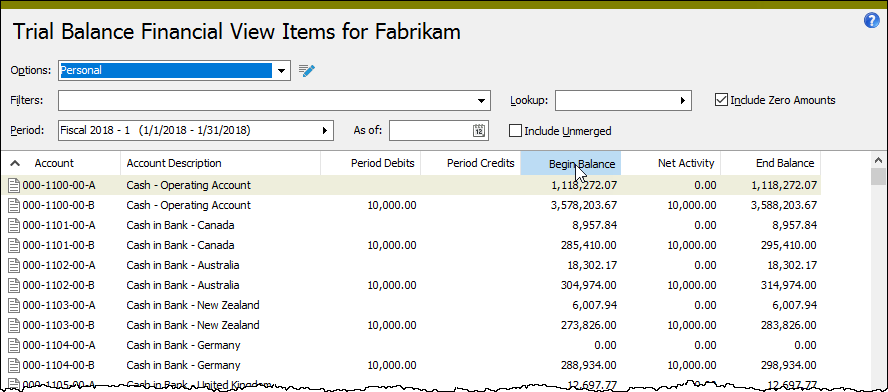
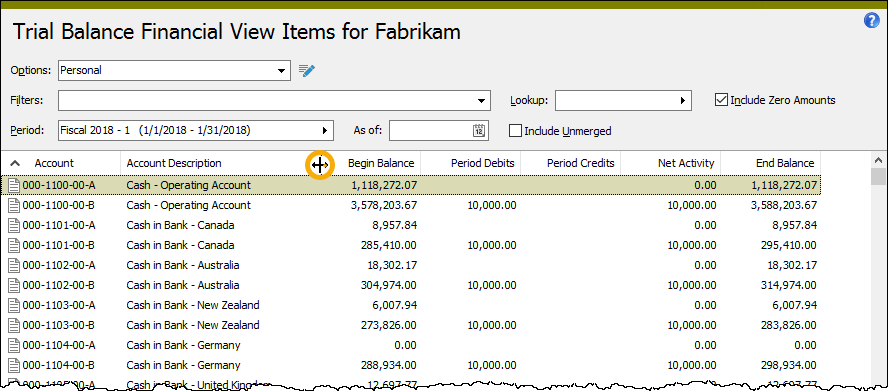
HD view
ActivReporter provides several ways to tweak the HD view to make it work for you.
Note
For more on how to show and hide columns when using the View Options feature, click here.
Showing columns
- Right-click in the HD view and select Options from the shortcut menu. The Options dialog box opens.
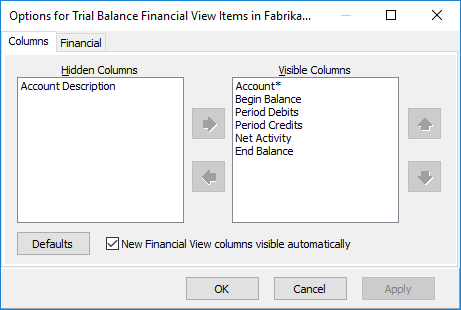
- In the Hidden Columns list box, select the column(s) to show. You can use Ctrl and/or Shift selection to select multiple columns.
- Click
 to move the selected column(s) to the Visible Columns list box.
 - Click OK.
Hiding columns
- Right-click in the HD view and select Options from the shortcut menu. The Options dialog box opens.
-
In the Visible Columns list box, select the column(s) to hide. You can use Ctrl and/or Shift selection to select multiple columns.
Note
Each entity has one or more identifier columns which are denoted in the Options dialog box by an asterisk (*). Identifier columns cannot be hidden and, consequently, cannot be removed from the Visible Columns list box.
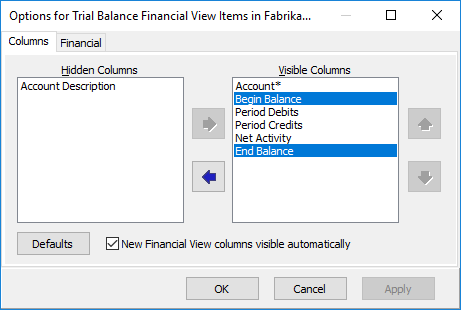
- Click
 to move the selected column(s) to the Hidden Columns list box.
 - Click OK.
Rearranging columns
Method 1
- Right-click in the HD view and select Options from the shortcut menu. The Options dialog box opens.
- In the Visible Columns list box, highlight a column you want to move.
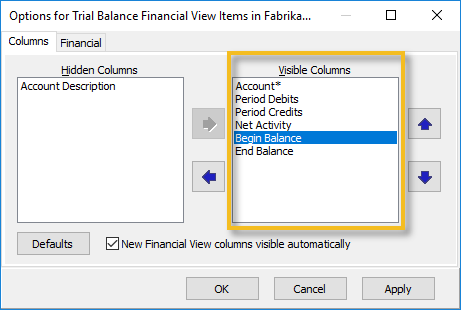
- Use
 and
and  to move the column to the desired position.
 - Repeat steps 2-3 for other columns until you achieve the desired order.
- Click OK.
Method 2
- In the HD view, click the heading of the column you want to move and hold the mouse button down.
- Drag the column to the desired position. A vertical blue line indicates where the column will be moved.
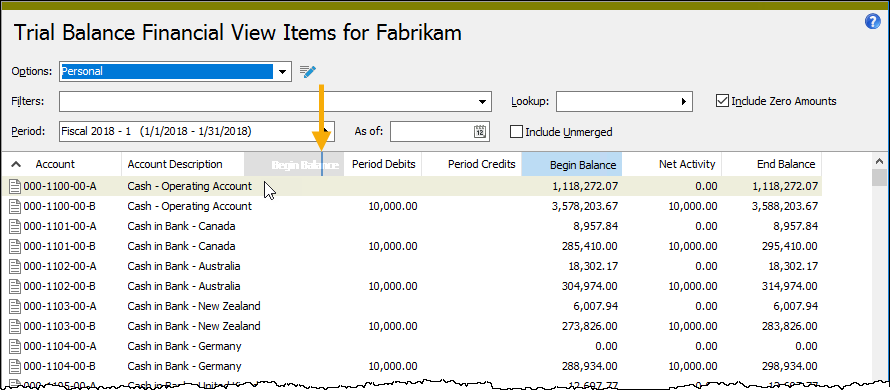
- Release the mouse button. The column is moved to its new position.
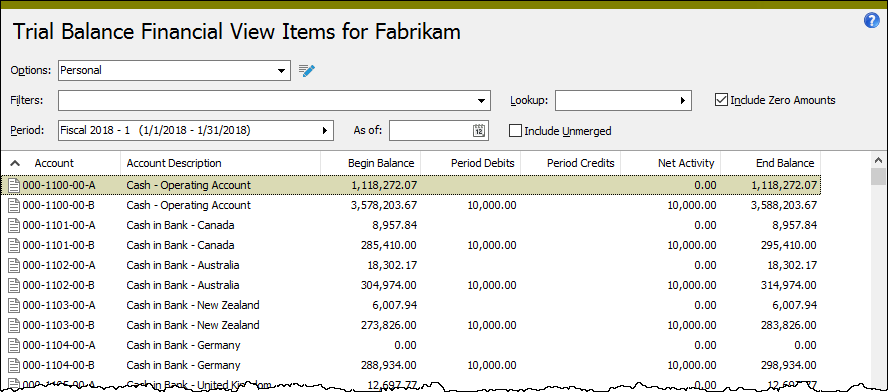
- Repeat steps 1-3 for any other columns you need to move.
Resizing columns
You can shorten or widen the display area of columns.
Method 1
-
Right-click in the HD view header row to open the shortcut menu. If you want to resize a particular column, right-click on that column in the header. If you want to resize all columns, right-click anywhere in the header.
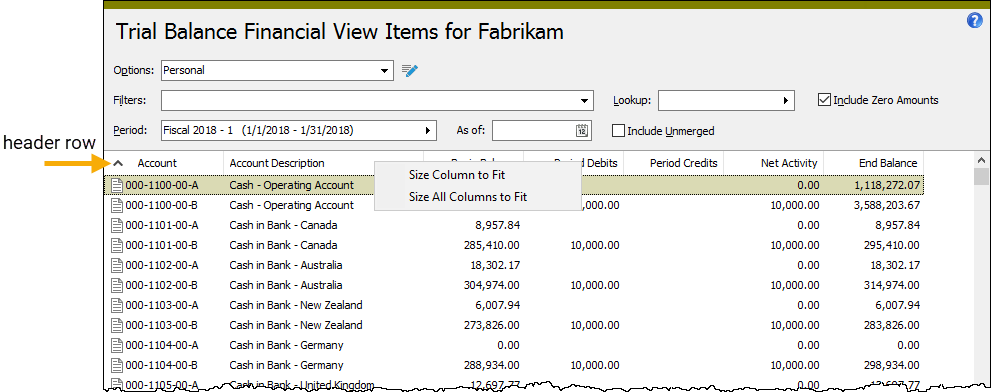
- From the menu, select Size Column to Fit to size the column you clicked on to the width of the longest value visible in the column, or select Size All Columns to Fit to size each column to the width of its longest visible value.
Method 2
- Hover over the vertical divider at the right end of the column you want to resize. The cursor changes to
 .
.
- Click and drag to the right to widen the column; to the left to shorten it.
- When you achieve the desired width, release the mouse button.
Restoring default column settings
At any time you can revert to the column settings you had for a folder when ActivReporter was installed.
- Right-click in the HD view and select Options from the shortcut menu. The Options dialog box opens.
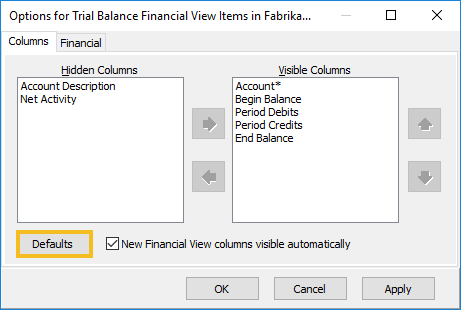
- Click Defaults. The Hidden Columns and Visible Columns list boxes are restored to their original settings as is the HD view.
- Click OK.
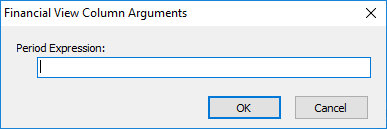
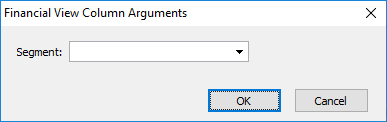
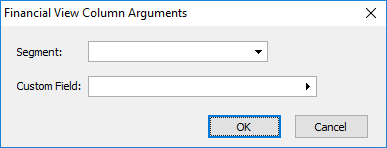
Financial View Column Arguments
Depending on the function selected, none, one, or a combination of the following argument types may be prompted for.
Enter a conditional expression to describe the information to include. The conditions you can apply depend on the function selected. For General Ledger functions, you can define conditions based on account numbers, segment items, or rollup items. In general terms, conditional expressions allow you to limit information by any available attribute that makes sense in the context of the selected function.
When writing conditional expressions, it is important to avoid ambiguity in identifying the item you want ActivReporter to evaluate. When ambiguity is possible, you should fully qualify the item name.
Examples
To distinguish the GL account entity from a GL segment named "Account", use "GL.Account" for the entity and "GL.Segment.Account" for the segment.
Items expressions are optional arguments.
Press F2 to open the Account Conditions dialog box where you can build and verify a conditional statement.
Select the name of the custom field for which to include information. Custom fields are required arguments.
Press F3 to look up the value.