Install ActivReporter
Installation scenarios
Important!
ActivReporter databases require a significant amount of disk space on the SQL Server machine. Typically, it will need disk space approximately equal to the disk space required for the GL tables in Dynamics GP. Seeding the company data during Company Configuration can potentially cause the SQL Server machine to run out of disk space, adversely affecting how the Dynamics GP application runs. Ensure that there is adequate disk space on the SQL Server machine before you attempt to configure your company databases.
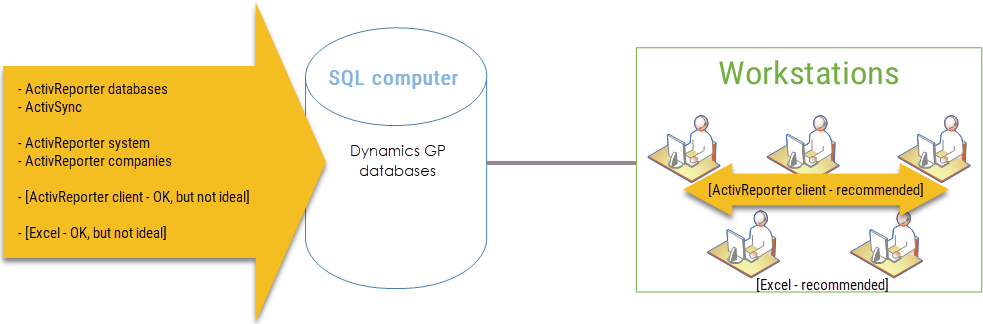
ActivReporter supports three installation scenarios. The scenarios differ in where the software components reside. The supported scenarios are:
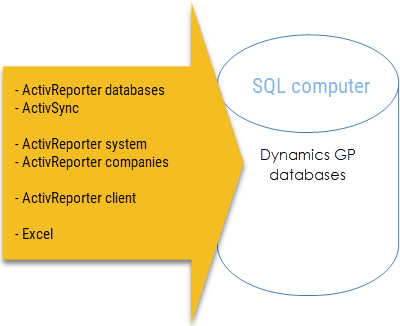
- Demo. All components of ActivReporter including the client and Excel are installed on the computer where the Dynamics GP databases reside. This corresponds to the "Server Install" options in the ActivReporter installation menu.
- Normal. A normal installation typically involves a "Server Install" on the SQL computer where the Dynamics GP databases reside, and a "Client Only" installation on each workstation which will be accessing ActivReporter. In this case, we recommend that Excel not be installed on the SQL computer but instead on each workstation.
- Isolated SQL. For an isolated SQL installation, nothing is installed on the computer where the Dynamics GP databases reside. A separate server (the ActivReporter application server) is set up, and this is where ActivReporter is installed. A "Client Only" installation is performed on each workstation which will be accessing ActivReporter. We recommend that Excel not be installed on the ActivReporter application server but instead on each workstation.

Deciding which "bitness" of ActivReporter to install
ActivReporter is available as a 32-bit or 64-bit application. The "bitness" of ActivReporter you install must match the "bitness" of Microsoft Excel that is installed on the computer you are installing the ActivReporter client on. To find the "bitness" of Microsoft Excel, open a worksheet in Excel, select the File tab, select Account in the left-hand menu, then click the About Excel button. An informational dialog opens.

Find the "bitness" at the end of the first line of text in the dialog.
Important!
Failure to install matching bitnesses may cause ActivReporter to malfunction.
Select the type of installation you want to perform:
A Demo installation occurs entirely on the computer where the Dynamics GP databases reside. Use a "Server Install" option from the ActivReporter installation menu for the Demo installation.
Additional considerations for the Demo installation
- Excel. Microsoft Excel must be installed on the computer you install ActivReporter on, and the "bitness" of ActivReporter you choose must match the "bitness" of Microsoft Excel.
- SQL Server Service Broker External Activator (SSBEA). SSBEA is part of the ActivReporter installation. For the Demo installation, you can run SSBEA using the Network Service account.
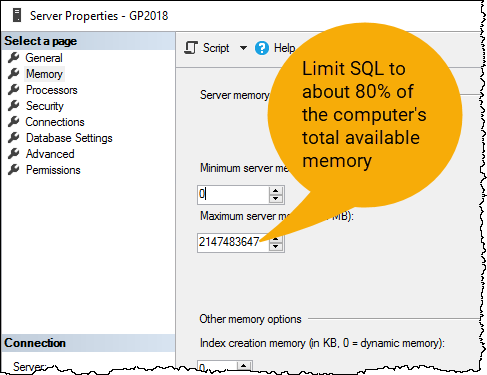
- SQL memory issues. When using the Demo configuration of ActivReporter, be mindful of the amount of memory available to SQL. By default, SQL will consume all the system memory, leaving insufficient memory for other applications such as the ActivReporter system service. As a rule of thumb, you should limit the Maximum Server Memory for SQL to about 80% of the available memory on the system.
- Firewall. Because the Demo installation is contained to a single computer, there should be no firewall issues.
Install the software
- Download the ActivReporter installation file at www.ActivReporter.com/Download.
-
Browse to the location where you saved the installation file and double-click the file name to start the installation process.
-
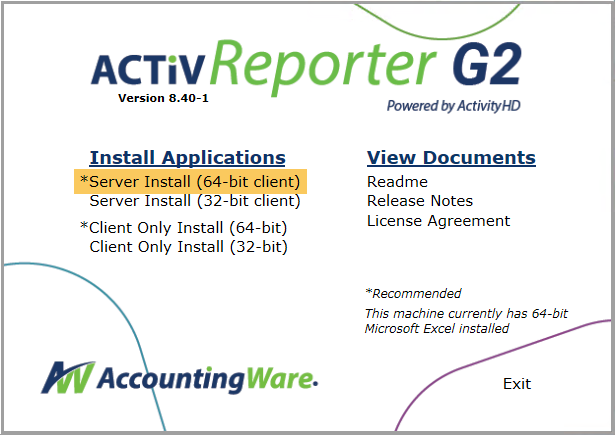
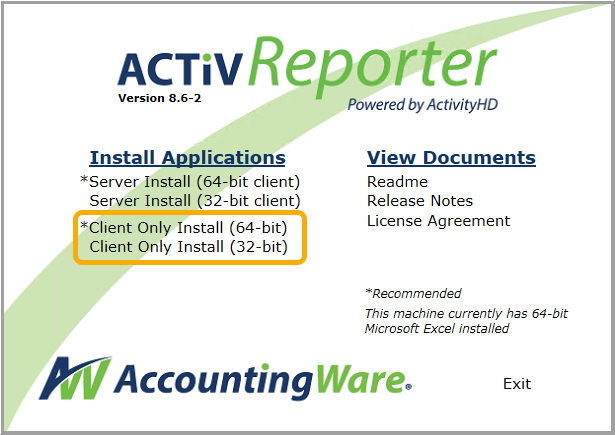
In the "Install Applications" column, click the "Server Install" package with the bitness that matches your installation of Microsoft Excel. ActivReporter conveniently denotes the proper installation with an asterisk (*).
-
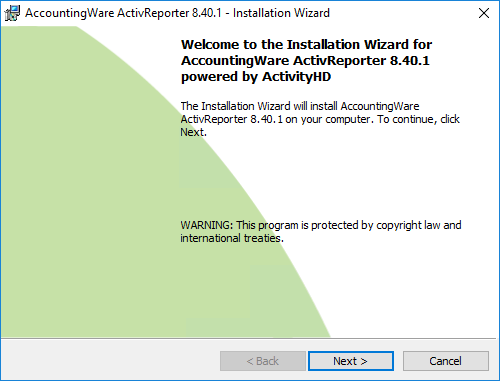
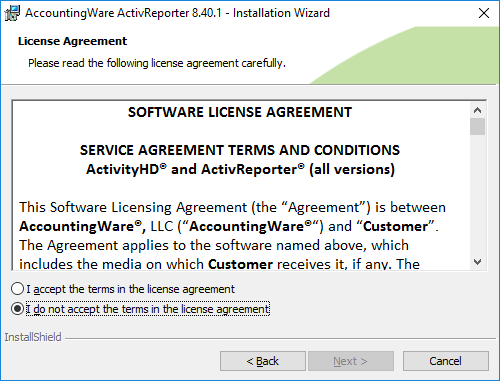
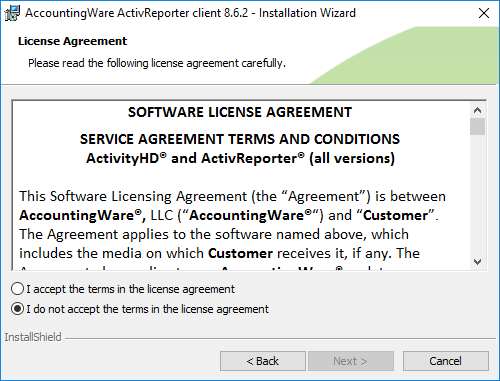
Click Next >. You are prompted to accept the license agreement.

-
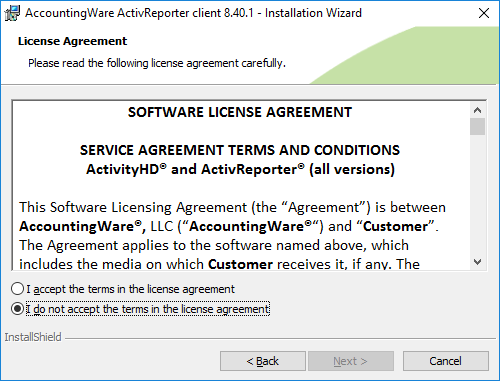
Select "I accept the terms in the license agreement", then click Next >.
-
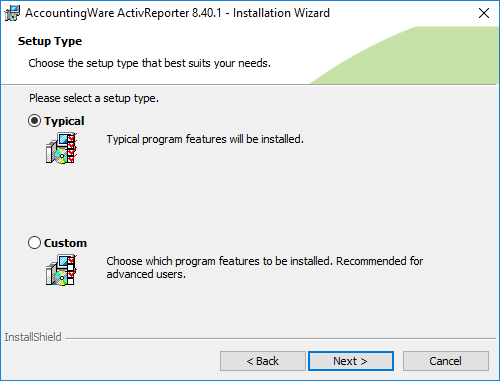
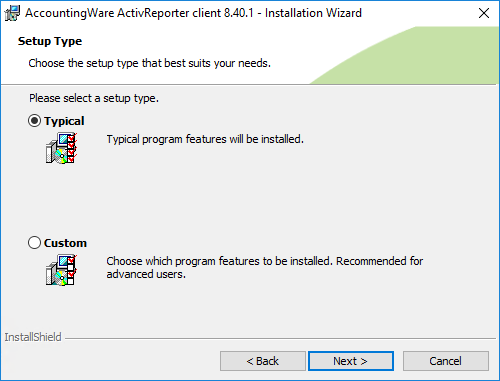
Leave "Typical" selected and click Next >.

-
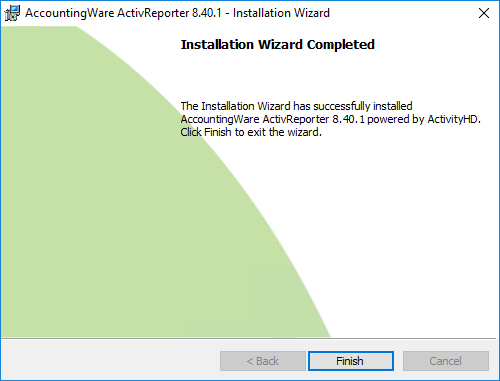
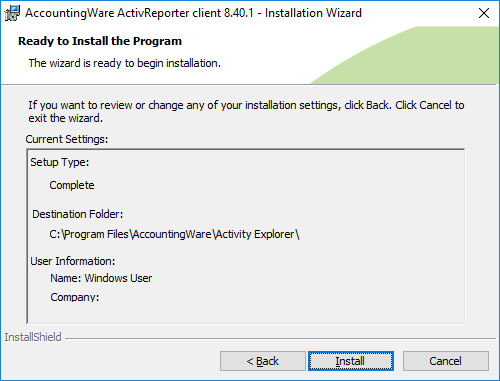
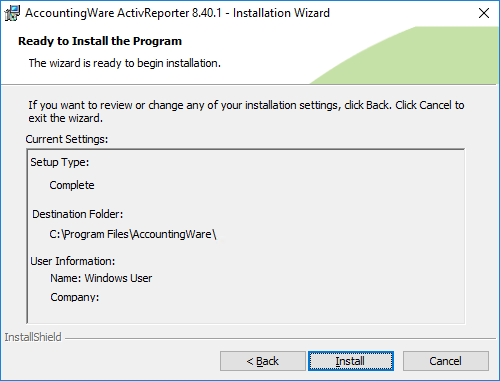
Review the installation settings. When you finish, click Install. The installation ensues and concludes.
-
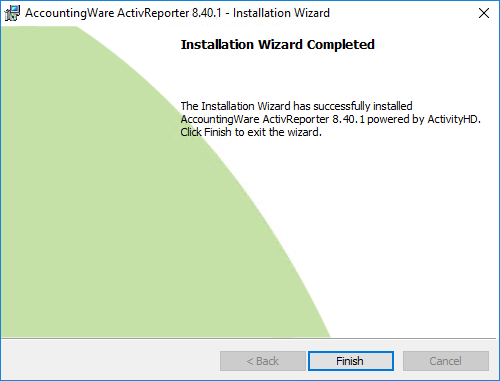
When the installation completes, click Finish.
Configure the system
-
Locate the ActivityHD Manager icon
 on your desktop and double-click it.
-
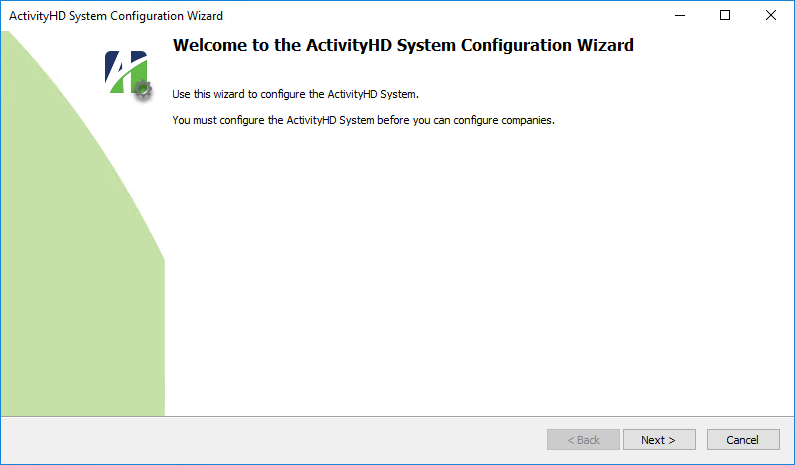
In the Activity System section, click Configure. The ActivityHD System Configuration Wizard starts.
-
Click Next >.
-
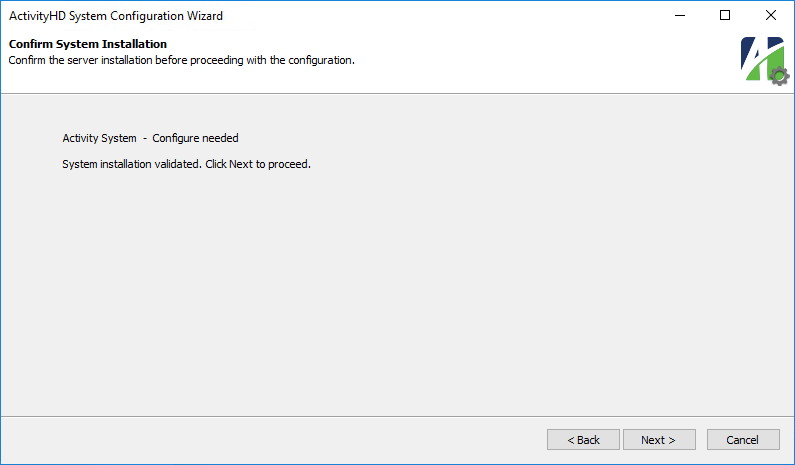
Click Next >.
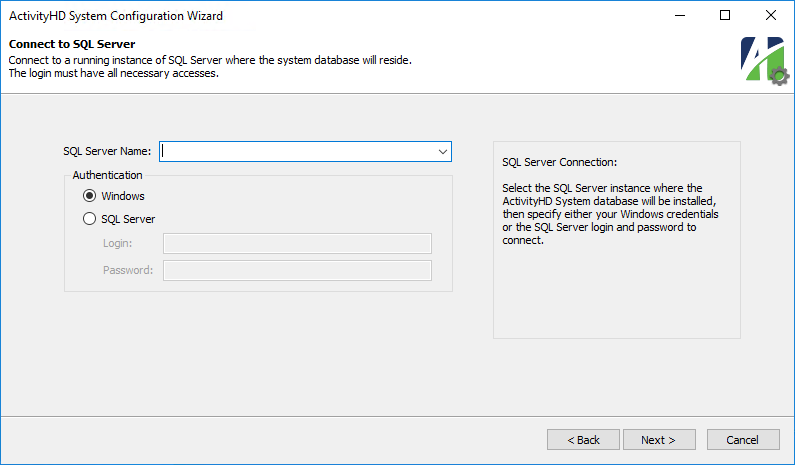
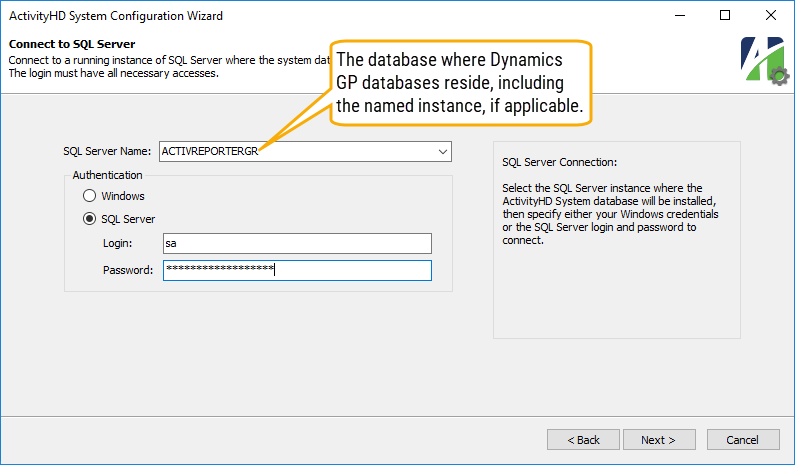
- In the SQL Server Name field, select or enter the name of the SQL Server instance where the system database will reside. For a Demo configuration, this should be an instance on the same server where the Dynamics GP databases reside.
- In the Authentication section, select the credentials to use to log into the database. Your options are:
- Windows. If you select this option, ActivReporter will use your Windows credentials to log into the database.
- SQL Server. If you select this option, provide your Login and Password for the database. The login should represent a user with sufficient privileges to install database components. AccountingWare recommends using the system administrator (sa) login.
-
Click Next >.
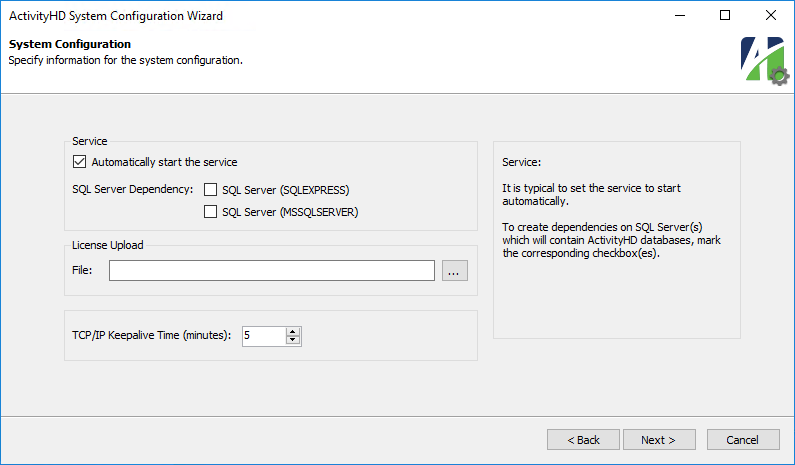
- By default the system service starts automatically when the system is started. If you want to manually start the service every time, clear the Automatically start the service checkbox.
- The correct instance of SQL Server must start before you can attempt to start the ActivReporter services. In the SQL Server Dependency area, mark the checkbox for the SQL Server instance where the ActivReporter database resides.
- The Demo installation scenario of ActivReporter is not typically used for production installations. To use the single-user license for the Fabrikam database which is automatically supplied for demonstration purposes, leave the License Upload File field blank. If you have been provided a license file and you want to use it with this installation scenario, enter the path and file name in this field.
- In the TCP/IP Keepalive Time field, select the number of minutes to maintain the client connection when there is no response. Records which are open when a connection is lost remain locked the number of minutes you specify here. AccountingWare recommends a keepalive time of five minutes.
-
Click Next >.
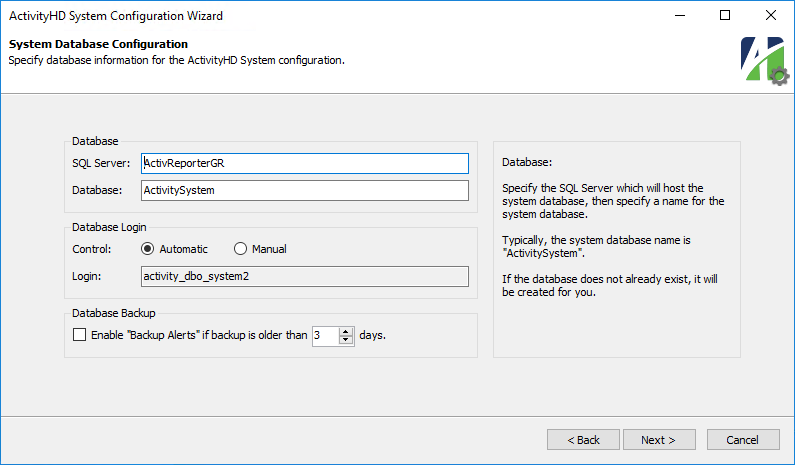
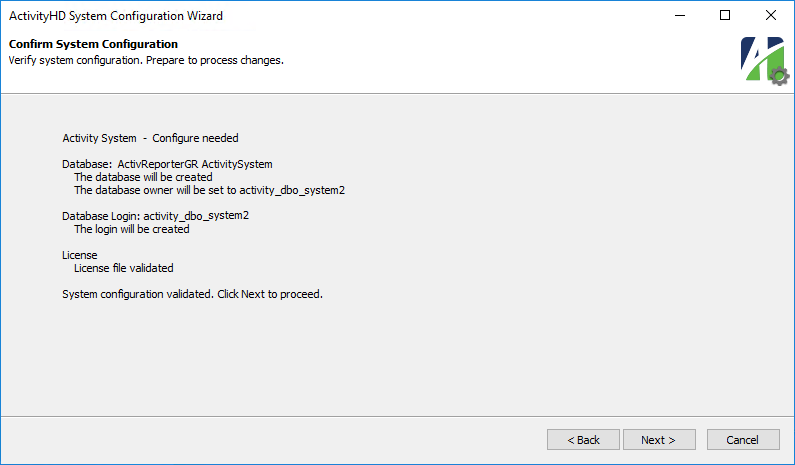
- Ensure that the SQL Server instance and system database name (typically "ActivitySystem") are correct.
Note
The ActivitySystem database is analogous to the database which is typically named "DYNAMICS" in Dynamics GP.
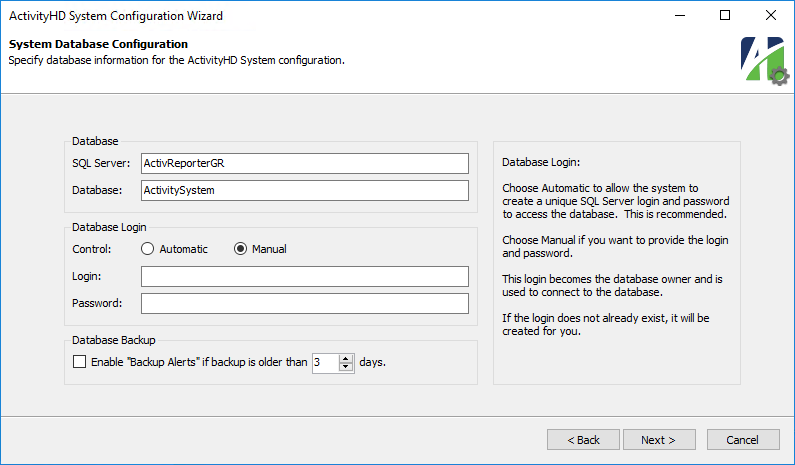
- In the Control field, select how to create the database login and password. The login you set up here becomes the database owner and is used to connect to the database. Your options are:
Automatic. Select this option to allow the wizard to create a unique SQL Server login and password for accessing the system database.
- Manual. Select this option to specify the SQL Server login and password yourself.
If you select "Manual", enter the Login and Password to use to access the system database.
-
If you want to use SQL Server Agent to back up your ActivReporter database and want to be reminded when backups have not been performed in a timely manner, mark the Enable "Backup Alerts" checkbox. If you want to be alerted, but at a different frequency than three days, select how many days old a backup can be before issuing an alert.
Best Practice
Disable backup alerts for the system database and all ActivSync-enabled company databases.
Note
Backup of the ActivReporter databases is optional since the databases can be recreated at will from the Dynamics GP database using the reseeding process. HOWEVER, if you depend on the reseeding process as a backup mechanism, be aware that anything added to the ActivReporter database will be lost, including rollups and rollup items, calendars, and financial designs.
-
Click Next >.
-
Click Next >.
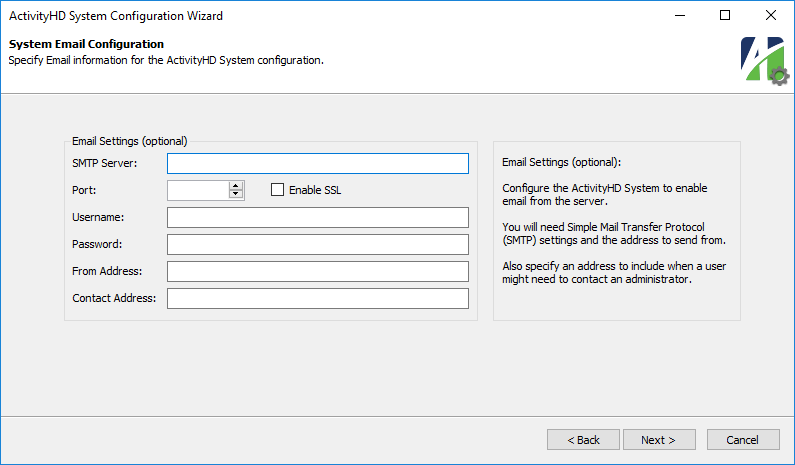
- If you want to configure the system to enable email from the server, provide your SMTP settings, the email address to send from, and an email address for users to use to contact an administrator.
-
Click Next >.
-
Click Next >.
-
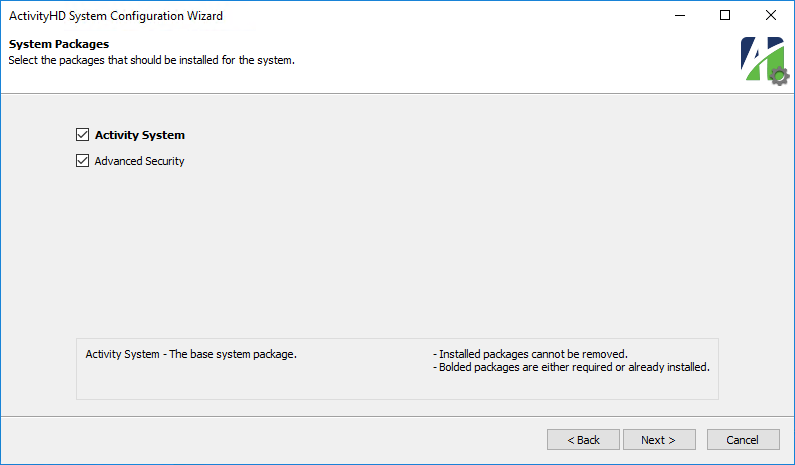
Accept the packages recommended for installation.
-
Click Next >. Configuration ensues and concludes.
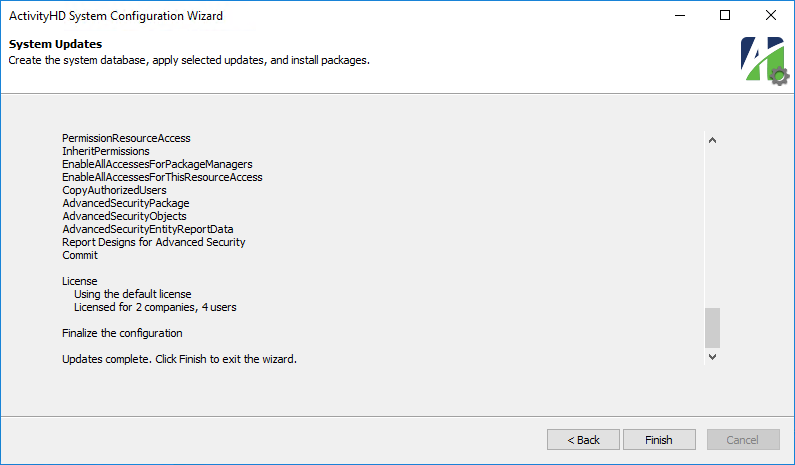
-
Click Finish to return to ActivityHD Manager.
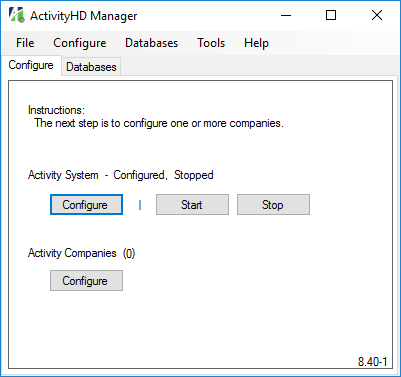
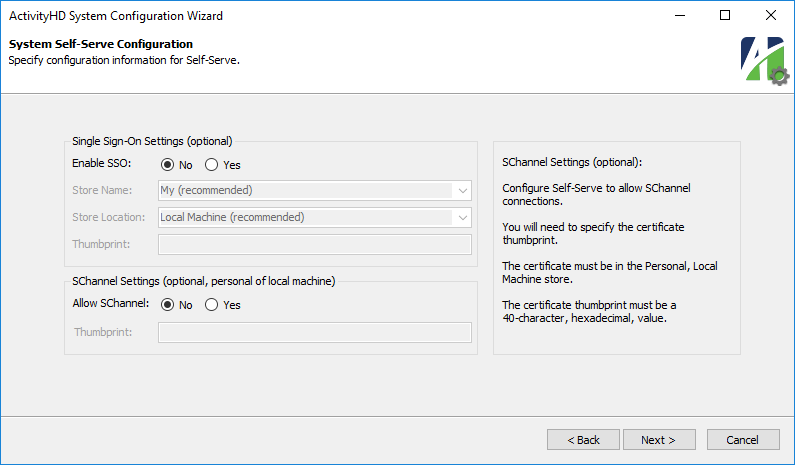
The Self-Serve features are not applicable to ActivReporter.
Tip
Before configuring companies, run the following SQL scripts against the Dynamics GP company databases that you need to configure in ActivReporter:
- GP_Database_Check
- GP_Check_Lines
These scripts are available in the ActivReporter distribution in the ...\Extras\ActivReporter folder.
These scripts will help you identify potential seeding issues so that you can take appropriate actions in Dynamics GP before propagating the data to ActivReporter.
Configure a company
Important!
ActivReporter databases require a large amount of disk space on the SQL Server machine. Typically, it will need disk space approximately equal to the entire Dynamics GP application. Seeding the company data can potentially cause the SQL Server machine to run out of disk space, adversely affecting how the Dynamics GP application runs. Ensure that there is adequate disk space on the SQL Server machine before you attempt to configure any of your company databases.
- Ensure that all Dynamics GP users are out of the Dynamics GP company you will be configuring in ActivReporter. Users can resume working in the Dynamics GP company once configuration finishes.
-
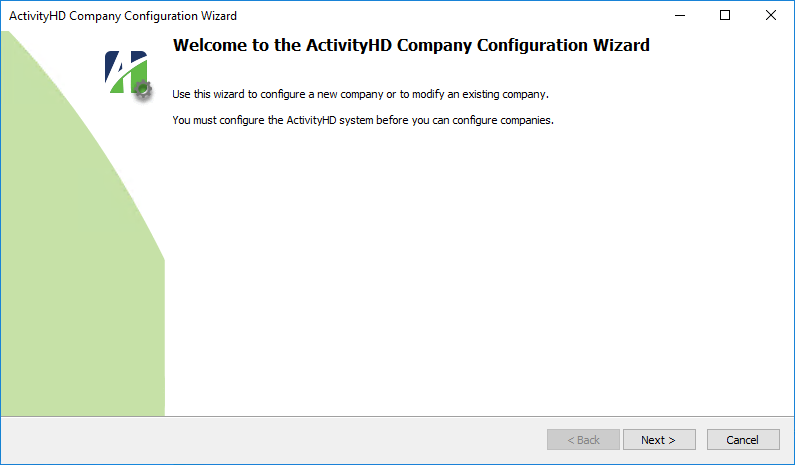
In the ActivityHD Companies section, click Configure. The ActivityHD Company Configuration Wizard starts.
-
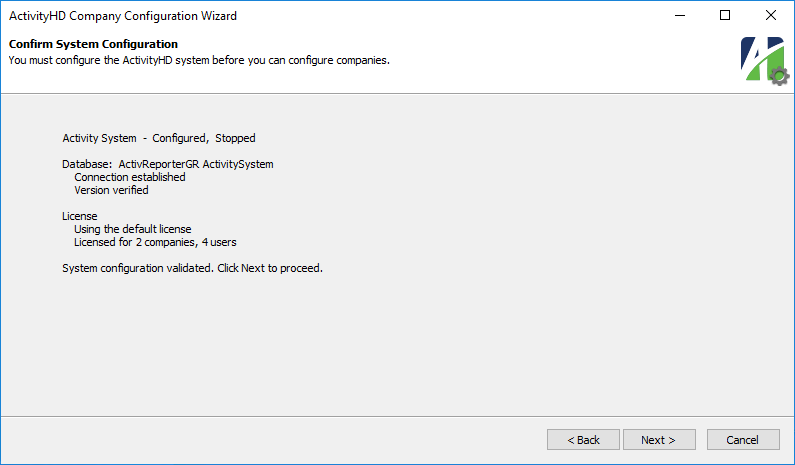
Click Next >.
-
Click Next >.
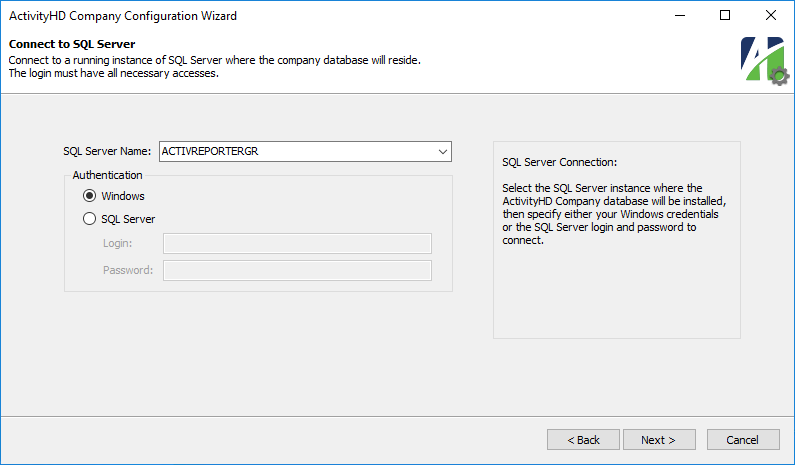
- Verify that the correct instance of SQL Server is selected, and that the correct authentication mode is selected. For the Demo configuration, this instance should be on the same server as the Dynamics GP databases and the ActivReporter system database.
- If you selected "SQL Server" authentication, enter the Password for the specified SQL Server login name.
-
Click Next >.
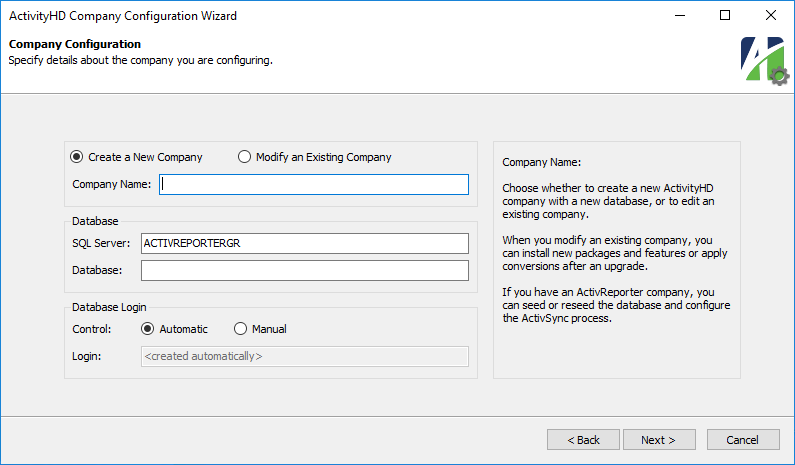
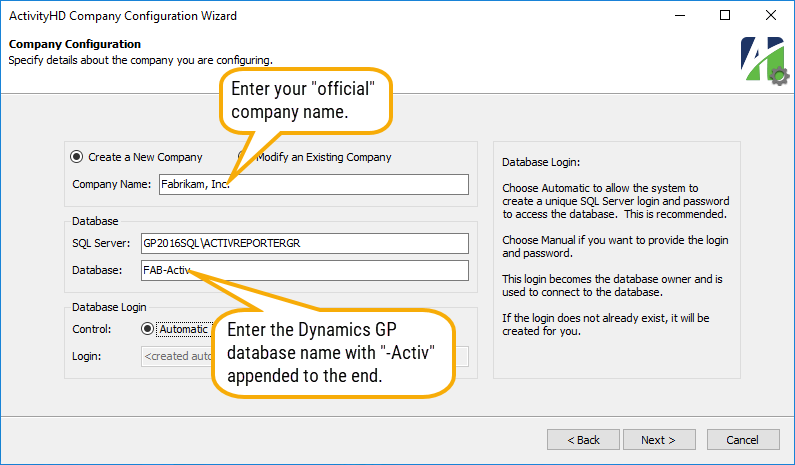
- Ensure the Create a New Company option is selected.
- Enter the Company Name to associate with the company database. The company name must be unique. It is used in ActivReporter to identify the company and typically prints on all ActivReporter financial reports.
- Enter the SQL Server instance where the company database will reside.
- Enter the Database name for the company. The naming convention for companies is to use the name of the Dynamics GP company database with "-Activ" appended.
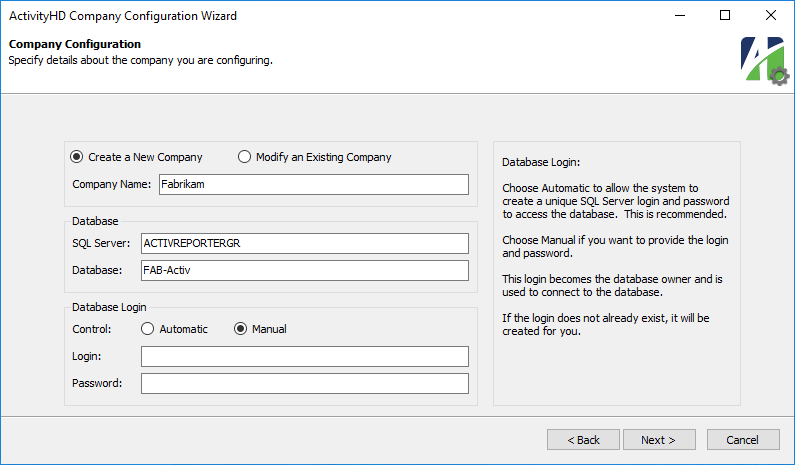
- In the Control field, select how to create the database login and password for the company database. The login you set up here becomes the company database owner and is used by all ActivReporter users to connect to the company database. Your options are:
Automatic. Select this option to allow the wizard to create a unique SQL Server login and password for accessing the company database.
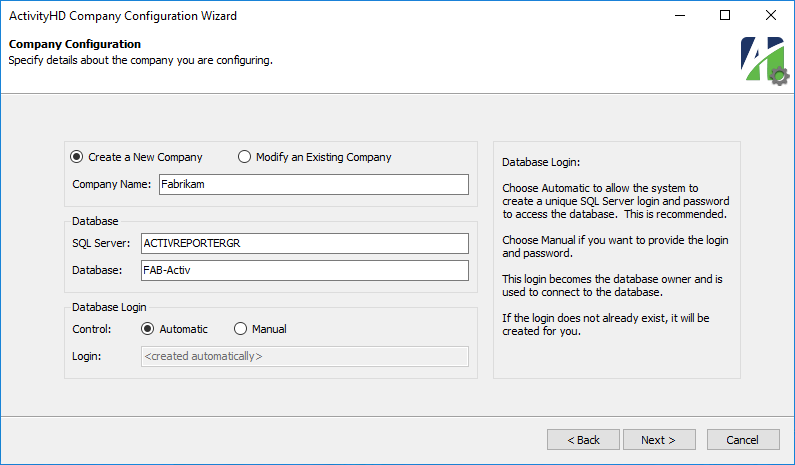
- Manual. Select this option to specify the SQL Server login name and password yourself.
If you select "Manual", enter the Login and Password to use to access the company database.
-
Click Next >.

-
Click Next >.
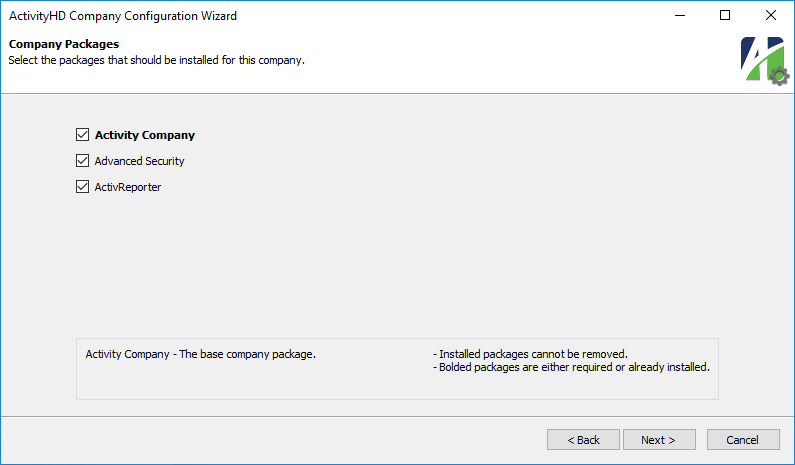
- Leave all recommended packages selected.
-
Click Next >. Company updates begin.
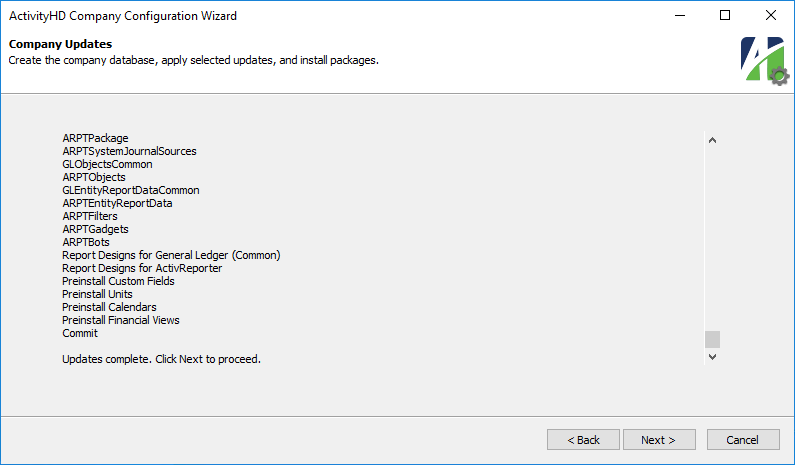
-
Click Next >.
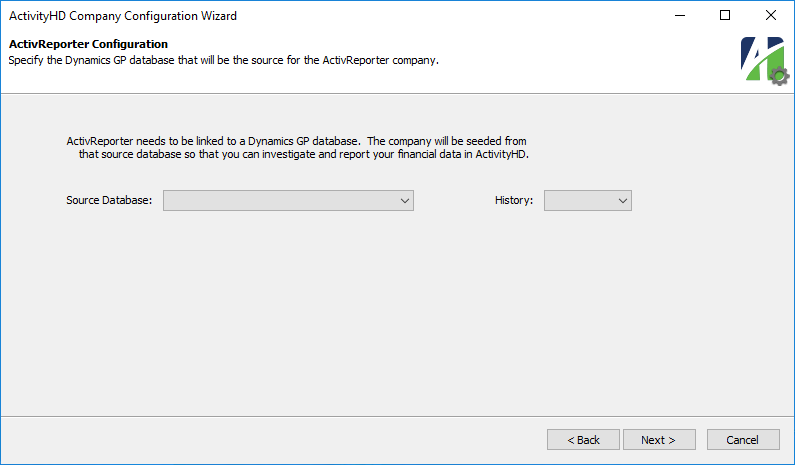
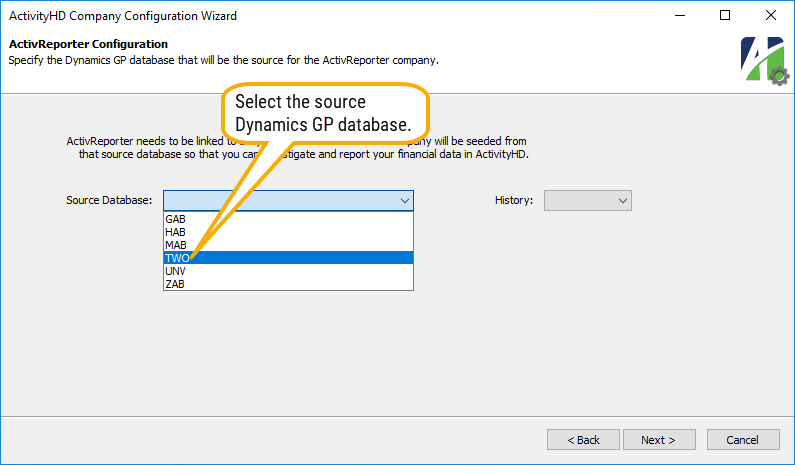
- From the Source Database dropdown, select the Dynamics GP company database to use as the source of data for the ActivReporter company database you are creating.
-
If you need to limit the amount of Dynamics GP historical data that is added to the ActivReporter database, select the oldest accounting year to import data for from the History drop-down list.
Typically, all historical data for a Dynamics GP company is copied. However, there are legitimate reasons you may want to limit the amount of historical data that is imported. Limiting the data will:
- Reduce seeding time.
- Require less storage space.
- Reduce the amount of data that financial functions have to process.
If you do not want to limit the data imported, skip the History field.
-
Click Next >.

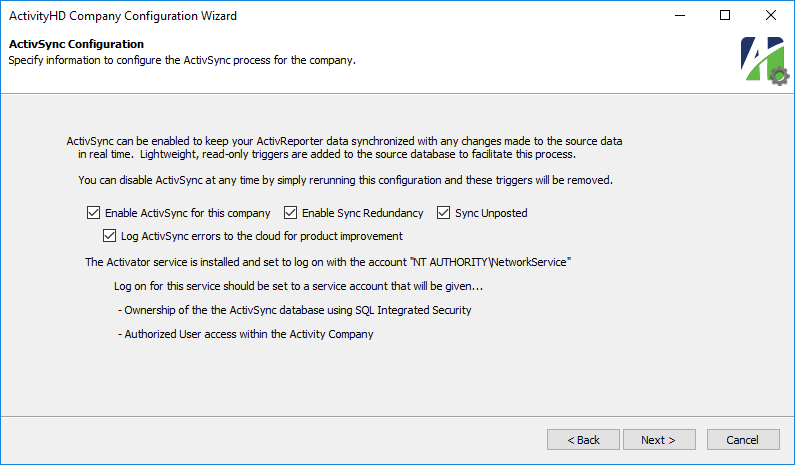
- If you want real-time synchronization of the data when changes occur to the Dynamics GP source data, ensure the Enable ActivSync for this company checkbox is marked.
- If Enable ActivSync is marked and you want to ensure that the ActivSync process does not conflict with the Journal Entry Update process, also ensure the Enable Sync Redundancy checkbox is marked (it is marked by default). Sync redundancy updates unposted journal entries, posted journal entries, and budget details by comparing all the values in the Dynamics GP company to the values in the ActivReporter company and ensuring they match.
- If Enable ActivSync is marked and your company has a high number of unposted entries per day in Dynamics GP and you do not want to include the unposted amounts in financial reports, ensure that the Sync Unposted checkbox is cleared in order to reduce the overhead in the ActivSync process. Unposted Dynamics GP entries are included in the seeding process and in the ActivSync process if this checkbox is marked.
- If you agree to allow any errors which occur during active syncing to be logged to the cloud so that AccountingWare can use the data to improve ActivReporter, leave the Log ActivSync errors checkbox marked.
- If the Enable ActivSync checkbox is marked, an Install button is visible to allow you to install the SQL Server Service Broker External Activator (SSBEA). (You only need to install SSBEA for the first company you configure with ActivSync.) If you do not want to enable ActivSync, clear the checkbox and skip to step 35.
The only reason you would not want to install SSBEA would be to mirror a "point-in-time" snapshot of the Dynamics GP database in ActivReporter.
-
Click Install. The SSBEA installation wizard starts.
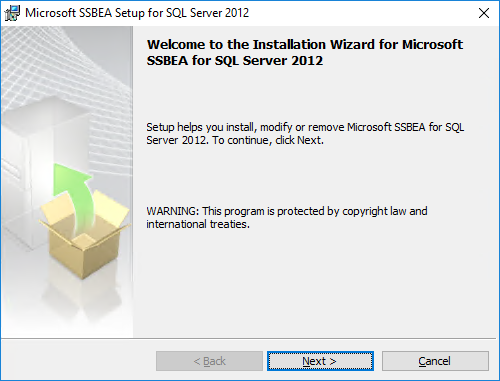
-
Click Next >.
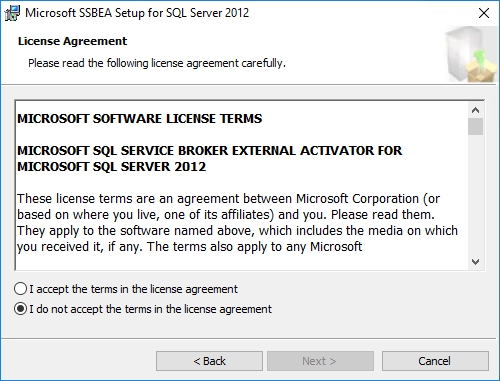
-
Select "I accept the terms in the license agreement", and then click Next >.
-
Click Next >.
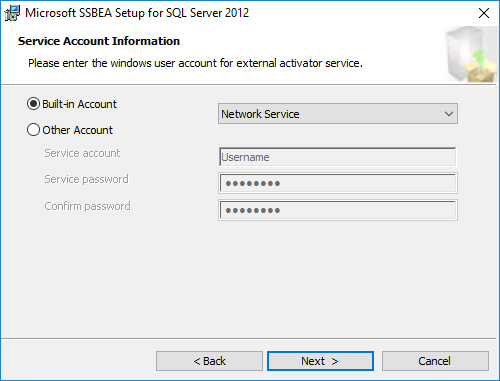
- Ensure Built-in Account is selected.
-
Ensure "Network Service" is selected in the dropdown.
-
Click Next >.
-
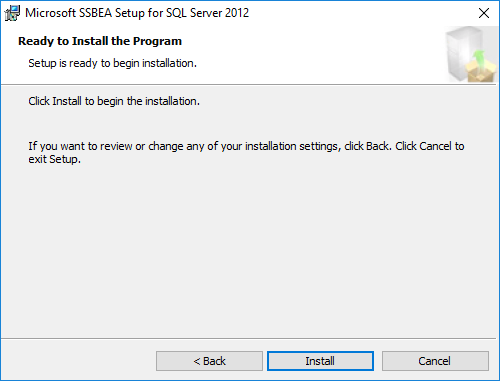
Click Install.
-
When the SSBEA installer completes, click Finish. You are returned to the company configuration wizard.
-
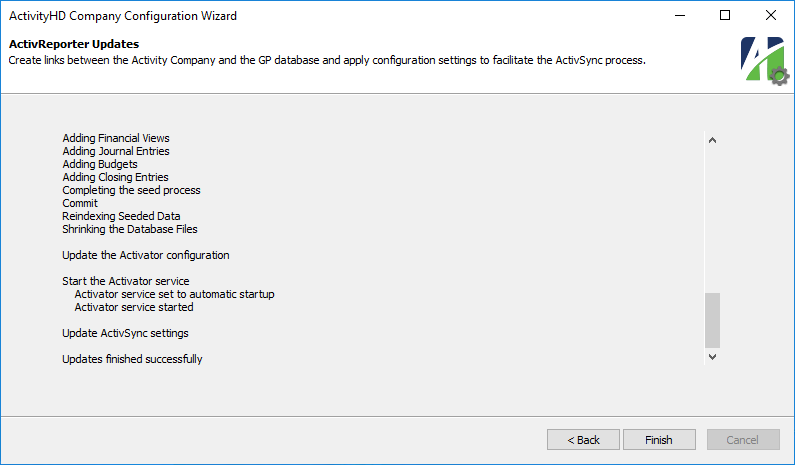
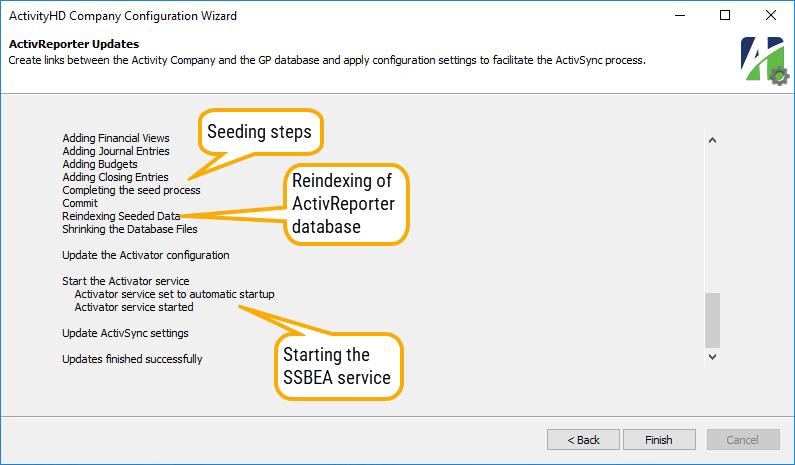
Click Next >. The wizard proceeds to "seed" the company database from the Dynamics GP data and the data is reindexed. Seeding typically takes 10 to 15 minutes per million transaction detail lines.
-
Click Finish to return to ActivityHD Manager.
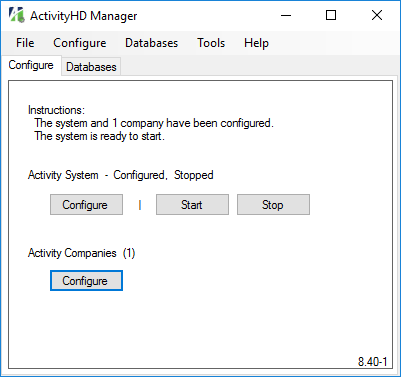
- Click Start to start the Activity System.
Get started with ActivReporter
-
Double-click the ActivReporter icon
 .
.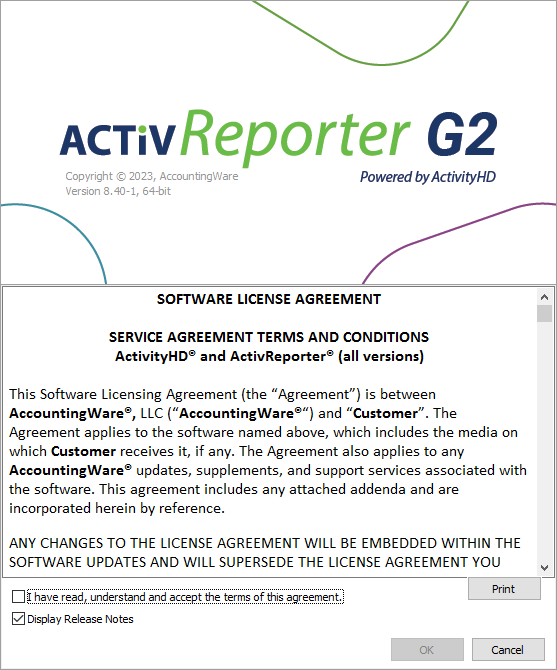
- To accept the license agreement, mark the I have read, understand and accept the terms of this agreement checkbox.
- Click OK. You are prompted to log in.
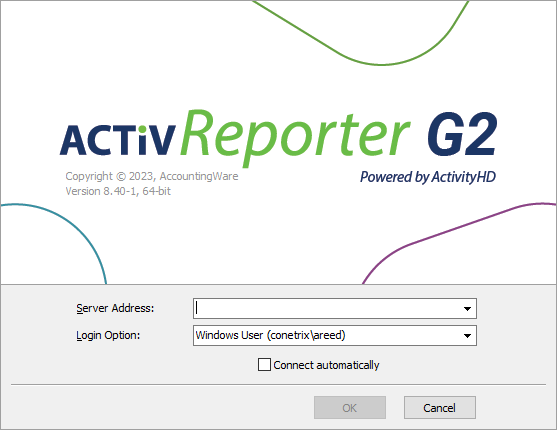
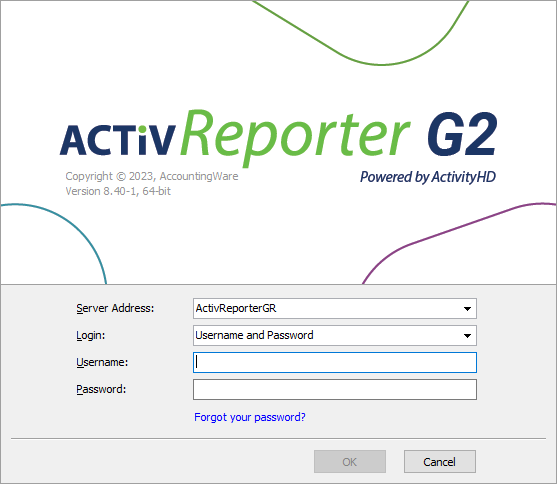
- In the Server Address field, enter or select the Windows server where the ActivReporter system database resides.
- From the Login dropdown, select how to authenticate your identity. Your options are:
- Windows User. If you select this option, your Windows credentials will be used to log in. If you want to bypass the login dialog in the future, mark the Connect automatically checkbox.
Username and Password. If you select this option, provide your Username and Password.
-
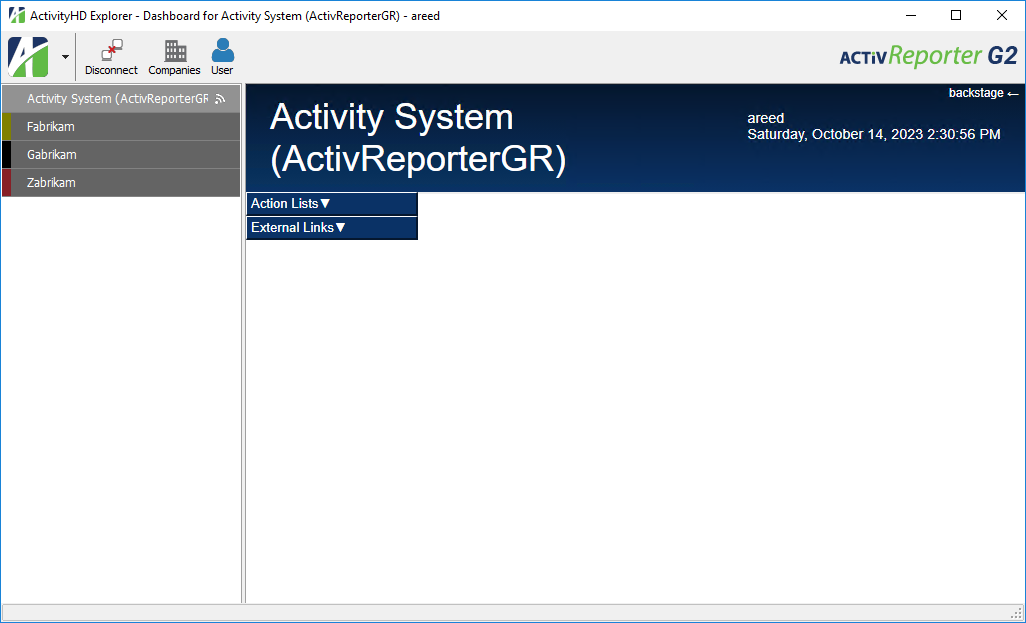
Click OK. ActivityHD Explorer opens.
-
In the navigation pane, click the company name you created.
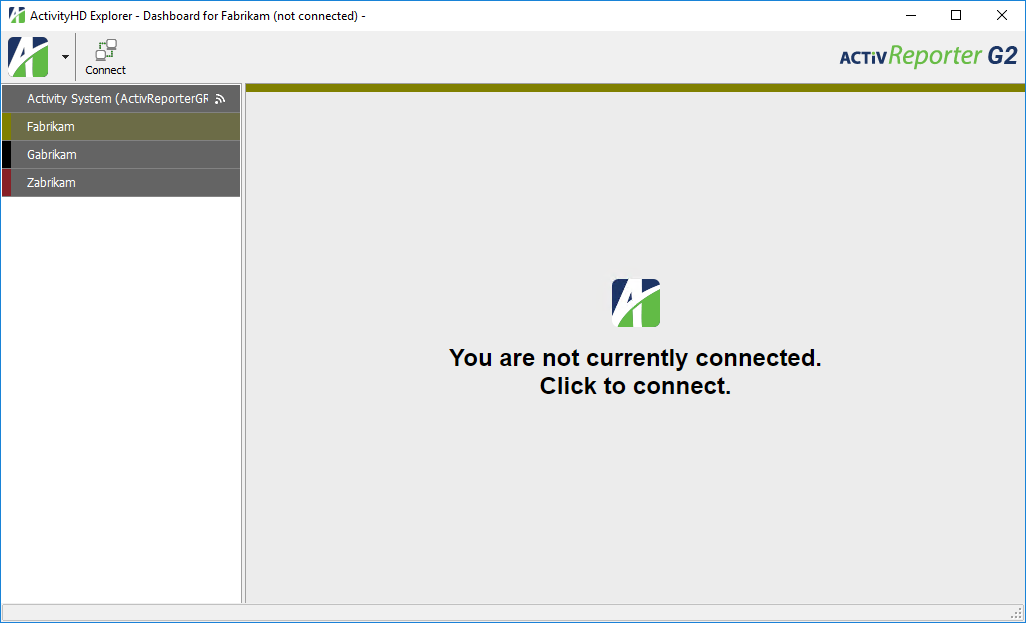
- In the toolbar, click
 to connect to the company database.
 -
Click on the company accordion menu options to expand the navigation and begin your exploration of ActivReporter.

A Normal installation is distributed between the SQL computer where the Dynamics GP databases reside and one or more workstations.
Additional considerations for the Normal installation
Computer with Dynamics GP databases
- Excel. There are two paths with regard to Microsoft Excel:
- (Recommended) Excel is not installed on the computer where the Dynamics GP databases reside. In this case, use the "Server Install (64-bit client)" option. You cannot run the Excel-based financial features of ActivReporter from this computer. ActivReporter and Excel will be run from workstations set up with the ActivReporter client.
- Excel is present on the SQL computer where the Dynamics GP databases reside. You can run ActivReporter from this computer. You must use the "Server Install" option which corresponds to the bitness (32-bit or 64-bit) of Excel that is present on the SQL computer.
- SQL Server Service Broker External Activator (SSBEA). SSBEA can run under the Network Service account; however, as a best practice, it should be run from a domain service account set up by you or your network administrator.
- SQL memory issues. When using the Normal configuration of ActivReporter, be mindful of the amount of memory available to SQL. By default, SQL will consume all the system memory, leaving insufficient memory for other applications such as the ActivReporter system service. As a rule of thumb, you should limit the Maximum Server Memory for SQL to about 80% of the available memory on the system.
- Firewall. There are typically no firewall issues associated with installing ActivReporter using Normal installation.
Workstations
- Use the "Client Only" installation that matches the "bitness" of the version of Excel on the workstation you are installing ActivReporter on. It is not necessary for all workstations to have the same "bitness" of Excel, only that the ActivReporter "bitness" matches the workstation "bitness" of Excel.
Server installation (on the SQL server where the Dynamics GP databases reside)
Install the ActivReporter system software
- Download the ActivReporter installation file at www.ActivReporter.com/Download.
-
Browse to the location where you saved the installation file and double-click the file name to start the installation process.
-
In the "Install Applications" column, click the appropriate "Server Install" package. If Excel is not installed on the SQL computer, choose "Server Install (64-bit client)"; otherwise, select the bitness that matches the installation of Microsoft Excel.
-
Click Next >. You are prompted to accept the license agreement.
-
Select "I accept the terms in the license agreement", then click Next >.
-
Leave "Typical" selected and click Next >.
-
Review the installation settings. When you finish, click Install. The installation ensues and concludes.
-
When the installation completes, click Finish.
Configure the system
- Locate the ActivityHD Manager icon on your desktop and double-click it.
-
In the Activity System section, click Configure. The ActivityHD System Configuration Wizard starts.
-
Click Next >.
-
Click Next >.
- In the SQL Server Name field, select or enter the name of the SQL Server instance where the system database will reside. For a Normal configuration, this should be the same SQL server instance where the Dynamics GP databases reside.
- In the Authentication section, select the credentials to use to log into the database. Your options are:
- Windows. If you select this option, ActivReporter will use your Windows credentials to log into the database.
- SQL Server. If you select this option, provide your Login and Password for the database. The login should represent a user with sufficient privileges to install database components. AccountingWare recommends using the system administrator (sa) login.
-
Click Next >.
- By default the system service starts automatically when the system is started. If you want to manually start the service every time, clear the Automatically start the service checkbox.
- The correct instance of SQL Server must start before you can attempt to start the ActivReporter services. In the SQL Server Dependency area, mark the checkbox for the SQL Server instance where the ActivReporter database resides.
- If you leave the License Upload File field blank, a single-user license file to the Fabrikam database is automatically supplied. If you have been provided a license file and you want to use it with this installation scenario, enter the path and file name in this field.
- In the TCP/IP Keepalive Time field, select the number of minutes to maintain the client connection when there is no response. Records which are open when a connection is lost remain locked the number of minutes you specify here. AccountingWare recommends a keepalive time of five minutes.
-
Click Next >.
- Ensure that the SQL Server instance and system database name (typically "ActivitySystem") are correct.
Note
The ActivitySystem database is analogous to the database which is typically named "DYNAMICS" in Dynamics GP.
- In the Control field, select how to create the database login and password. The login you set up here becomes the database owner and is used to connect to the database. Your options are:
Automatic. Select this option to allow the wizard to create a unique SQL Server login and password for accessing the system database.
- Manual. Select this option to specify the SQL Server login and password yourself.
If you select "Manual", enter the Login and Password to use to access the system database.
- If you want to use SQL Server Agent to back up your ActivReporter database and want to be reminded when backups have not been performed in a timely manner, mark the Enable "Backup Alerts" checkbox. If you want to be alerted, but at a different frequency than three days, select how many days old a backup can be before issuing an alert.
Best Practice
Disable backup alerts for the system database and all ActivSync-enabled company databases.
Note
Backup of the ActivReporter databases is optional since the databases can be recreated at will from the Dynamics GP database using the reseeding process. HOWEVER, if you depend on the reseeding process as a backup mechanism, be aware that anything added to the ActivReporter database will be lost, including rollups and rollup items, calendars, and financial designs.
-
Click Next >.
The Self-Serve features are not applicable to ActivReporter.
-
Click Next >.
- If you want to configure the system to enable email from the server, provide your SMTP settings, the email address to send from, and an email address for users to use to contact an administrator.
-
Click Next >.
-
Click Next >.
-
Accept the recommended packages for installation.
-
Click Next >. Configuration ensues and concludes.
-
Click Finish to return to ActivityHD Manager.
Tip
Before configuring companies, run the following SQL scripts against the Dynamics GP company databases that you need to configure in ActivReporter:
- GP_Database_Check
- GP_Check_Lines
These scripts are available in the ActivReporter distribution in the ...\Extras\ActivReporter folder.
These scripts will help you identify potential seeding issues so that you can take appropriate actions in Dynamics GP before propagating the data to ActivReporter.
Configure a company
Important!
ActivReporter databases require a large amount of disk space on the SQL Server machine. Typically, it will need disk space approximately equal to the entire Dynamics GP application. Seeding the company data can potentially cause the SQL Server machine to run out of disk space, adversely affecting how the Dynamics GP application runs. Ensure that there is adequate disk space on the SQL Server machine before you attempt to configure any of your company databases.
- Ensure that all Dynamics GP users are out of the Dynamics GP company you will be configuring in ActivReporter. Users can resume working in the Dynamics GP company once configuration finishes.
-
In the ActivityHD Companies section, click Configure. The ActivityHD Company Configuration Wizard starts.
-
Click Next >.
-
Click Next >.
- Verify that the correct instance of SQL Server is selected, and that the correct authentication mode is selected.
- If you selected "SQL Server" authentication, enter the Password for the specified SQL Server login name.
-
Click Next >.
- Ensure the Create a New Company option is selected.
- Enter the Company Name to associate with the company database. The company name must be unique. It is used in ActivReporter to identify the company and typically prints on all ActivReporter financial reports.
- Enter the SQL Server instance where the company database will reside.
- Enter the Database name for the company. The naming convention for companies is to use the name of the Dynamics GP company database with "-Activ" appended.
- In the Control field, select how to create the database login and password for the company database. The login you set up here becomes the company database owner and is used by all ActivReporter users to connect to the company database. Your options are:
- Automatic. Select this option to allow the wizard to create a unique SQL Server login and password for accessing the company database.
- Manual. Select this option to specify the SQL Server login and password yourself.
- If you select "Manual", enter the Login and Password to use to access the company database.
-
Click Next >.
-
Click Next >.
- Leave all recommended packages selected.
-
Click Next >. Company updates begin.
-
Click Next >.
- From the Source Database dropdown, select the Dynamics GP company database to use as the source of data for the ActivReporter company database you are creating.
-
If you need to limit the amount of Dynamics GP historical data that is added to the ActivReporter database, select the oldest accounting year to import data for from the History drop-down list.
Typically, all historical data for a Dynamics GP company is copied. However, there are legitimate reasons you may want to limit the amount of historical data that is imported. Limiting the data will:
- Reduce seeding time.
- Require less storage space.
- Reduce the amount of data that financial functions have to process.
If you do not want to limit the data imported, skip the History field.
-
Click Next >.
- If you want real-time synchronization of the data when changes occur to the Dynamics GP source data, ensure the Enable ActivSync for this company checkbox is marked.
- If Enable ActivSync is marked and you want to ensure that the ActivSync process does not conflict with the Journal Entry Update process, also ensure the Enable Sync Redundancy checkbox is marked (it is marked by default). Sync redundancy updates unposted journal entries, posted journal entries, and budget details by comparing all the values in the Dynamics GP company to the values in the ActivReporter company and ensuring they match.
- If Enable ActivSync is marked and your company has a high number of unposted entries per day in Dynamics GP and you do not want to include the unposted amounts in financial reports, ensure that the Sync Unposted checkbox is cleared in order to reduce the overhead in the ActivSync process. Unposted Dynamics GP entries are included in the seeding process and in the ActivSync process if this checkbox is marked.
- If you agree to allow any errors which occur during active syncing to be logged to the cloud so that AccountingWare can use the data to improve ActivReporter, leave the Log ActivSync errors checkbox marked.
- If the Enable ActivSync checkbox is marked, an Install button is visible to allow you to install the SQL Server Service Broker External Activator (SSBEA). (You only need to install SSBEA for the first company you configure with ActivSync.) If you do not want to enable ActivSync, clear the checkbox and skip to step 34.
The only reason you would not want to install SSBEA would be to mirror a "point-in-time" snapshot of the Dynamics GP database in ActivReporter.
-
Click Install. The SSBEA installation wizard starts.
-
Click Next >.
-
Select "I accept the terms in the license agreement", and then click Next >.
-
Click Next >.
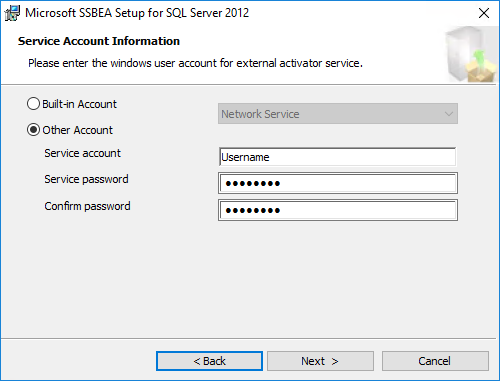
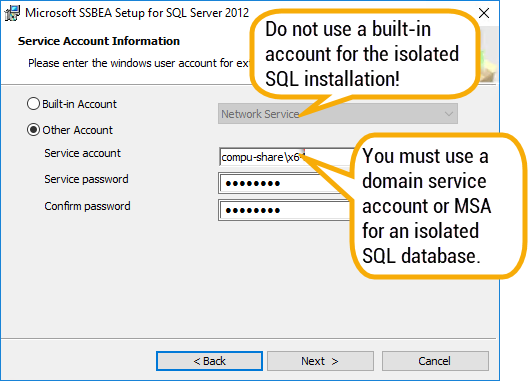
- Select the type of user account to use for the external activator service. Your options are:
- Built-in Account. (Not recommended) If you select this option, select the built-in user account to use from the adjacent drop-down list.
- Other Account. (Best practice) If you select this option, you will need a network administrator to set up a domain service account (or managed service account) to run SQL Server Service Broker External Activator (SSBEA). Supply the following information:
- In the Service account field, enter the domain service account (or managed service account) set up by your network administrator.
- In the Service password field, enter the password associated with the service account.
- Confirm the password.
-
Click Next >.
-
Click Install.
-
When the SSBEA installer completes, click Finish. You are returned to the company configuration wizard.
-
Click Next >. The wizard proceeds to "seed" the company database from the Dynamics GP data and the data is reindexed. Seeding typically takes 10 to 15 minutes per million transaction detail lines.
-
Click Finish to return to ActivityHD Manager.
- Click Start to start the Activity System.
Workstation installation
-
Browse to the location where the installation file is saved and double-click the file name to start the installation process.
-
In the "Install Applications" column, click the "Client Only Install" package with the bitness that matches the installation of Microsoft Excel on the workstation.
-
Click Next >. You are prompted to accept the license agreement.
-
Select "I accept the terms in the license agreement", then click Next >.
-
Leave "Typical" selected and click Next >.
-
Review the installation settings. When you finish, click Install. The installation ensues and concludes.
- Click Finish.
- Click Exit to close the installation menu.
Get started with ActivReporter
-
Double-click the ActivReporter icon
. You may be prompted for a system connection.
- In the Server Address field, enter or select the Windows server where the ActivReporter system database resides.
- From the Login dropdown, select how to authenticate your identity. Your options are:
- Windows User. If you select this option, your Windows credentials will be used to log in. If you want to bypass the login dialog in the future, mark the Connect automatically checkbox.
Username and Password. If you select this option, provide your Username and Password.
-
Click OK. ActivityHD Explorer opens.
-
In the navigation pane, click on the company name you created.
- In the toolbar, click to connect to the company database.
-
Click on the company accordion menu options to expand the navigation and begin your exploration of ActivReporter.
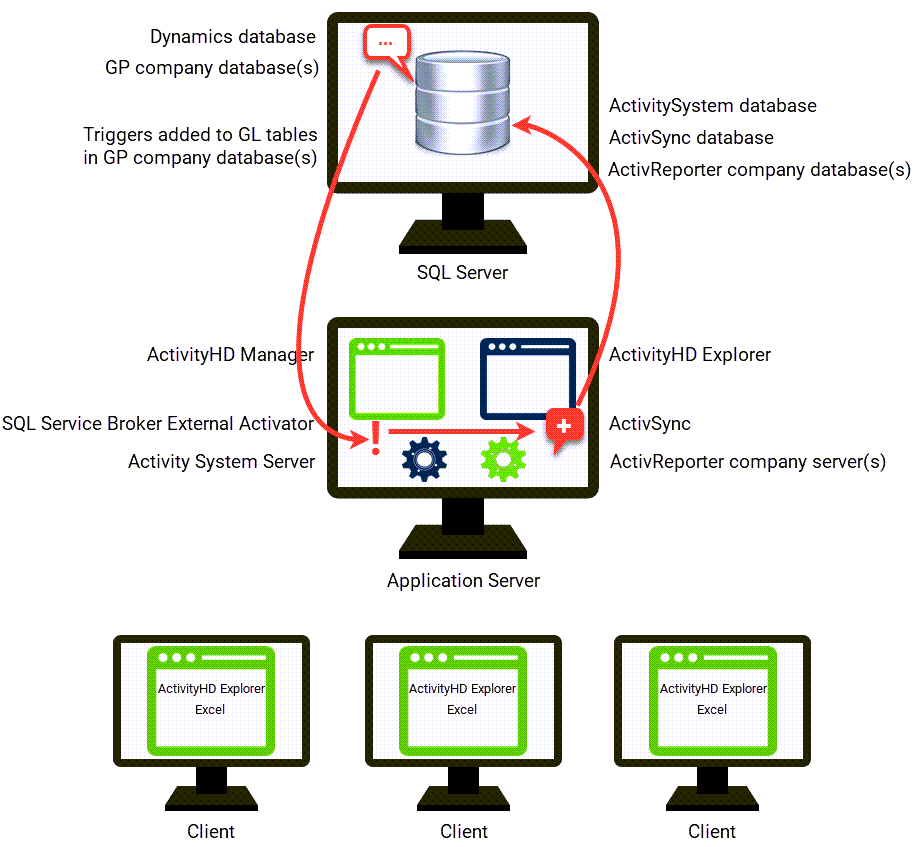
An "Isolated SQL" installation entails installing ActivReporter system and company servers on a separate application server from the SQL server where the Dynamics GP databases reside, and installing the ActivReporter client (ActivityHD Explorer) on one or more workstations.
Additional considerations for the Isolated SQL installation
SQL computer with Dynamics GP databases
- Installation. There is no specific installation process directly on the SQL computer where the Dynamics GP databases reside. However, triggers are added to the Dynamics GP tables, ActivReporter databases are created on the SQL computer, and the SQL Server Service Broker External Activator (SSBEA) service is installed on the application server.
- Firewall. You will need to allow access for ActivitySystem.exe.
Application Server
For this scenario, you need to stand up a separate Windows server, the ActivReporter Server.
- Prerequisites. Before you install ActivReporter on this computer, a few other items are required:
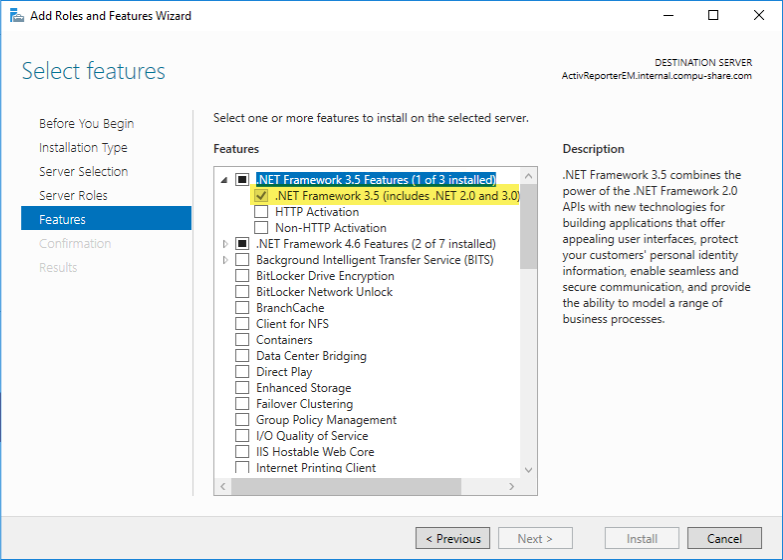
- .Net Framework 3.5. Use Server Manager to install .Net Framework 3.5 on the ActivReporter Server. It is needed in order to install and use SQL Server Service Broker External Activator (SSBEA).
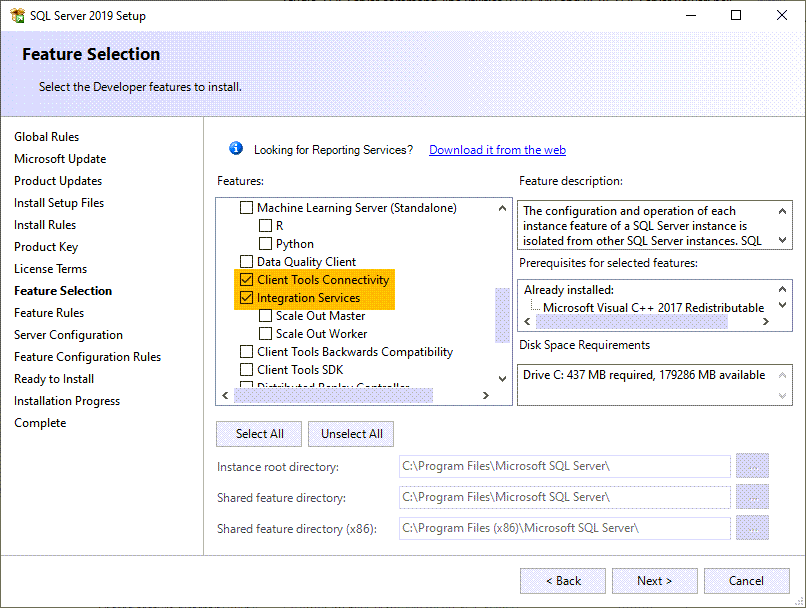
- SQL Server 2019 Developer edition (free). Use the SQL Server installation procedure to install only the Client Tools Connectivity and Integration Services components.
- Domain service account. You or your network administrator should create a special domain service account for running SQL Server Service Broker External Activator (SSBEA).
- Excel. There are two paths with regards to Excel:
- (Recommended) Excel is not installed on the computer where the Dynamics GP databases reside. In this case, use the "Server Install (64-bit client)" option. You cannot run the Excel-based financial features of ActivReporter from this computer. ActivReporter and Excel will be run from workstations set up with the ActivReporter client.
- Excel is present on the SQL computer where the Dynamics GP databases reside. You can run ActivReporter from this computer. You must use the "Server Install" option which corresponds to the bitness (32-bit or 64-bit) of Excel that is present on the SQL computer.
- SSBEA. As noted above, SSBEA must run from a special domain service account.
- Firewall. There are typically no firewall issues associated with installing ActivReporter in an "isolated" installation.
Workstations
- Use the "Client Only" installation that matches the "bitness" of the version of Excel on the workstation you are installing ActivReporter on. It is not necessary for all workstations to have the same "bitness" of Excel, only that the ActivReporter "bitness" matches the workstation "bitness" of Excel.
Prepare the application server
-
Using Server Manager, install the .NET Framework 3.5 features.
- Download SQL Server 2019 Developer edition (free) and commence installing it.
-
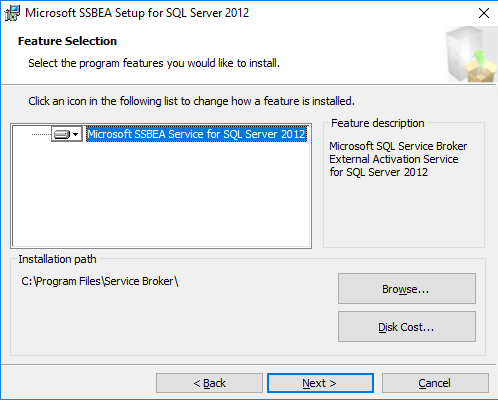
In the SQL Installation wizard, select "New SQL Server stand-alone installation...", then in the Features list box on the "Feature Selection" page, mark only the "Client Tools Connectivity" and "Integration Services" checkboxes.
- On the "Server Configuration" page, accept the default options on the Service Accounts tab.
- Proceed with installation. Installation takes about ten minutes to complete.
-
Using the Services application, stop and disable all SQL-related services.

Install the software
The installation procedures below assume you are installing ActivReporter on the application server, not on the computer where the Dynamics GP databases reside.
- Download the ActivReporter installation file at www.ActivReporter.com/Download.
-
Browse to the location where you saved the installation file and double-click the file name to start the installation process.
-
In the "Install Applications" column, click the appropriate "Server Install" package. Choose the 64-bit client provided that Excel is not installed on the same computer as the application server; otherwise, select the bitness that matches the installation of Microsoft Excel.

-
Click Next >. You are prompted to accept the license agreement.
-
Select "I accept the terms in the license agreement", then click Next >.

-
Leave "Typical" selected and click Next >.
-
Review the installation settings. When you finish, click Install. The installation ensues and concludes.
-
When the installation completes, click Finish.
Configure the system
-
Locate the ActivityHD Manager icon
on your desktop and double-click it.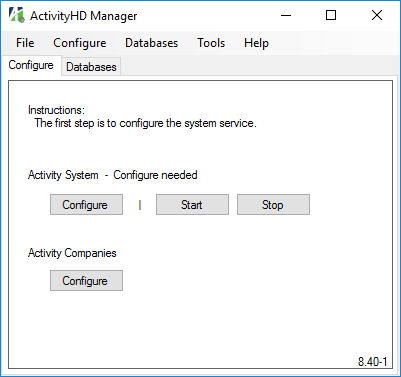
-
In the Activity System section, click Configure. The ActivityHD System Configuration Wizard starts.
-
Click Next >.
-
Click Next >.
- In the SQL Server Name field, select or enter the name of the SQL Server instance on the Dynamics GP database server where the system database will reside.
- In the Authentication section, select the credentials to use to log into the database. Your options are:
- Windows. If you select this option, ActivReporter will use your Windows credentials to log into the database.
- SQL Server. If you select this option, provide your Login and Password for the database. AccountingWare recommends using the system administrator (sa) login.
Note
The "sa" user (or the Windows user) can be any user with access to create and modify databases on the specified SQL Server. Although the user name is stored, the password is not. Furthermore, neither the user name or password is used after installation of the Activity System.
-
Click Next >.
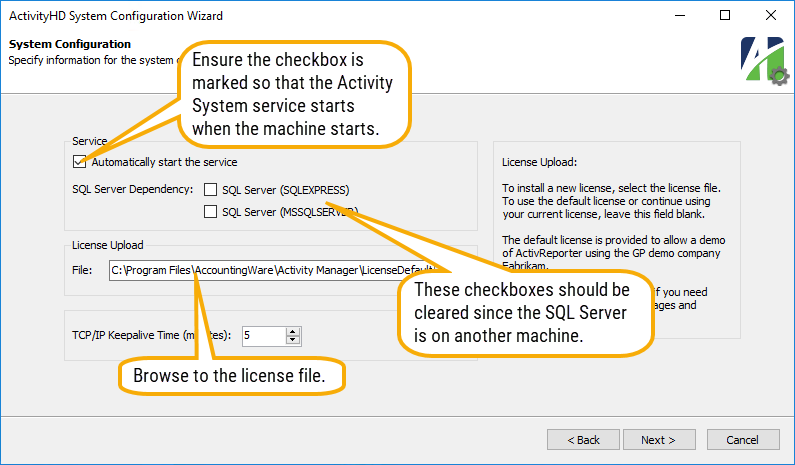
- By default the system service starts automatically when the system is started. Ensure the Automatically start the service checkbox is marked so that the Activity System service starts when the machine starts.
- Leave the checkboxes in the SQL Server Dependency area cleared.
- If you leave the License Upload File field blank, a single-user license file to the Fabrikam database is automatically supplied. If you have been provided a license file and you want to use it with this installation scenario, browse to the file location or enter the path and file name in this field.
- In the TCP/IP Keepalive Time field, select the number of minutes to maintain the client connection when there is no response. Records which are open when a connection is lost remain locked the number of minutes you specify here. AccountingWare recommends a keepalive time of five minutes.
-
Click Next >.

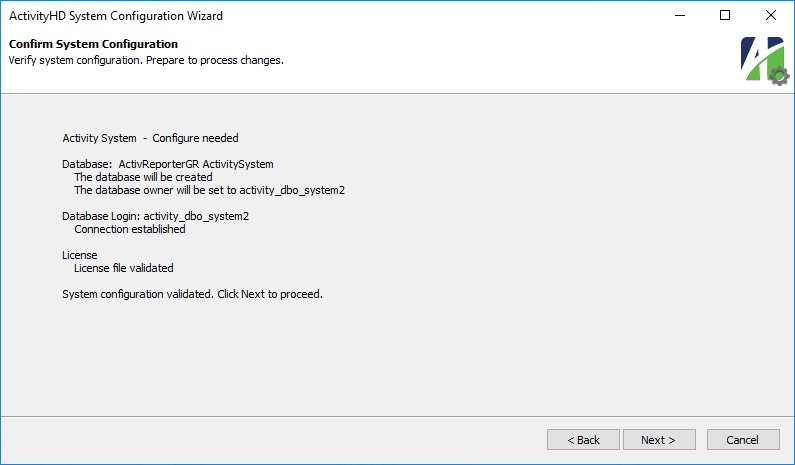
- Ensure that the SQL Server instance and system database name (typically "ActivitySystem") are correct.
Note
The ActivitySystem database is analogous to the database which is typically named "DYNAMICS" in Dynamics GP.
- In the Control field, select how to create the database login and password. The login you set up here becomes the database owner and is used to connect to the database. Your options are:
- Automatic. Select this option to allow the wizard to create a unique SQL Server login and password for accessing the system database.
- Manual. Select this option to specify the SQL Server login and password yourself.
- If you select "Manual", enter the Login and Password to use to access the system database.
- If you want to use SQL Server Agent to back up your ActivReporter database and want to be reminded when backups have not been performed in a timely manner, mark the Enable "Backup Alerts" checkbox. If you want to be alerted, but at a different frequency than three days, select how many days old a backup can be before issuing an alert.
Best Practice
Disable backup alerts for the system database and all ActivSync-enabled company databases.
Note
If you enable backup alerts, the database will be queried to determine whether a backup has been performed. If one has not been performed within the time threshold designated, the user is reminded. Enabling backup is recommended in most cases; however, the best response depends on how your backups are performed and whether the database is "aware" of backups.
-
Click Next >.
The Self-Serve features are not applicable to ActivReporter.
-
Click Next >.
- If you want to configure the system to enable email from the server, provide your SMTP settings, the email address to send from, and an email address for users to use to contact an administrator.
-
Click Next >.
-
Click Next >.
-
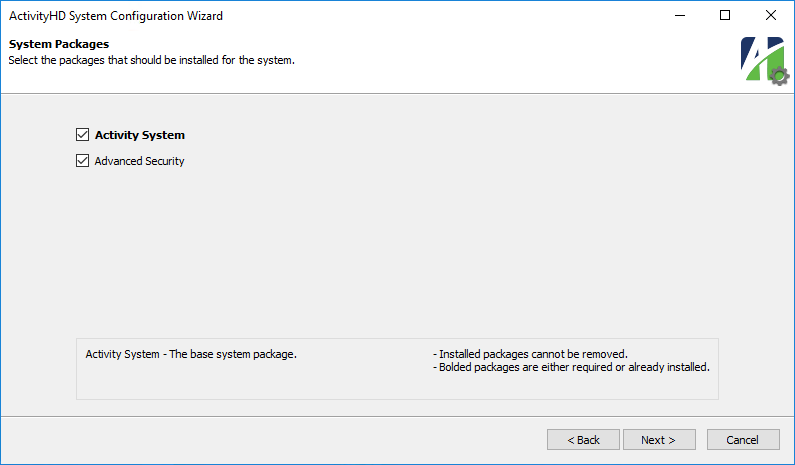
Accept the recommended packages for installation.
-
Click Next >. Configuration ensues and concludes.

-
Click Finish to return to ActivityHD Manager.

Note
As a sanity check, feel free to start the ActivityHD system service to verify that it starts. Once you've confirmed that, be sure to stop the service so that you can continue to configure one or more companies.
Tip
Before configuring companies, run the following SQL scripts against the Dynamics GP company databases that you need to configure in ActivReporter:
- GP_Database_Check
- GP_Check_Lines
These scripts are available in the ActivReporter distribution in the ...\Extras\ActivReporter folder.
These scripts will help you identify potential seeding issues so that you can take appropriate actions in Dynamics GP before propagating the data to ActivReporter.
Configure a company
Important!
ActivReporter databases require a large amount of disk space on the SQL Server machine. Typically, it will need disk space approximately equal to the entire Dynamics GP application. Seeding the company data can potentially cause the SQL Server machine to run out of disk space, adversely affecting how the Dynamics GP application runs. Ensure that there is adequate disk space on the SQL Server machine before you attempt to configure any of your company databases.
- Ensure that all Dynamics GP users are out of the Dynamics GP company you will be configuring in ActivReporter. Users can resume working in the Dynamics GP company once configuration finishes.
-
In the ActivityHD Companies section, click Configure. The ActivityHD Company Configuration Wizard starts.
-
Click Next >.

-
Click Next >.
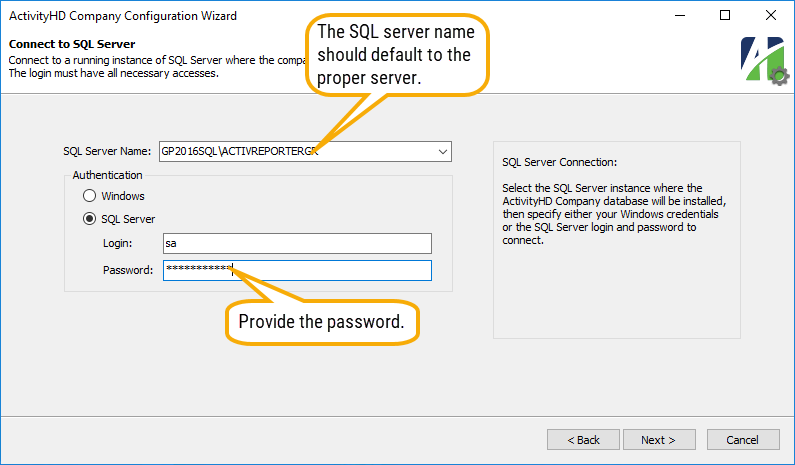
- Verify that the correct instance of SQL Server is selected, and that the correct authentication mode is selected.
- If you selected "SQL Server" authentication, enter the Password for the specified SQL Server login name.
-
Click Next >.
- Ensure the Create a New Company option is selected.
- Enter the Company Name to associate with the company database. The company name must be unique. It is used in ActivReporter to identify the company and typically prints on all ActivReporter financial reports.
- Enter the SQL Server instance where the company database will reside.
- Enter the Database name for the company. The naming convention for companies is to use the name of the Dynamics GP company database with "-Activ" appended.
- In the Control field, select how to create the database login and password for the company database. The login you set up here becomes the company database owner and is used by all ActivReporter users to connect to the company database. Your options are:
- Automatic. Select this option to allow the wizard to create a unique SQL Server login and password for accessing the company database.
- Manual. Select this option to specify the SQL Server login and password yourself.
- If you select "Manual", enter the Login and Password to use to access the company database.
Note
This database login is the only SQL Server user who logs into the ActivReporter company database.
-
Click Next >.
-
Click Next >.

- Leave all recommended packages selected.
-
Click Next >. Company updates begin.
-
Click Next >.
- From the Source Database dropdown, select the Dynamics GP company database to use as the source of data for the ActivReporter company database you are creating.
-
If you need to limit the amount of Dynamics GP historical data that is added to the ActivReporter database, select the oldest accounting year to import data for from the History drop-down list.
Typically, all historical data for a Dynamics GP company is copied. However, there are legitimate reasons you may want to limit the amount of historical data that is imported. Limiting the data will:
- Reduce seeding time.
- Require less storage space.
- Reduce the amount of data that financial functions have to process.
If you do not want to limit the data imported, skip the History field.
-
Click Next >.

-
If you want real-time synchronization of the data when changes occur to the Dynamics GP source data, ensure the Enable ActivSync for this company checkbox is marked. To ensure that the ActivSync process does not conflict with the Journal Entry Update process, ensure the Enable Sync Redundancy checkbox is also marked (it is marked by default). Sync redundancy updates unposted journal entries, posted journal entries, and budget details by comparing all the values in the Dynamics GP company to the values in the ActivReporter company and ensuring they match. If you agree to allow any errors which occur during active syncing to be logged to the cloud so that AccountingWare can use the data to improve ActivReporter, leave the Log ActivSync errors checkbox marked. If the Enable ActivSync checkbox is marked, an Install button is visible to allow you to install the SQL Server Service Broker External Activator (SSBEA). (You only need to install SSBEA for the first company you configure with ActivSync.) If you do not want to enable ActivSync, clear the checkbox and skip to step 30.
The only reason you would not want to install SSBEA would be to mirror a "point-in-time" snapshot of the Dynamics GP database in ActivReporter. -
If you have not already installed SSBEA for another company, click Install. The SSBEA installation wizard starts.
-
Click Next >.
-
Select "I accept the terms in the license agreement", and then click Next >.
-
Click Next >.
- Select the Other Account option. A network administrator will need to set up a domain service account (or managed service account) to run SQL Server Service Broker External Activator (SSBEA). Supply the following information:
- In the Service account field, enter the domain service account (or managed service account) set up by your network administrator.
- In the Service password field, enter the password associated with the service account.
- Confirm the password.
-
Click Next >.
-
Click Install.
-
When the SSBEA installer completes, click Finish. You are returned to the company configuration wizard.
-
Click Next >. The wizard proceeds to "seed" the company database from the Dynamics GP data and the data is reindexed. Seeding typically takes 10 to 15 minutes per million transaction detail lines.
-
Click Finish to return to ActivityHD Manager. If you have additional companies to configure, repeat the foregoing process for each one.
- When you finish configuring and seeding companies, click Start to start the Activity System service.
Note
The "sa" user (or the Windows user) can be any user with access to create and modify databases on the specified SQL Server. Although the user name is stored, the password is not. Furthermore, neither the user name or password is used after installation of the Activity System.
Create a bootstrap user
You may need to add users to the roster of ActivReporter authorized users. The AD user (i.e., installation user) which was used to install ActivReporter on the application server was automatically added to the authorized users database for both the system and individual company database(s) with all access rights.
As a matter of necessity, the installation user is a local admin user on the application server. The installation user is not likely to be the user you want to run the ActivReporter software on a day-to-day basis. For that reason, you should add a "bootstrap" user. The bootstrap user can add other users as needed and assign them the appropriate security authorizations.
The bootstrap user must be added to both the Activity System database and the company database.
To add the bootstrap user:
- Run the ActivityHD Explorer which you installed on the application server.
-
Browse to Activity System > Administration > Security > Authorized Users.
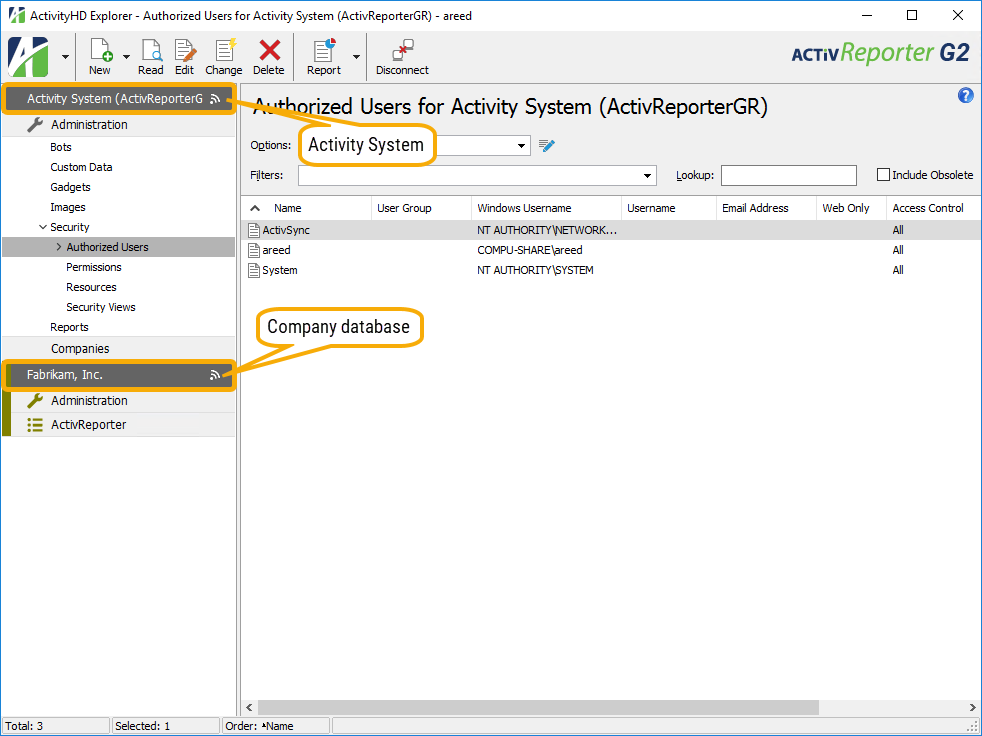
-
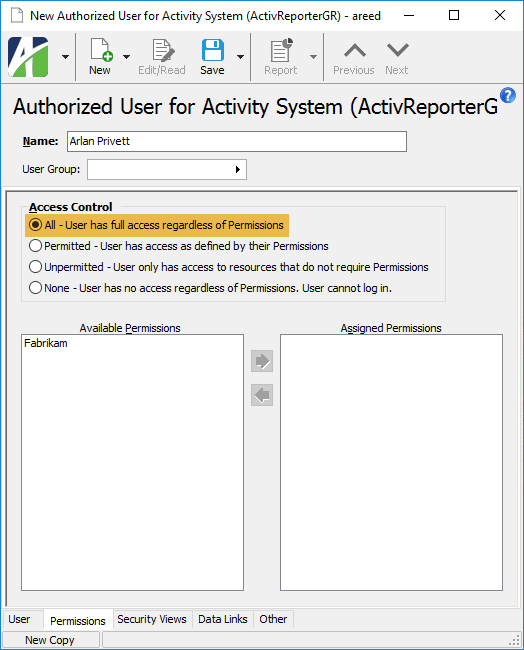
In the HD view, highlight the installation user's record, right-click, and select New Copy from the shortcut menu.
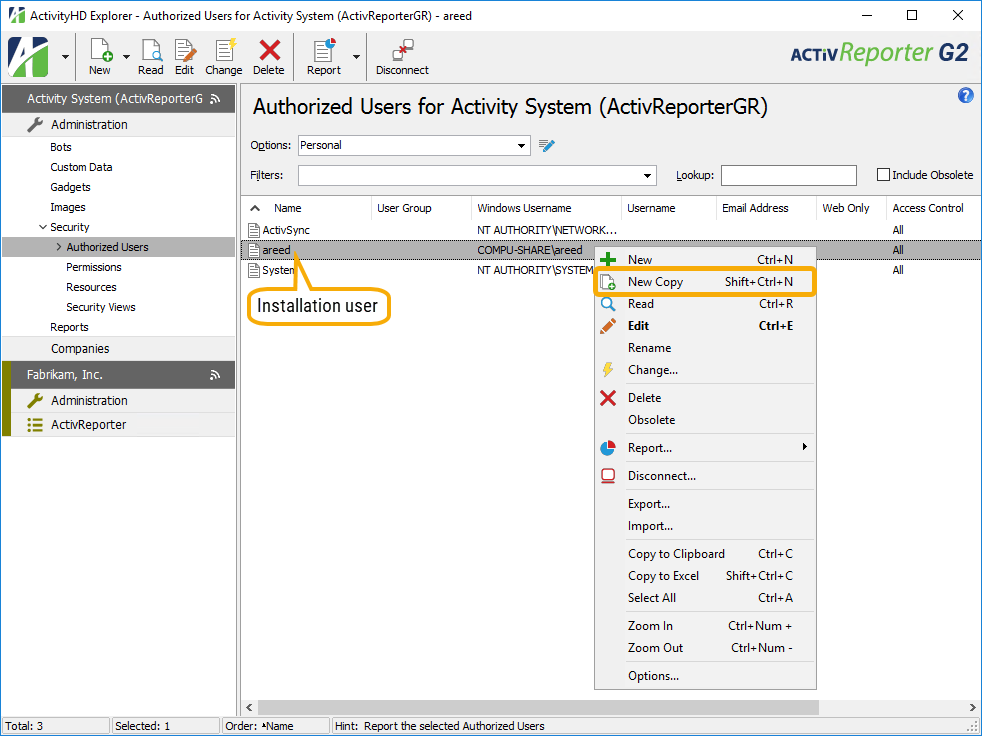
A new record is created.
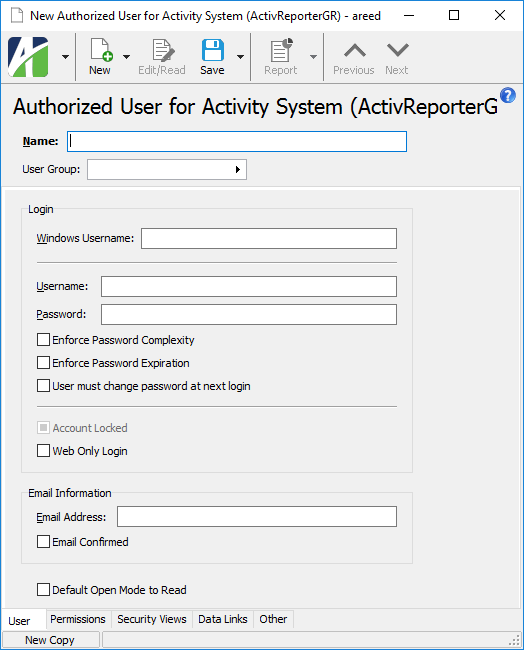
- In the Name field, enter a unique name for the authorized user.
- In the Access Control field, notice that since the installation user has "All" access, the user on the copied record has "All" access. "All" access is appropriate for the bootstrap user.
- Leave the Admin checkbox marked.
-
In the Windows Username field, enter the user's fully qualified name on the Windows domain.
Note
All ActivReporter users must be full Windows domain AD users.
The remaining fields on the User tab are either not applicable or optional.

-
Select the Companies tab. When the AD user's system authorized user record was created, the associated company records were automatically created as well. Since the bootstrap user record was copied from the AD user record, the bootstrap user has company authorized user records for the same companies. These records can be managed from the Companies tab.
Notice that the bootstrap user has "All" access and "Admin" privileges for all the companies created by the AD user.
- If there are companies in the table the bootstrap user should not have full access to, select the appropriate level of Access Control. Valid options are:
- All. The user has full access to company resources.
- Permitted. The user has access to the company resources he/she is assigned permissions for.
- Unpermitted. The user only has access to the company resources which do not require permissions.
- None. The user has no access at all, not even to log in.
- If there are companies in the table for which the bootstrap user should not have privileges to start and stop the system and company servers and to disconnect users (i.e., a company administrator), clear the corresponding Admin checkbox.
- Ensure that the bootstrap user has "All" access and "Admin" privileges for the appropriate companies. (Ensure also that you create a bootstrap user for other companies as needed.)
- Save your changes.
Workstation installation
Note
In a hosted environment, the ActivReporter client application should be installed on a terminal server or Citrix server which is local to the application server and SQL Server (i.e., with high-speed LAN connectivity). Do not attempt to run the ActivReporter application from a remote workstation!
About firewalls. It may be necessary to open the firewall on terminal server computers for Excel.exe so that Excel can communicate with the ActivReporter application server.
Perform the following procedure on each client workstation that will need access to the ActivReporter application:
-
Browse to the location where the installation file is saved and double-click the file name to start the installation process.
-
In the "Install Applications" column, click the "Client Only Install" package with the bitness that matches your installation of Microsoft Excel.

-
Click Next >. You are prompted to accept the license agreement.
-
Select "I accept the terms in the license agreement", then click Next >.

-
Leave "Typical" selected and click Next >.

-
Review the installation settings. When you finish, click Install. The installation ensues and concludes.
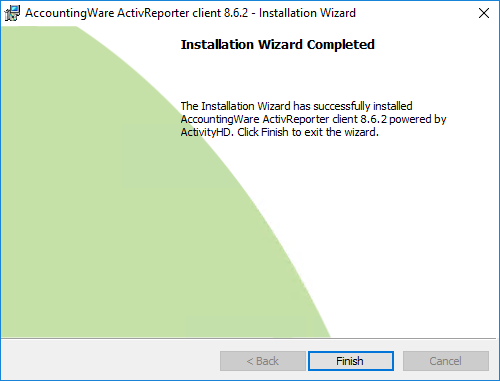
- Click Finish.
- Click Exit to close the installation menu.
Get started with ActivReporter
-
Double-click the ActivReporter icon
. You may be prompted for a system connection.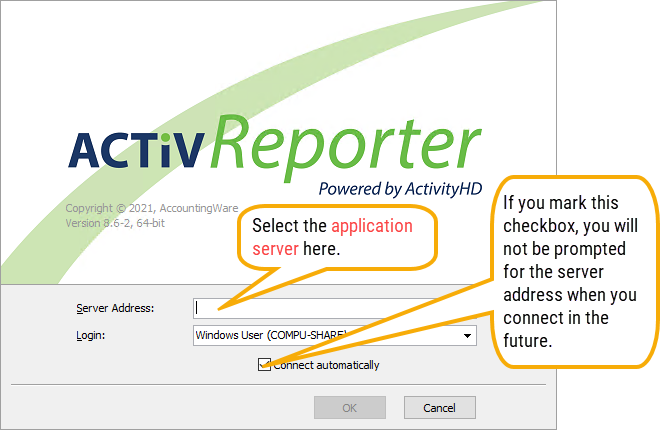
- In the Server Address field, enter or select the Windows server where the ActivReporter system database resides.
- AccountingWare recommends you leave the Connect automatically checkbox marked.
-
Click OK. ActivityHD Explorer opens.
-
In the navigation pane, click on the company name you created.
- In the toolbar, click to connect to the company database.
-
Click on the company accordion menu options to expand the navigation and begin your exploration of ActivReporter.