Journal entries
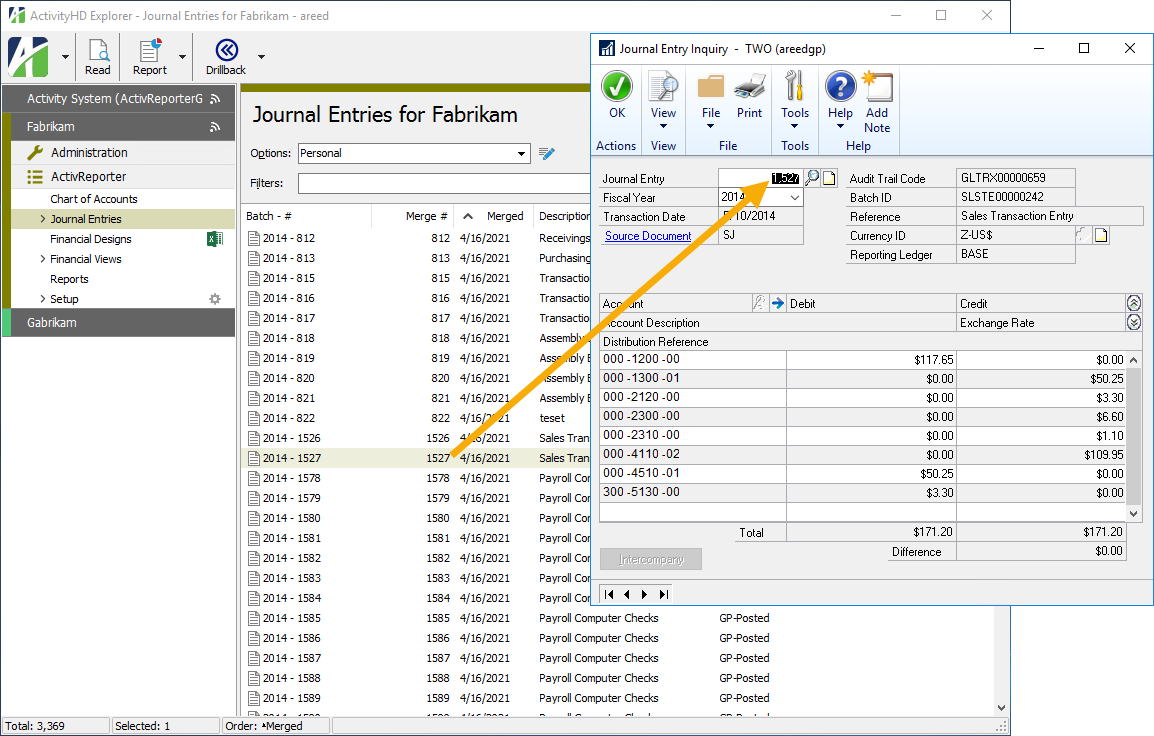
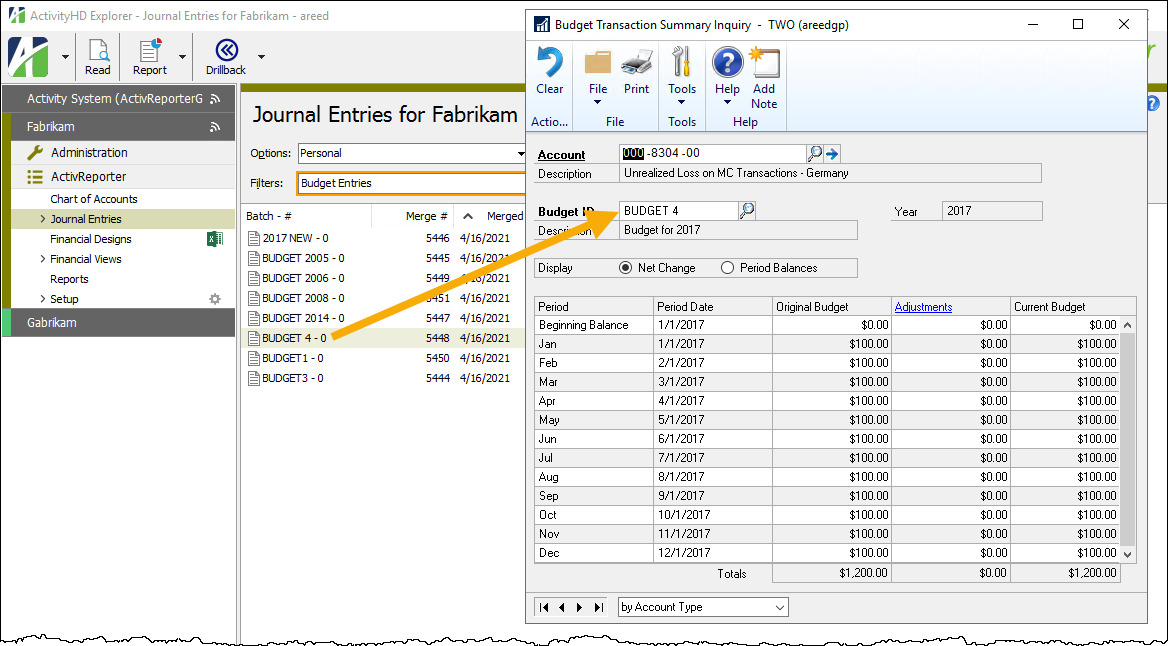
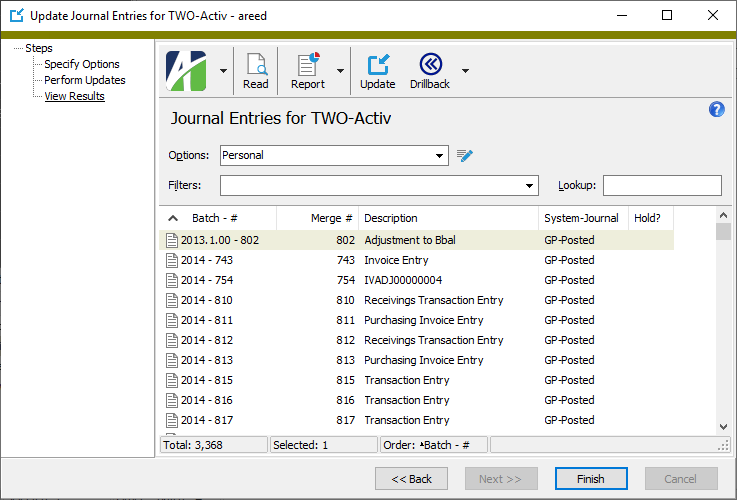
Use the Journal Entry window to view general ledger transactions, including journal detail.

Note
ActivReporter calculates the correct closing entry if the Dynamics GP database has correcting entries for the closed fiscal year. The closing entries in ActivReporter mirror the end-of-year entries in Dynamics GP. If necessary, it is possible to post journal entries into the most recently closed fiscal year in Dynamics GP. Dynamics GP adds detail lines to the new entry to change any previously calculated balance brought forward values or retained earnings.

Journal entries security
Common accesses available on journal entries
| Access | A user with this access can... |
|---|---|
| Data | Have read-only access to journal entries from anywhere in the software (e.g., field validations, filters, date expressions). |
| Export | Export journal entries from ActivReporter. |
| Read | Have read-only access to journal entries. |
| Report | Run reports with journal entry information. |
| Report Designs | Create and edit report designs with journal entry information. This access enables the Report Designs button on the Output tab of report dialogs. |
| Shared Answers | Create and edit saved answers related to journal entries. |
| Shared Filters | Create and edit shared filters on journal entries. |
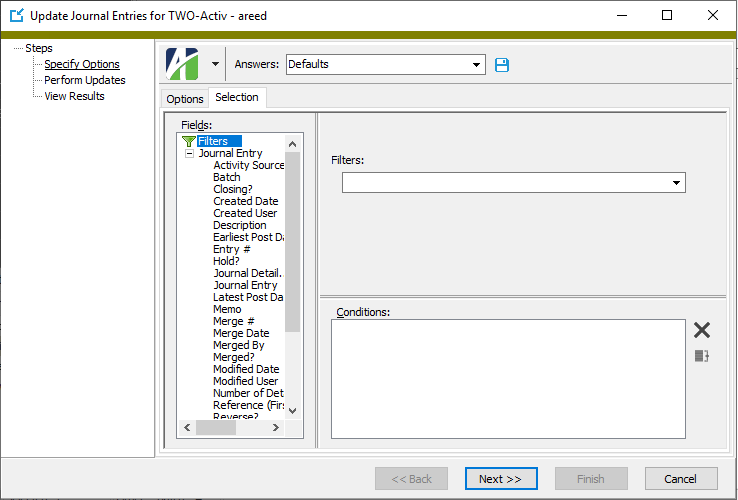
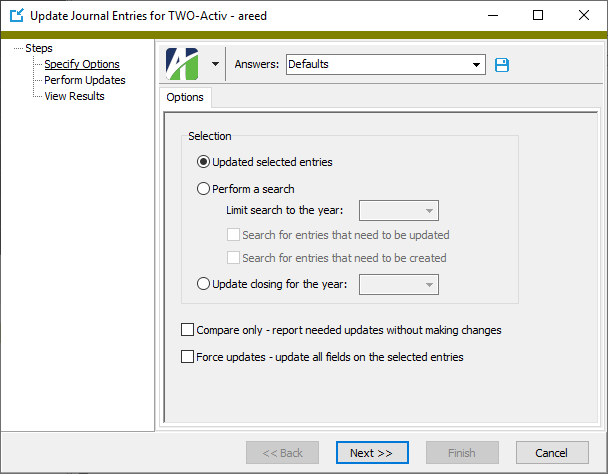
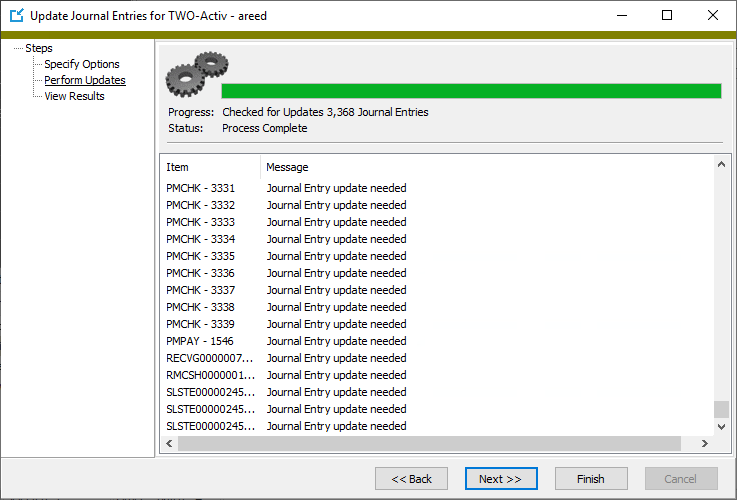
| Update | Run the Update Journal Entries process. |
| Visible | View the Journal Entries folder in the Navigation pane. |
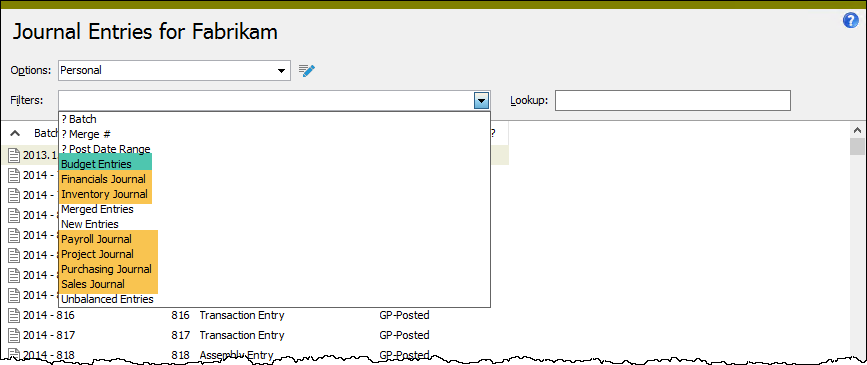
Journal entries filters
The following built-in filters are available for journal entries:
| Filter Name | Effect |
|---|---|
| ? Batch | Prompts for the batch name and lists the journal entries with a batch name that contains the specified search string. |
| ? Merge # | Prompts for a range of merge numbers and lists the journal entries with a merge number between the two values. |
| ? Post Date Range | Prompts for a range of posting dates and lists the journal entries with at least one journal detail line posted in the date range. |
| Budget Entries | Lists budget journal entries only. |
| Financials Journal | Lists journal entries from the financials journal only. |
| Inventory Journal | Lists journal entries from the inventory journal only. |
| Merged Entries | Lists merged journal entries only. |
| New Entries | Lists unmerged journal entries only. |
| Payroll Journal | Lists journal entries from the payroll journal only. |
| Project Journal | Lists journal entries from the project journal only. |
| Purchasing Journal | Lists journal entries from the purchasing journal only. |
| Sales Journal | Lists journal entries from the sales journal only. |
| Unbalanced Entries | Lists the journal entries which fail the balancing rules enforced by Proof/Merge Journal Entries. |
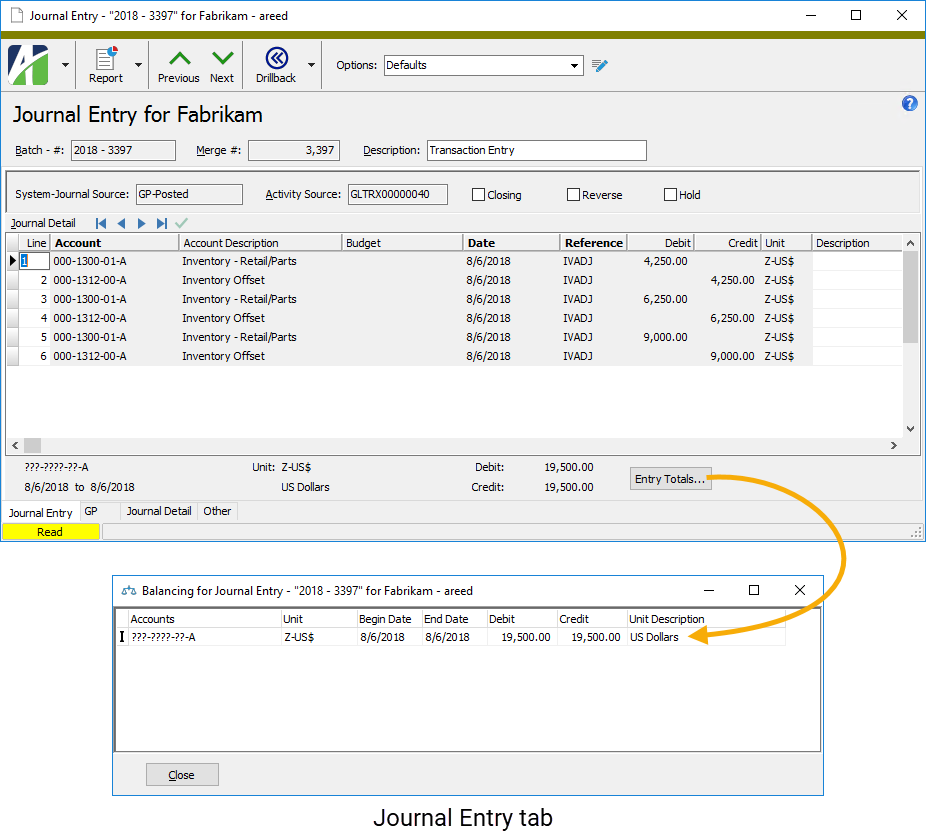
Balancing for Journal Entry
- Accounts
- Displays segment codes for the segments which require balancing. Displays question marks for segments that do not require balancing. If none of the segments requires balancing, the account number shows all question marks.
- Unit
- Displays the unit associated with the account mask on this row.
- Begin Date
- This date and the end date are determined by the balance option selected on the ledger for the account mask. The options are:
- None. If this option was used, the range of dates is 01/01/1950 to 12/31/9999.
- Period. If this option was used, the range of dates is the period begin and end dates of the period in which the date on the journal entry detail line falls.
- Daily. If this option was used, the date on the journal entry detail line is used as both the begin date and end date.
- End Date
- See "Begin Date".
- Debit
- Displays the amount debited to the account mask on the journal entry. Debits in red indicate an out-of-balance condition.
- Credit
- Displays the amount credited to the account mask on the journal entry. Credits in red indicate an out-of-balance condition.
- Unit Description
- Displays the description of the unit associated with the account mask.