Rollup items
Rollup items typically represent lines of a financial statement. Rollup items are defined by the segment items and/or rollup items or combinations they include.
Example
A rollup item could combine all segment items and/or rollup items that would go into the Accounts Receivable line on a balance sheet.
Rollup items for built-in rollups are read-only. To learn more about built-in rollups, see "Rollups".
 Create a rollup item
Create a direct-assignment rollup item
- In the Navigation pane, select the General Ledger > Setup > Rollups folder and then select the folder for the type of rollup item you need to create.
- Click
 . The New Rollup Item window opens.
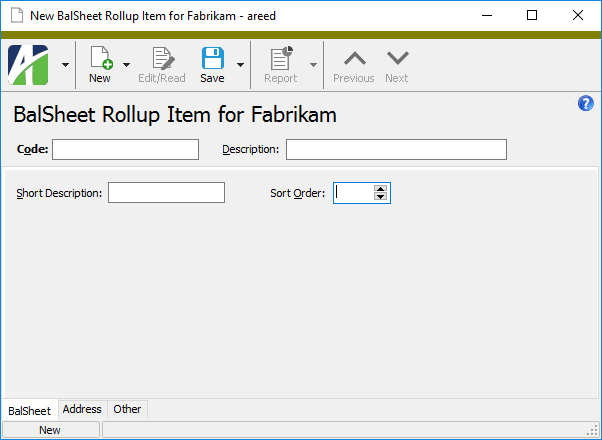
- Enter a unique Code for the rollup item. The length and data type for the code depend on how the associated rollup is set up.
- Enter a Description of the rollup item. You can use up to 40 characters.
- Enter a Short Description of the rollup item. You can use up to 20 characters.
- In the Sort Order field, enter the order in which you want the rollup item to appear in the HD view and on financial view reports when the "Sort Order" column is included and used to control line order. If no sort order is specified on a new rollup item, it is automatically added to the end of the sort order.
-
If the rollup item is associated with a particular address, select the Address tab. Otherwise, skip to step 9.
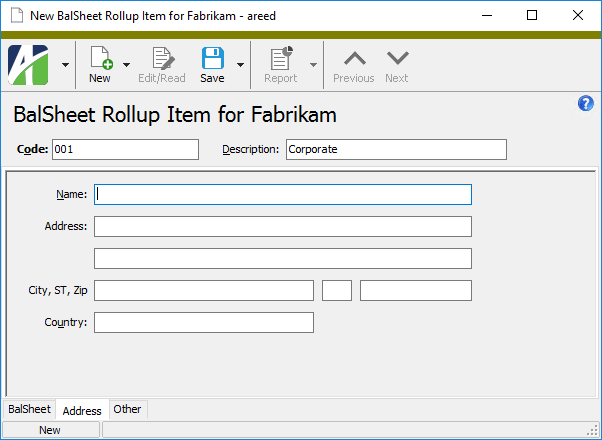
- Enter the name and address to associate with the rollup item.
- Save the new rollup item.
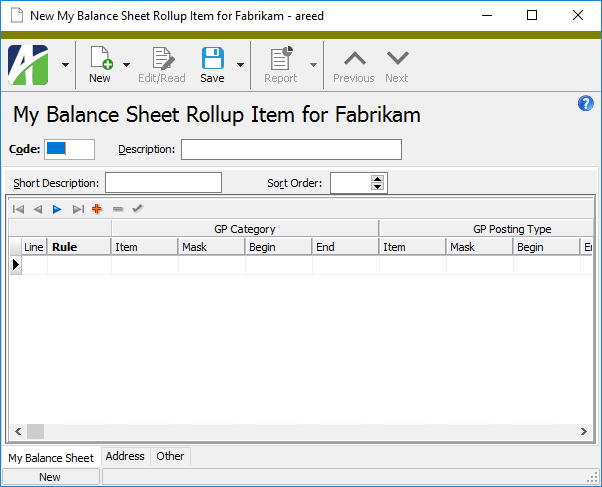
Create a rules-based rollup item
- In the Navigation pane, select the General Ledger > Setup > Rollups folder and then select the folder for the type of rollup item you need to create.
- Click . The New Rollup Item window opens.
- Enter a unique Code for the rollup item. The length and data type for the code depend on how the associated rollup is set up.
- Enter a Description of the rollup item. You can use up to 40 characters.
- Enter a Short Description of the rollup item. You can use up to 20 characters.
- In the Sort Order field, enter the order in which you want the rollup item to appear in the HD view and on financial view reports when the "Sort Order" column is included and used to control line order. If no sort order is specified on a new rollup item, it is automatically added to the end of the sort order.
- In the table, do one of the following for each segment and/or rollup assigned to the associated rollup item. If there are multiple segments and/or rollups, use them in combination to define the combinations of segment items and/or rollup items to include.
- In the Rule column, select the type of rule to use. Your choices are:
- Include
- Exclude
Note
If an include rule and exclude rule both reference the same item, the exclude rule will be followed. For example, if one rule includes accounts with a main segment in the range 1500-1599, and another rule excludes accounts assigned a main segment of 1527, then the rollup will include accounts with main segments 1500-1526 and 1528-1599.
- In the Item column, select the segment item or rollup item to include in the rollup item.
- In the Mask column, select the segment item mask or rollup item mask to use to select the segment items or rollup items to include in the rollup item. Use this option when the items you are rolling up have common characters but are not in a particular order.
- In the Begin and End fields, enter the range of segment items or rollup items to include in the rollup item.
- In the Rule column, select the type of rule to use. Your choices are:
- Add more lines to the table until you have described all the segment items and/or rollup items you need to include in the rollup item.
- If the rollup item is associated with a particular address, select the Address tab. Otherwise, skip to step 11.
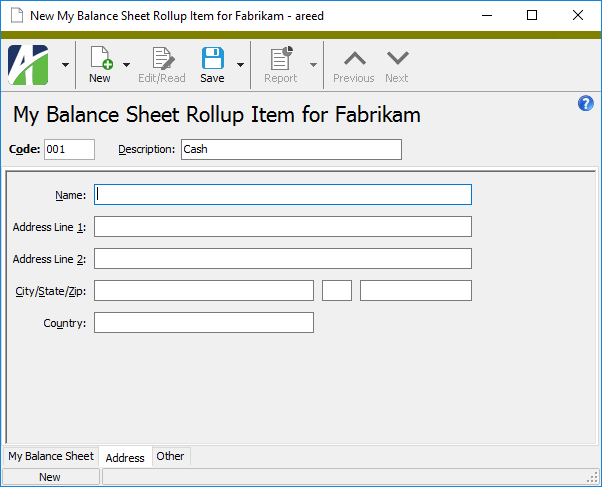
- Enter the name and address to associate with the rollup item.
- Save the new rollup item.
Rollup Items Listing
Purpose
The Rollup Items Listing provides a list of items defined for a particular rollup.
Content
For each rollup item included on the report, the listing shows:
- description
- short description.
In addition, you can include one or more of the following:
- addresses
- detail (line number, assigned segment, segment/rollup item, mask, begin segment/rollup item, end segment/rollup item)
- timestamps
- memos
- custom fields.
The following total appears on the report:
- record count.
Print the report
- In the Navigation pane, expand the ActivReporter > Setup > Rollups folder and highlight the folder for the rollup items you want to report on.
- Start the report set-up wizard.
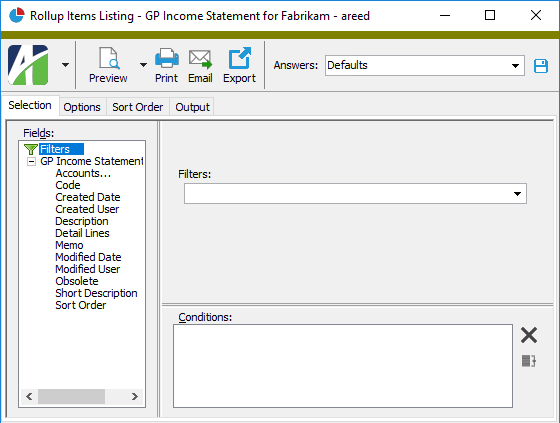
- To report on all or a filtered subset of rollup items:
- Right-click the rollup items folder and select Select and Report > Rollup Items Listing from the shortcut menu.
- On the Selection tab, define any filters you want to apply to the data.
- To report on specifically selected rollup items:
- In the HD view, select the rollup items to include on the report. You can use Ctrl and/or Shift selection to select multiple records.
- Click
 .
.
- To report on a particular rollup item from the Rollup Item window:
- In the HD view, locate and double-click the rollup item you want to report on. The Rollup Item window opens with the rollup item loaded.
- Click .
- To report on all or a filtered subset of rollup items:
- Select the Options tab.
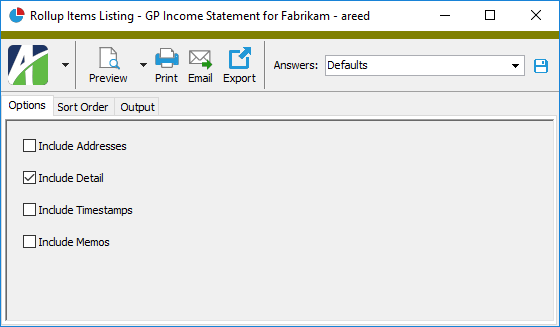
- Mark the checkbox(es) for the additional information to include:
- Addresses
- Detail
- Timestamps
- Memos
- Custom Fields (only visible if custom fields are set up)
- Select the Output tab.
- In the Design field, look up and select the report design to use.
- In the toolbar, click the icon for the type of output you want:
 - Provides access to two preview options.
- Preview - Click the icon or click the drop-down arrow and select Preview from the drop-down menu to view the report in the Crystal Reports viewer.
- Preview to PDF - Click the drop-down arrow next to the icon and select Preview to PDF to view the report in the PDF reader.
 - Opens the Print dialog so that you can select and configure a printer and then print a paper copy of the report.
 - Opens the Report Email dialog so that you can address and compose an email that the report will be attached to. For best results, ensure your email client is running before you attempt to send a report via email.
 - Opens the Export Report dialog so that you can save the report to a file. File types include Crystal Reports (.rpt), PDF (.pdf), Microsoft Excel (.xls), Microsoft Word (.doc), rich text (.rtf), and XML (.xml).
- From
- The email account from which to send the email. Valid options are:
- Windows user default account. Sends email using the user's Windows default email account. For most users, this is the account configured in Outlook or another email client application.
- Server personal. Sends email using the email configuration for the system or company server and the email address on the current user's authorized user record. The authorized user record must have a confirmed email address.
- Server generic. Sends email using the email configuration and "from" address for the system or company server. This option requires "Send generic" access to the Server Email resource.
- To
- The email address(es) to which to send the email. Separate email addresses with semi-colons.
- CC
- The email addresses to copy on the email. Separate email addresses with semi-colons.
- BCC
- The email addresses to blind copy on the email. Separate email addresses with semi-colons.
- Subject
- The subject line.
- Text box
- The body of the email.
Report Email dialog
Data extensions
The following data extension is available for the report:
- Rollup items
Rollup Item Record ID
[Rollup Name] tab
The remaining fields on the [Rollup Name] tab apply to rules-based rollups only.
If a specific segment item or rollup item is designated for the segment or rollup, it displays in this column.
Press F3 to look up the value.
If a value is already selected, you can press F4 to open the record in its native editor.
For segment items or rollup items for the segment or rollup selected by segment item mask or by rollup item mask, this is the mask to use to select the items included in the rollup item. This option is typically used when the items you are rolling up have common characters but are not in a particular order.
Press F3 to look up the value.
If a value is already selected, you can press F4 to open the record in its native editor.
For segment items or rollup items for the segment or rollup selected by a range of segment items or rollup items, this is the first segment item or rollup item of the range of items included in the rollup item.
Press F3 to look up the value.
If a value is already selected, you can press F4 to open the record in its native editor.
For segment items or rollup items for the segment or rollup selected by a range of segment items or rollup items, this is the last segment item or rollup item of the range of items included in the rollup item.
Press F3 to look up the value.
If a value is already selected, you can press F4 to open the record in its native editor.
Address tab
Information on this tab is used only if the rollup item represents a location such as a region or store number.
Chart of Accounts tab
The Chart of Accounts pane shows the Accounts HD view filtered to show all accounts associated with the selected rollup item.
Double-click a row in the pane to drill down to its record in the Account window.
Journal Detail tab
The Journal Detail pane shows the Journal Detail HD view filtered to show all journal detail lines for accounts associated with the rollup item.
Double-click a row in the pane to drill down to its record in the Journal Detail window.
Financial Views tab
One tab appears in this area for each active account-level financial view. Select the tab for the financial view you want to view totals for.
Depending on how the columns in a financial view are defined, you can view account totals such as period beginning balance, period activity, period ending balance, year-to-date activity, activity for the month, activity for the quarter, etc. Use the filters above the tabs to select the period to view totals for and to include or exclude unmerged entries.
Double-click a row in the pane to drill down to its record in the Financial View Item window, then highlight a total to view the journal detail entries which comprise the total.
Attachments tab
The Attachments tab is visible if any record for a given entity has an attachment. If the Attachments tab is not visible, this implies that no record of the entity type has an attachment on it; however, once an attachment is added to any record of the entity type, the Attachments tab will become available.
Change Logs tab
This tab is visible if the user has "Change Logs" access to the associated data folder resource.
The Change Logs pane shows the Change Logs HD view filtered to show all change logs for the selected entity record.
Double-click a row in the pane to drill down to its record in the Change Log window.
Other tab
This tab shows the user who created this record and the date and time of creation as well as the user, date, and time of the latest modification to the record.
Note
For entries coming from Dynamics-GP, the dates are the date and time of the last seeding/syncing.
Developer tab
This tab is visible only when developer features are enabled.
Automation subtab
This subtab shows field names and values for the current data record. Use the information in the subtab to assist when creating automation objects such as bots and import files. The field names and field values can be copied from the text box and pasted directly into your code or application. To copy content from the text box, highlight the content to copy and press Ctrl+C or right-click your selection and select Copy from the context menu.
Export (XML) subtab
This subtab shows the XML syntax for exporting the selected data record. The syntax can be copied from the text box as an exemplar for creating your own automation objects for bots, import files, ActivWebAPI, etc. To copy content from the text box, highlight the content to copy and press Ctrl+C or right-click your selection and select Copy from the context menu.
Import (XML) subtab
This subtab allows you to select a file for import and shows the XML syntax for importing data records. Use the subtab to explore the XML syntax for importing data records. In particular, you can investigate the syntax which results when using Data.Import and ActivWebAPI data POST and DELETE routes.
Change Log (XML) subtab
This subtab is visible only when the Enable Change Logs option is marked in System Options or Company Options (depending on whether the feature applies at the system or the company level). This is the default setting when developer features are enabled.
This subtab allows you to investigate changes to the current data record. The syntax can be copied for use in bots, dashboards, ActivWebAPI, and other automation. To copy content from the text box, highlight the content to copy and press Ctrl+C or right-click your selection and select Copy from the context menu.
Select Statement (SQL) subtab
This subtab allows you to investigate the SQL select statement used to retrieve the current data record. The syntax can be copied as an exemplar for data sources and other automation. To copy content from the text box, highlight the content to copy and press Ctrl+C or right-click your selection and select Copy from the context menu.
Calendar Period
- Calendar
-
- Expression
-
A period expression which defines a relative reporting period for the financial view. You can select a period expression from the drop-down list or enter a period expression directly in the field. To explicitly specify a reporting period for the selected calendar, use the Year and Period fields instead.
The dropdown contains the following common period expressions:
- Current
- Current - 1 period
- Current - 1 year
For help with proper period expression syntax, click the help button to the right of the field.
- Year
- The year from the GL calendar to use for the financial view. If a period expression is entered in the Expression field, ActivReporter automatically updates this field for you.
- Period
- The period from the selected year to use for the financial view. If a period expression is entered in the Expression field, ActivReporter automatically updates this field for you.
Rollup items security
Common accesses available on rollup items
| Access | A user with this access can... |
|---|---|
| Change | Use the mass change action on rollup items. |
| Change Logs | Access change logs for rollup items. |
| Data | Have read-only access to rollup items from anywhere in the software (e.g., field validations, filters, date expressions). |
| Edit | Edit rollup item records. |
| Export | Export rollup item records from ActivReporter. |
| Import | Import rollup item records into ActivReporter. |
| Read | Read rollup item records. |
| Report | Run reports with rollup item information. |
| Report Designs | Create and edit report designs with rollup item information. This access enables the Report Designs button on the Output tab of report dialogs. |
| Shared Answers | Create and edit saved answers related to rollup items. |
| Shared Filters | Create and edit shared filters on rollup items. |
| Visible | View the [Rollup Items] folder in the Navigation pane. |