Package options
ActivityHD provides an Options dialog where you can manage and view settings per company which affect the software at the package level. To access the Options dialog, right-click the company folder or right-click a package folder and select Options from the shortcut menu. Package options are currently available for General Ledger, Accounts Payable, Accounts Receivable, and Payroll.
Access to particular options depends on which packages are installed and upon each user's security settings. Security settings are controlled by two security accesses, Options (Admin) and/or Options (Controller), available on each package's package folder resource. For example, manage access to General Ledger options by assigning privileges to the General Ledger folder resource.

Option settings can be exported and imported for sharing among companies.
-
Right-click the company folder and select Options from the shortcut menu.
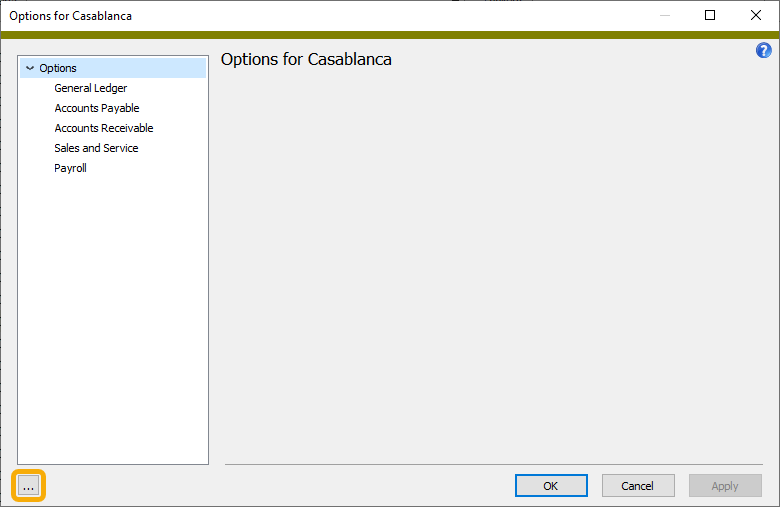
- Click
 .
. -
From the menu, select Export. The Options Export dialog opens.
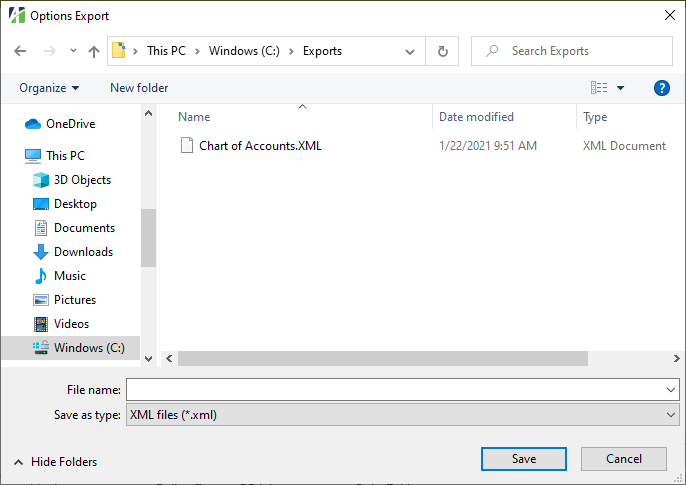
- Browse to the location where you want to save the export file.
- Enter the File name.
- Click Save. Your current settings are saved in XML format to the location you specified.
Export is available through automation:
Activity.OptionsExport(Parameters (xml string))
Company.OptionsExport(Parameters (xml string))
Syntax
<Export @DiskFilePrompt(True/False) @DiskFileName />
-
Right-click the company folder and select Options from the shortcut menu.
- Click .
-
From the menu, select Import. The Options Import dialog opens.
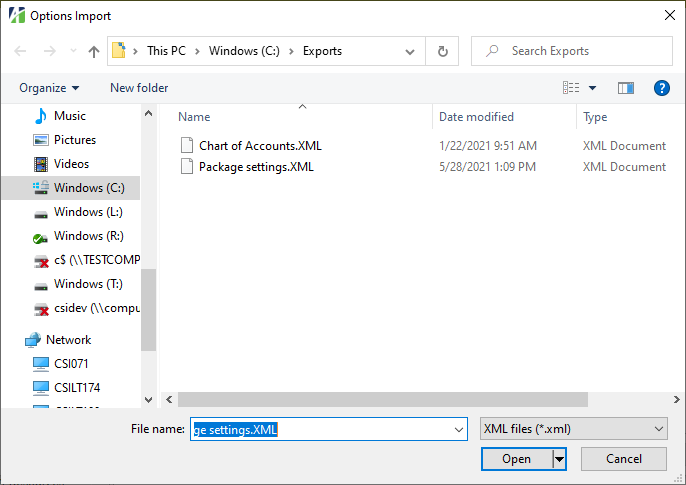
- Browse to the location of the file you want to import and highlight the file name to load it in the File name field.
-
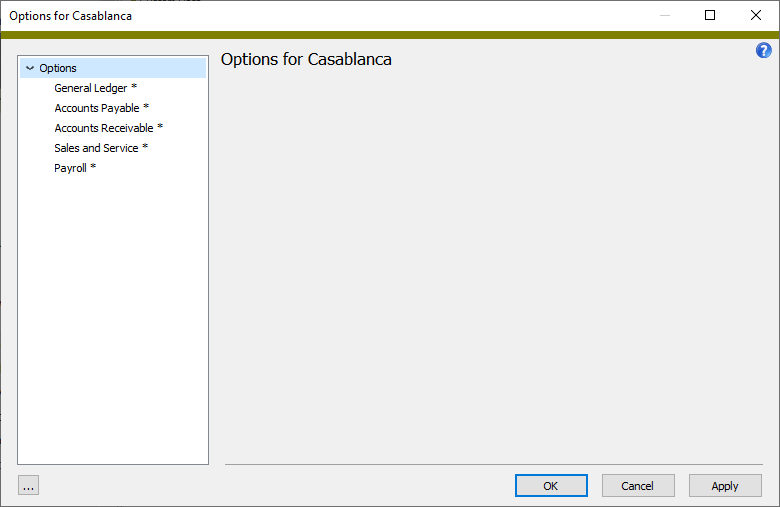
Click Open. Notice that each package affected by the import is denoted by an asterisk.
- Click Apply to apply the new settings and leave the Options dialog open, or click OK to apply the new settings and close the dialog.
Import is available through automation:
Activity.OptionsImport(Parameters (xml string))
Company.OptionsImport(Parameters (xml string))
Syntax
<Import @DiskFilePrompt(True/False) @DiskFileName />
<Options>
<!--Use Export for example of available options-->
</Options>
</Import>
To learn about each package's settings, expand the package name.
The General Ledger tab of the Options dialog lets you maintain the account masks used for tracking intercompany transactions.
Note
Intercompany posting requires that your companies share a common company segment in the chart of accounts. The process does not pertain when companies are maintained in separate company databases.
Intercompany account masks let you define how ActivityHD generates intercompany accounts for the additional postings needed to track intercompany receivables and payables. These are not intercompany elimination entries which are needed to eliminate the profit/loss of transactions between companies in a consolidated financial statement. Instead, these are the postings which are created to track the intercompany receivables and payables amounts when one company, usually the parent company, does business on behalf of another company, usually a subsidiary.
Example
Suppose parent company "0" pays bills for subsidiary companies "1" and "2". An invoice is received for equipment and is to be distributed to both subsidiaries. The liability is posted to Company 0. The expenses are posted to Company 1 and Company 2. Intercompany postings (marked with an asterisk) are created automatically:
| Account | Description | Debit | Credit | |||||
| 2000-0-A | Accounts Payable (0) | 900.00 | ||||||
| 5048-1-A | Office Supplies (1) | 200.00 | ||||||
| 5048-2-A | Office Supplies (2) | 700.00 | ||||||
| *1991-0-A | Intercompany Receivables | 200.00 | Company 0 receivables from Company 1 | |||||
| *2990-1-A | Intercompany Payables | 200.00 | Company 1 payables to Company 0 | |||||
| *1992-0-A | Intercompany Receivables | 700.00 | Company 0 receivables from Company 2 | |||||
| *2990-2-A | Intercompany Payables | 700.00 | Company 2 payables to Company 0 |
Notice that Company 0's intercompany receivables (200 + 700) balance the liability posted for the invoice. Company 1's intercompany payables posting balances its expense and Company 2's intercompany payables posting balances its expense. Each company remains in balance.
For this example, you would define the following account masks:
Intercompany AR Account Mask: 199?-_-_
Intercompany AP Account Mask: 299?-_-_
The example assumes that both the Company segment (the second segment) and the Ledger segment (the third segment) require balance. The question marks in the masks are replaced with the non-ledger balancing segment(s) which, in this example, are one-digit company numbers.
Maintain General Ledger options
Important
Only complete this window if you will need to post intercompany transactions for receivables and payables.
Note
You must have "Options (Controller)" access to the General Ledger folder resource to maintain intercompany options.
- In the Navigation pane, highlight the General Ledger folder.
- Right-click the folder and select Options from the shortcut menu. The Options window opens with the General Ledger tab selected.
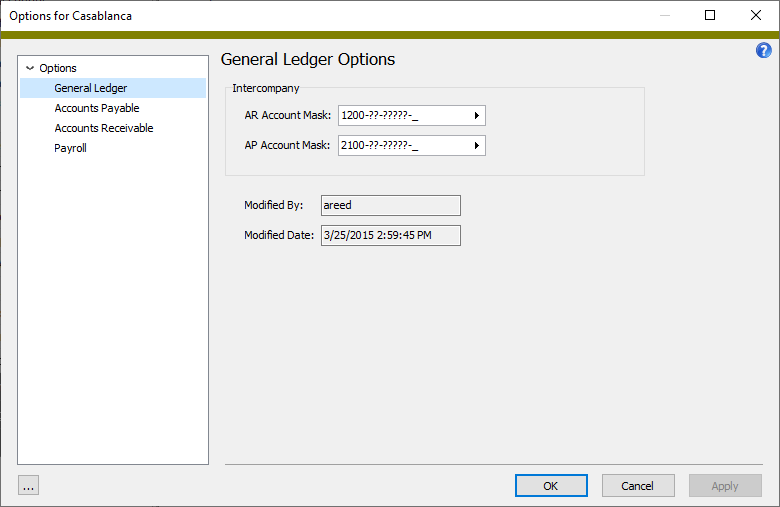
- In the AR Account Mask field, enter the account mask to use to generate the intercompany accounts needed for making additional postings to track intercompany receivables. Segments that require balance are not editable and are left blank.
- In the AP Account Mask field, enter the account mask to use to generate the intercompany accounts needed for making additional postings to track intercompany payables. Segments that require balance are not editable and are left blank.
- In the Field Character Limits section in the Financial Design Description field, select the number of characters to allow in the Description field on financial design records. The default value is 90 characters. Valid values are 1 to 255 characters.
- Click OK.
Maintain Accounts Payable options
- In the Navigation pane, highlight the Accounts Payable folder.
- Right-click the Accounts Payable folder and select Options from the shortcut menu. The Options dialog box opens with the Accounts Payable branch selected.
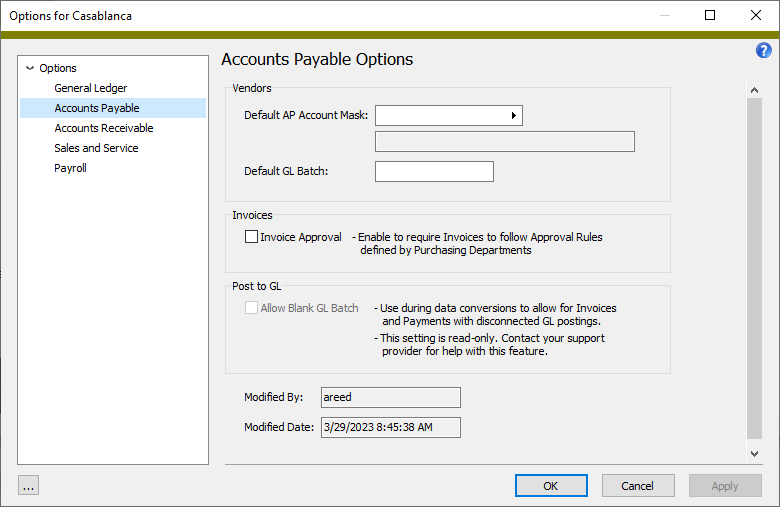
- To provide a default AP account mask to use whenever a new vendor is created, enter the full or partial account mask in the Default AP Account Mask field. The account mask you enter is copied as the initial default value on new vendors. Consider using this option if most of your vendors and invoices will use the same AP account.
- To provide a default GL batch to use whenever a new vendor is created, enter the name in the Default GL Batch field. The batch name you enter is copied as the initial default GL batch name on new vendors. Consider using this option if most of your vendors and invoices will use the same GL batch name.
- To enable the AP invoice approval feature, mark the Invoice Approval checkbox. Enabling approvals requires invoices to follow the approval rules defined by Purchasing departments.
- When you finish, click OK.
![]() Maintain Accounts Receivable options
Maintain Accounts Receivable options
- In the Navigation pane, highlight the Accounts Receivable folder.
- Right-click the Accounts Receivable folder and select Options from the shortcut menu. The Options dialog box opens with the Accounts Receivable branch selected.
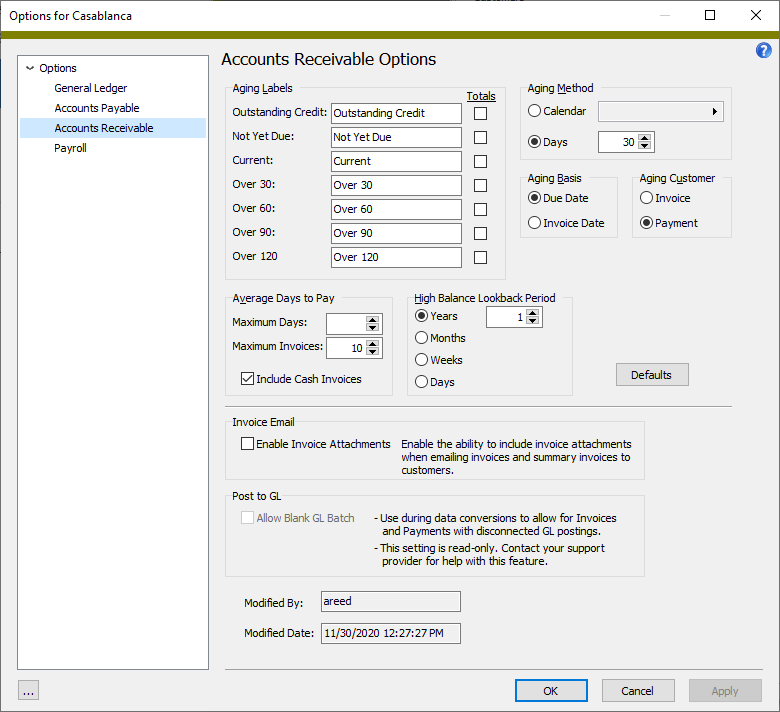
- In the Aging Labels section, modify the aging labels to match your actual aging periods. These labels appear in the Customers HD view as column headings and as headings in the Aged Invoice Analysis. The following table shows the default aging categories and what each means.
- In the Totals column in the Aging Labels section, mark the checkbox for each aging category to show subtotals for in the view. When an aging category that is flagged to show totals is shown in the view, the total for the selected rows is shown at the bottom of the view.
- In the Aging Method field, select how to determine aging periods. Aging periods are used to calculate aging amounts such as those shown in the Customers HD view. Your options are:
- Calendar. If you select this option, select the GL calendar to use to determine aging periods. This allows you, for example, to use actual months as aging periods. The current aging period is the calendar period that contains today's date. Other aging periods are relative to the current period.
- Days. If you select this option, enter the fixed number of days in each aging period. Aging periods are relative to today's date.
- In the Aging Basis field, select the type of date to use as the basis for determining the aging period. Your options are:
- Due Date. Use the invoice due date as the basis for the aging period.
- Invoice Date. Use the original invoice date as the basis for the aging period.
- In the Aging Customer field, select which customer to age balances for. Your options are:
- Invoice. Calculate aging totals based on the outstanding invoices for the invoice customer. Payment customers who have outstanding invoices for other customers who bill to them will NOT have the other invoices included in the aging totals.
- Payment. Include invoice customers who bill to a payment customer when calculating aging totals for payment customers. In this case, an invoice customer who bills to a different payment customer will always show zero aging totals.
- In the Average Days to Pay section in the Maximum Days field, enter the number of days before today within which an invoice must have been paid to be included in the average days to pay calculation. Invoices paid before this moving date are excluded from the calculation. To include invoices regardless of the final payment date, leave this field blank.
- In the Maximum Invoices field, select or enter the maximum number of invoices to include in the average days to pay calculation. Only the most recently paid invoices are included based on the maximum invoice number. If you do not want to limit the number of invoices used in the calculation, leave this field blank.
- To include invoices which are completely paid on the same day as the invoice date in the average days to pay calculation, mark the Include Cash Invoices checkbox. To exclude these invoices, ensure the checkbox is cleared.
- In the High Balance Lookback Period section, select the type of lookback period to use to determine a customer's high balance totals. Your options are:
- Years
- Months
- Weeks
- Days
When you select an option, a spinner field becomes available to its right. Enter the number of years/months/weeks/days in the lookback period. To include all previous customer history in the lookback period, leave this field blank.
Example
To provide high balance totals for the last three years, select "Years" and enter "3" in the adjacent field.
- If you need to be able to include invoice attachments when emailing invoices and summary invoices to customers, mark the Enable Invoice Attachments checkbox.
- Click OK.
| Aging Category | Description |
|---|---|
| Outstanding Credit | Total of all credit-balance invoices |
| Not Yet Due | Total of unpaid invoices due after the current aging period |
| Current | Total of unpaid invoices due in the current period |
| Over 30 | Total of unpaid invoices due in the first past due period |
| Over 60 | Total of unpaid invoices due in the second past due period |
| Over 90 | Total of unpaid invoices due in the third past due period |
| Over 120 | Total of unpaid invoices due before the oldest past due period |
Note
High balance totals are available by invoice customer and by payment customer. The high balance totals are calculated by looking back over the time period specified in the High Balance Lookback Period section. The end of day balance for each day in the lookback period is evaluated to determine the highest balance at any point in time during the lookback period. All invoices and receipts for a customer during the lookback period, both merged and unmerged, are evaluated. The lookback period always starts with the current date. Invoices or receipts with future dates are not included.
The High Balance (Invoice Customer) and High Balance (Payment Customer) columns are available to be added to the Customers HD view. If you include activity totals when you run the Customers Listing, high balances are included on the report.
![]() Reset customer options to the original defaults
Reset customer options to the original defaults
If changes have been made to settings on the Accounts Receivable Options tab of the Options dialog box but you decide you need to revert to the original settings from when Accounts Receivable was installed, you can recall the system defaults.
- In the Navigation pane, highlight the Accounts Receivable folder.
- Right-click the Accounts Receivable folder and select Options from the shortcut menu. The Options dialog box opens with the Accounts Receivable branch selected.
- Click Defaults. ActivityHD resets the options.
- Click OK.
View Payroll options
- In the Navigation pane, highlight the Payroll/Human Resources folder.
- Right-click the Payroll/Human Resources folder and select Options from the shortcut menu. The Options dialog box opens with the Payroll branch selected.
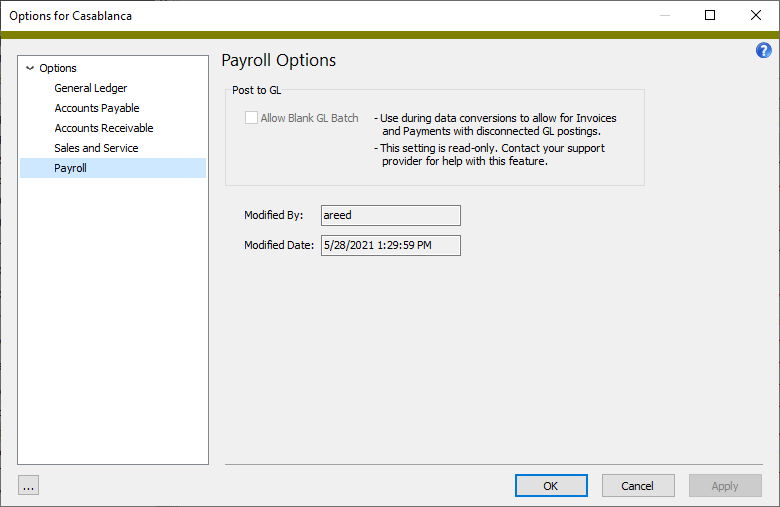
- When you finish viewing options, click OK or Cancel.
General Ledger Options tab
The account mask for ActivityHD to use to generate the intercompany accounts for the additional postings needed to track intercompany receivables. Segments which are required to be in balance cannot be edited and are left blank. If you do not need to produce intercompany postings for receivables, leave this field blank.
Press F2 to open the Account Expand dialog box where you can look up an account number, find an account number by its alias, build the account number by segment, or view setup and setup sources.
Press F3 to look up the account.
If an account is already selected, you can press F4 to open the record in the Account window.
The account mask for ActivityHD to use to generate the intercompany accounts for the additional postings needed to track intercompany payables. Segments which are required to be in balance cannot be edited and are left blank. If you do not need to produce intercompany postings for payables, leave this field blank.
Press F2 to open the Account Expand dialog box where you can look up an account number, find an account number by its alias, build the account number by segment, or view setup and setup sources.
Press F3 to look up the account.
If an account is already selected, you can press F4 to open the record in the Account window.
Accounts Payable Options tab
The AP account mask to copy as the initial default AP account mask on new vendors.
Press F2 to open the Account Expand dialog box where you can look up an account number, find an account number by its alias, build the account number by segment, or view setup and setup sources.
Press F3 to look up the account.
If an account is already selected, you can press F4 to open the record in the Account window.
Accounts Receivable Options tab
Select how to determine aging periods. Your options are:
-
Calendar. If you select this option, the adjacent field is enabled. Select the GL calendar to use to determine aging periods. This allows you, for example, to use actual months as aging periods. The current aging period is the calendar period that contains today's date. Other aging periods are relative to the current period.
Press F3 to look up the value.
If a value is already selected, you can press F4 to open the record in its native editor.
- Days. If you select this option, the adjacent field is enabled. Enter the fixed number of days in each aging period. Aging periods are relative to today's date.
Select the type of date to use as the basis for the aging period. Your options are:
- Due Date. Use the invoice due date as the basis for the aging period.
- Invoice Date. Use the original invoice date as the basis for the aging period.
Select which customer to age balances for. Your options are:
- Invoice. Calculate aging totals based on the outstanding invoices for the invoice customer. Payment customers who have outstanding invoices for other customers who bill to them will NOT have the other invoices included in the aging totals.
- Payment. Include invoice customers who bill to a payment customer when calculating aging totals for payment customers. In this case, an invoice customer who bills to a different payment customer will always show zero aging totals.
Select the type of lookback period to use to determine a customer's high balance totals. Your options are:
- Years
- Months
- Weeks
- Days
When you select an option, a field adjacent to the option becomes visible. Enter the number of years/months/week/days in the lookback period. To include all previous customer history in the lookback period, leave this field blank.
Example
To provide high balance totals for the last three years, select "Years" and enter "3" in the adjacent field.
Note
High balance totals are available by invoice customer and by payment customer. The high balance totals are calculated by looking back over the time period specified in the High Balance Lookback Period section. The end of day balance for each day in the lookback period is evaluated to determine the highest balance at any point in time during the lookback period. All invoices and receipts for a customer during the lookback period, both merged and unmerged, are evaluated. The lookback period always starts with the current date. Invoices or receipts with future dates are not included.
The High Balance (Invoice Customer) and High Balance (Payment Customer) columns are available to be added to the Customers HD view. If you include activity totals when you run the Customers Listing, high balances are included on the report.
Payroll Options tab
|
5225 S Loop 289, #207 Lubbock, TX 79424 806.687.8500 | 800.354.7152 |
© 2025 AccountingWare, LLC All rights reserved. |