Bots
Use bots to automate tasks within ActivityHD Explorer. To use a specific bot, users must be assigned permissions to the bot. Currently, there are six bot types: class, module, general, record, record list, and record loop.
A shortcut key combination can be assigned to a bot to make it easy to execute. (When you assign shortcuts, be sure to avoid conflicts with other ActivReporter shortcuts.)
 Optional: Install VBSEdit
In version 8.11-0, a new VBSEdit script editor and debugger was introduced to ActivReporter which handles Javascript in addition to VBScript. This version of VBSEdit is optional and must be installed separately. The current recommended version of VBSEdit is 25.1.30.7. ActivReporter includes a license to run VBSEdit without restrictions when called from ActivReporter. It must be licensed separately to run apart from ActivReporter except in evaluation mode.
VBSEdit must be installed from the command line with administrator privileges and must be installed for all users using the /allusers switch.
To install VBSEdit:
- Click the Windows Start button, then enter
cmdin the search bar.
- If the Command Prompt with its options is not visible in the right pane of the search box, locate it in the left pane and select it.
-
In the right pane, click Run as administrator.
If you are prompted for your credentials, supply them and click Yes.
The Command Prompt window opens in administrator mode.

- Change directories to the folder on your system which contains the "vbsedit_x64.exe" and "vbsedit_x86.exe" files. (The path indicated in the image below may not be identical to the path in your environment.)

- At the prompt, type
vbsedit_x64 /allusers(64-bit) orvbsedit_x86 /allusers(32-bit).
- Press Enter. The VBSEdit installation wizard starts.

- Click Next >. Installation begins. You are notified when installation completes.

- Click Finish.
Now when you click Script Editor in the Bot window, the new VBSEdit editor loads.
Note
If VBSEdit has been installed without the /allusers switch, you should uninstall VBSEdit and reinstall it properly. To uninstall VBSEdit, use the uninstaller provided. Locate the uninstaller in your Users folder; e.g., C:\Users\<username>\AppData\Local\Vbsedit_uninstall\x64. (Choose the x86 subfolder if you installed the 32-bit version of VBSEdit.) To run the uninstaller, double-click the uninstall.exe file.
Create a bot
Tip
Use the Run button ![]() or press F9 to test your bots as you build them.
or press F9 to test your bots as you build them.
Expand the instructions for the type of bot you need to create. The instructions assume you have the Javascript-capable version of VBSEdit.
Class
Use the "class" bot type to define a class which can be used in other bots. A class bot can be referenced in the "Script Using" section of other bots to create an instance of the class. Using a class bot simplifies your creation of other bots by allowing reuse of the class definition in multiple bots, thus eliminating duplicated code.
To create a class bot:
- In the Navigation pane, highlight the Activity System > Administration > Setup > Bots folder.
- Click
 . The New Bot window opens.
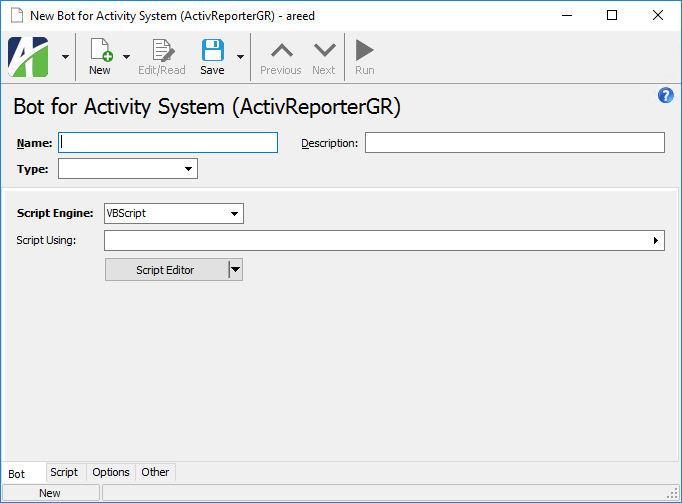
- Enter a Name for the class. A class name cannot contain spaces.
- Enter a Description of the class.
- From the Type drop-down list, select "Class".

- From the Script Engine dropdown, select the scripting engine to use to write the bot. Valid options are:
- JScript - All JScript 5.8 features, including the JSON object, are available.
- JScript9
- JScript (Chakra) - Only one Chakra JScript scripting engine can be loaded in a single process.
- ActivScriptV8
- ActivScriptNode
- VBScript
Beyond the listed options, you can enter the PROGID or CLSID of any ActiveScript language that is currently registered on the computer where the bot will be run.
Note
Ensure that the scripting engine you use is from a trusted source and that it is installed on every computer which needs to run the bot.
- In the Script Using field, select the class and module bot(s) that this class references.
- Click Script Editor. The ActivityHD Bot Editor opens.

- In the text area, write the code for the class.
- Save your changes.
Module
Use the "module" bot type to define code snippets for methods which can be used in other bots. A module bot can be referenced in the "Script Using" section of other bots so that its snippets and methods are available to the other bots. Like class bots, module bots simplify creation of other bots by allowing reuse of the module in multiple bots thereby eliminating duplicate code.
To create a module bot:
- In the Navigation pane, highlight the Activity System > Administration > Setup > Bots folder.
- Click . The New Bot window opens.
- Enter a Name for the module. A module name cannot contain spaces.
- Enter a Description of the module.
- From the Type drop-down list, select "Module".

- From the Script Engine dropdown, select the scripting engine to use to write the bot. Valid options are:
- JScript - All JScript 5.8 features, including the JSON object, are available.
- JScript9
- JScript (Chakra) - Only one Chakra JScript scripting engine can be loaded in a single process.
- ActivScriptV8
- ActivScriptNode
- VBScript
Beyond the listed options, you can enter the PROGID or CLSID of any ActiveScript language that is currently registered on the computer where the bot will be run.
Note
Ensure that the scripting engine you use is from a trusted source and that it is installed on every computer which needs to run the bot.
- In the Script Using field, select the class and module bot(s) that this module references.
- Click Script Editor. The ActivityHD Bot Editor opens.

- In the text area, write the code for the module.
- Save your changes.
General
Use the "general" bot type to define actions which can be run in ActivReporter. General bots can be made available to users via buttons and/or menu items. The following context objects are available when you run a general bot:
- Activity - The system connection.
- Company - The company connection.
- - The bot execution context object.
To create a general bot:
- In the Navigation pane, highlight the Activity System > Administration > Setup > Bots folder.
- Click . The New Bot window opens.
- Enter a Name for the bot.
- Enter a Description of the bot.
- From the Type drop-down list, select "General".

-
If you want to assign a keyboard shortcut to the bot to make it easier to run, select one from the Shortcut drop-down list.
Note
When assigning shortcuts, avoid conflicts with other ActivReporter shortcuts.
- If you want the bot to return result records to the user, mark the Enable Results checkbox.
- If you want the bot to run without presenting a dialog for user interaction, mark the No Dialog checkbox.
- In the Run From field, select the folder(s) from which the bot can be run.
- From the Script Engine dropdown, select the scripting engine to use to write the bot. Valid options are:
- JScript - All JScript 5.8 features, including the JSON object, are available.
- JScript9
- JScript (Chakra) - Only one Chakra JScript scripting engine can be loaded in a single process.
- ActivScriptV8
- ActivScriptNode
- VBScript
Beyond the listed options, you can enter the PROGID or CLSID of any ActiveScript language that is currently registered on the computer where the bot will be run.
Note
Ensure that the scripting engine you use is from a trusted source and that it is installed on every computer which needs to run the bot.
- In the Script Using field, select the class and module bot(s) that this bot references.
- Click Script Editor. The ActivityHD Bot Editor opens.

- In the text area, write the code for the bot.
- Save your changes.
Record
Use a record bot type (formerly called a "singleton" bot) to define actions which can be run in ActivReporter. Record bots can be made available to users via buttons and/or menu items.
Record bots are similar to record loop bots (see below) except without the loop. Record bots can only be executed on one record at a time. They are only enabled when exactly one record is selected, and if you execute a record bot from a folder without first selecting a record, you are prompted to select a single record to act on.
The following context objects are available when you run a record bot:
- Activity - The system connection.
- Company - The company connection.
- - The bot execution context object.
- Record - The record selected by the user.
To create a record bot:
- In the Navigation pane, highlight the Activity System > Administration > Setup > Bots folder.
- Click . The New Bot window opens.
- Enter a Name for the bot.
- Enter a Description of the bot.
- From the Type drop-down list, select "Record".

-
If you want to assign a keyboard shortcut to the bot to make it easier to run, select one from the Shortcut drop-down list.
Note
When assigning shortcuts, avoid conflicts with other ActivReporter shortcuts.
- If you want the bot to return result records to the user, mark the Enable Results checkbox.
- If you want the bot to run without presenting a dialog for user interaction, mark the No Dialog checkbox.
- Select the Record Type to associate with the bot. Record types are based on the data folders with an IData automation interface. Your options are:
Generic. The bot can be run for generic record types, and thus, is runnable from any number of data folders. Use the Run From field to designate which data folders the bot can be run from.
Example
A bot written for attachments could apply to virtually any record type.
- Specific. A bot that must be run for a specific record type. This bot can only be run for the data folder specified in this field.
-
In the Run From field, select the folders from which the bot can be run.
If you selected "Generic" in the Record Type field, select one or more folders on which to run the bot.
If you selected "Specific" in the Record Type field, the bot can only be run for the data folder specified; however, you can run the bot from other folders, but the bot will only act on records of the specified data type.
- From the Script Engine dropdown, select the scripting engine to use to write the bot. Valid options are:
- JScript - All JScript 5.8 features, including the JSON object, are available.
- JScript9
- JScript (Chakra) - Only one Chakra JScript scripting engine can be loaded in a single process.
- ActivScriptV8
- ActivScriptNode
- VBScript
Beyond the listed options, you can enter the PROGID or CLSID of any ActiveScript language that is currently registered on the computer where the bot will be run.
Note
Ensure that the scripting engine you use is from a trusted source and that it is installed on every computer which needs to run the bot.
- In the Script Using field, select the class and module bot(s) that this bot references.
- Click Script Editor. The ActivityHD Bot Editor opens.

- In the text area, write the code for the bot.
- Save your changes.
Record list
Use the "record list" bot type to define actions which can be run in ActivReporter. Record list bots can be made available to users via buttons and/or menu items. The user must select one or more records to run a record list bot.
Use a record list bot when you want the bot to perform an action based on a list of user-selected records but do not need the structure of a record loop bot (see below). Record loop bots are appropriate when the bot needs to act on records one at a time and the user needs to see the progress being made. Record lists are better at acting on an entire list of records at once. In addition, the No Dialog option is available on record list bots for actions where the user will not benefit from displaying a dialog.
The following context objects are available when you run a record list bot:
- Activity - The system connection.
- Company - The company connection.
- - The bot execution context object.
- RecordList - The record(s) selected by the user.
To create a record list bot:
- In the Navigation pane, highlight the Activity System > Administration > Setup > Bots folder.
- Click . The New Bot window opens.
- Enter a Name for the bot.
- Enter a Description of the bot.
- From the Type drop-down list, select "Record List".

-
If you want to assign a keyboard shortcut to the bot to make it easier to run, select one from the Shortcut drop-down list.
Note
When assigning shortcuts, avoid conflicts with other ActivReporter shortcuts.
- If you want the bot to return result records to the user, mark the Enable Results checkbox.
- If you want the bot to run without presenting a dialog for user interaction, mark the No Dialog checkbox.
- Select the Record Type to associate with the bot. Record types are based on the data folders with an IData automation interface. Your options are:
Generic. The bot can be run for generic record types, and thus, is runnable from any number of data folders. Use the Run From field to designate which data folders the bot can be run from.
Example
A bot written for attachments could apply to virtually any record type.
- Specific. A bot that must be run for a specific record type. This bot can only be run for the data folder specified in this field.
-
In the Run From field, select the folders from which the bot can be run.
If you selected "Generic" in the Record Type field, select one or more folders on which to run the bot.
If you selected "Specific" in the Record Type field, the bot can only be run for the data folder specified; however, you can run the bot from other folders, but the bot will only act on records of the specified data type.
- From the Script Engine dropdown, select the scripting engine to use to write the bot. Valid options are:
- JScript - All JScript 5.8 features, including the JSON object, are available.
- JScript9
- JScript (Chakra) - Only one Chakra JScript scripting engine can be loaded in a single process.
- ActivScriptV8
- ActivScriptNode
- VBScript
Beyond the listed options, you can enter the PROGID or CLSID of any ActiveScript language that is currently registered on the computer where the bot will be run.
Note
Ensure that the scripting engine you use is from a trusted source and that it is installed on every computer which needs to run the bot.
- In the Script Using field, select the class and module bot(s) that this bot references.
- Click Script Editor. The ActivityHD Bot Editor opens.

- In the text area, write the code for the bot.
- Save your changes.
Record loop
Use the "record loop" bot type to define actions which can be run in ActivityHD. Record loop bots can be made available to users via buttons and/or menu items. The user must select one or more records to run a record loop bot. As the name suggests, record loop bots are executed in a loop on all the selected records. Record loop bots are very similar to record list bots, except that the code is structured in three steps: Initialize, Loop, and Finalize. Also, when a record loop bot is run, the user interface shows loop progress. The following context objects are available when you run a record loop bot:
- Activity - The system connection.
- Company - The company connection.
- - The bot execution context object.
- RecordLoop - The record loop execution object which provides the bot context as the loop progresses.
Result records can be returned to the user by marking the Enable Results checkbox.
IRecordLoop properties
| Property | Type | Description |
|---|---|---|
| Data | IData | Provides access to the IData interface, located to the record currently being processed. |
| ItemCount | Integer | The number of records selected for processing. |
| ItemNumber | Integer | The index of the record currently being processed. |
| Items[ ] | OLEVariant | Internal identifiers for each of the records selected for processing. |
| Success Count | Integer | The count of records which have been processed without error. |
| AddMessage | String | A text message for display to the user. |
| AddMessages | Variant (string or array of strings) | Messages for display to the user. |
| Results | IDataResults | Provides access to the IDataResults interface which is used to display result records. IDataResults is only available when the Enable Results checkbox is marked. |
To create a record loop bot:
- In the Navigation pane, highlight the Activity System > Administration > Setup > Bots folder.
- Click . The New Bot window opens.
- Enter a Name for the bot.
- Enter a Description of the bot.
- From the Type drop-down list, select "Record Loop".

-
If you want to assign a keyboard shortcut to the bot to make it easier to run, select one from the Shortcut drop-down list.
Note
When assigning shortcuts, avoid conflicts with other ActivReporter shortcuts.
- If you want the bot to return result records to the user, mark the Enable Results checkbox.
- Select the Record Type to associate with the bot. Record types are based on the data folders with an IData automation interface. Your options are:
Generic. The bot can be run for generic record types, and thus, is runnable from any number of data folders. Use the Run From field to designate which data folders the bot can be run from.
Example
A bot written for attachments could apply to virtually any record type.
- Specific. A bot that must be run for a specific record type. This bot can only be run for the data folder specified in this field.
-
In the Run From field, select the folders from which the bot can be run.
If you selected "Generic" in the Record Type field, select one or more folders on which to run the bot.
If you selected "Specific" in the Record Type field, the bot can only be run for the data folder specified; however, you can run the bot from other folders, but the bot will only act on records of the specified data type.
- From the Script Engine dropdown, select the scripting engine to use to write the bot. Valid options are:
- JScript - All JScript 5.8 features, including the JSON object, are available.
- JScript9
- JScript (Chakra) - Only one Chakra JScript scripting engine can be loaded in a single process.
- ActivScriptV8
- ActivScriptNode
- VBScript
Beyond the listed options, you can enter the PROGID or CLSID of any ActiveScript language that is currently registered on the computer where the bot will be run.
Note
Ensure that the scripting engine you use is from a trusted source and that it is installed on every computer which needs to run the bot.
- In the Script Using field, select the class and module bot(s) that this bot references.
- Click Script Editor. The ActivityHD Bot Editor opens.

- In the text area, write the code for the bot.
- Save your changes.
Add prompts to a bot
Bots can prompt users for information that is needed to run bot processes. Prompts are defined on the Options tab of the bot record. Prompts are composed using xml. When a user runs a bot process that includes prompts, the prompts appear as options in the "Specify Options" step of the bot wizard. Option settings can be stored in action profiles (aka "saved answers") for repeated use and action profiles can be referenced in bot code to obviate the need for user intervention.
For more on options syntax and a few examples, refer to "Prompt for option values" on the "Syntax samples" tab of this topic.
- Open the bot record to add prompts to.
- Select the Options tab.

-
In the Option Definitions (xml) text area, use xml to define prompts for the user input which is needed to run the bot.
Example
The following xml defines prompts for a report date and an email address using exemplary xml syntax:
Copy snippet<Options>
<Field Name="Report Date" Type="Date" DefaultExpression="begin last year"/>
<Field Name="Email Address" Type="Text" Size="60"/>
</Options> - When you finish, save your changes.
Assign permissions to a bot
Note
If Access Control is set to "None" or if it is set to "Permitted" with no permissions assigned, the bot will not be visible on the Bots menu of the "run from" folder specified on the Bot tab. If this situation occurs, a banner displays below the toolbar to warn you so that permissions can be assigned if needed.
- Open the bot record for which to assign permissions.
- Select the Permissions tab.

- In the Access Control field, select the level of access an authorized user needs to execute the bot. Your options are:
- All. The bot is available to all users regardless of permissions.
- None. The bot is unavailable to all users regardless of permissions.
- Permitted. The bot is available based on the permissions assigned to a user. If you select this option, do the following:
- In the Available Permissions list box, highlight the permissions to assign to the bot. You can use Ctrl and/or Shift selection to select multiple permissions.
- Click
 to move your selection(s) to the Assigned Permissions list box.
- Save your changes.
Run a bot
The process of running a bot varies based on how much interaction is required from the user. In fact, bots which have the No Dialog checkbox marked require little or no intervention from the user. These bots have no user interface and can be run by simply clicking the bot button and selecting the bot, or by including the bot in a scheduled process.
Many bots, however, do require user input. These bots are typically initiated from the toolbar or from a menu command. The prompts you see are driven by the context and by the bot's creator/designer.
Bots are context aware. When a bot is set up, the creator establishes the place(s) from which the bot can be launched. So a bot is only available in a particular menu or toolbar if the creator made it available there. Moreover, a bot is sensitive to the data that you have selected in the HD view. For instance, if you select a record bot while you have multiple records selected in the HD view, the bot option will be disabled in its drop-down menu, or you'll be prompted to select the particular record you want the bot to act on.
These are the basic steps for running a bot which requires user interaction:
- Navigate to the HD view which contains the type of record(s) you need to act on.
- Do your favorite from the following:
- If you know the bot's shortcut, press those keys (e.g., Ctrl+J).
In the toolbar, click
 and then select the bot from the drop-down menu.
From the toolbar menu, select
 > Edit > Bots and then select the bot from the drop-down menu.
In the Navigation pane, locate the entity which represents the type of record(s) you need to act on, right-click it and select Bots, then select the bot from the shortcut menu.

In the HD view, highlight the record(s) you need to act on, right-click and select Bots, then select the bot from the shortcut menu.

- Respond to any prompts as appropriate.
- When you finish, click OK to run the bot.
Debug a bot
If you use VBSEdit as your script editor, notice that debugging capabilities are built in. Expand the Debug menu to access debugging commands.

For help on debugging with VBSEdit, select Help > Contents and browse the topics under "Running and Debugging Scripts". Note that the VBSEdit online help is unavailable while you are in debugging mode.
ActivReporter provides a couple of tools to assist while you are debugging. Both commands are available from the drop-down menu of the Script Editor button if the script editor is running.

-
Show Debug Output. Opens the Bot Debug Output window to show bot messages and results while debugging.

- Reset Debug Objects. Resets debug objects so that you can start debugging from scratch without having to close and reopen the bot. This command is also available from the Reset button in the Bot Debug Output window.
Bot Record ID
- Class
- Module
- General
- Record
- Record List
- Record Loop
Bot tab
Generic (based on Run From). The bot can be run for generic record types, and thus, is runnable from any number of data folders. Use the Run From field to designate which data folders the bot can be run from.
Example
A bot written for attachments could apply to virtually any record type.
Specific. A bot that must be run for a specific record type. If you select this option, the adjacent field is enabled. Select the data folder to associate with the bot. This bot can only be run for the data folder specified in this field.
Press F3 to look up the value.
If a value is already selected, you can press F4 to open the record in its native editor.
This field is visible for general, record, record list, and record loop bots. Select the folders from which the bot can be run.
If this is a record, record list, or record loop bot, the resources you can select are affected by the option selected in the Record Type field.
If "Generic" is selected, you can select one or more folders on which to run the bot.
If "Specific" is selected, the bot can only be run for the data folder specified in the Specific field; however, you can run the bot from other folders, but the bot will only act on records of the specified data type.
Press F2 to open a dialog box where you can add and remove selections for this field.
Press F3 to look up the item.
- JScript - All JScript 5.8 features, including the JSON object, are available.
- JScript9
- JScript (Chakra) - Only one Chakra JScript scripting engine can be loaded in a single process.
- ActivScriptV8
- ActivScriptNode
- VBScript
Beyond the listed options, the PROGID or CLSID of any ActiveScript language that is currently registered on the computer where the bot will be run is a valid entry in this field.
Note
Ensure that the scripting engine you use is from a trusted source and that it is installed on every computer which needs to run the bot.
Select the class and module bot(s) that this bot references.
Press F2 to open a dialog box where you can add and remove selections for this field.
Press F3 to look up the item.
Script tab
Options tab
This area is provided for defining user prompts to provide information needed to run the bot. Prompts are defined using xml.
Example
The following xml defines prompts for a report date and an email address using exemplary xml syntax:
<Options>
    <Field Name="Report Date" Type="Date" DefaultExpression="begin last year"/>
    <Field Name="Email Address" Type="Text" Size="60"/>
</Options>Permissions tab
- All. The bot is available to all users regardless of permissions.
- None. The bot is unavailable to all users regardless of permissions.
- Permitted. The bot is available based on the permissions assigned to a user. If you select this option, specify which permissions to assign to the bot.
The list box shows the permissions available for assignment to the bot.
To assign a permission to the bot, double-click the permission to move it to the Assigned Permissions list box or highlight it and click ![]() to move it to the Assigned Permissions list box.
to move it to the Assigned Permissions list box.
The list box shows the permissions currently assigned to the bot.
To unassign a permission to the bot, double-click the permission to move it to the Available Permissions list box or highlight it and click ![]() to move it to the Available Permissions list box.
to move it to the Available Permissions list box.
Custom tab
This tab is visible if custom fields exist for the entity. At a minimum, if there are custom fields a Fields subtab will be present. One or more additional categories of subtabs may also be visible.
Fields subtab
This tab prompts for values for any custom fields set up for entity records of this entity type. Respond to the prompts as appropriate.
References subtab
This tab is visible if other records reference the current record.
Exchange Folder subtab
This tab is visible only if you set up a custom field with a data type of "Exchange Folder". The label on this tab is the name assigned to the custom field.
This tab shows the contents of the specified exchange folder.
File subtab
This tab is visible only if you set up a custom field with a data type of "File". The label on the tab is the name assigned to the custom field.
This tab renders the contents of the specified file according to its file type.
Internet Address subtab
This tab is visible only if you set up a custom field with a data type of "Internet Address". The label on this tab is the name assigned to the custom field.
This tab shows the contents of the specified web page.
Network Folder subtab
This tab is visible only if you set up a custom field with a data type of "Network Folder". The label on this tab is the name assigned to the custom field.
This tab shows the contents of the specified network folder.
Attachments tab
The Attachments tab is visible if any record for a given entity has an attachment. If the Attachments tab is not visible, this implies that no record of the entity type has an attachment on it; however, once an attachment is added to any record of the entity type, the Attachments tab will become available.
Change Logs tab
This tab is visible if the user has "Change Logs" access to the associated data folder resource.
The Change Logs pane shows the Change Logs HD view filtered to show all change logs for the selected entity record.
Double-click a row in the pane to drill down to its record in the Change Log window.
Other tab
Developer tab
This tab is visible only when developer features are enabled.
Automation subtab
This subtab shows field names and values for the current data record. Use the information in the subtab to assist when creating automation objects such as bots and import files. The field names and field values can be copied from the text box and pasted directly into your code or application. To copy content from the text box, highlight the content to copy and press Ctrl+C or right-click your selection and select Copy from the context menu.
Export (XML) subtab
This subtab shows the XML syntax for exporting the selected data record. The syntax can be copied from the text box as an exemplar for creating your own automation objects for bots, import files, ActivWebAPI, etc. To copy content from the text box, highlight the content to copy and press Ctrl+C or right-click your selection and select Copy from the context menu.
Import (XML) subtab
This subtab allows you to select a file for import and shows the XML syntax for importing data records. Use the subtab to explore the XML syntax for importing data records. In particular, you can investigate the syntax which results when using Data.Import and ActivWebAPI data POST and DELETE routes.
Change Log (XML) subtab
This subtab is visible only when the Enable Change Logs option is marked in System Options or Company Options (depending on whether the feature applies at the system or the company level). This is the default setting when developer features are enabled.
This subtab allows you to investigate changes to the current data record. The syntax can be copied for use in bots, dashboards, ActivWebAPI, and other automation. To copy content from the text box, highlight the content to copy and press Ctrl+C or right-click your selection and select Copy from the context menu.
Select Statement (SQL) subtab
This subtab allows you to investigate the SQL select statement used to retrieve the current data record. The syntax can be copied as an exemplar for data sources and other automation. To copy content from the text box, highlight the content to copy and press Ctrl+C or right-click your selection and select Copy from the context menu.
Prompt for option values
Options are composed using XML which can be edited on the Options tab of the Bot window. The XML syntax for these option definitions is modeled below.
Option values can be accessed using the MacroProcess.OptionValues() automation method.
Sample option definitions syntax
<Options>
    <Field Name="Report Date" Type="Date" DefaultExpression="begin last year"/>
    <Field Name="Email Address" Type="Text" Size="60"/>
</Options>Sample bot code
Dim vReportDate
Dim vEmailAddress
vReportDate = MacroProcess.OptionValues("Report Date")
vEmailAddress = MacroProcess.OptionValues("Email Address")
Bot definition syntax in context
<Options>
    <Header @Caption/>
    <Instruction><!--inner text of this element is displayed to the user--></Instruction>
    <Field @Name Type="Calendar Period" @Required(True, False)>
        <Default>
            <!--Syntax for the Default element should match what is seen when exporting Answers with a Calendar Period-->
        </Default>
        <AsOf>
            <!--Syntax for the AsOf element can have all the properties of a "Date" field-- >
            <!--When @Name is not specified, defaults to the name of the "Calendar Period" field + - As of"-->
        </AsOf>
    </Field>
    <Field @Name Type="Date" @DefaultValue @DefaultExpression @Required(True, False) @AltBasis>
        <AltBases>
            <AltBasis @Name/>
        </AltBases>
    </Field>
    <Field @Name Type="Dropdown" @DefaultValue @Required(True, False)/>
        <Item @Value/>(n)
    </Field>
    <Field @Name Type="Filename" @DefaultValue @Required(True, False)/>
    <Field @Name Type="File Folder" @DefaultValue @Required(True, False)/>
    <Field @Name Type="Memo" @Required(True, False)>
        <DefaultValue></DefaultValue>
    </Field>
    <Field @Name Type="Number" @Precision @Scale @AllowNegative(True, False) @DefaultValue @Required(True, False)/>
    <Field @Name Type="Reference" @ReferenceType @SQLConditions @DefaultValue @Required(True, False)>
        <Filters>
            <Filter @Name @Type(Personal/Shared/Built-In)>
                <Parameter @Name @Value/@Code/@ID/@Expression/>(n)
            <Filter/>(n)
        </Filters>
    </Field>
    <Field @Name Type="Reference List" @ReferenceType @SQLConditions @Required(True, False)>
        <Filters>
            <Filter @Name @Type(Personal/Shared/Built-In)>
                <Parameter @Name @Value/@Code/@ID/@Expression/>(n)
            </Filter>(n)
        </Filters>
        <DefaultValue @Value/>(n)
    </Field>
    <Field @Name Type="Reference List" @ReferenceType @DefaultValue @Required(True, False)>
        <ReferenceType @Value @SQLConditions>
            <Filters>
                <Filter @Name @Type(Personal/Shared/Built-In)>
                    <Parameter @Name @Value/@Code/@ID/@Expression/>(n)
                </Filter>(n)
            </Filters>
            <DefaultValue @Value/>(n)
        </ReferenceType>(n)
    </Field>
    <Field @Name Type="Text" @Size @Case(Upper, Lower, Normal) @DefaultValue @Required(True, False)>
        <Dropdown>
            <Item @Value/>(n)
        </Dropdown>
    </Field>
    <Field @Name Type="True/False" @DefaultValue(True, False) @Required(True, False)/>
</Options>
Special option types
Expand the following links to explore certain option types in greater detail.
Prompt for alternate date bases
You can add alternate bases to date fields through bot options.
For instance, suppose you have the following dates as options for your bot: Begin Date, End Date, Log Date. Log Date has a date expression of "today + 1".
Normally, "today + 1" indicates one day after the current system date. However, you can base the date expression off either Begin Date or End Date. When you press F2 on the log date, the Date Expression popup opens.

Leave the date expression as is, but change the Basis for Today options as needed. Valid options are:
- Today's Date. The basis for "today" is the current system date. This is the normal basis of a date. So, "today + 1" is tomorrow.
- Begin Date. "today + 1" is the day after the begin date.
- End Date. "today + 1" is the day after the end date.
Syntax
<Options>
    <Field Name="Begin Date" Type="Date" />
    <Field Name="End Date" Type="Date" />
    <Field Name="Date" Type="Date" DefaultExpression="today + 1">
        <AltBases>
            <AltBasis Name="Begin Date"/>
            <AltBasis Name="End Date"/>
        </AltBases>
    </Field>
</Options>
Prompt for a file folder
You can prompt for a file folder from the Options dialog of a bot.
Syntax
<Options>
    <Field @Name Type="File Folder" @DefaultValue @Required(True, False)/>
</Options>
Prompt for values from a drop-down list
The "Dropdown" list feature allows users to select from a predetermined list of values or to enter their own value in the text field.
Syntax
<Options>
    <Field @Name Type="Text" @Size @Case(Upper, Lower, Normal) @DefaultValue @Required(True, False)>
        <Dropdown>
            <Item @Value/>(n)
        </Dropdown>
    </Field>
</Options>
Prompt for a password
You can prompt for a password from the Options dialog of a bot.
Syntax
<Options>
    <Field @Name Type="Password" @Size @DefaultValue @Required(True, False)/>
</Options>
Prompt for a calendar period
You can prompt for a calendar period from the Options dialog of a bot.
Syntax
<Options>
    <Field @Name Type="Calendar Period" @Required(True, False)>
        <Default>
            <!--Syntax for the Default element should match what is seen when exporting Answers with a Calendar Period-->
        </Default>
        <AsOf>
            <!--Syntax for the AsOf element can have all the properties of a "Date" field-->
            <!--When @Name is not specified, defaults to the name of the "Calendar Period" field + - As of"-->
        </AsOf>
    </Field>
</Options>
Add a header on a form
Header elements can be added to improve the layout of forms produced through bot Options.
Syntax
<Options>
    <Header @Caption/>
</Options>
Add instructions on a form
Instruction elements can be added to improve the usability of forms produced through bot Options.
Syntax
<Options>
    <Instruction><!--inner text of this element is displayed to the user--></Instruction>
</Options>
Incorporate an options dialog in a bot
Use an OptionsDialog automation object to present a dialog to the user with the same types of options which are also available for bot Options. Bot Options (XML) must be defined as part of a bot record and are always shown to the user as the first step when running a bot. The OptionsDialog object is similar but more flexible. The options XML can be defined programmatically and the dialog can be displayed at any point during bot execution or during any other type of automation.
Syntax
Activity
Function OptionsDialog As OptionsDialog '- Returns an OptionsDialog within the Activity System
Company
Function OptionsDialog As OptionsDialog '- Returns an OptionsDialog within the Activity Company
OptionsDialog
Function Show(Caption As String, Options As String) As Boolean '- Shows the dialog with a specific caption and set of options (defined as XML); returns "True" if not canceled by the user
Property OptionValues(Index) '- Access the user-specified option values by index or field name
Sample bot code
Dim vOptionsDialog

Set vOptionsDialog = Activity.OptionsDialog
MacroProcess.AddMessage ""
MacroProcess.AddMessage "Options Dialog (System):"
If vOptionsDialog.Show("Options Test (System)", _
    "<Options>" + _
        "<Field Name='Reference' Type='Reference' ReferenceType='Authorized Users (Activity System)'/>" + _
    "</Options>" _
) Then
    MacroProcess.AddMessage "Option 1: " + CStr(vOptionsDialog.OptionValues( 1))
Else
    MacroProcess.AddMessage "Canceled"
End If

Set vOptionsDialog = Company.OptionsDialog
MacroProcess.AddMessage = ""
MacroProcess.AddMessage = "OptionsDialog (Company):"
If vOptionsDialog.Show("Options Test (Company):, _
    "<Options>" + _
        "<Field Name='Reference' Type='Reference' ReferenceType='Authorized Users (Activity Company)'/>" + _
    "</Options>" _
) Then
    MacroProcess.AddMessage "Option 1:" + CStr(vOptionsDialog.OptionValues( 1))
Else
    MacroProcess.AddMessage "Canceled"
End If
Additional OptionsDialog features
Expand the following links to learn about more features available to the OptionsDialog object.
Add a header to an OptionsDialog form
Header elements can be added to improve the layout of OptionsDialog forms.
Syntax
<Options>
    <Header @Caption/>
</Options>
Add instructions to an OptionsDialog form
Instruction elements can be added to improve the usability of OptionsDialog forms.
Syntax
<Options>
    <Instruction><!--inner text of this element is displayed to the user--></Instruction>
</Options>
Provide user feedback messages
The MacroProcess automation object has two methods for displaying messages to the user:
- AddMessage. AddMessage accepts a string parameter, the text of the message to be displayed.
- AddMessages. AddMessages accepts a variant parameter which can be either a string or an array of strings. AddMessages is easier to use with other automation methods that return an array of strings.
Example
Set data = Company.AccountsPayable.APInvoice
Dim messages
data.Locate "050110 - 1"
If Not data.Merge(messages) Then
    MacroProcess.AddMessage "Merge Failed" '-Add a single message
End If
MacroProcess.AddMessages messages '-Add all messages returned by the call to MergeMacroProcess
The MacroProcess context object provides information about the bot being run and allows messages and results to be be shown.
MacroProcess properties:
- Activity
- Attachments
- Company
- MacroID: Variant - The internal identifier (GUID) of the bot object being run
- MacroName: Variant - The name of the bot being run
- OptionValues
- RecordList
- Results: IDataResults - Gives access to the IDataResults interface which is used to display result records. Available when the Enable Results checkbox is marked.
MacroProcess methods:
- AddMessage(Value: String) - Add text messages to be displayed to the user
- AddMessages(Value: String array or string) - Add text messages to be displayed to the user
- CreateObject(ByVal ObjectName As String) As Object
Bot security
Common accesses available on bots
| Access | A user with this access can... |
|---|---|
| Change | Use the mass change action on bots. |
| Change Logs | Access change logs for bots. |
| Custom Fields | Create and edit custom fields for bots. |
| Data | Have read-only access to bots from anywhere in the software (e.g., field validations, filters, date expressions). |
| Delete | Delete bots. |
| Edit | Edit bot records. |
| Export | Export bot records from ActivReporter. |
| Import | Import bot records into ActivReporter. |
| New | Create new bot records. |
| Read | Have read-only access to bot records. |
| Report | Run reports with bot information. |
| Report Designs | Create and edit report designs with bot information. This access enables the Report Designs button on the Output tab of report dialogs. |
| Shared Answers | Create and edit saved answers related to bots. |
| Shared Filters | Create and edit shared filters on bots. |
| Visible | View the Bots folder in the Navigation pane. |
Special accesses available on bots
| Access | A user with this access can... |
|---|---|
| Run | Run a bot. |