Reports
ActivReporter provides five ways for you to output report data. You can preview it in the Crystal Reports viewer, preview it to PDF, print it, email it, or export it to another format for further analysis.
 Preview a report in the Crystal Reports viewer
All ActivReporter report wizards provide an option to preview a report in the Crystal Reports viewer before printing, e-mailing, or exporting it. Preview mode gives you the opportunity to tweak report settings and to check your results before you finalize the report. The advantage of the Crystal Reports viewer over previewing to PDF is that it provides the ability to group data based on sorting options.
- Open the report wizard.
- Configure report options as desired.
-
When you finish setting up the report, click
 . The report opens in the Preview window.
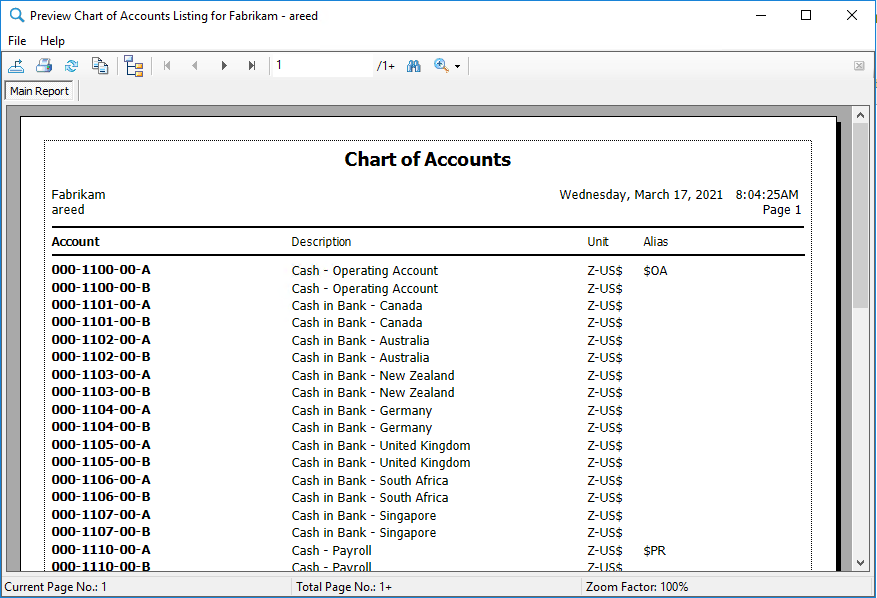
Access report options within the Crystal Reports viewer
You can easily access the options in the report wizard from the Crystal Reports viewer. This allows you to investigate the options the report is based on and even change those options. To access the options from the Crystal Reports viewer:
- Open the report wizard.
- Configure report options as desired.
- When you finish setting up the report, click the drop-down arrow next to the Preview button and select Preview from the drop-down menu.
-
From the viewer menu, select File > Options. The report wizard opens.

- Change options as needed. The report updates to reflect your changes.
Preview window features
The toolbar in the Preview window provides access to report viewing and output options.

Export
To export a report to a location in your file system:
- In the Preview window, click
 . The Export Report dialog box opens.
 - Navigate to the folder where you want to export the report.
- In the File name field, enter a name for the report file or accept the default name.
- From the Save as type drop-down list, select the file format to export to.

- Click Save.
Print
- Click
 . The Print dialog box opens.
- Specify your printing preferences.
- Click Print. Voilà!
Refresh
To ensure your report has the most up-to-date data, click ![]() . When you refresh the report data, the report timestamp updates as well.
. When you refresh the report data, the report timestamp updates as well.
Copy
To copy content from the report to the clipboard:
- Highlight the report content to copy.
- Click
 . The text is now available on your clipboard for pasting (Ctrl+V) elsewhere.
Toggle Group Tree
Some reports let you group data based on sorting options. The preview window includes a group tree that can be exposed to help you navigate the report by group. Even when no grouping is specified, the group tree lets you scroll the list of records on the report so that you can move quickly to a particular record.
To show the group tree, click ![]() .
.
To hide the group tree, click ![]() again.
again.

Navigate
Use the navigation controls to browse the pages of a report or to go to a specific page of the report.

To go to a specific page of the report, type a page number in the current page field and press Enter.
Find Text
To find a particular text string in a report:
- Click
 . The Find Text dialog box opens.
- In the Find what field, enter the text to search for.
- Click Find Next. If the text string is found, the first instance is outlined in red.

- To find the next instance of the string, click Find Next again. When you reach the last instance of the text string, the next time you click Find Next the viewer returns the following message:

- Click OK.
Zoom
To zoom in or out on a report:
- Click
 .
. - From the drop-down list, select the zoom factor you want.

The preview is reduced or enlarged by the factor you select.

Preview to PDF
Among the advantages of previewing to PDF is that the format provides continuous scrolling through the document preview.
- Open the report wizard.
- Configure report options as desired.
- When you finish setting up the report, click the drop-down arrow next to the Preview button and select Preview to PDF from the drop-down menu. The report opens in your PDF reader window.

Print a report
- In the Navigation pane, expand the folder of the package you need to print a report for and highlight the Reports subfolder.
- In the HD view, double-click the report you need to print to start the report wizard.

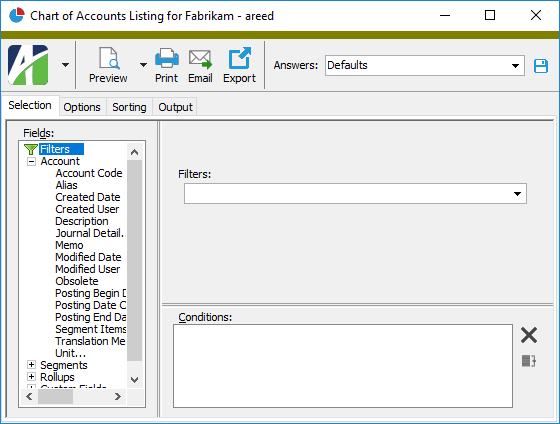
- On the Selection tab, define any filters you want to apply to the data.
- On the Options tab, specify optional settings for the report. The most common options are preset for you.

- If there are other tabs in the wizard, respond to the prompts as needed.
- On the Output tab in the Design field, look up and select the report design to use.

Tip
AccountingWare recommends that you preview reports before committing them to paper.
- Click
 . The Print dialog box opens.
- Select a printer and configure print options as desired.
- Click Print and scurry to the printer.
Email a report
The email feature lets you send reports as PDF attachments.
Note
A configured MAPI or SMTP mail profile is required to use the email feature.
To learn more, expand this link.
Email from ActivityHD Explorer is managed through each user's email profile. For many users, email is configured through Microsoft Outlook. One type of profile is called the Messaging Application Programming Interface (MAPI) profile. You may need to make changes to the MAPI setup to allow ActivReporter to send email successfully.
Another type of profile is called the Simple Mail Transfer Protocol (SMTP) profile. SMTP is configured in the system configuration wizard.
- In the Navigation pane, expand the folder of the package you need to email a report for and highlight the Reports subfolder.
- In the HD view, double-click the report you need to email to start the report wizard.

- On the Selection tab, define any filters you want to apply to the data.
- On the Options tab, specify optional settings for the report. The most common options are preset for you.

- If there are other tabs in the wizard, respond to the prompts as needed.
- On the Output tab in the Design field, look up and select the report design to use.

- Click
 . The Report Email popup opens.
- From the From drop-down list, select the email account from which to send the email. Your options are:
- Windows user default account. Sends email using the user's Windows default email account. For most users, this is the account configured in Outlook or another email client application.
- Server personal. Sends email using the email configuration for the system or company server and the email address on the current user's authorized user record. The authorized user record must have a confirmed email address.
- Server generic. Sends email using the email configuration and "from" address for the system or company server. This option requires "Send generic" access to the Server Email resource.
- Specify the email destination and subject (To, CC, BCC, and Subject) using one of the following methods:
- For one-time email, select To and enter the destination addresses and subject in the appropriate fields.
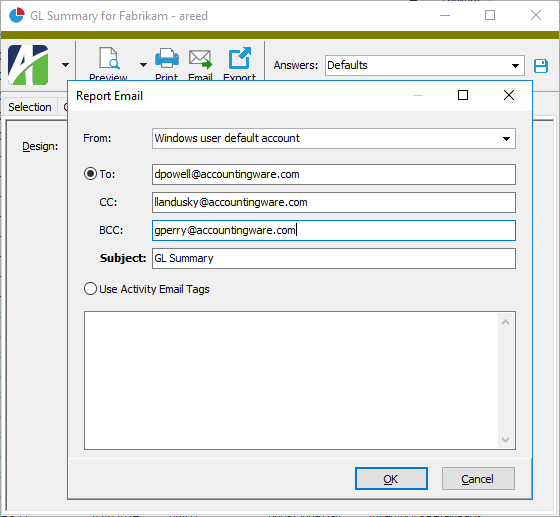
For a report that has the destination addresses you need embedded in the Crystal Reports design, select Use Activity Email Tags.
Note
The Use Activity Email Tags option is selected by default if the report design contains the special formula @ActivityEmailTag.

- For one-time email, select To and enter the destination addresses and subject in the appropriate fields.
- In the text box, enter the message to accompany the report.
- Click OK. ActivReporter reports the number of messages sent and the number of errors encountered.
- Click OK.
Export a report
ActivReporter's report export feature makes it easy to save report data to a file on removable media, or on your local system or network. You can save report data in a variety of file formats including Crystal Reports (.rpt), PDF (.pdf), Microsoft Excel (.xls), Microsoft Word (.doc), rich text format (.rtf), and XML (.xml).
Tip
You can also export a report from the Preview window.
- In the Navigation pane, expand the folder of the package you need to export a report for and highlight the Reports subfolder.
- In the HD view, double-click the report you need to export to start the report wizard.

- Configure report options as needed.
- When you finish, click
 . The Export Report dialog box opens.
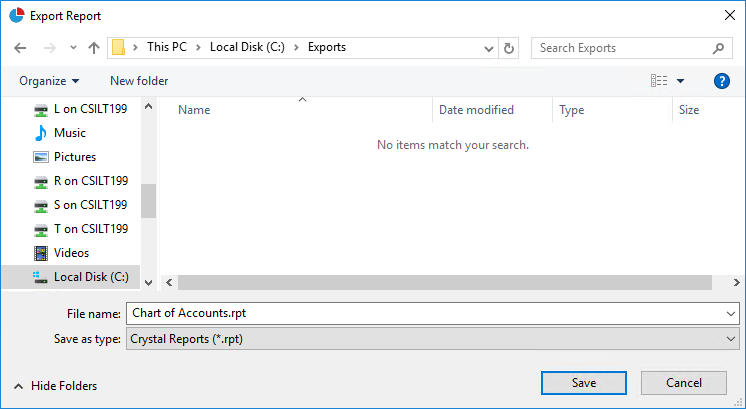
- Navigate to the location where you want to save the file.
- In the File name field, enter a file name for the export file.
- From the Save as type drop-down list, select the file format to save the report data in.

- Click Save. ActivReporter notifies you when the export completes.

- Click OK.
Run a report from a Reports folder
You can run any report from its package's Reports folder.
To do so:
- Expand the folder of the package you want to print a report for, then highlight the Reports folder.
-
In the HD view, highlight the report to run and right-click to open a shortcut menu.

- Select Run. The report wizard starts.